1-Install a theme using wordpress admin
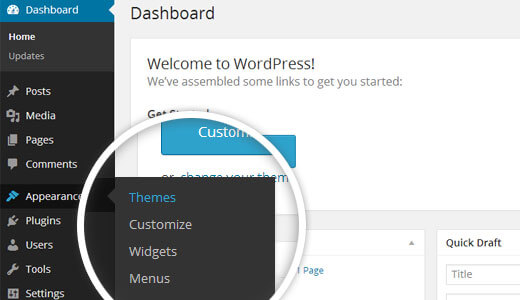
First thing you need to do is to login to your WordPress admin area. Next, click on
1.Go to the menu Appearance >> Themes
The template package you have downloaded consists of several folders. Let's see what each folder contains:
First thing you need to do is to login to your WordPress admin area. Next, click on
1.Go to the menu Appearance >> Themes
2. Once you are on the themes page, click on the Add New button at the top.
3. Click on upload theme button.
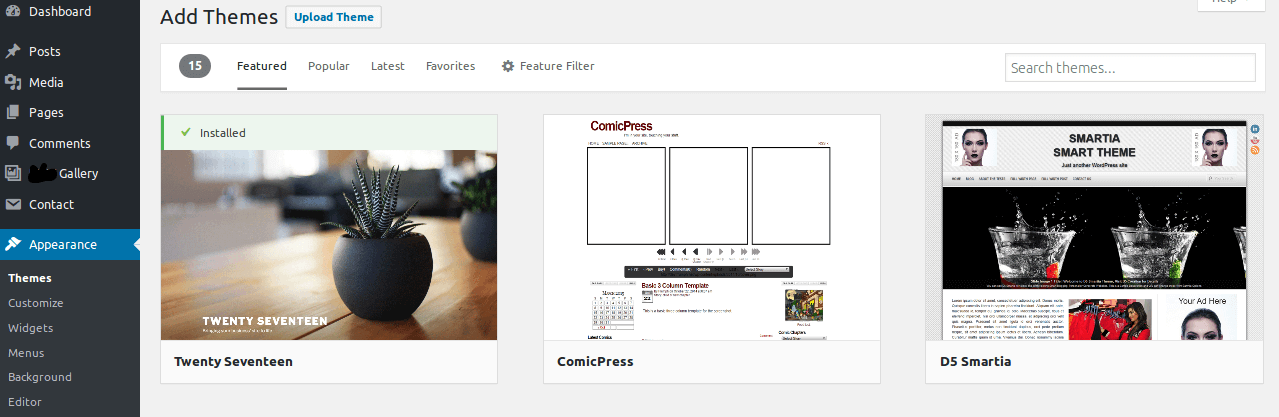
4. Click on Browse Button then select your bwt-multipurpose-blog_1.0.zip theme and click on install now button.

5. WordPress will now install your theme and show you a success message along with the link to activate or live preview.
Congratulations your theme have been successfully installed
For importing the theme demo.
Visit Dashboard >> Appearance >> Theme Demo Import >> Click on Run Import
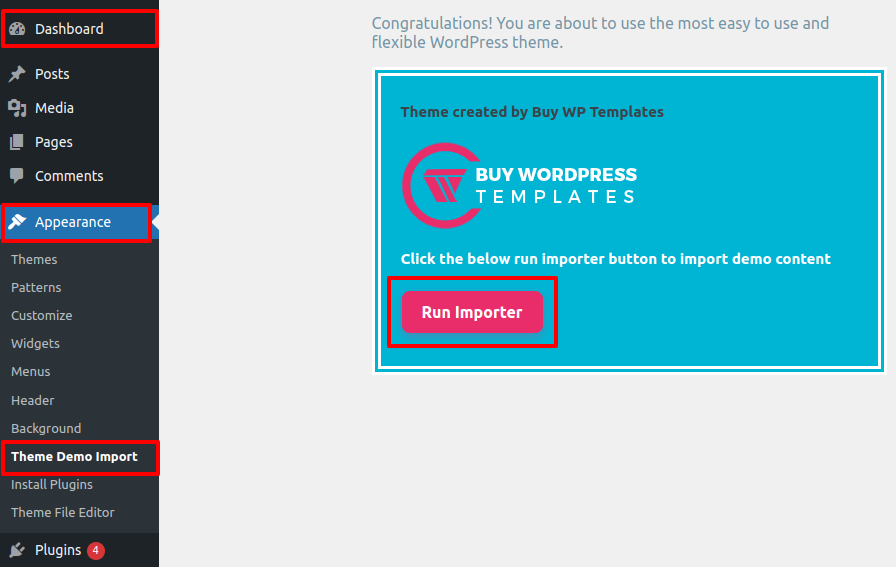
With importing theme demo Ace Post Type Builder and needed plugin installed.
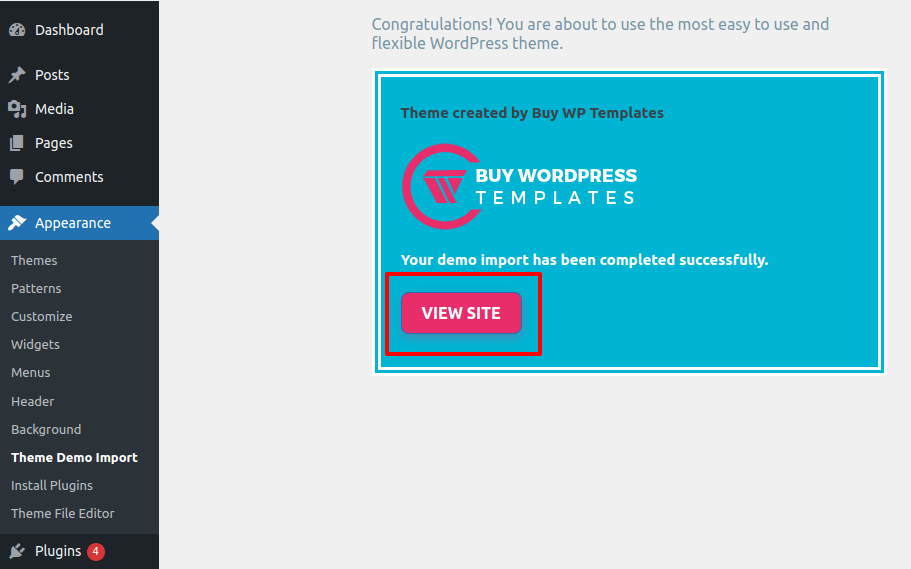
Now Click on View Site Button.
This theme supports the default Site Identity section provided by the WordPress and we have integrated some options in this theme in this section.
Follow these instructions to setup Home page.
Label it "home" or anything as you wish. Then select template "home-page" from template dropdown.
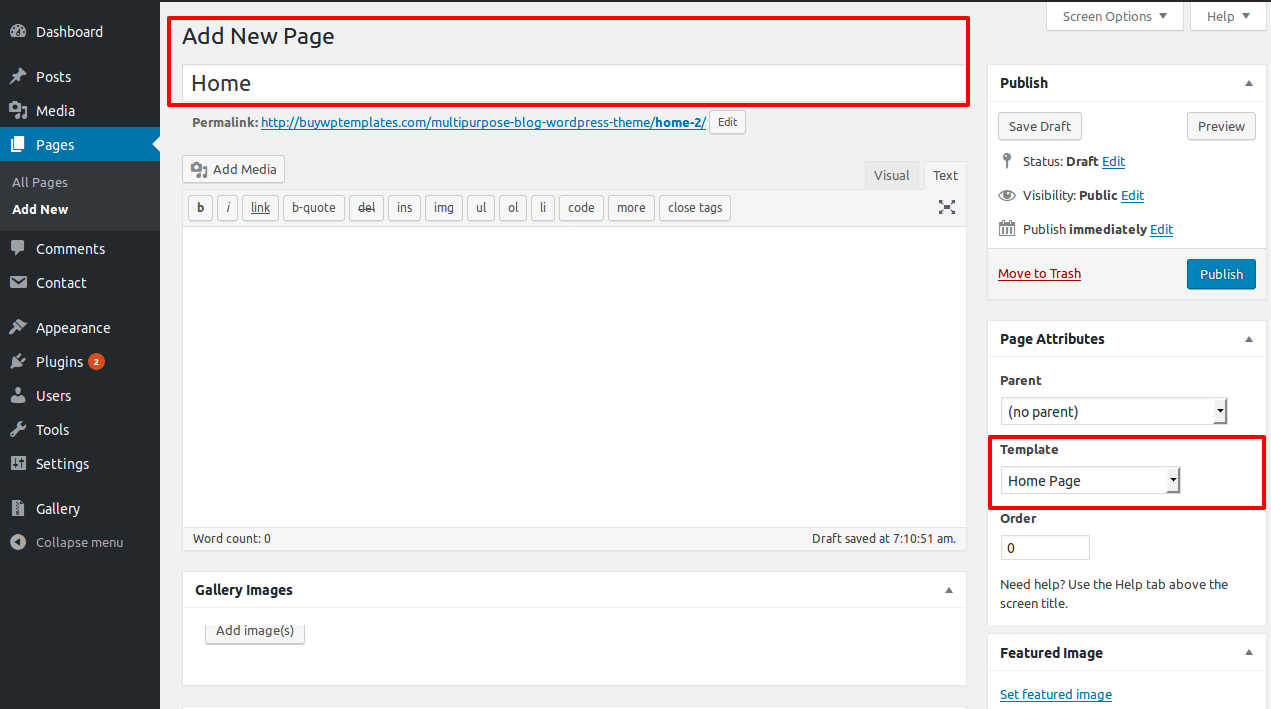

Once you are done with this, you can see all the demo content on front page.
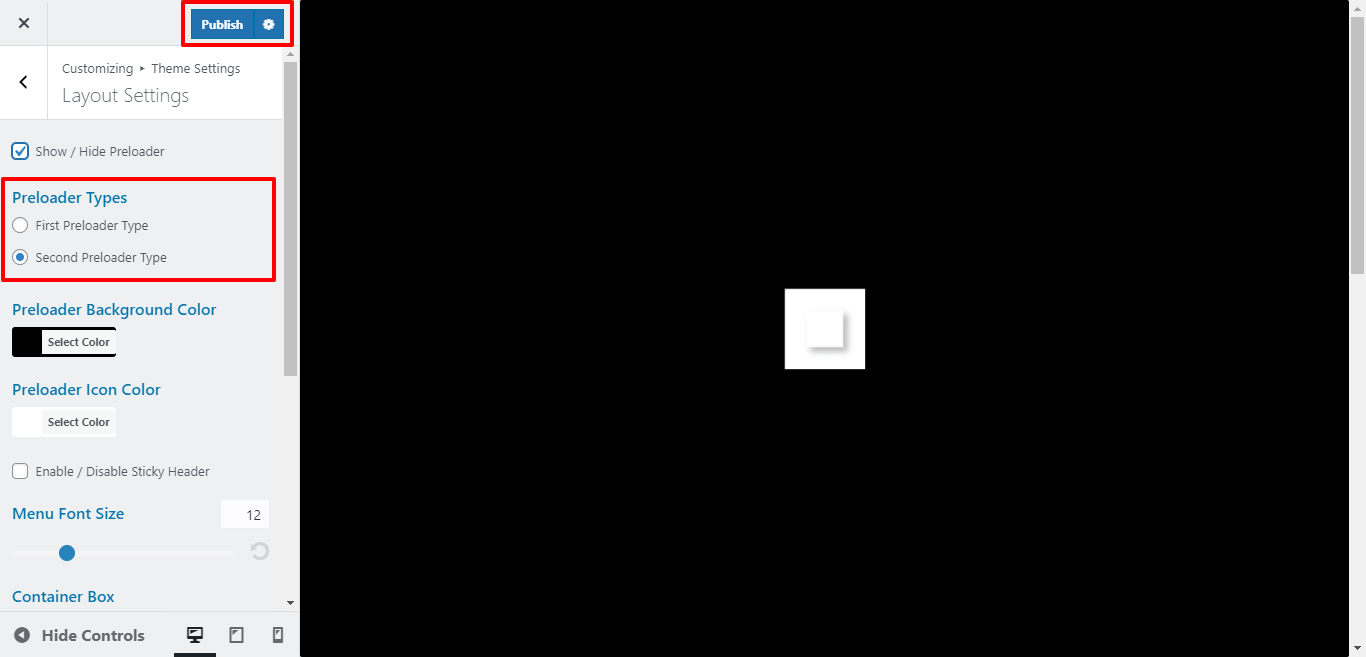
In order to proceed with Layout Settings,
Follow the below steps to setup Layout Settings
Go to Appearance >> Customize >> Theme Settings >>Layout Settings
In Layout Settings, you can select the Blog Post Layout Sidebar.

Here You can click the checkebox if you want to Show / Hide preloader.

Here You can select type of preloader.
Here You can select type of preloader icon color and background color.

For Enable / disable stick-header for the theme by click on checkbox
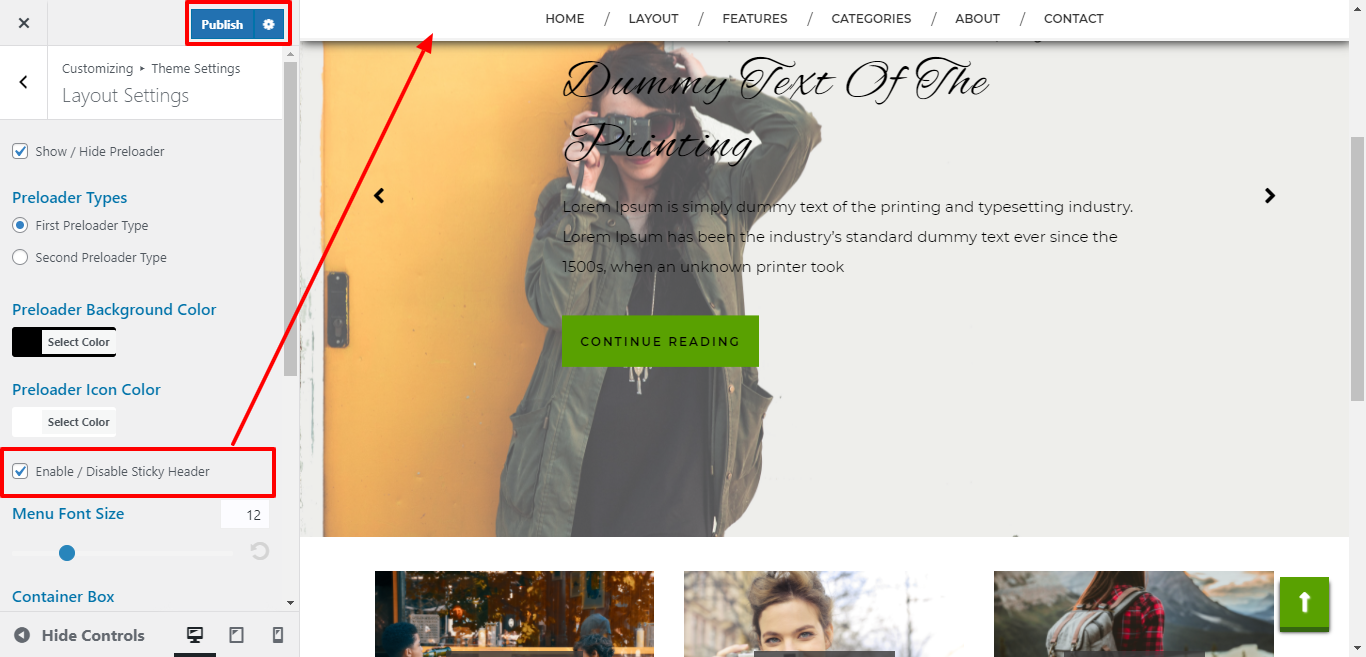
Here you can select the font size for menu items.

Here You can select the Default layout for the themes.
After Default layout themes will look like screenshot
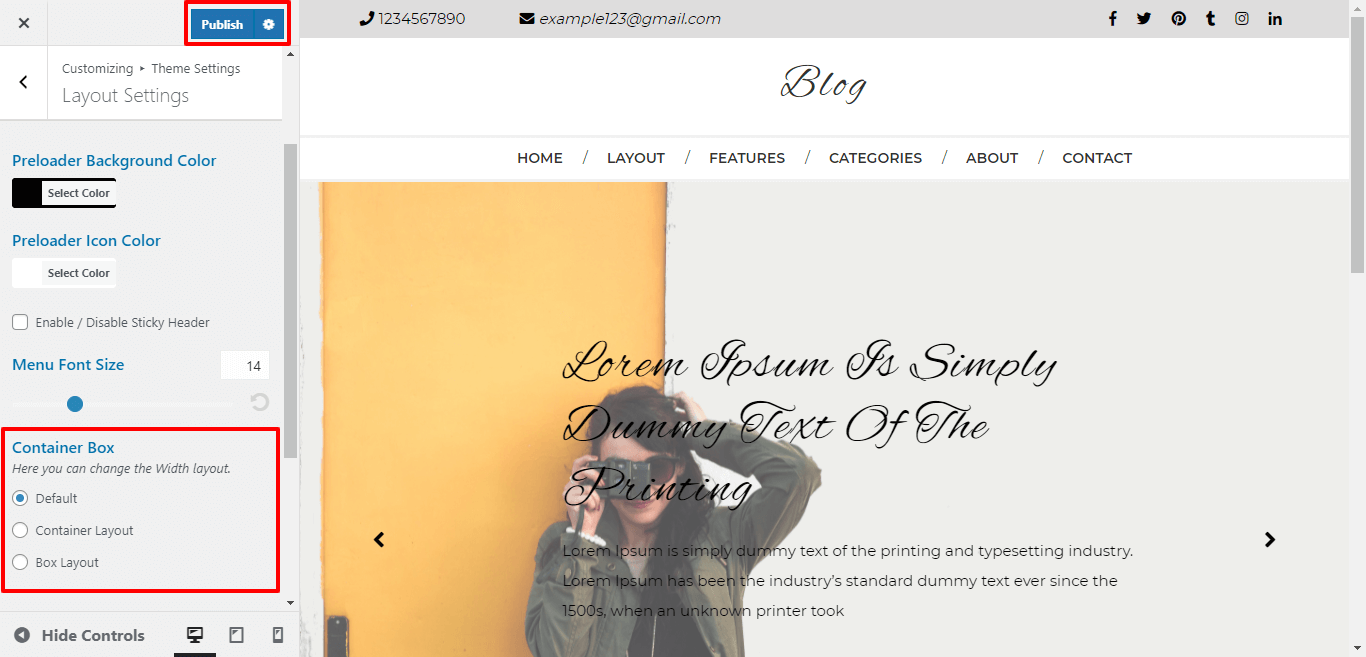
Here You can select the Container layout for the themes.
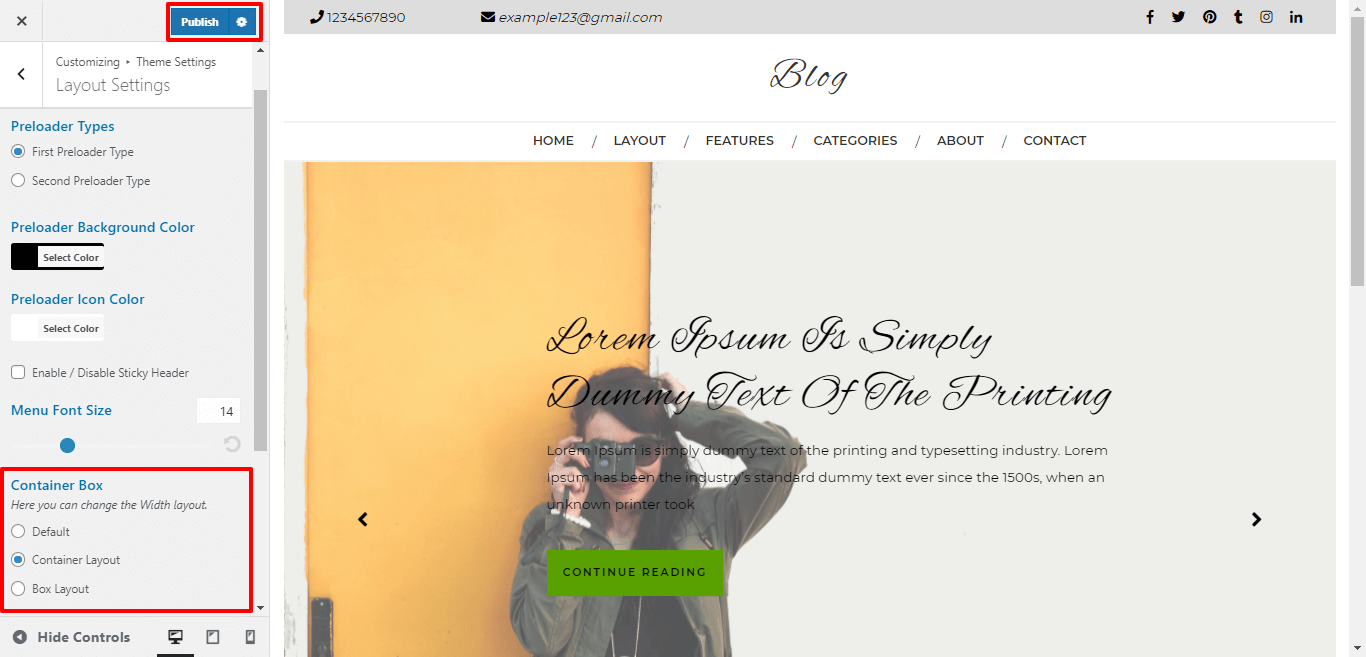
After Selecting Container layout themes will look like screenshot

Here You can select the Box-Container layout for the themes.

After Selecting Box-Container layout themes will look like screenshot

Here you can select icon for responsive open menu.
Here you can select icon for responsive close menu.

In order to proceed with Theme Color Option, you can change complete theme color on just one click, follow the below steps.
Go to Appearance >> Customize >> Theme Settings >>Theme Color Option
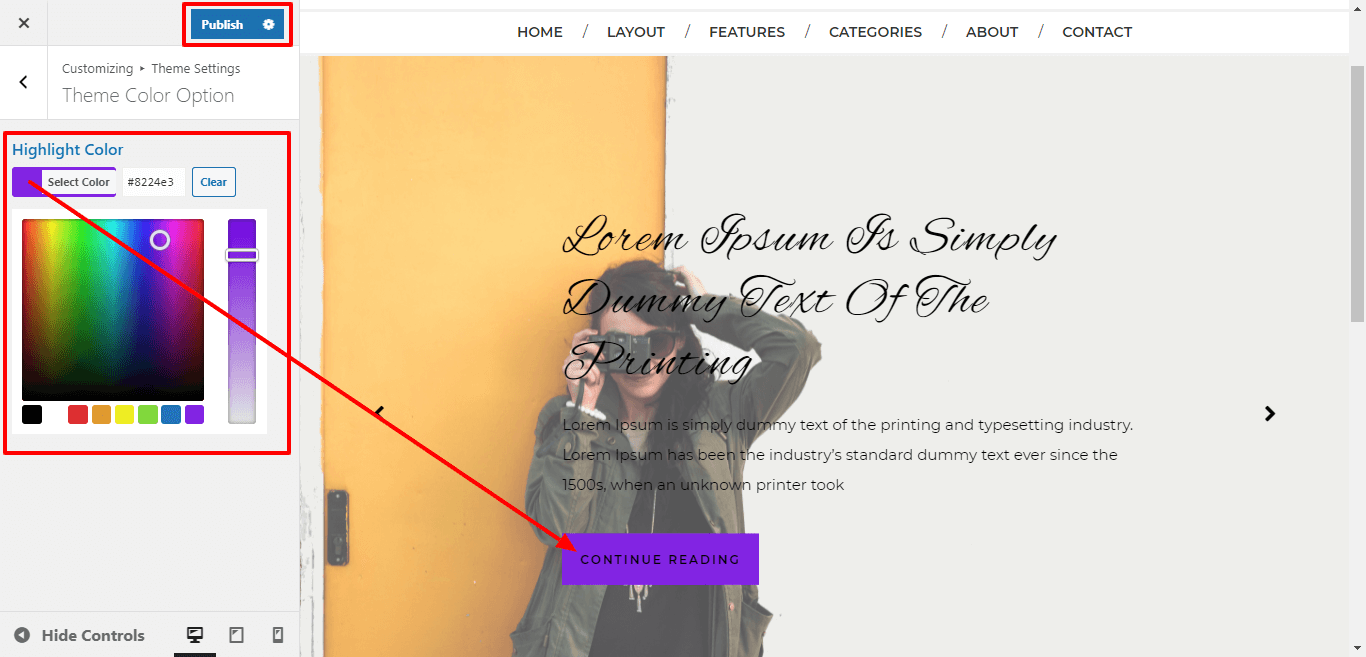
It will appear like this on the front end.
In order to setup the Typography, follow the below steps.
Go to Appearance >> Customize >> Theme Settings >> Typography
Their customizer settings are like below screenshot.
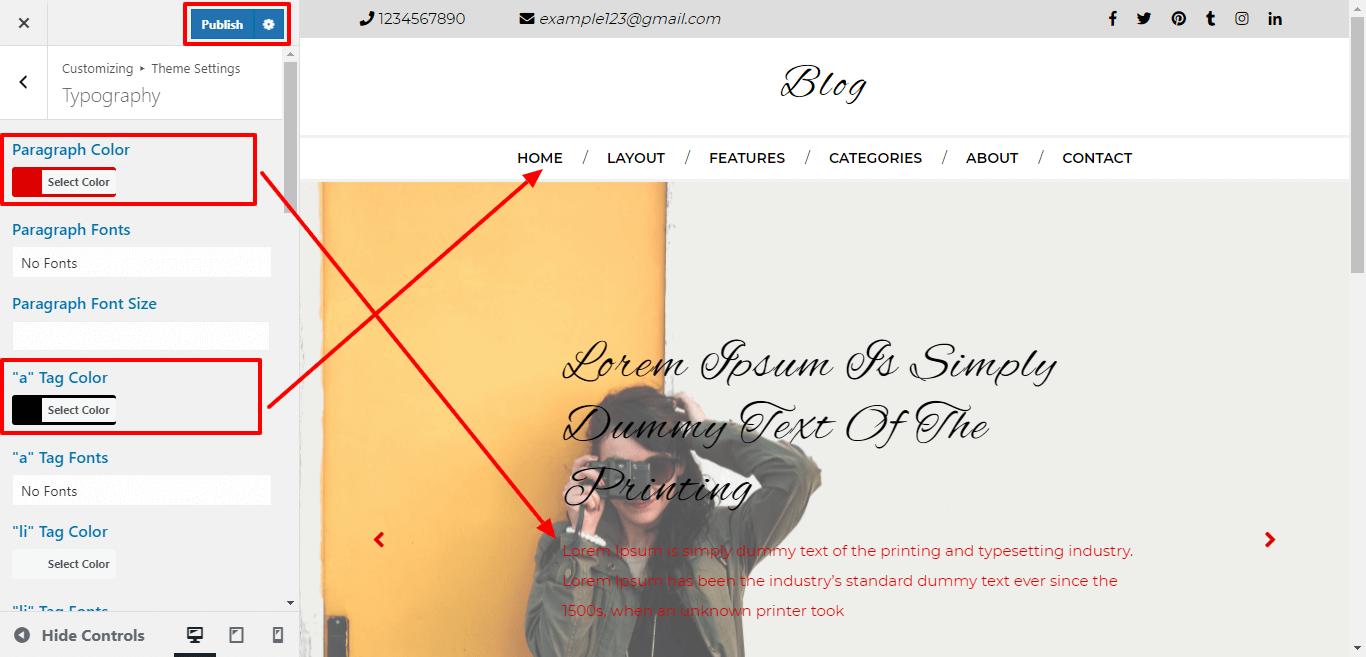
1. Color: Here you can change the colors of all Paragraph, 'a' tag, 'li' tag, H1, H2, H3, H4, H5 and H6 respectively.
2. Fonts: Here you can change the Font Family of all Paragraph, 'a' tag, 'li' tag, H1, H2, H3, H4, H5 and H6 respectively.
3. Font Size: Here you can change the Font size of all Paragraph, 'a' tag, 'li' tag, H1, H2, H3, H4, H5 and H6 respectively.

In order to proceed with Top Bar,
For Logo :
In order to proceed with Header Logo, follow the below steps
Go to Appearance >> Customize >> Site Identity
Here you select the logo and size for logo of the theme
Here you can add you Site title and tagline for the theme
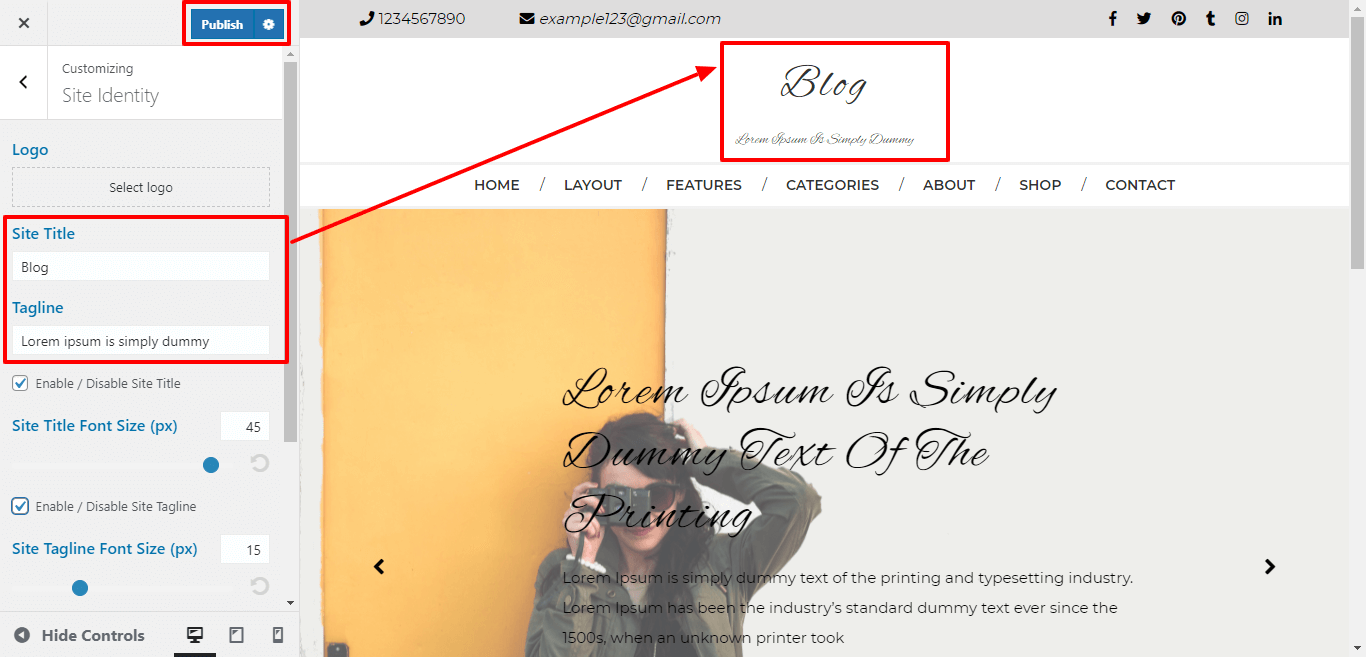
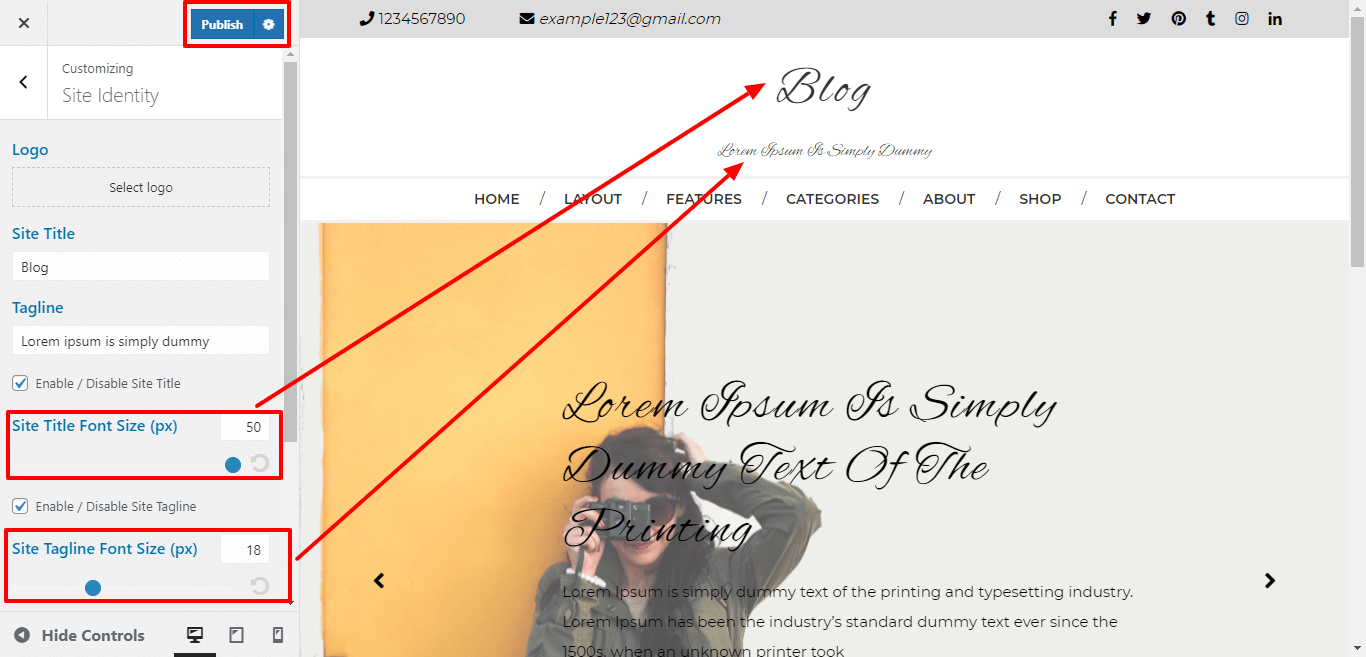
For enable / disable site title and tagline for the theme, click on the checkbox for the theme.

Here you can select the size for site title and tagline for the theme.
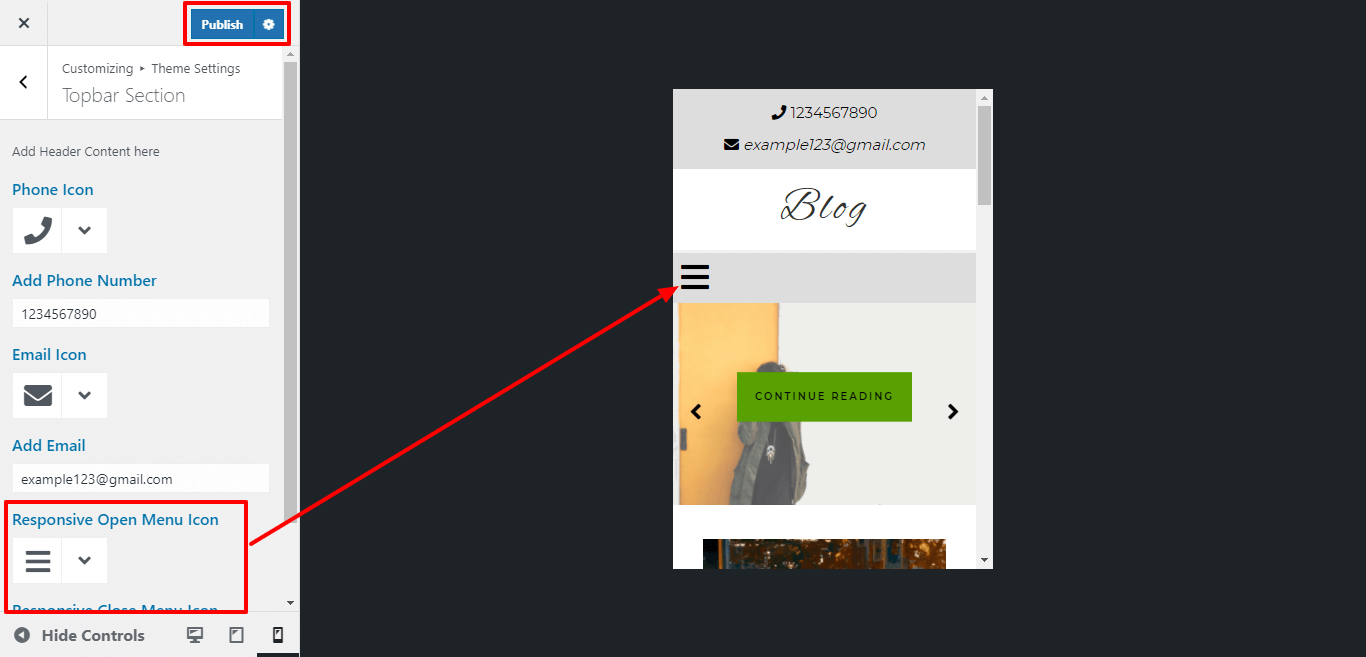
Go to Appearance >> Customize >> Theme Settings >>Topbar Section
Here you can add Email address and select icon for email.
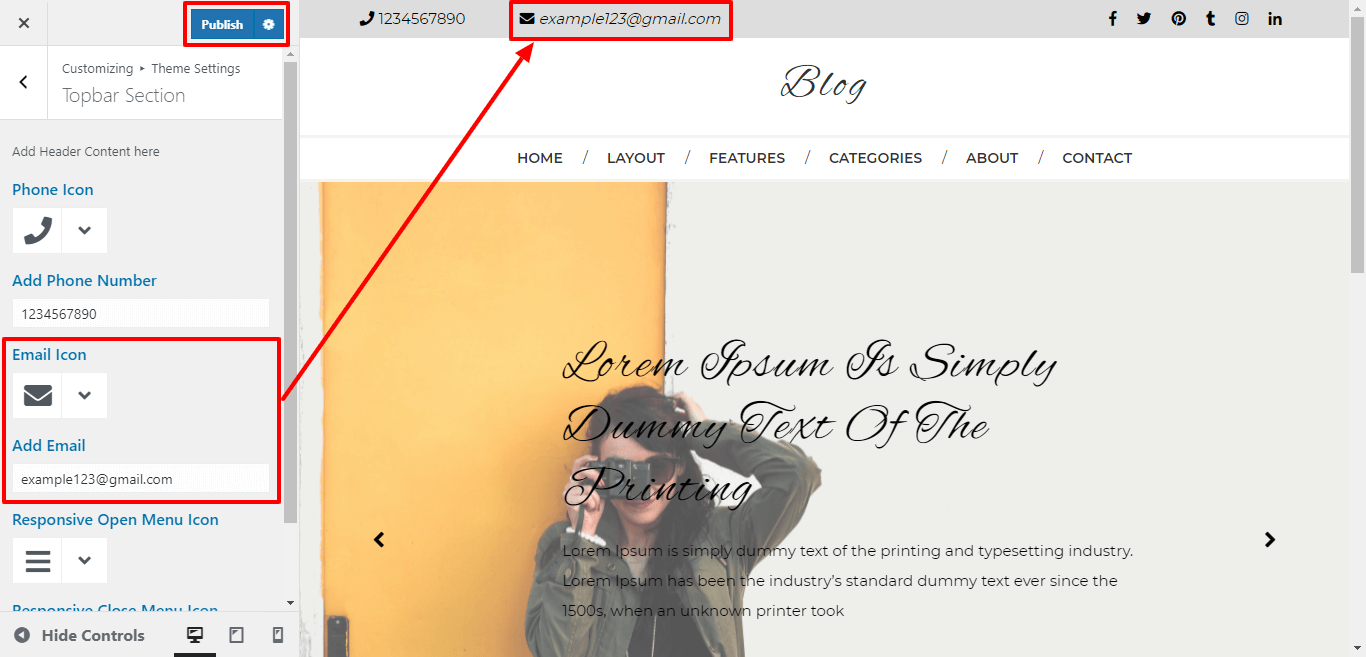
Here you can add Phone Number and select icon for phone number.

Here you can select icon for responsive open menu.
Here you can select icon for responsive close menu.
In order to proceed with Social Icon Section,
In order to proceed with Social Icon Section, follow the below steps.
Go to Appearance >> Customize >> Theme Settings >>Social Icon Section

Add Facebook Link: You can add facebook link here and the facebook icon will be displayed in the top bar of your site.
Add twitter link : This option allows you to add twitter link to the top bar of your site. Adding twitter link adds twitter icon in the top bar of your site.
Add Pinterest link : This option allows you to add pinterest link. Adding twitter link adds twitter icon in the top bar of your site.

Add Tumblr Link: This option allows you to add Tumblr link.
Add Instagram Link: This option allows you to add Instagram link.
Add Linkedin Link: This option allows you to add Linkedin link.

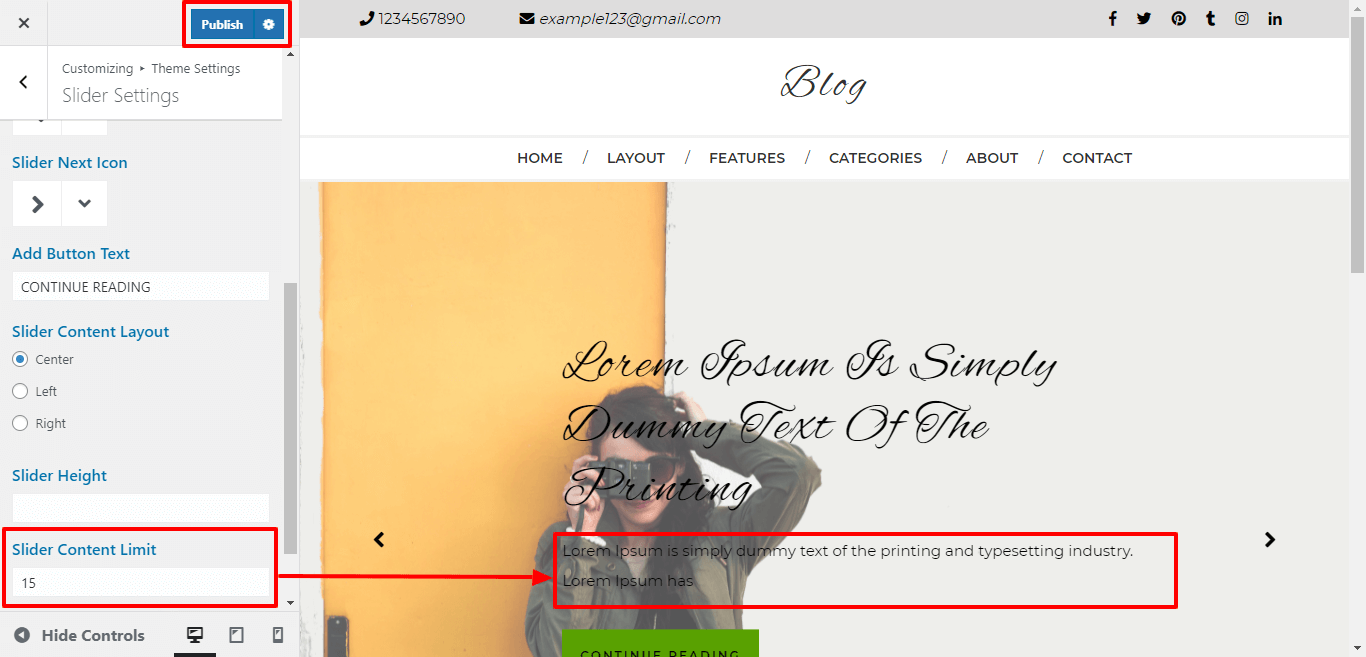
Follow the below steps to setup the slider
Go to Appearance >> Customize >> Theme Settings >> Slider Settings
Select Slider Image page: You can Select slider Image Page i.e Home, Sample page, Contact Us,etc, You can choose from this options for each slider option. Even, you can edit any slider image page option, for that you need to go to pages section of admin navigation

For show/hide slider, click twice on the checkbox.
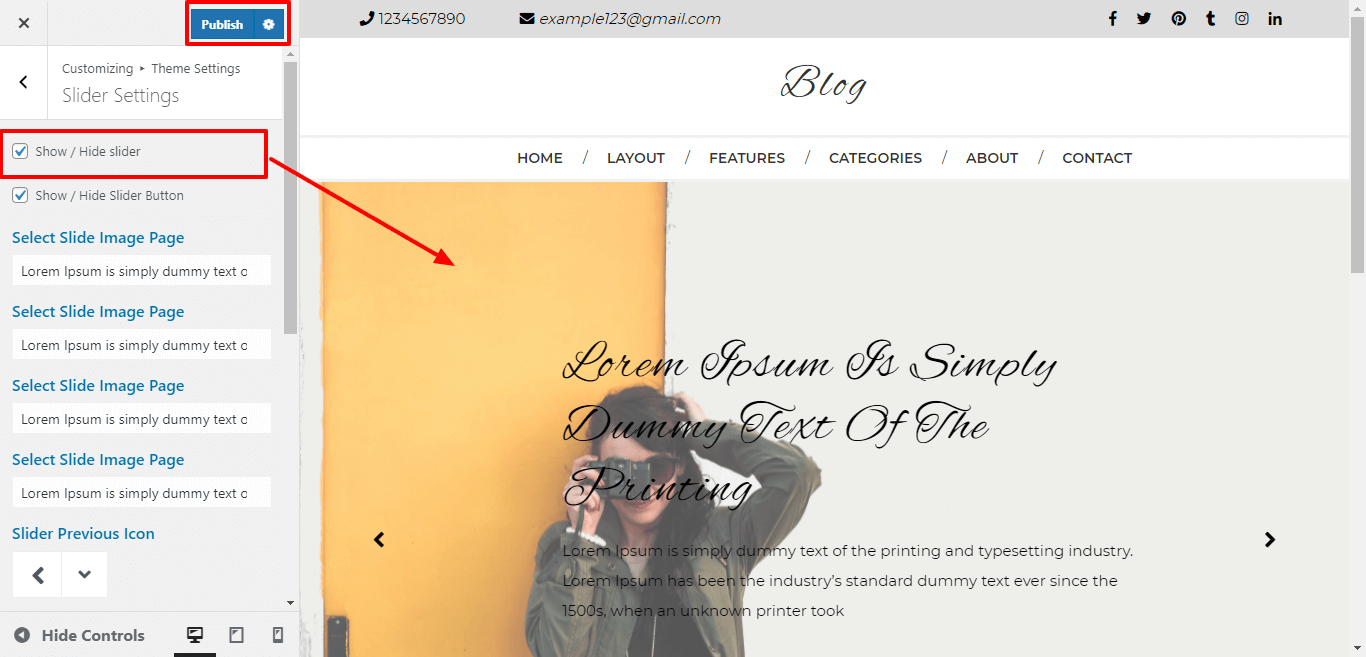
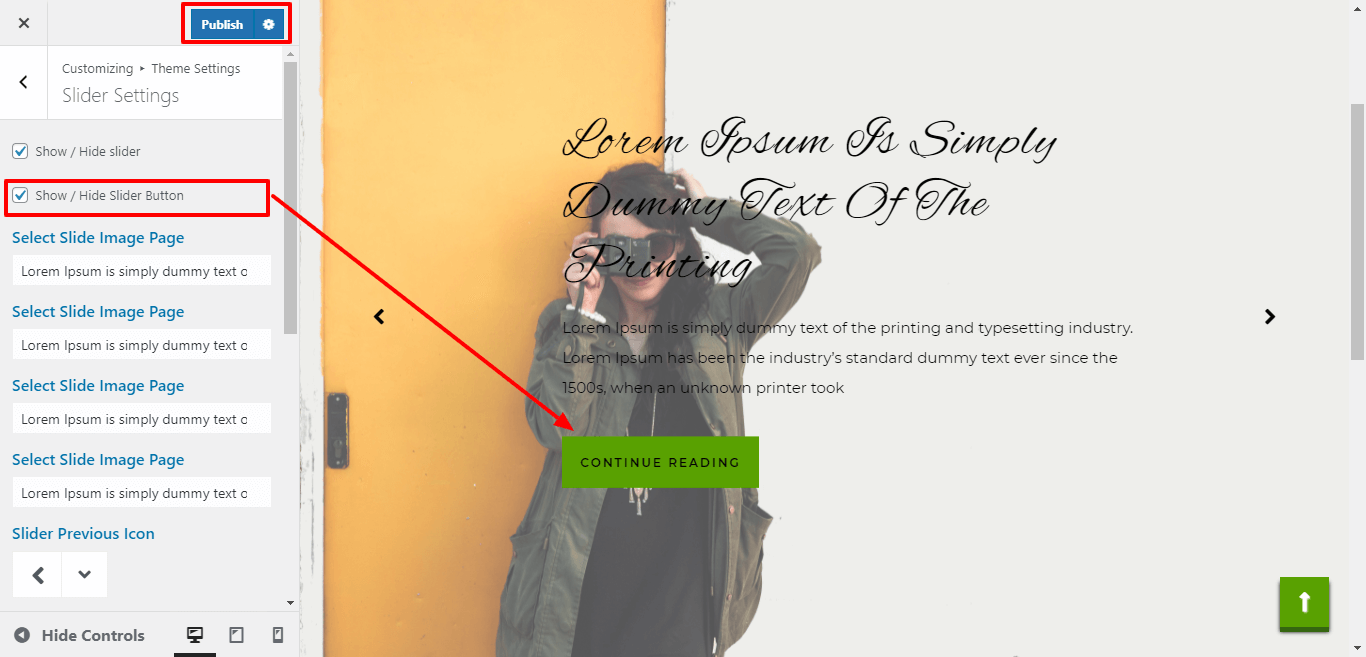
For show/hide slider button, click twice on the checkbox.
Here you can select the icon for slider previous and next carsoul images
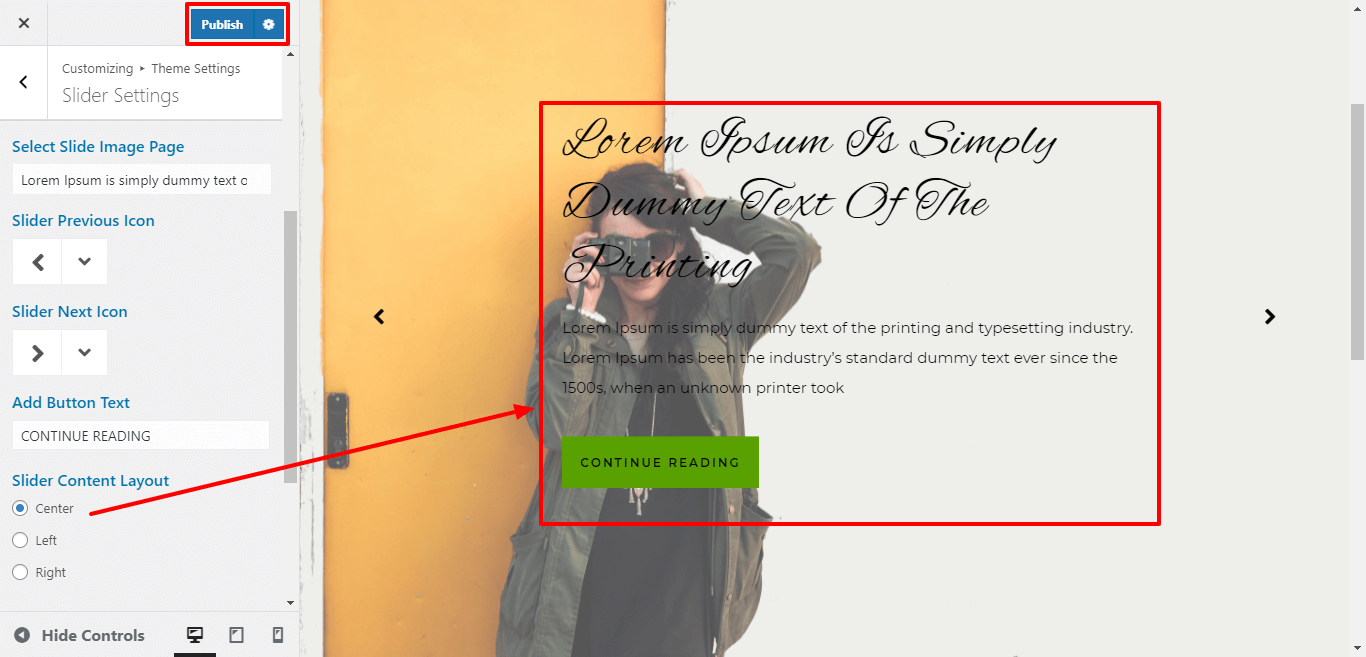
Here you can add Slider Button Lable for the theme.

You can select the slider content alignment .
Here you can add Image Height of slider for the theme.

You can select opacity for slider image.

For Slider Content Limit, You can change slider content limit.
Once you have done with this you will see the slider on your front page.
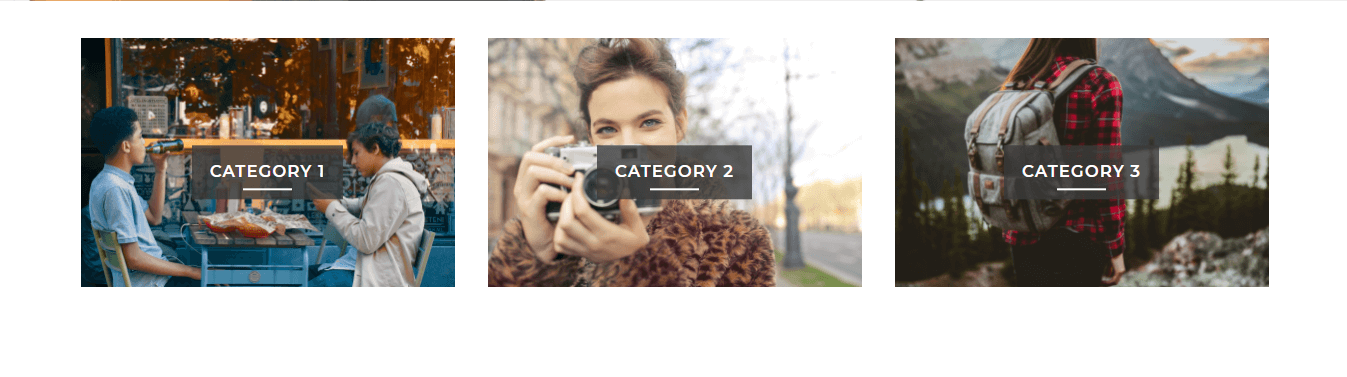
In order to proceed with photography,
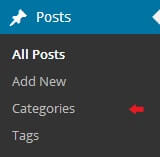
1. Go to Dashboard >> Post >> Categories >> Add New
In this section, you have to add new category for each post.
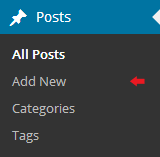
2. Go to Dashboard >> Post >> Add New

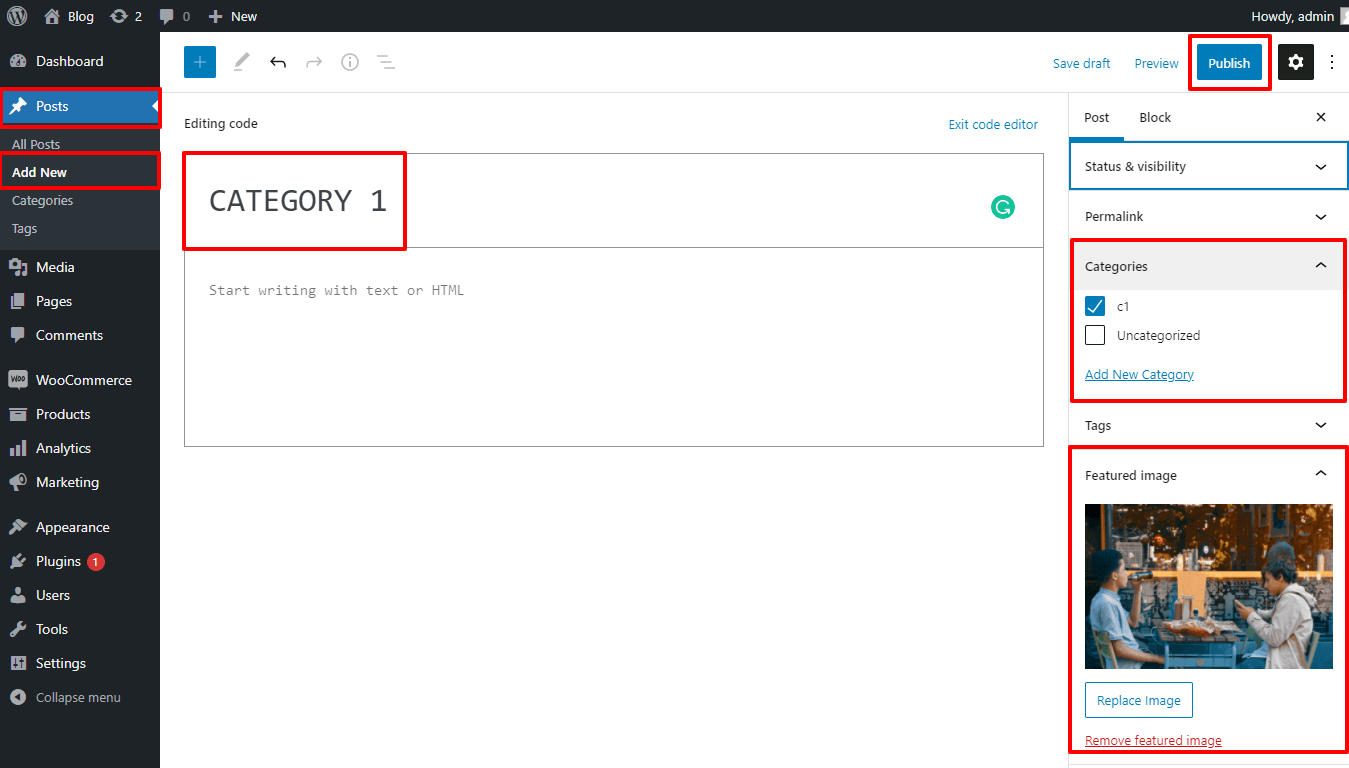
In this section, you can add new post, In the post you can add the Title, Content, Image and select the category that you have added. Options here are further described according to the sections they belong to :
3. Go to Appearance >> Customize >> Theme Settings >> Photography Section
Here you can select the post which you have created.

Once you have done with this you will see the Photography Section on your front page.
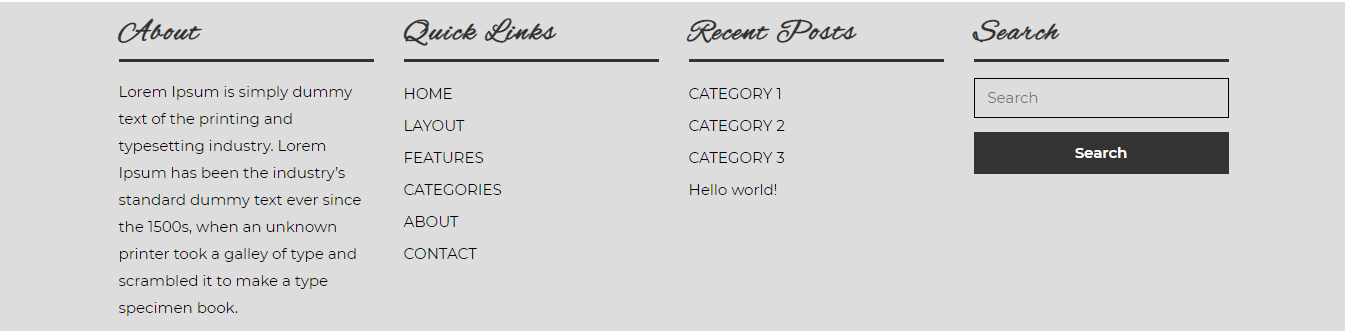
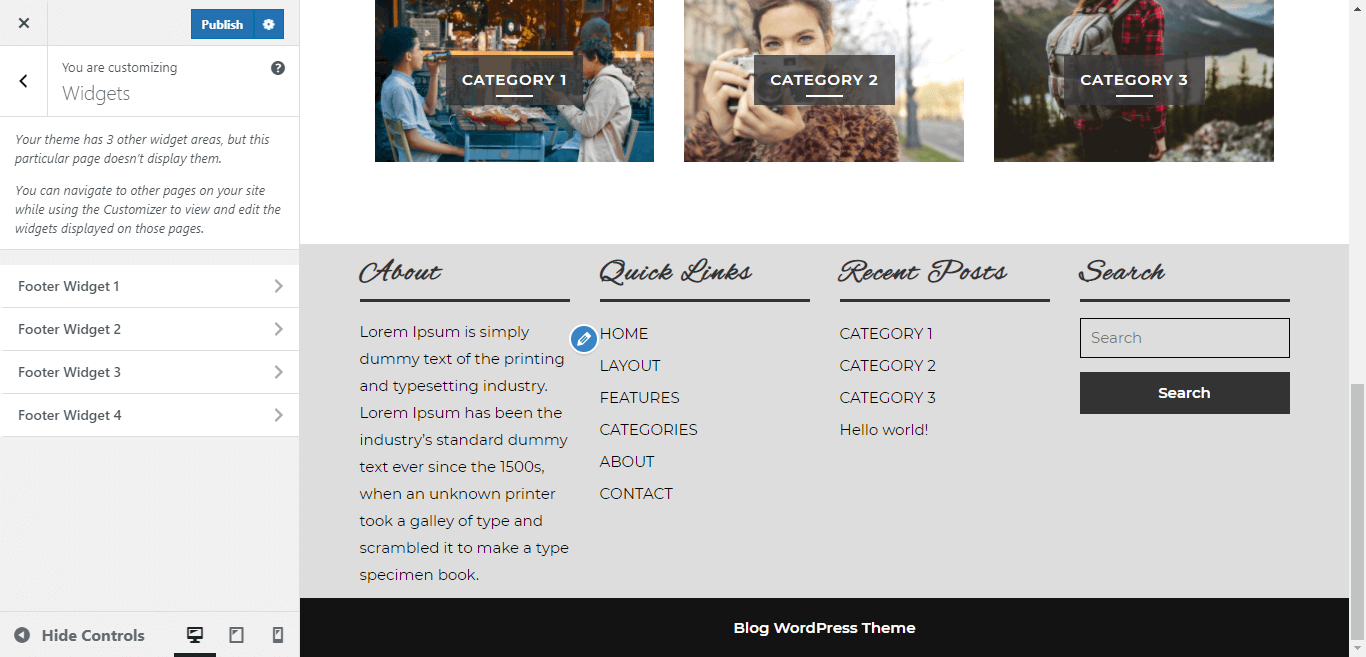
Footer have four coloumns. You can add any widget there.
There are two ways adding widgets to the footer.
1. Go to Appearance->Widgets
Here is a screenshot below for adding widgets to footer.

You can add footer coloumns, for that you need to select widgets like text, image, gallery, etc which allows you to add text or image as per your choice with ease.
Once you add widgets to the footer, your footer will look like this,
2. Now, let's see the another important way to add widgets to the footer of your website.
Go to Appearance >> Customize >> Widgets
Once you will select widgets, you will get this page, refer the below screenshot.
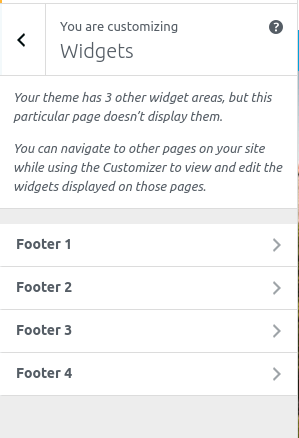
Now you can select footer1, footer2 footer3 and footer4 option to add footer contents using widgets one by one.
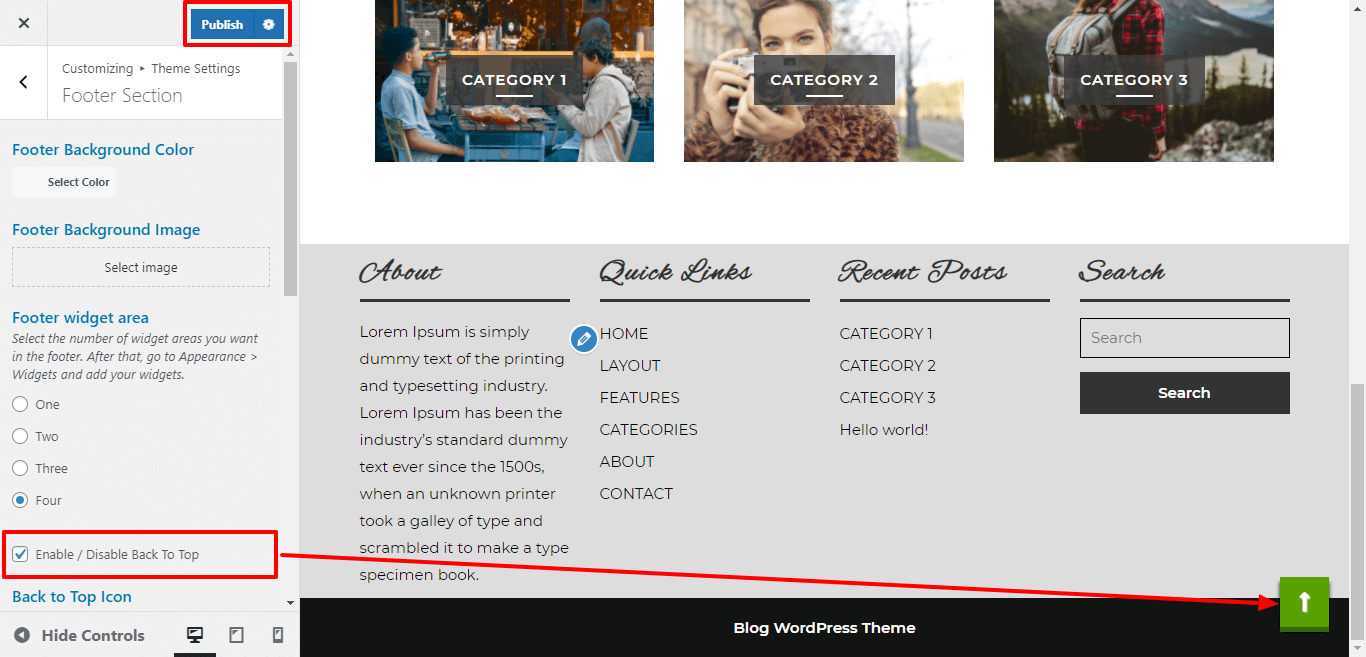
Here you can select the number of widget areas in the footer.
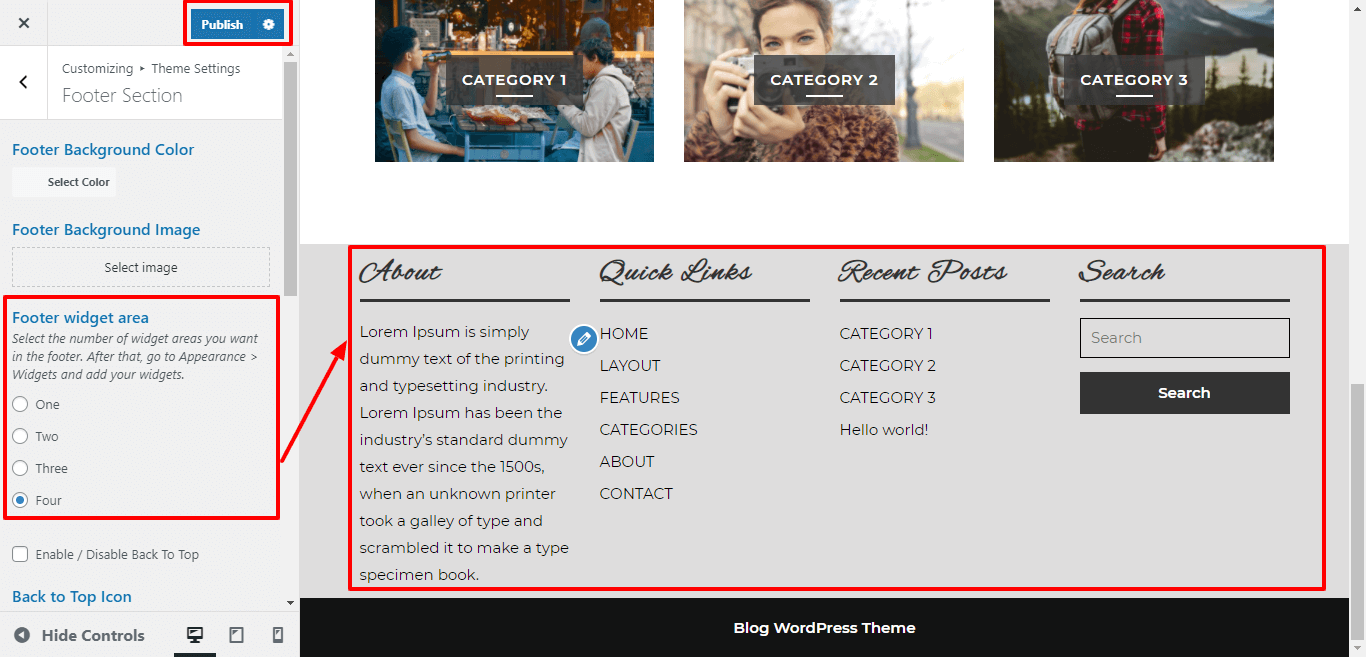
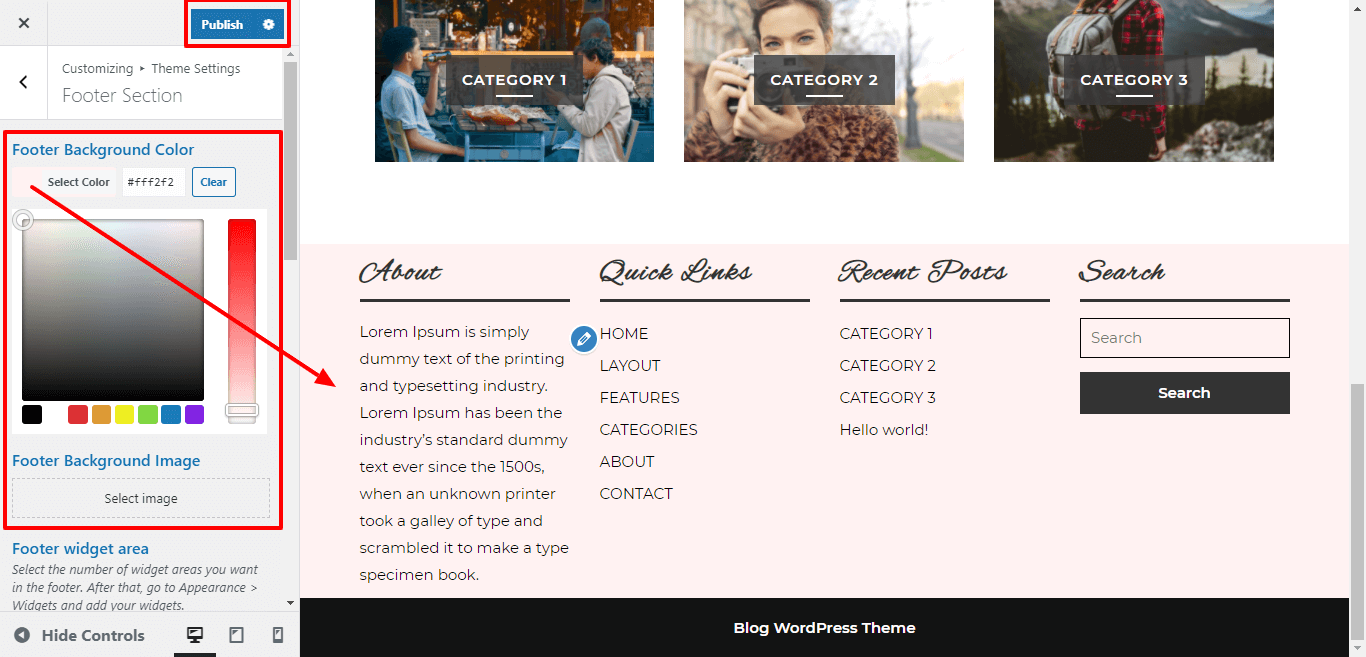
From here you can select the Footer Widget Background Color and Footer Widget Background Image for the themes.
In order to proceed with Footer Text section, follow the below steps.
Go to Appearance >> Customize >> Themes Settings>> Footer Text.
For enable or disable Back To Top button, click on the checkbox.
Here you can select the back to top button icon.
Here you can select the back to top icon button size
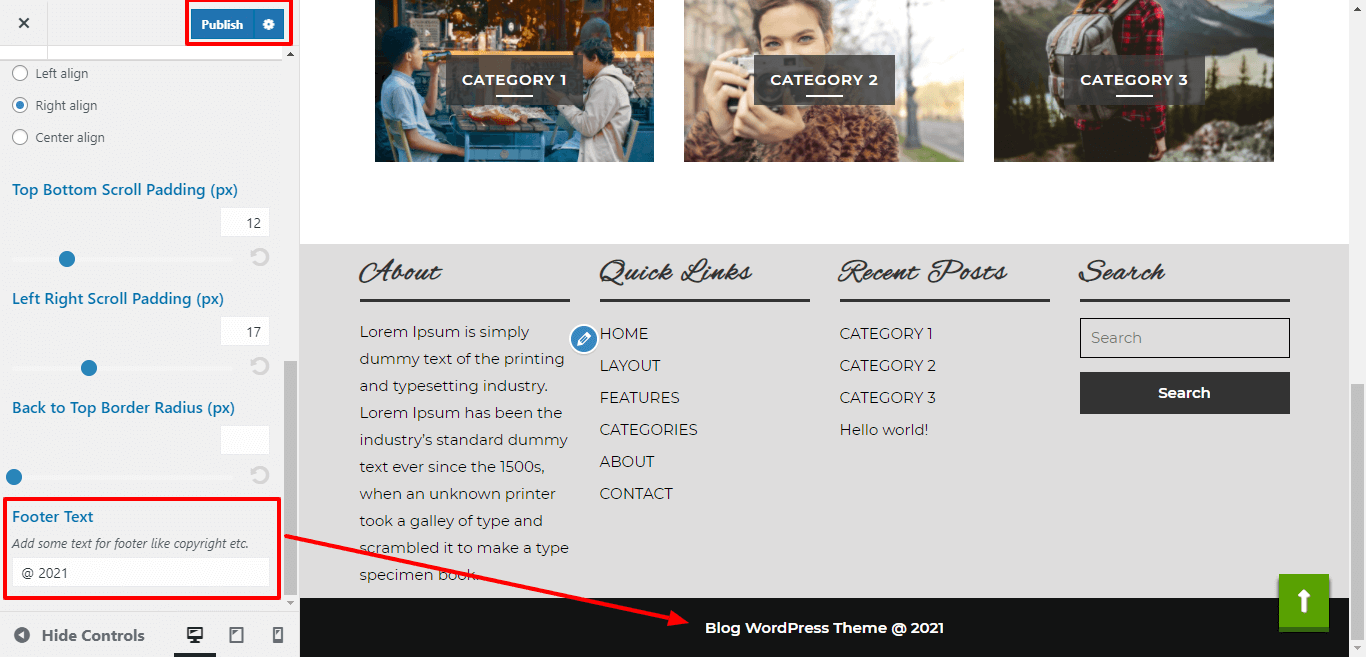
Here you can give the Scroll button top-bottom, left-right padding and border radius
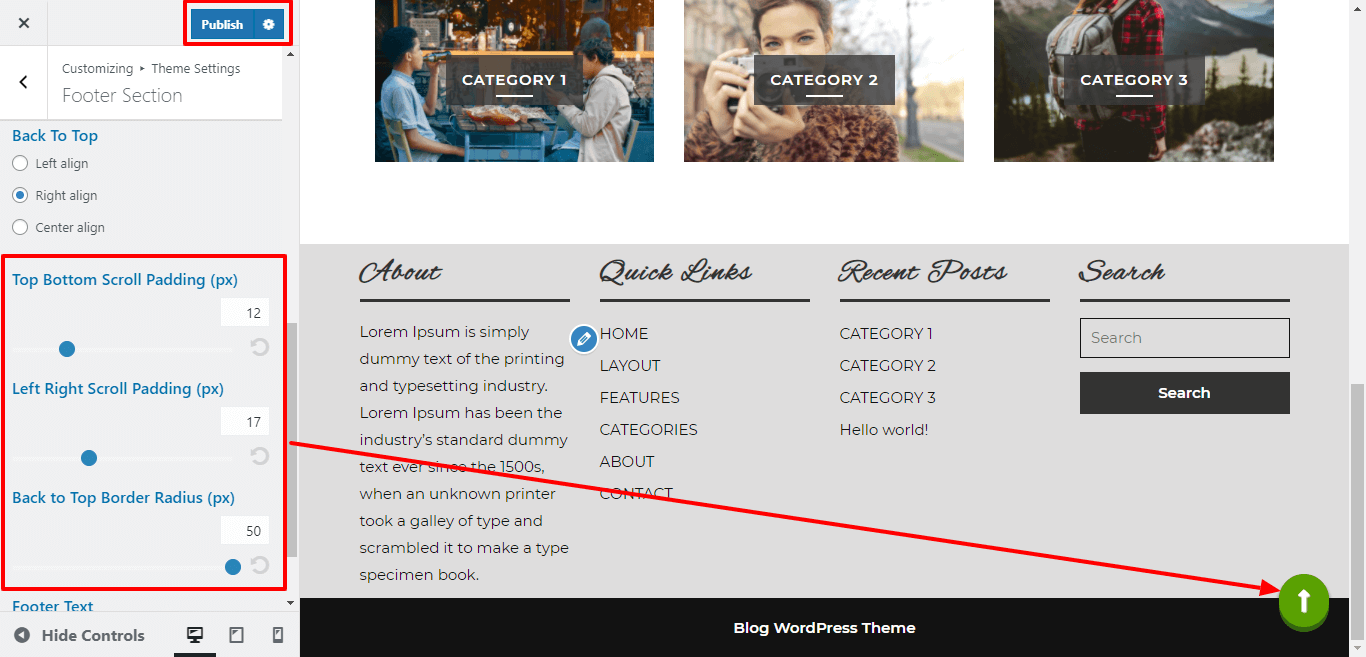
In order to proceed with Back To Top position, you can change position of scroll.

Here you can add copyright text
It will appear like this on the front end.

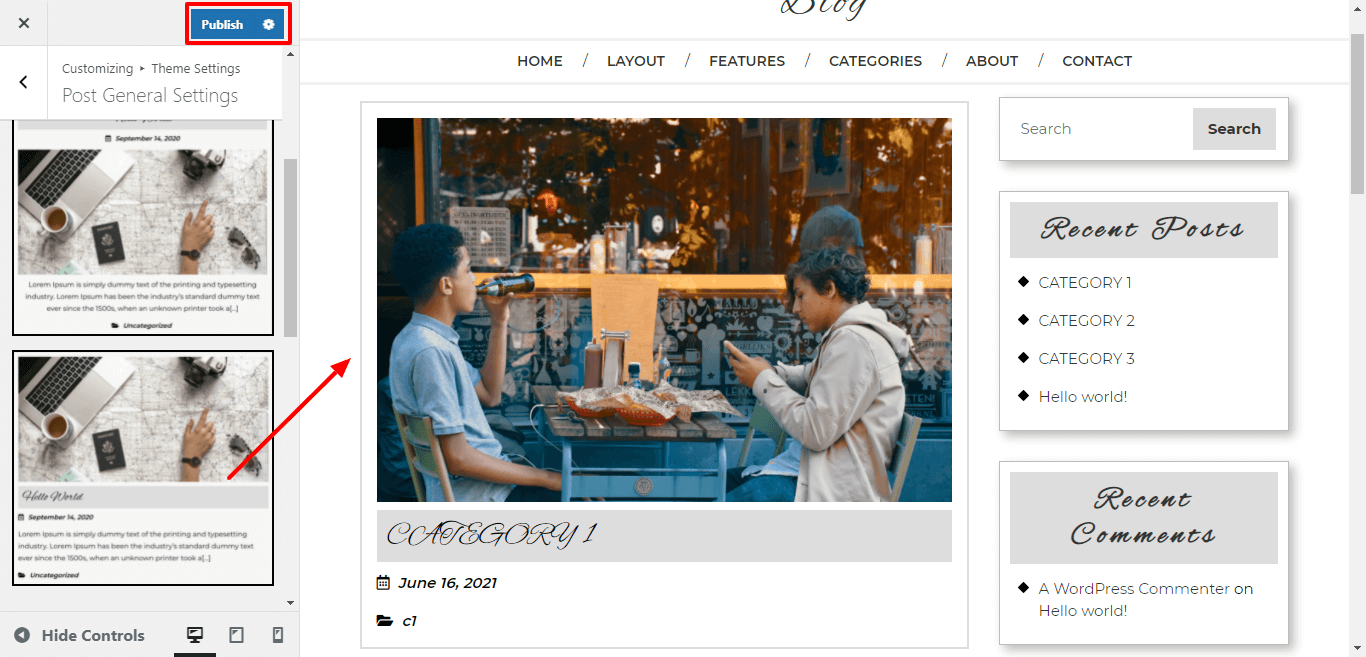
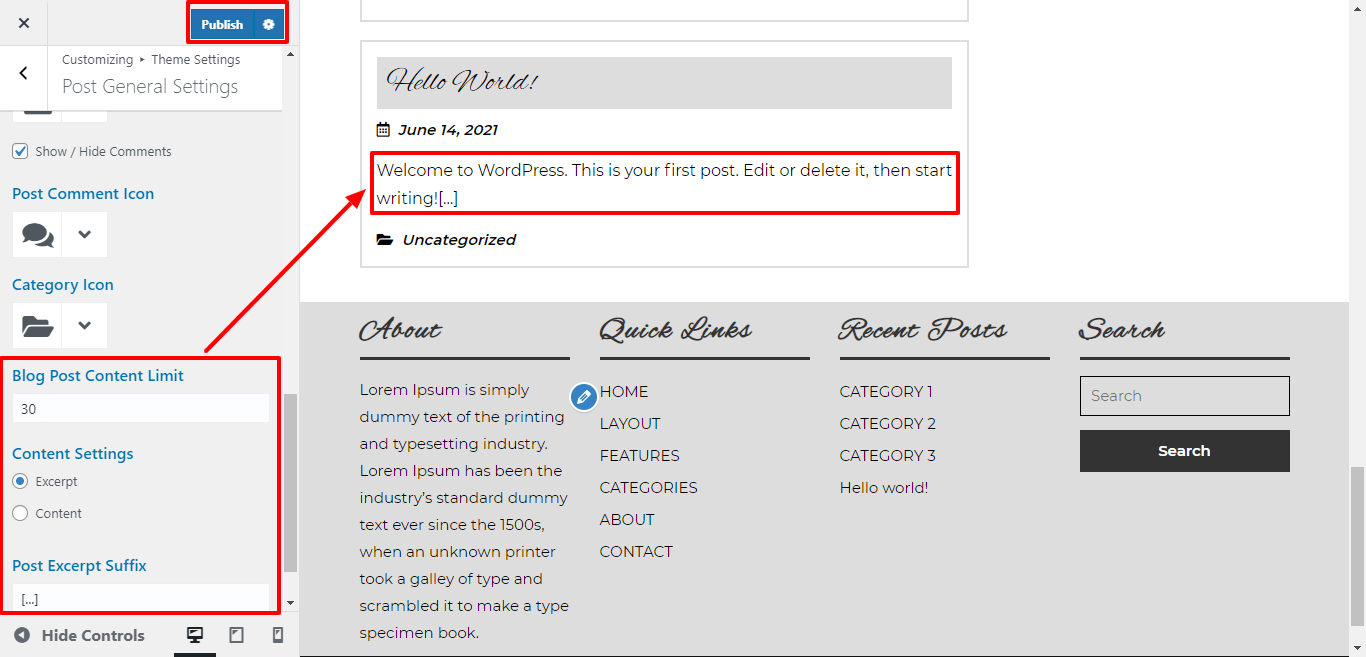
In order to proceed with Post General Settings, follow the below steps.
Go to Appearance >> Customize >> Theme Settings >>Post General Settings
Here you can select the layout for blog post

Here you can select the content limt for blog post
In single blog page, For Show / Hide Date by click on checkbox and select the icon for date.

In single blog page, For Show / Hide Author by click on checkbox and select the icon for author.

In single blog page, For Show / Hide Comment by click on checkbox and select the icon for comment.

In single blog page, Here you can select the icon for Categories.

In order to proceed with Single Post Settings, follow the below steps
In single blog page, For show / hide single post tags & featured image click on the checkbox for the theme.
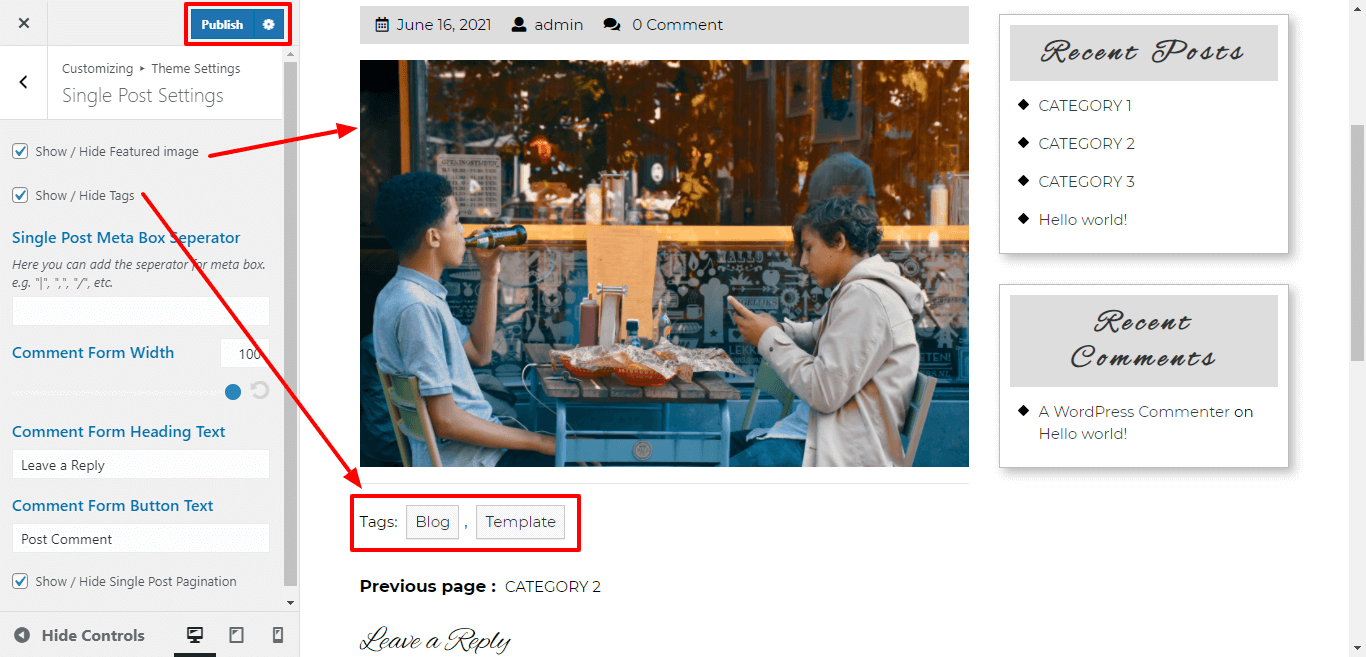
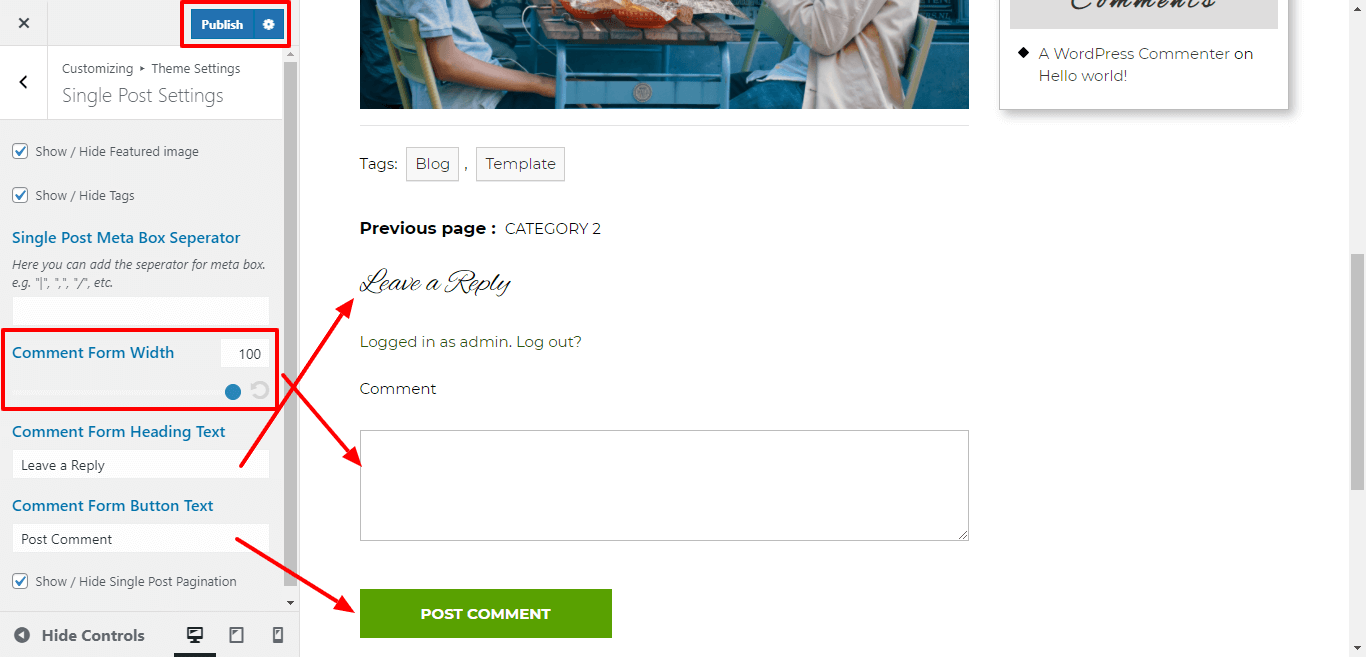
Here you can select the width for comment form, comment form heading and comment form button text.
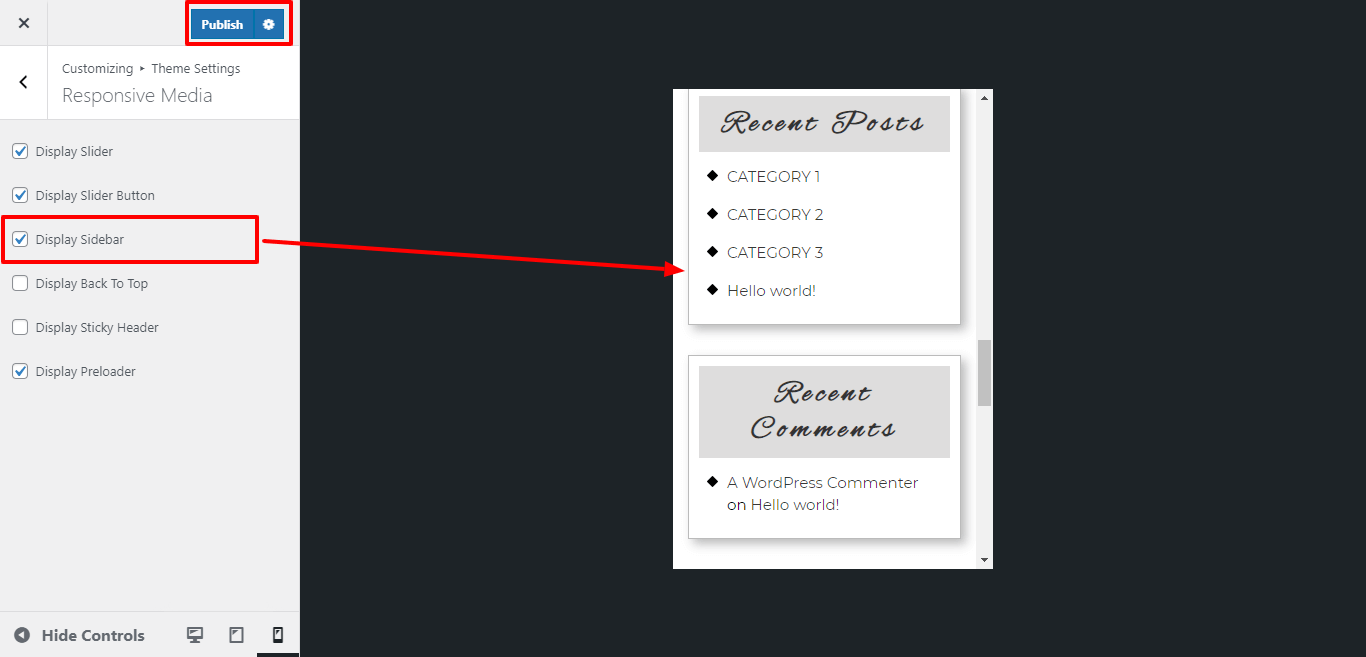
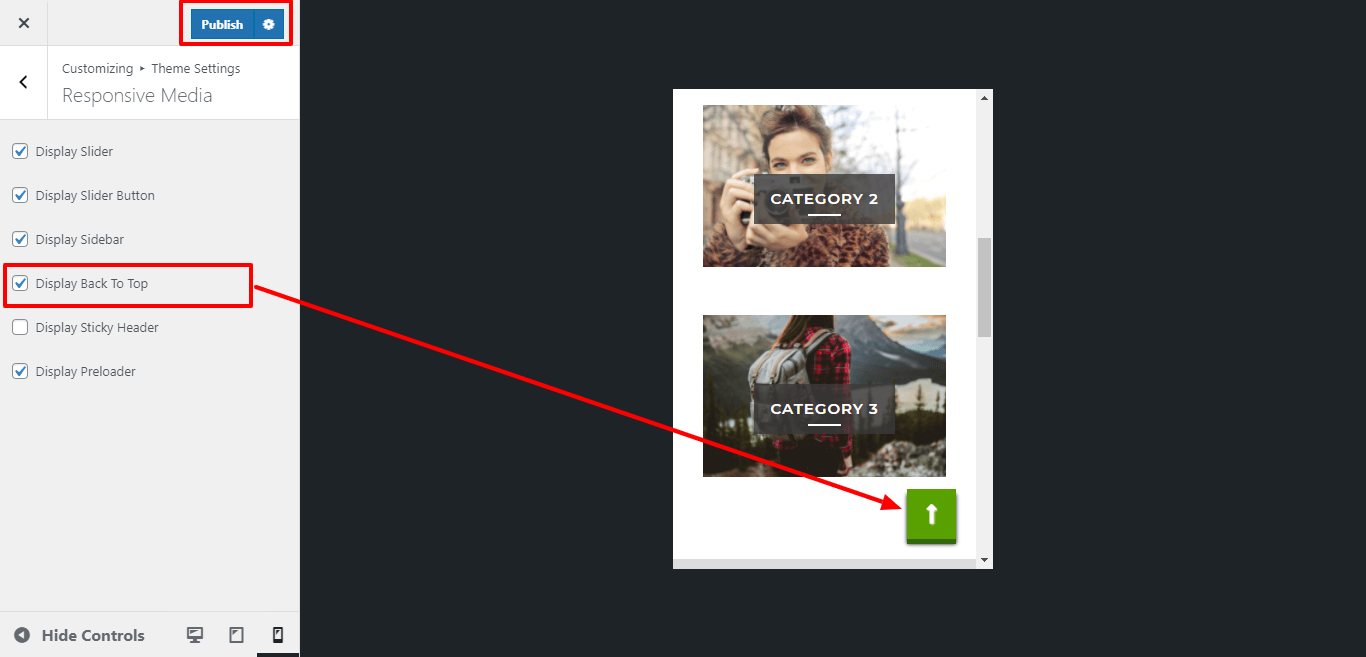
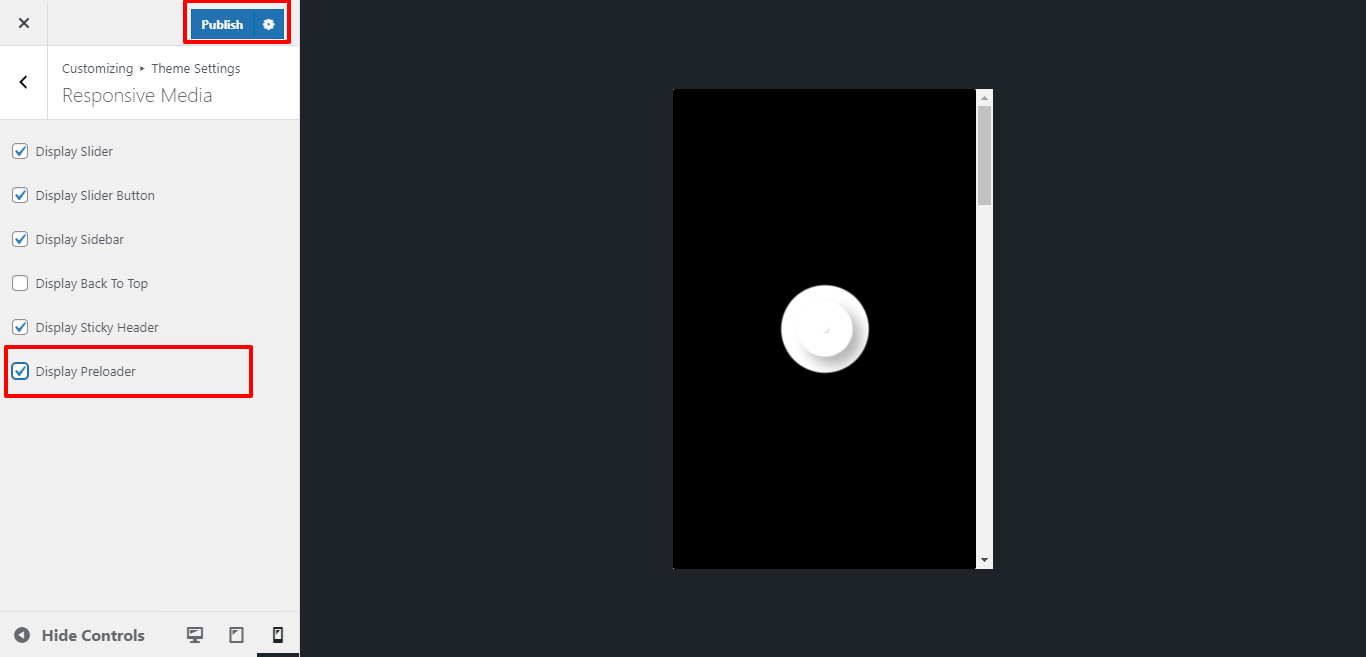
In order to proceed with setup Responsive Section , follow the below steps.
Go to Appearance >> Customize >> Theme Settings >> Responsive Media
For Display post sidebar for mobile device or responsive media by click on checkbox .
For Display stick-header for mobile device or responsive media by click on checkbox .

For Display slider and slider button for mobile device or responsive media by click on checkbox .

For Display Back to Top Button for mobile device or responsive media by click on checkbox .
For Display preloader for mobile device or responsive media by click on checkbox .
In this way you can setup Responsive Setting Section.
In order to proceed with setup 404 Page , follow the below steps.
Go to Appearance >> Customize >> Theme Settings >> 404 Page Not Found / No Result

1. 404 Heading: Here you can add 404 page Heading.
2. 404 Content: Here you can add 404 page content
3. 404 Button: Here you can add 404 page button text
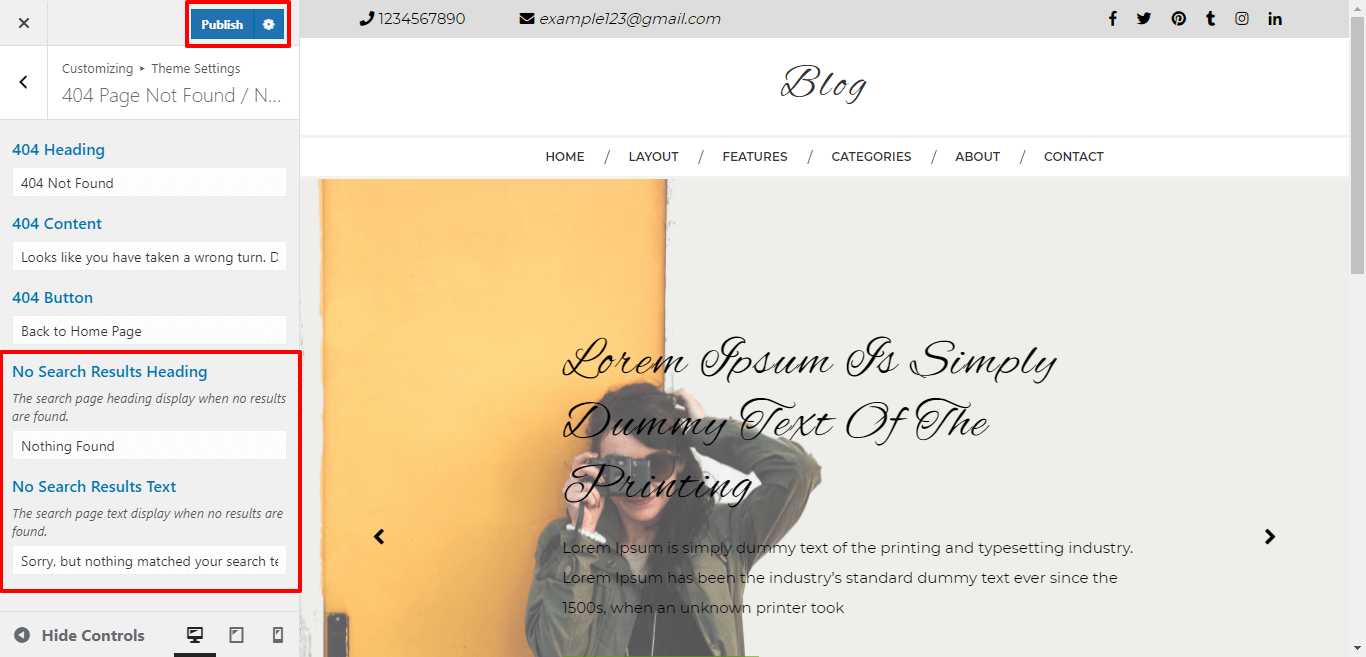
1. No Search Result Heading: Here you can add No Search Result Heading.
2. No Search Result Text: Here you can add No Search Result Text
In this way you can setup 404 Page Not Found / No Resultsection.
In order to proceed with Woocommerce , follow the below steps.
First, you need to download woocommerce plugin from the site Wordpress.org . Next, you need to go to WordPress admin and visit Plugin.
You will see a success message like this after installation is finished.Once installed, you need to click on the Activate Plugin link to start using the plugin.
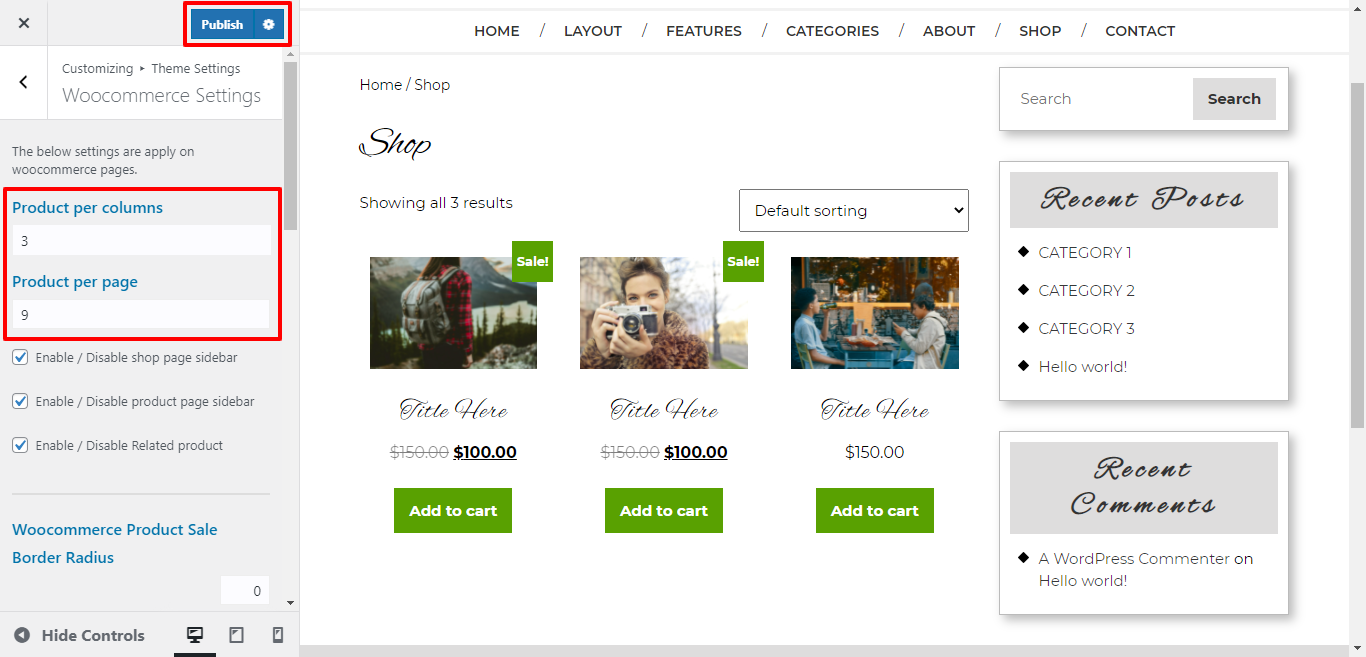
Go to Appearance >> Customize >> Theme Settings >> WooCommerce Settings
Here You have an option to add select the Number Of Product in one Row and single page.
Here You have an option to Enable / Disable shop page sidebar by click on checkbox.
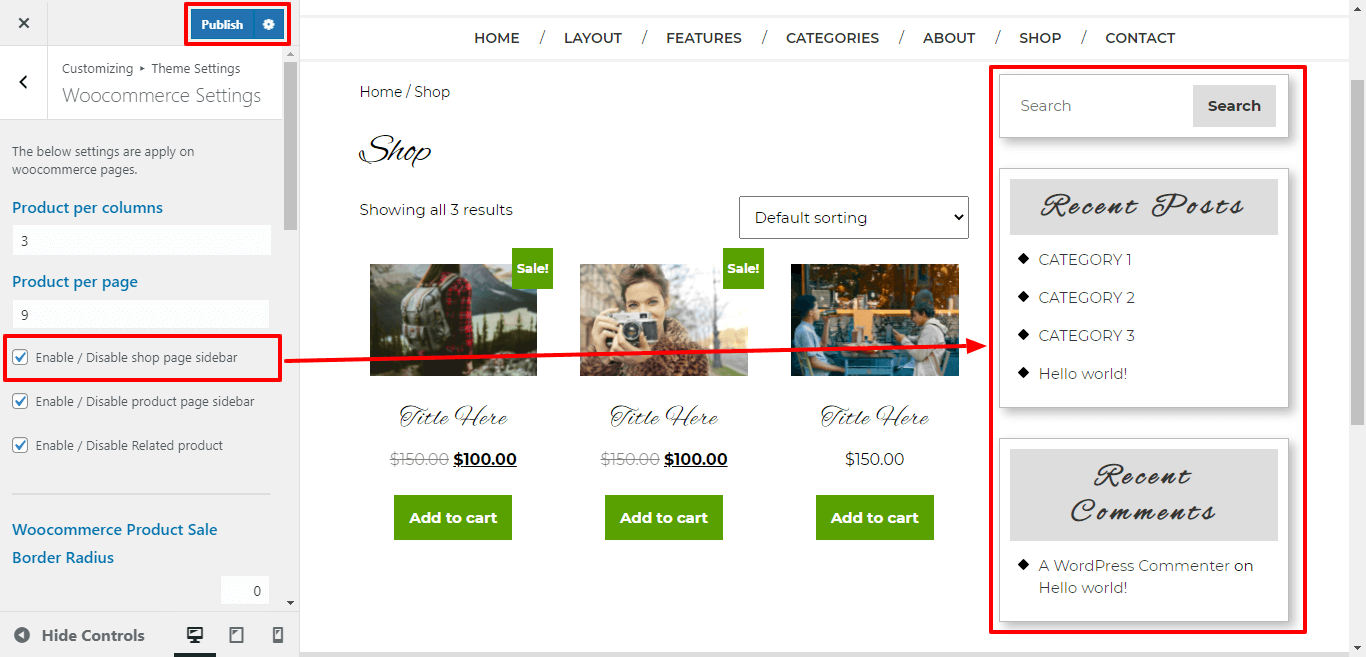
Here You have an option to Enable / Disable product page sidebar by click on checkbox.

Here You have an option to Enable / Disable Related product of shop page by click on checkbox.

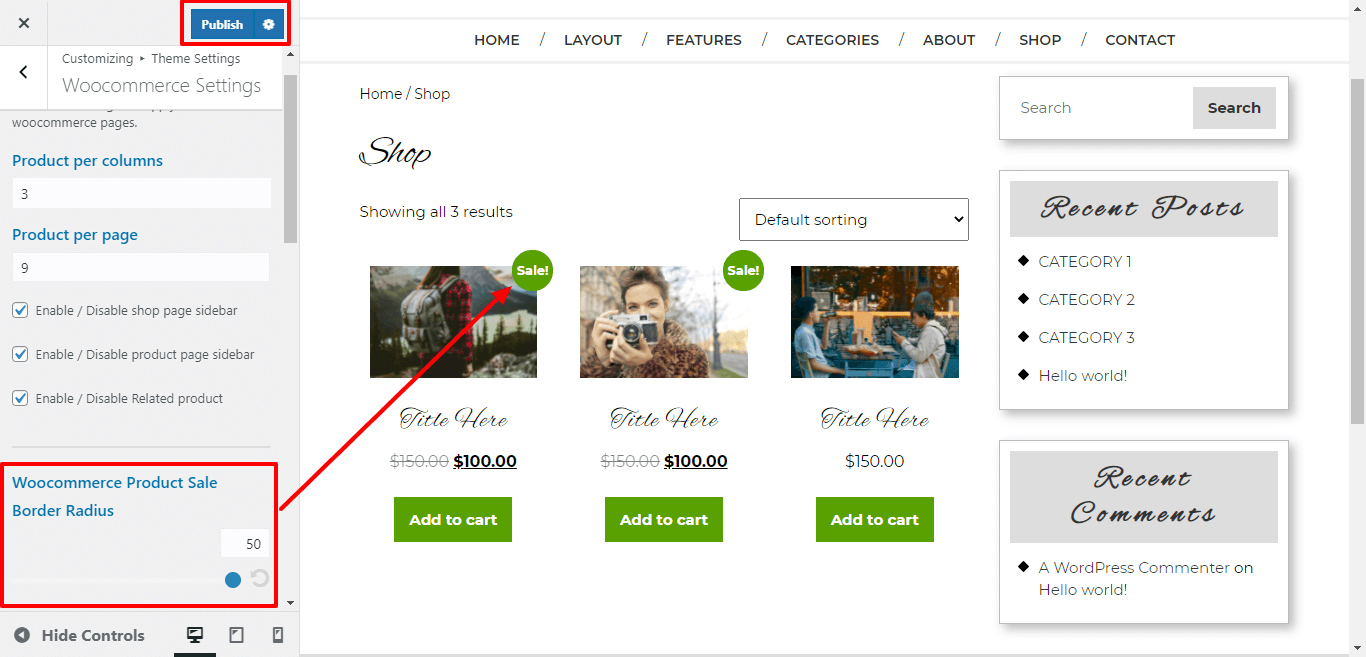
Here You have an option to add border radius for product sale button of the theme.
Here You have an option to top-bottom, left-right padding for Sale product button.

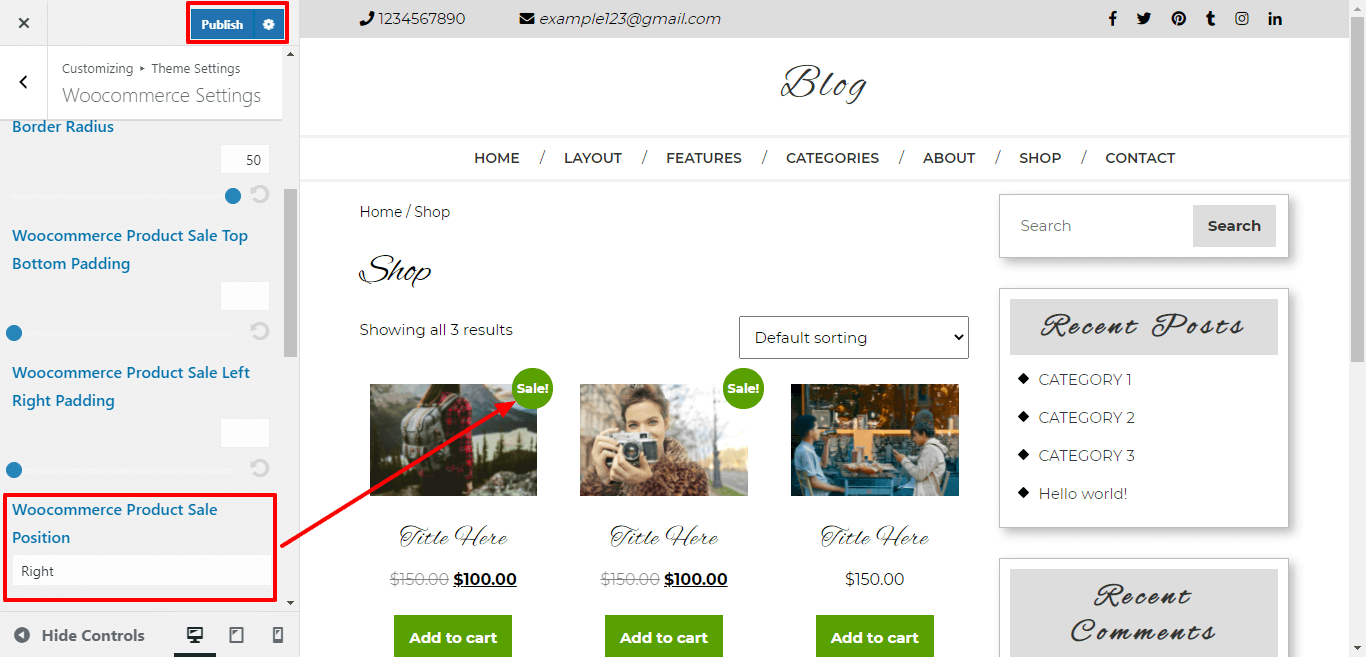
Here You have an option to select the product sale postion of the theme.
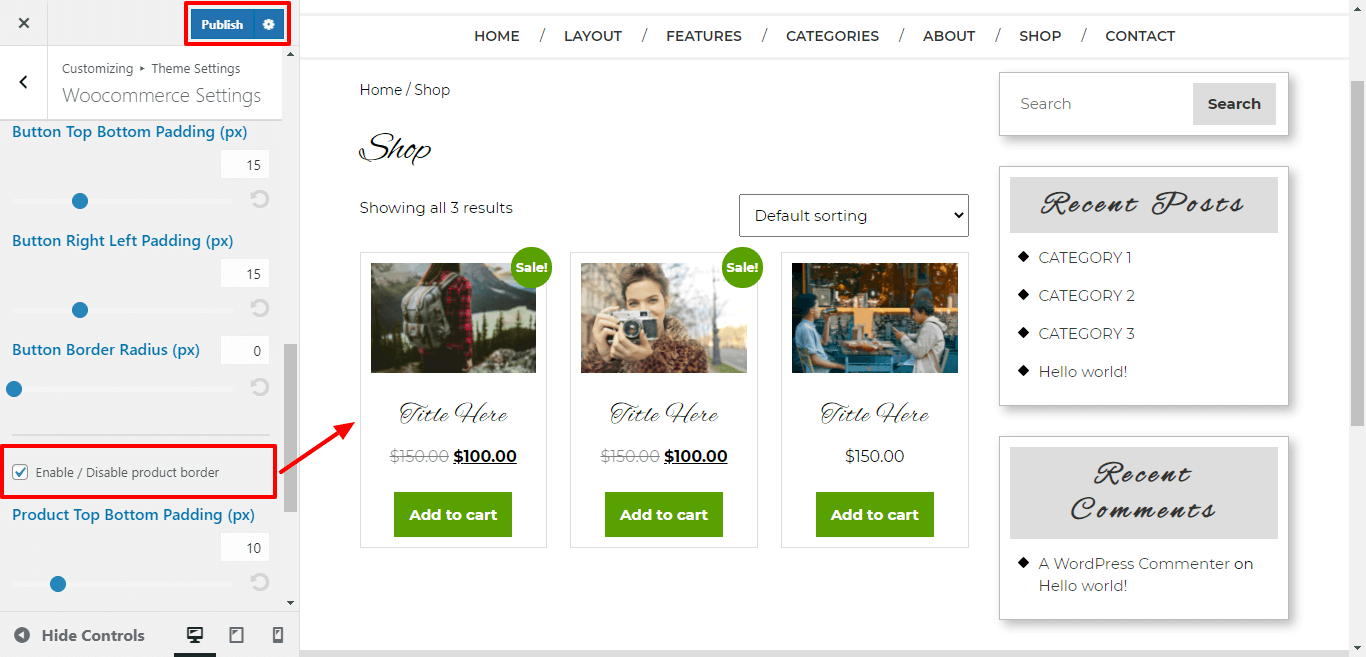
Here You have an option to enable / disable product border by click on checkbox.
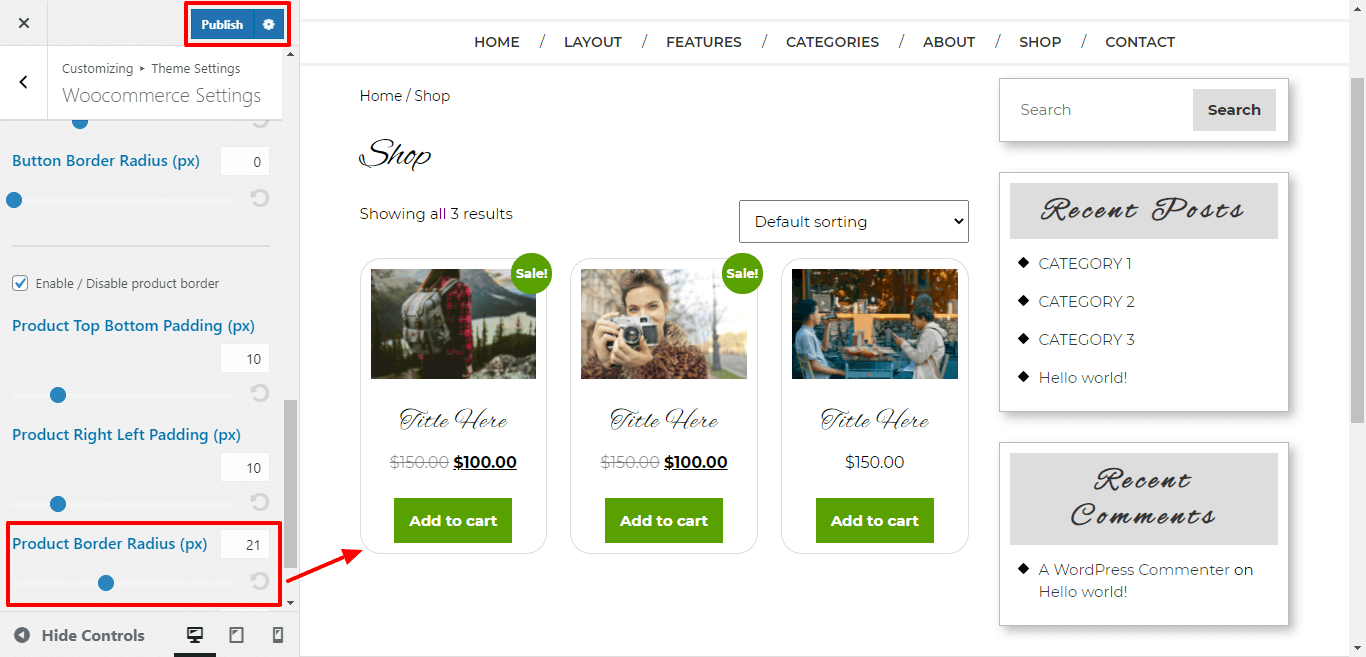
Here You have an option to top-bottom, left-right padding for product.
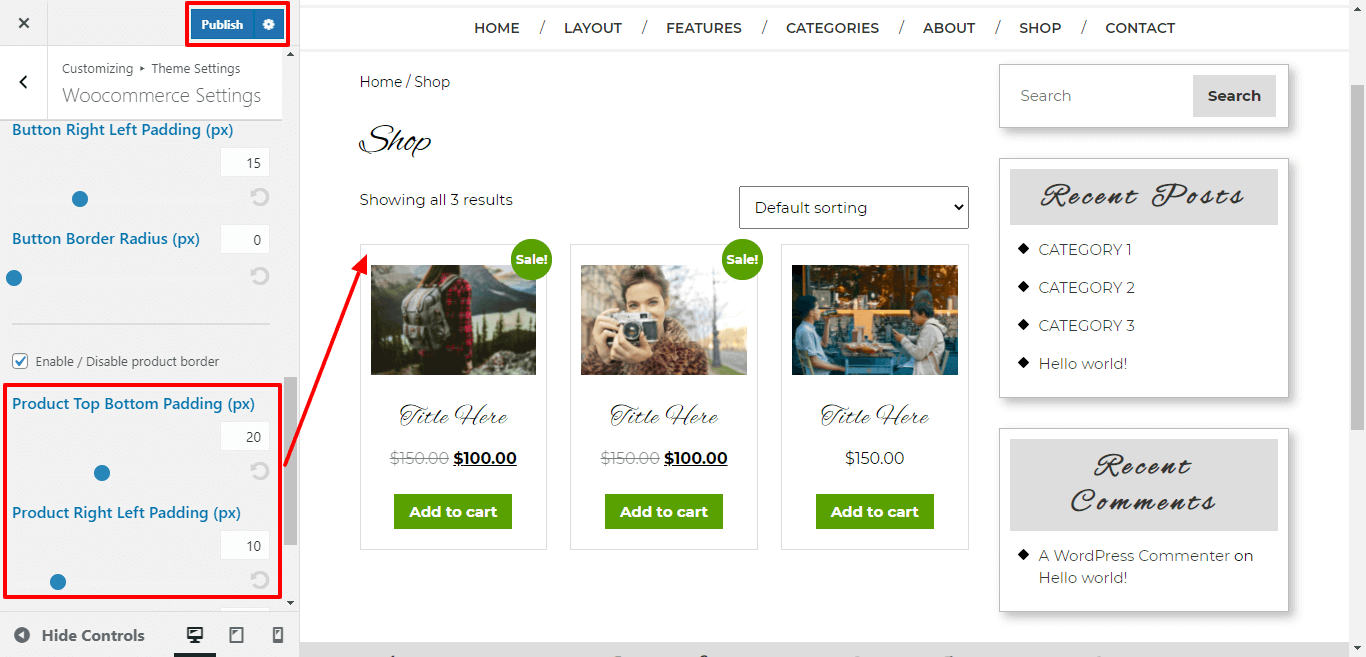
Here You have an option to give border radius to product.
Here You have an option to give box shadow to the product.

Here You have an option to add top-bottom, left-right padding product button and radius of product button.

In this way you can setup Woocommerce Section.
See this screenshot for better understanding.
Review the following article for more information on adding categories: http://codex.wordpress.org/Manage_Categories_SubPanel
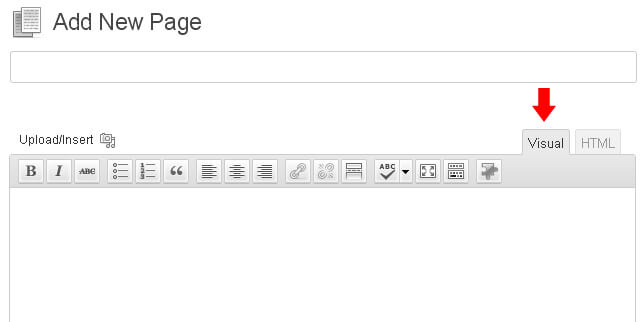
A shortcode is a powerful content building tool http://codex.wordpress.org/Shortcode. Shortcodes are easy to use. First of all, make sure that the editing mode is set to Visual.

Copyright © 2023 Buy WP Templates. All Right Reserved.