1-Install a theme using wordpress admin
The first step is to log in to your WordPress admin dashboard. then click on
1.Go to the menu Appearance >> Themes
The template bundle that you downloaded is divided into various directories. Let's examine the contents of each folder:
The steps for activating a BWT key are as follows.
Given that you will receive the License Key via Email, use that key to Activate License.
Follow the following Process to Activate License.
Go to Dashboard >> Appearance >>BWT Key Activation>>Enter Key>>Save Changes.

After Entering The Key >> Activate Licence.

After you Activate Licence,as the key is activated, you can begin using the theme.
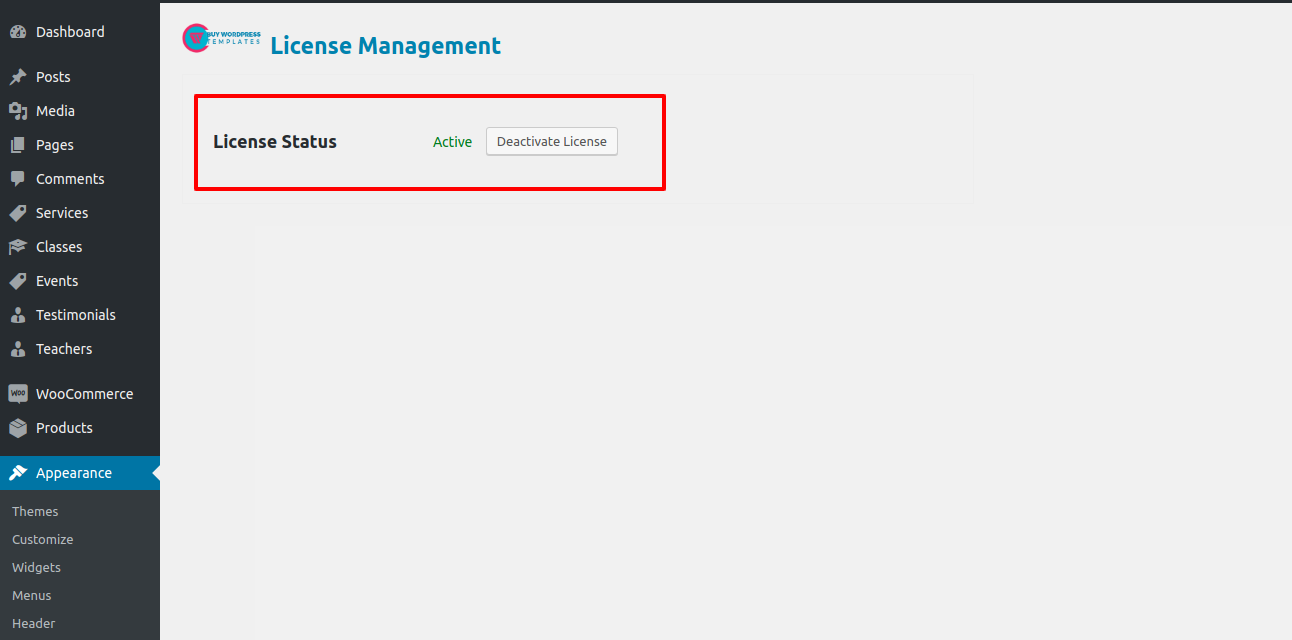
In this way you can activate your Licence Key.
The first step is to log in to your WordPress admin dashboard. then click on
1.Go to the menu Appearance >> Themes

2. After arriving at the themes page, click on the Add New button at the top.
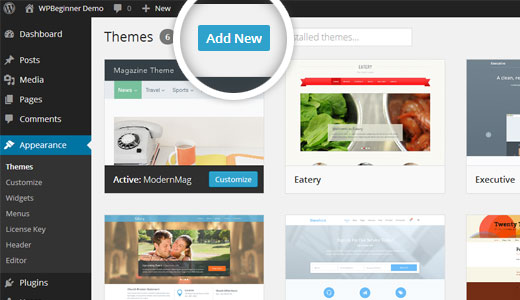
3. Click on upload theme button.

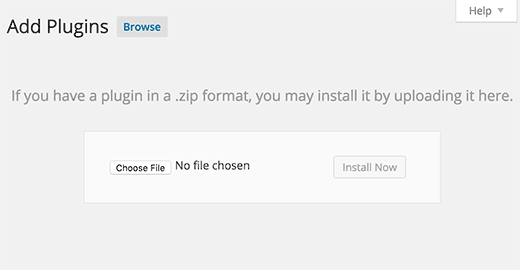
4. Choose your bwt-multipurpose-blog 1.0.zip theme by clicking the Browse button, then hit the Install Now button.

5. Your theme will now be installed by WordPress, and you will see a success message with a link to activate it or view a live preview.

Congrats! Your theme has been installed successfully.
The theme can be uploaded using FTP, which is your second installation option. To use this method, first log into your website using FTP and navigate to the wp-content/themes folder. Just extract the Theme folder from the theme file you got and upload it to your server.

Next log into your WordPress site and navigate to Appearance >> Themes to activate Theme.

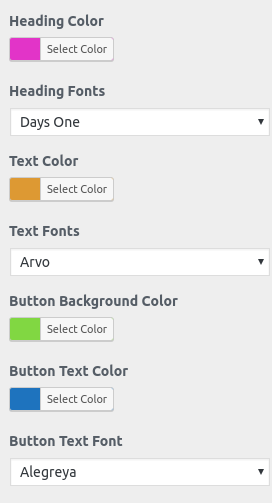
The method of changing the colour or font is quite simple. These choices are available in all customizer areas. It is a comprehensive graphic that demonstrates the typeface and colour palette. You can change the colour and font of the headings, paragraphs, and buttons with a single quick click.
Depending on the number of options accessible in each area, there is an option to change the colour scheme for the headings, title/text, paragraphs, button text, and button background.

The index page with the most recent post will be visible when you access your site after activating the theme. You must now configure the home page design such that it displays the entire demo area on your front page.
Set up your home page by following these instructions.
1. Create a Page to set template: Go to Dashboard >> Pages >> Add New Page.
You can label it anything you like, such as "home." then pick the "home-page" template from the template menu.

2. Set the front page: Go to Setting -> Reading --> Set the front page display static page to home page
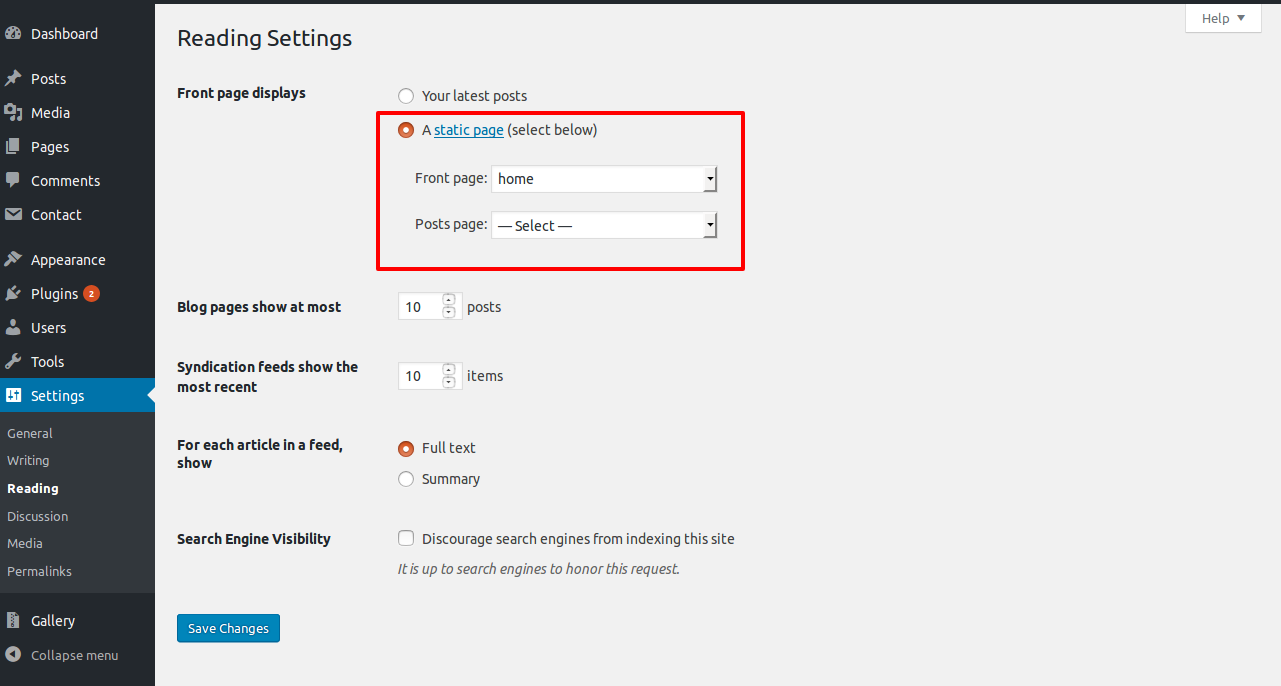
When you're finished, you can view the entire demo content on the top page.

In order to proceed with Top Bar,
Go to Appearance >> Customize >> Theme Settings >>Top bar section
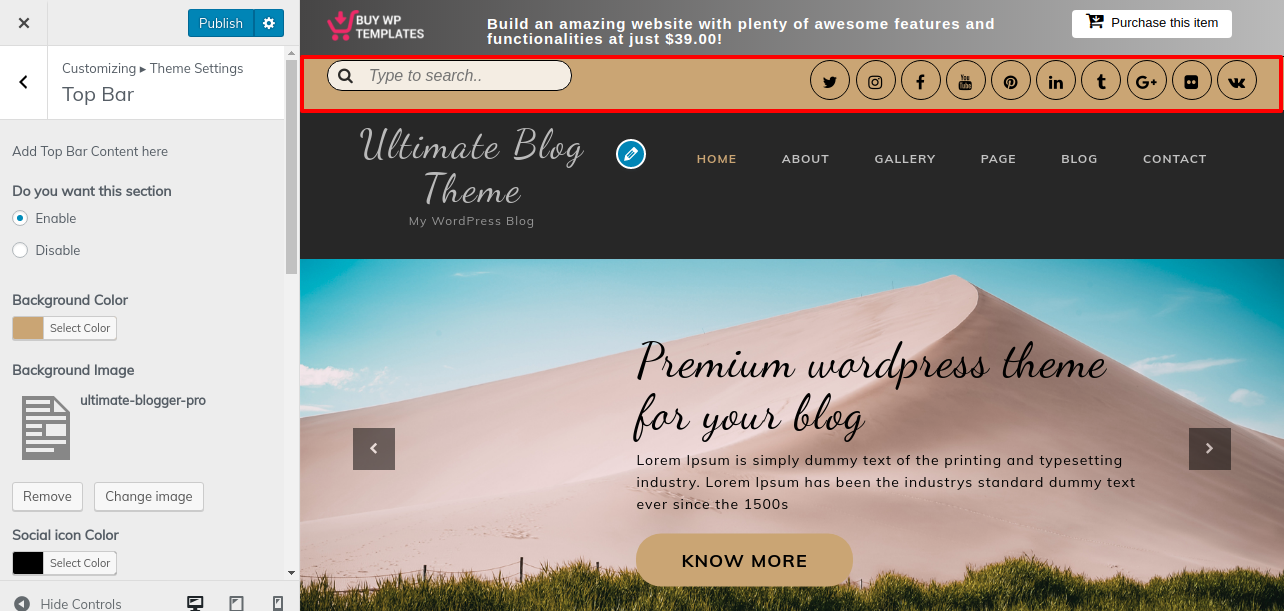
Observe these guidelines to to setup top bar.
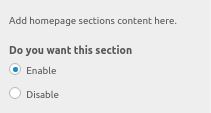
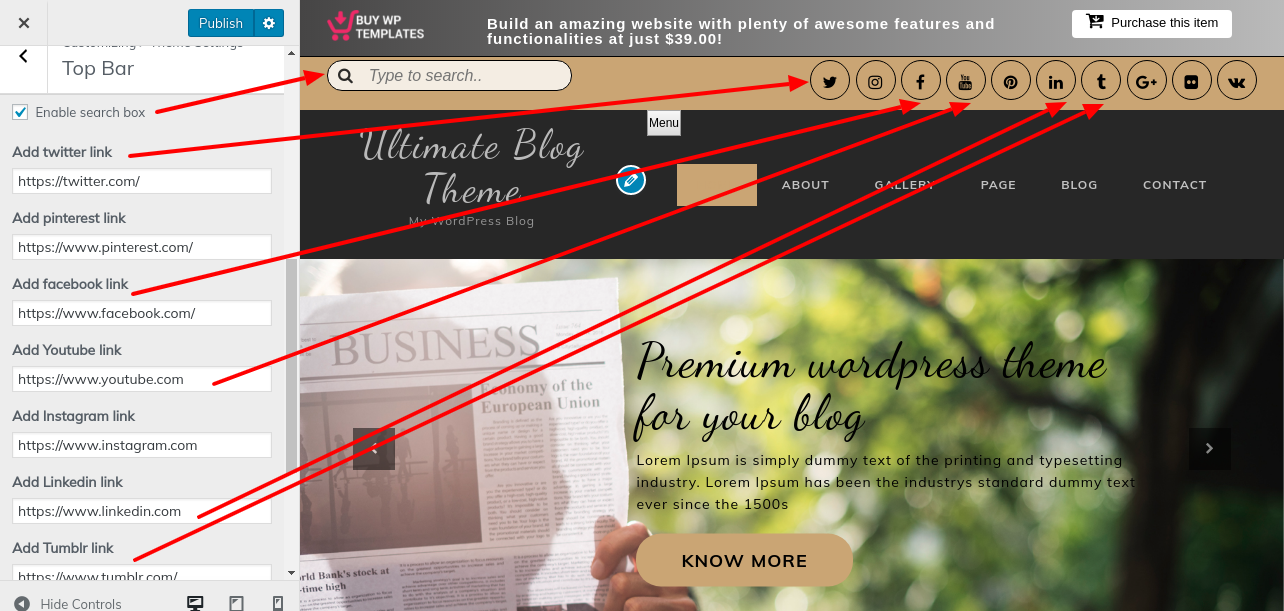
To set up the top bar in more detail, see the screenshot below..

In order to proceed with Header,
Go to Appearance >> Customize >> Theme Settings >> Header section
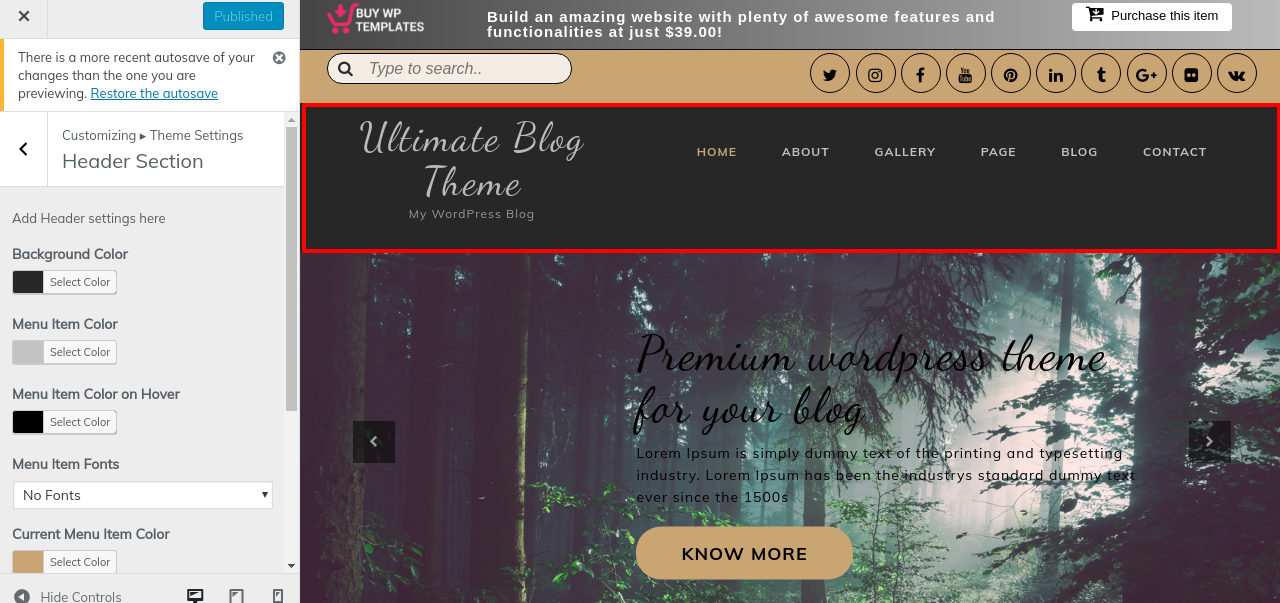
Refer below screenshot for setting up header.
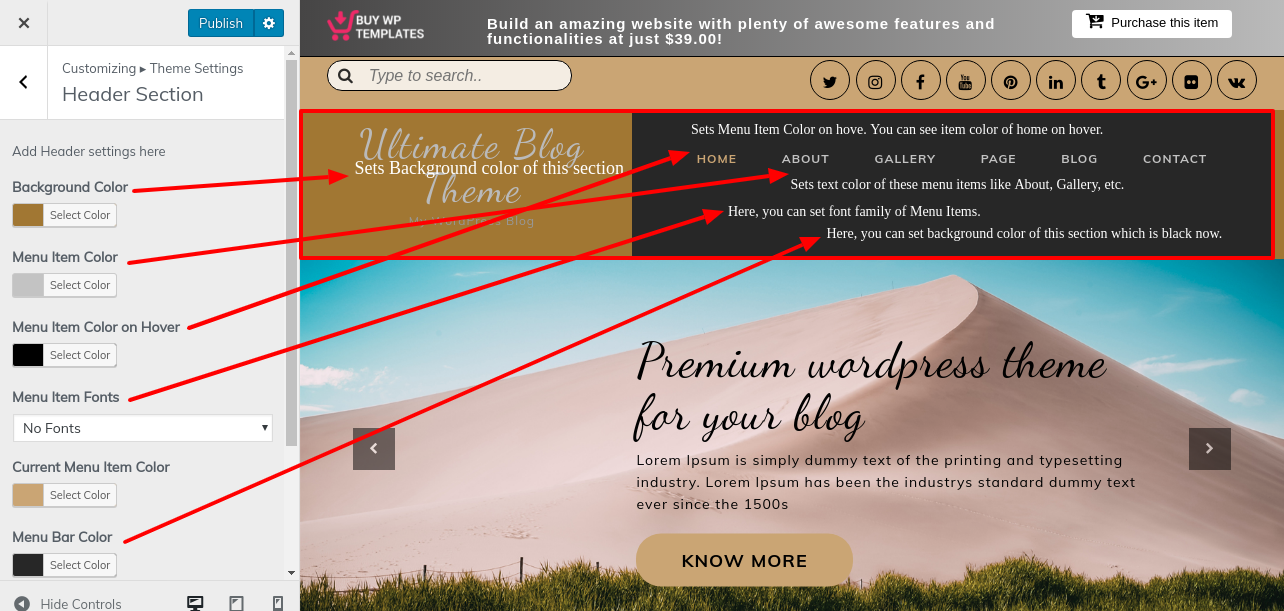

In order to proceed with slider
Go to Appearance >> Customize >> Theme Settings >>Slider Settings

Refer below screenshot for setting up slider.


In order to proceed with Our Latest categories,
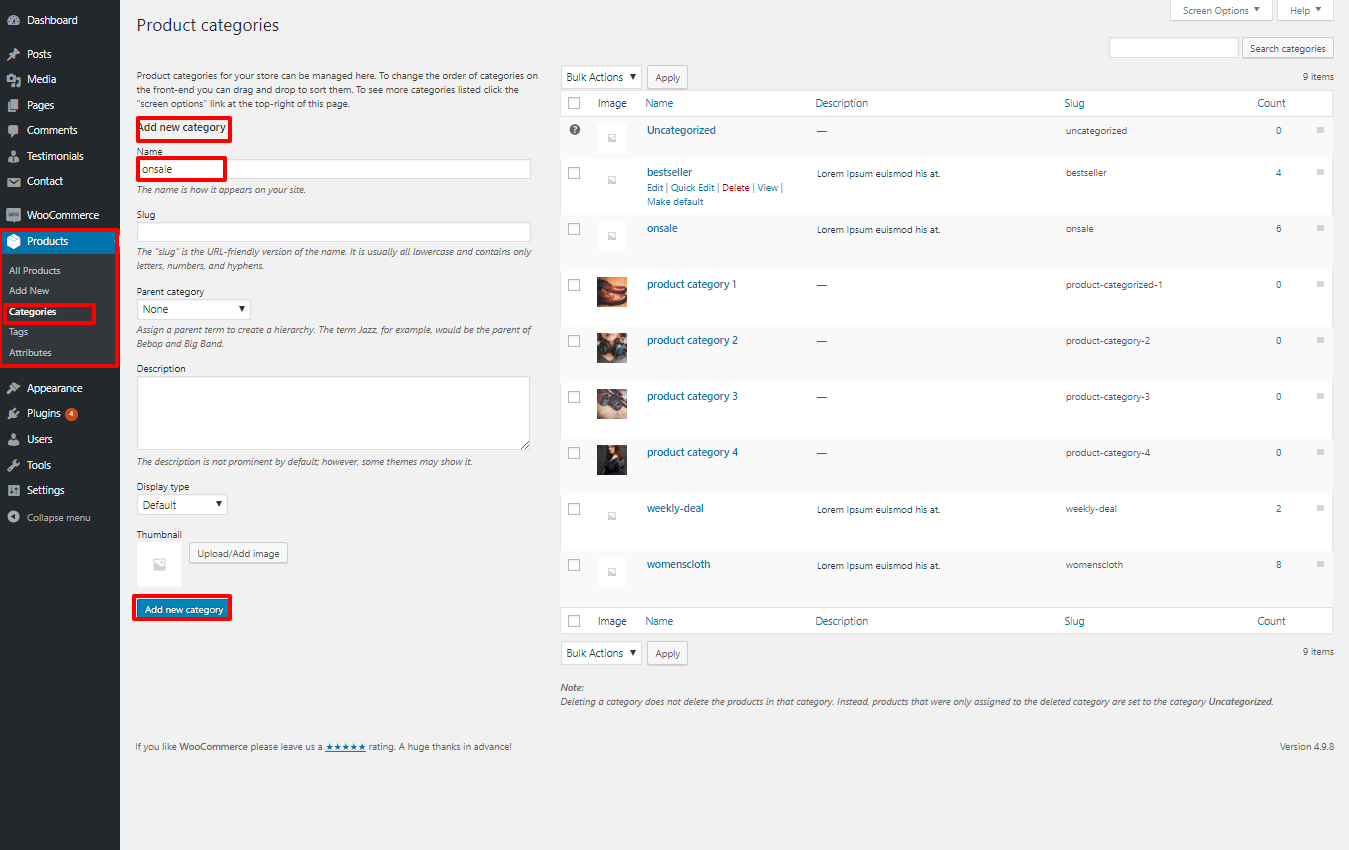
Go to Dashboard >> Post >> Categories >> Add New
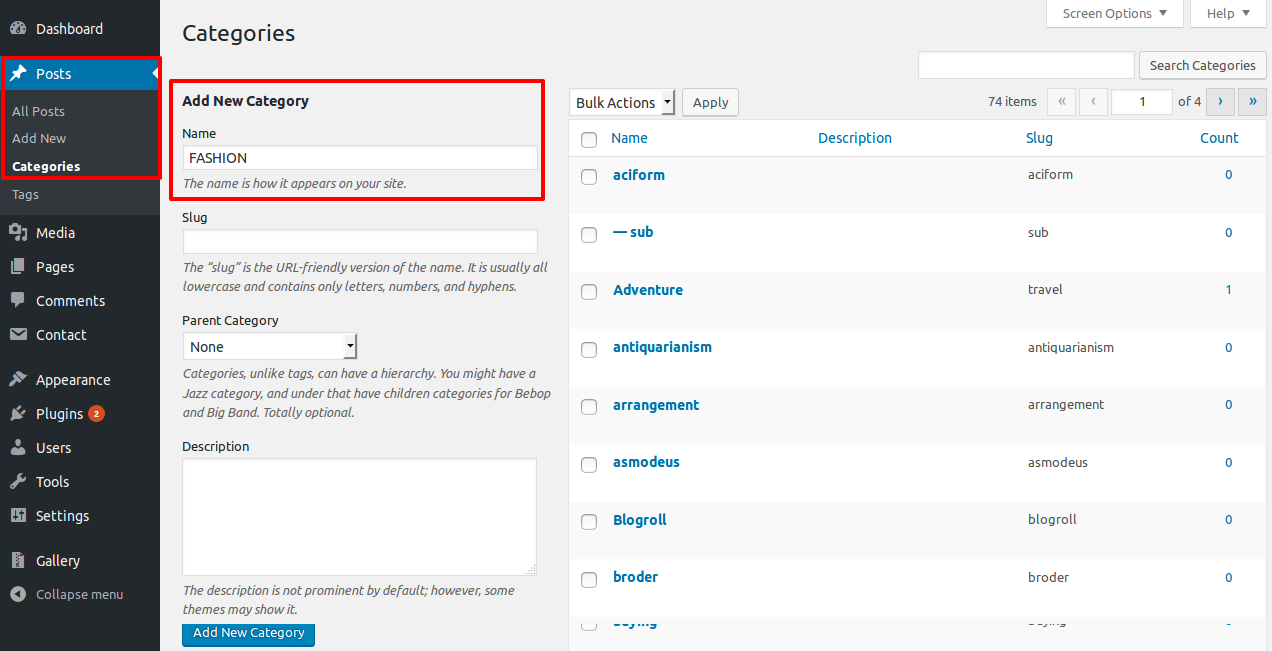
In this section you have to add new category for each post.
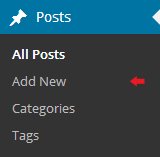
2-Go to Dashboard >> Post >> Add New
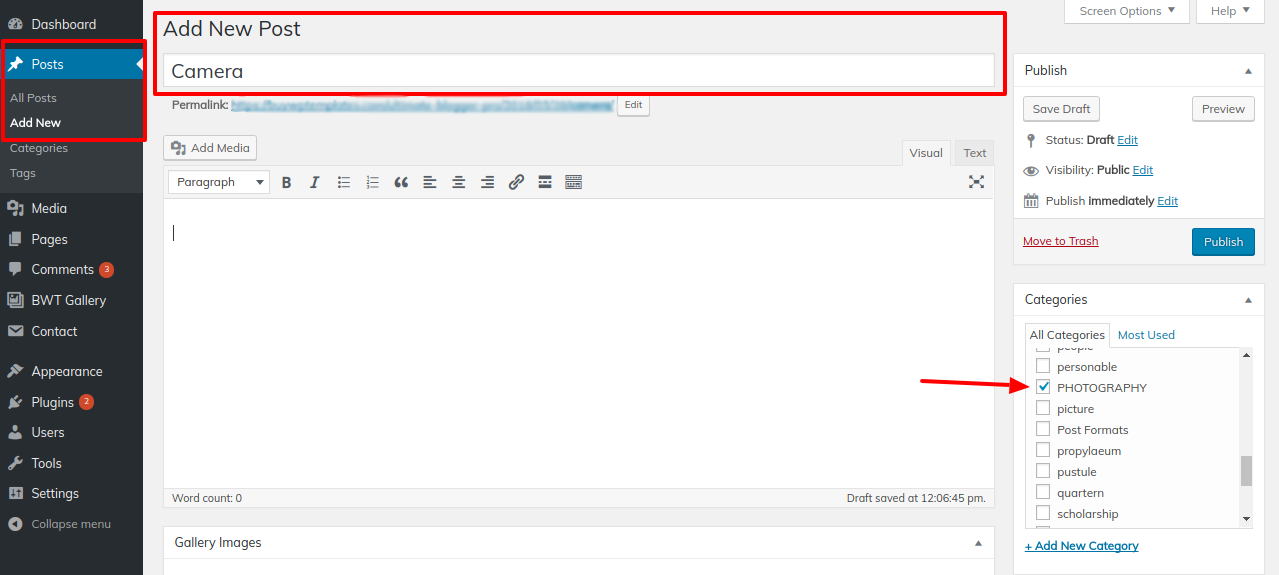
You can create new posts in this section, You can add a title, content, image, and the category you added to the post. Here, options are further described in accordance with the sections to which they belong:
Go to Appearance >> Customize >> Theme Settings >> Top categories

Observe these guidelines to to further set up this section.


You must first add Posts and categories to this Post section. Click here to add Post and Category
To customise this section, follow the instructions below. :
Go to Appearance >> Customize >> Theme Settings >>Post Section

In this section you can display or disable the "Category Title", "Post Name", "Author", "Publish date", "Comments", "Post Thumbnail", "Post Content", "Continue Reading" , "Social Sharing", "Post Tags", "Enable Author Description" & "Show Related Post" on your Post through the customizer. Options here are further described in sreenshot according to the sections they belong to :
To set up this section further, please see the screenshot below.


This section is coming from the widget sidebar

The admin panel widget section will be used to build up these sections. Add whatever widget you want to see in the sidebar on the home page.
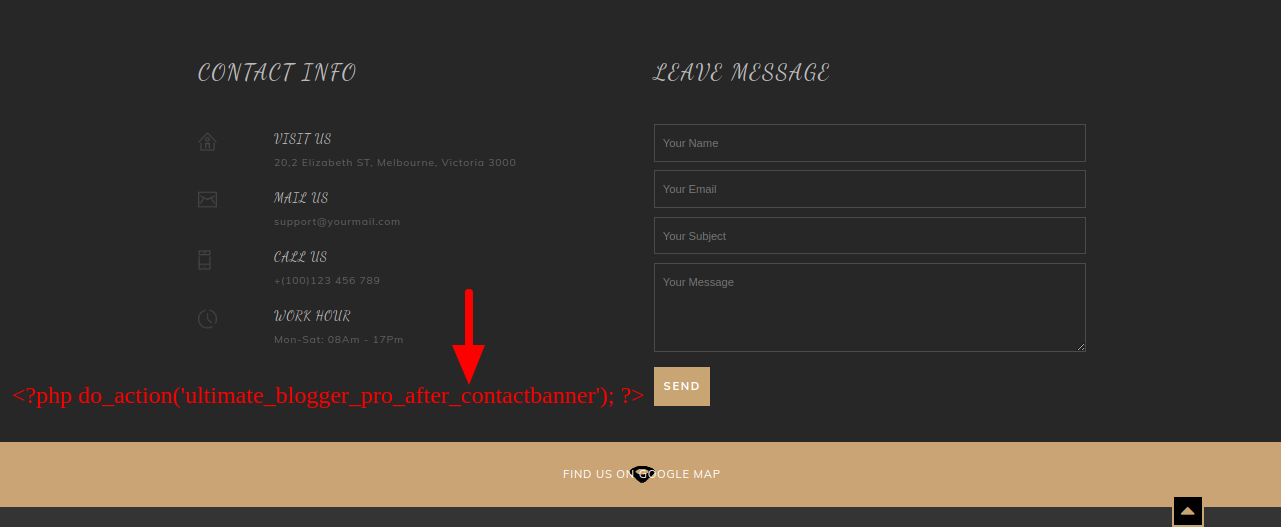
To display the contact page, you must first choose the contact template.
Go to Pages -> Add New Add title "Contact" and select the template "Contact".
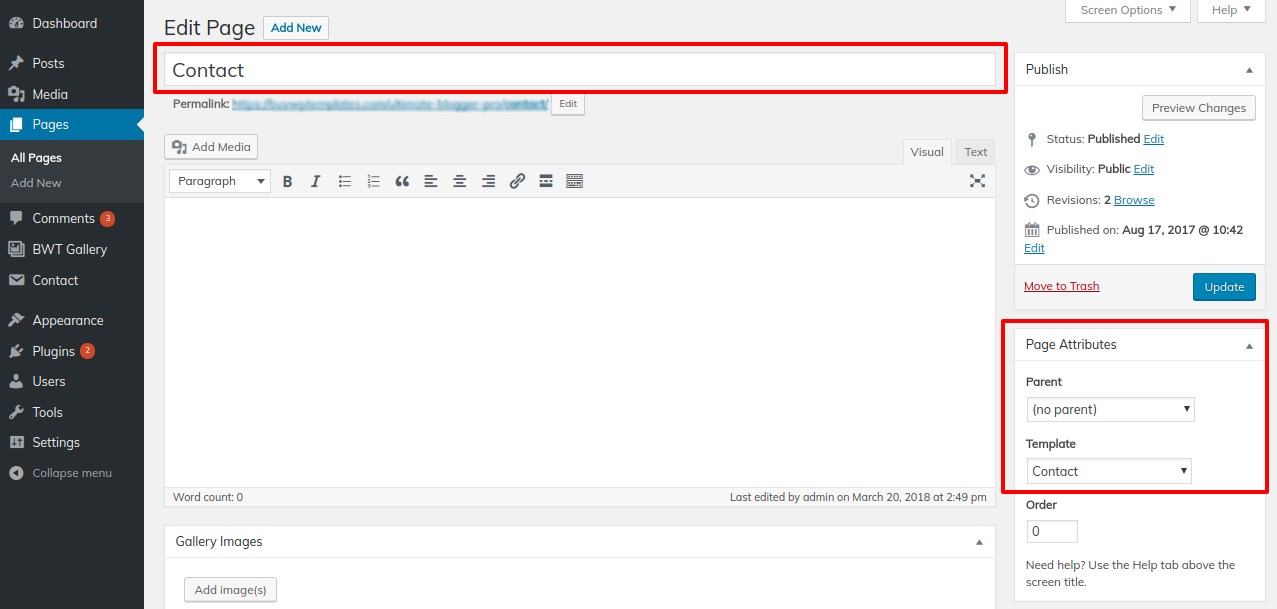
Then Go to Dashboard >> Contact >> Contact Forms
Your WordPress account should now have the contact form 7 plugin. Turn on the plugin, then make your own form. Copy the shortcode after you are finished.

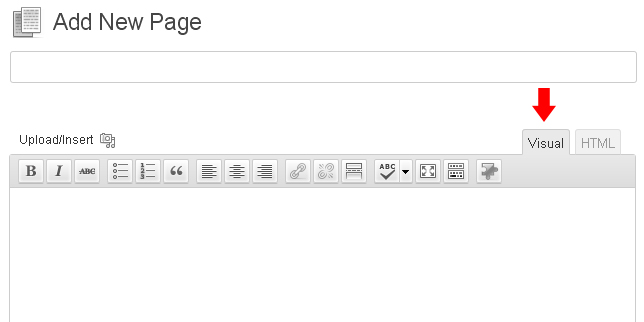
Open the newly formed page, then add the shortcode using the page editor. Ensure that "Text" is enabled.


Additionally, it has customization options for the following:
Go to Appearance >> Customize >> Themes Settings >> Contact Us

Please refer to the screenshot below for a more detailed setup of this section.


In order to proceed with About Us Page,
Go to Dashboard >> Pages >> Add New
In order to display the about us page, you must first choose the contact template.
Any content you upload to the editor for your about page will be shown at the top of the page.
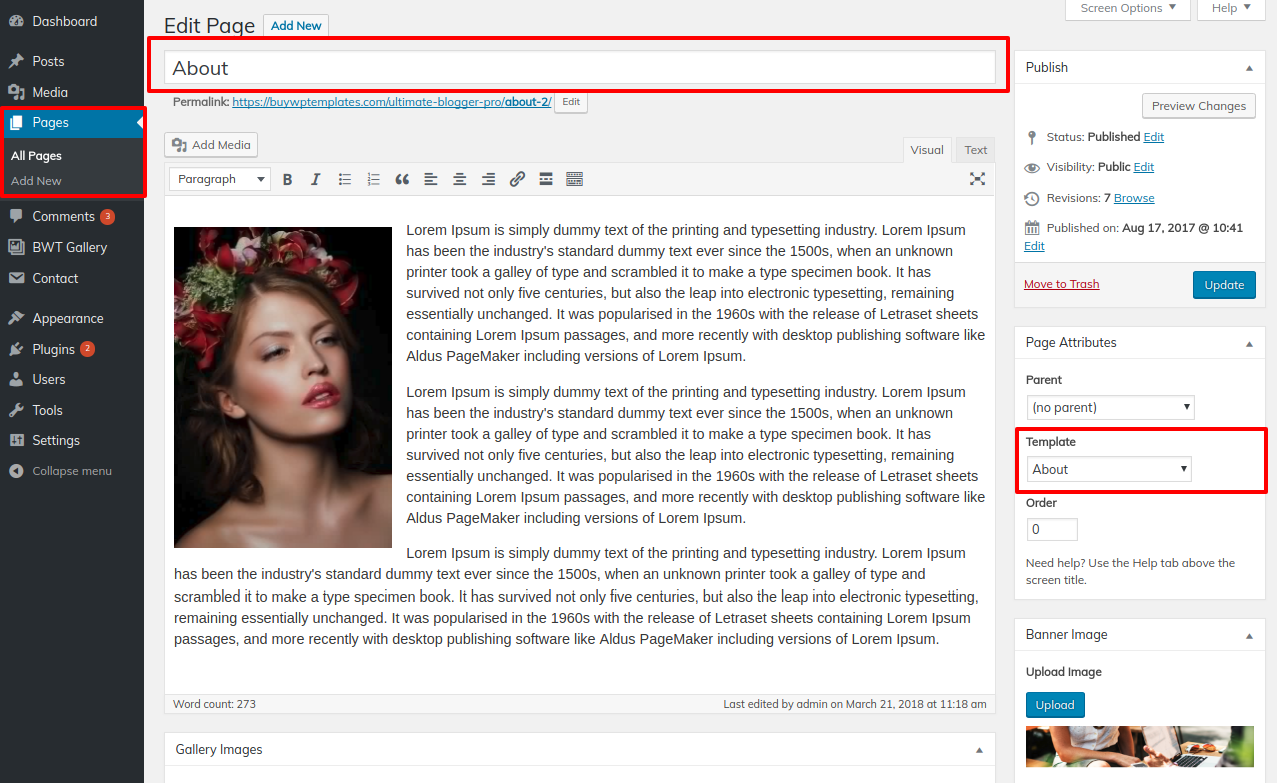
Additionally, it has customization options for the following:
Go to Appearance >> Customize >> Themes Settings >> About Us Page
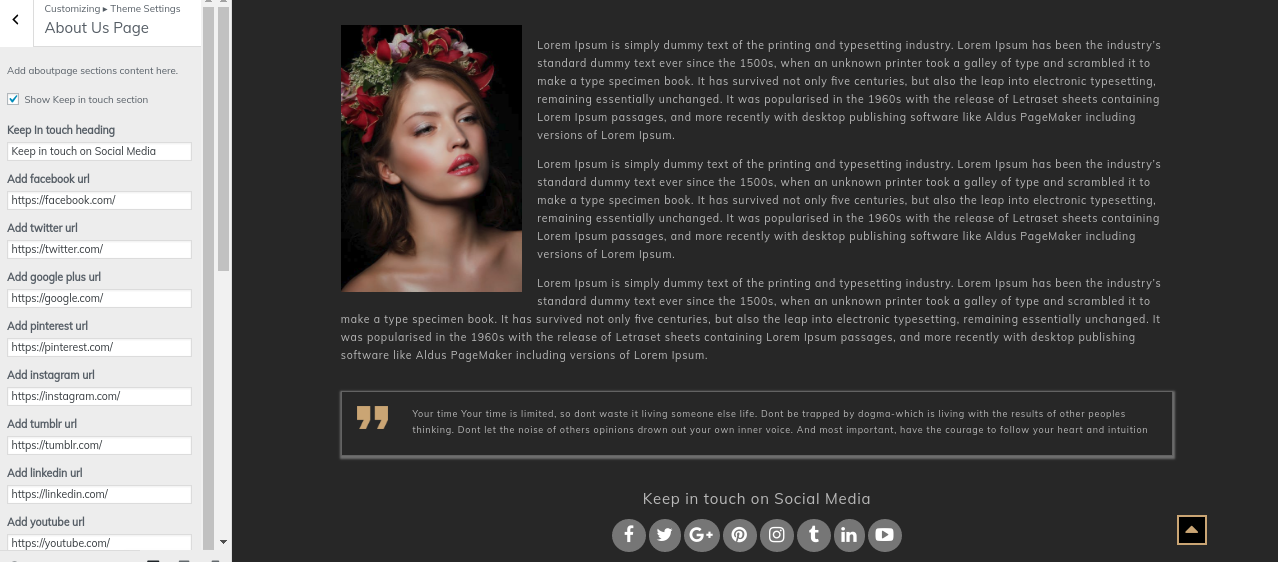
To configure the About Us Section further, see the screenshot below.


In order to proceed with Footer,
Go to Appearance >> Customize >> Theme Settings >>Footer Section

3 columns make up the footer. Any widget can be added there. The addition will come from Appearance -> widget


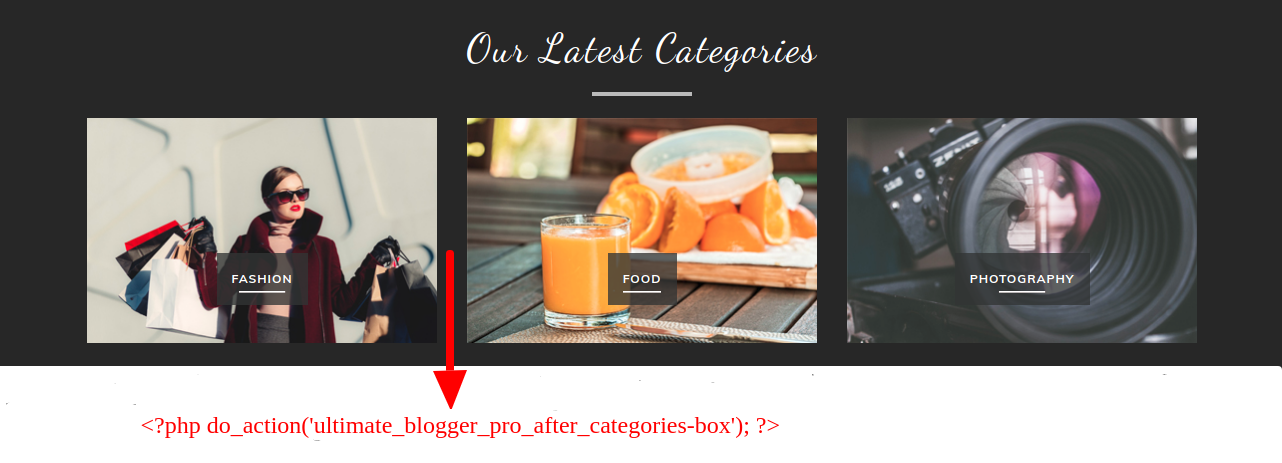

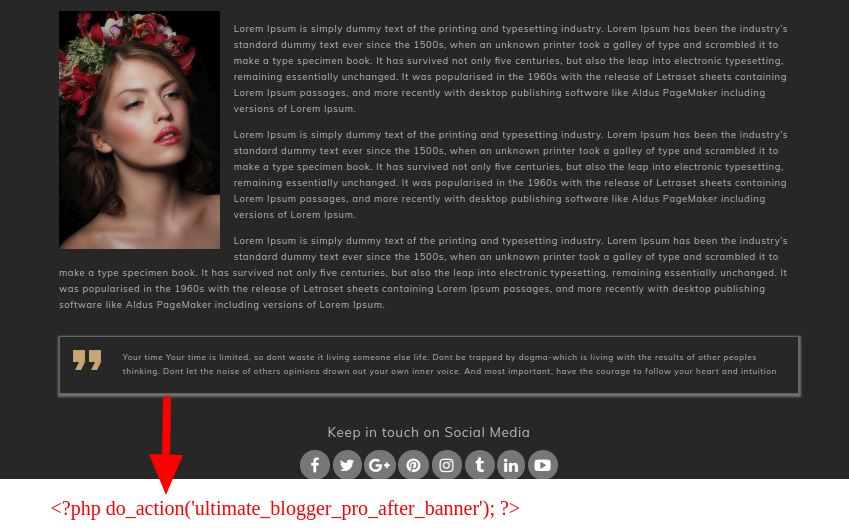



Here is the list of created categories

Check out the Themes' list of available shortcodes:
Fetch All the Properties: [all_properties]
Fetch All the Properties By Categpory: [properties_by_cat cat_name="Add category slug"]
Fetch All the Agents: [agents]
Fetch All the Testimonials: [testimonials]


After this plugin is activated, every page, post, registered post, etc. will have the following option.
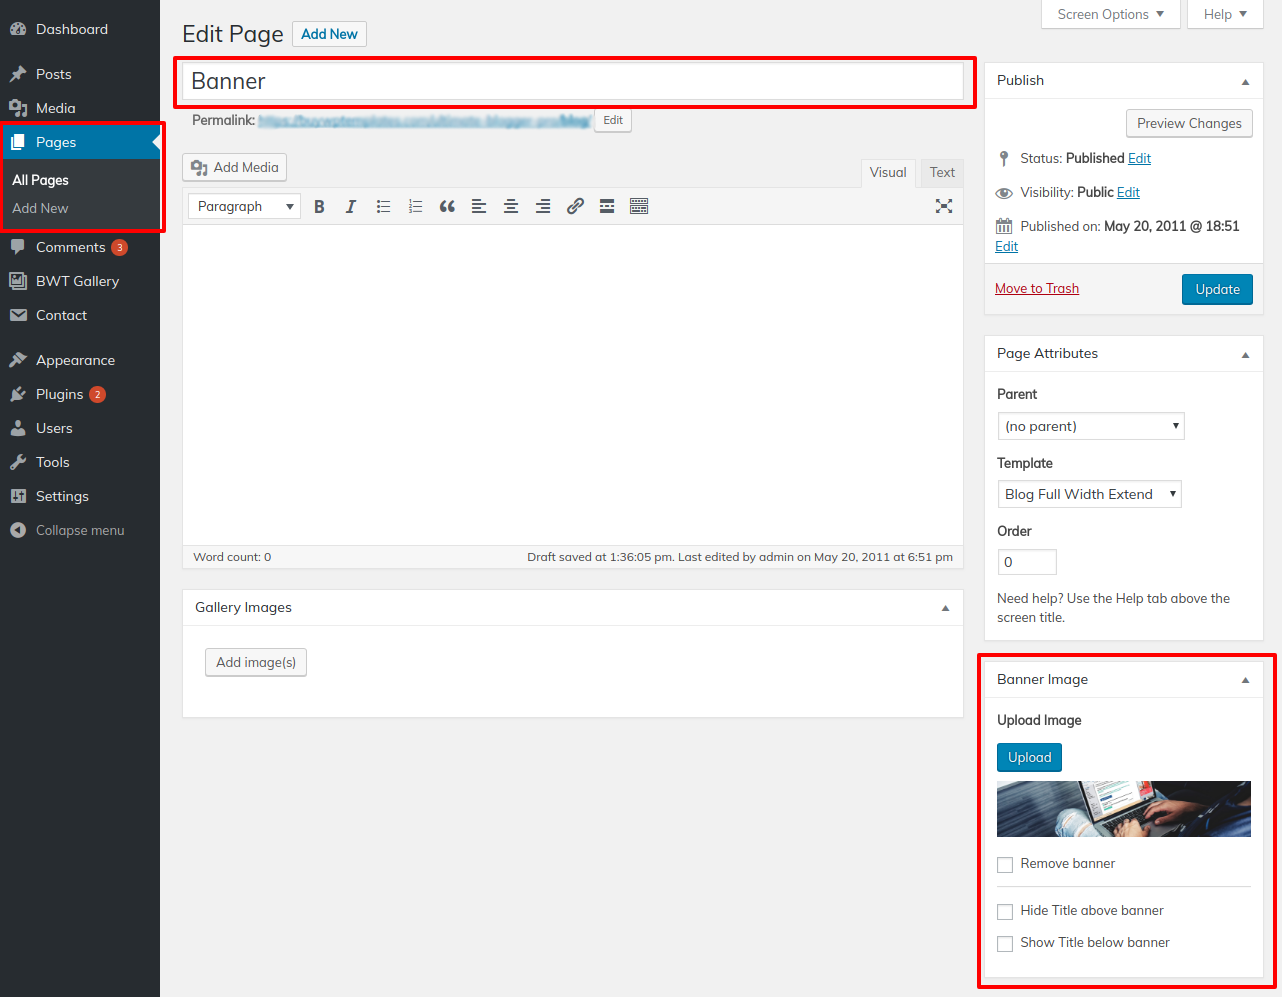

When you enable this plugin, the BWT-Gallery will appear on the Dashboard.
On the Add new gallery button, click. the title, too. Add the amount of photographs a gallery should display..

For each single post and page that appears at the bottom of the page, you may also add a gallery.


when you've finished uploading the gallery's photographs. Use the next shortcode.(" [bwt-galleryshow bwt_gallery=1779 numberofitem="8"] ") By just changing the gallery post id in the Gallery shorthcode, you can make your gallery appear on whatever page you like. To obtain the ID, view the photos.
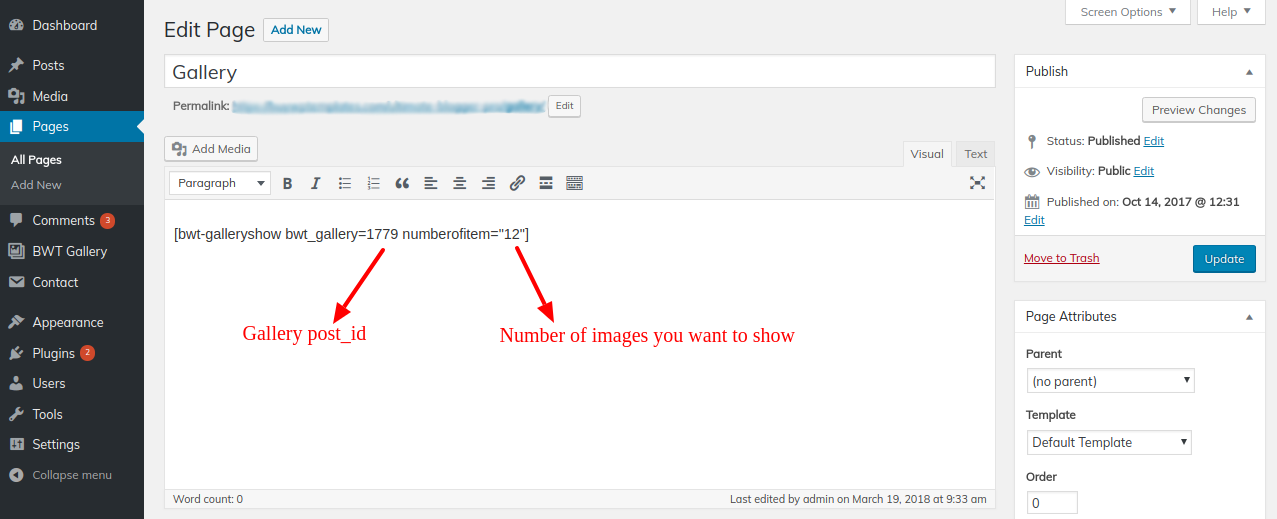
That's All! You can now access your page to view the gallery of pictures.....
