1-Using WordPress admin, one may install a theme.
First thing you need to do is sign in to the WordPress dashboard. later, just click
1.Visit the menu Presentation -- Theme
The group of templates you have downloaded consists of several folders. Let's see what each folder contains:
First thing you need to do is sign in to the WordPress dashboard. later, just click
1.Visit the menu Presentation -- Theme

2. The button named "Theme upload".
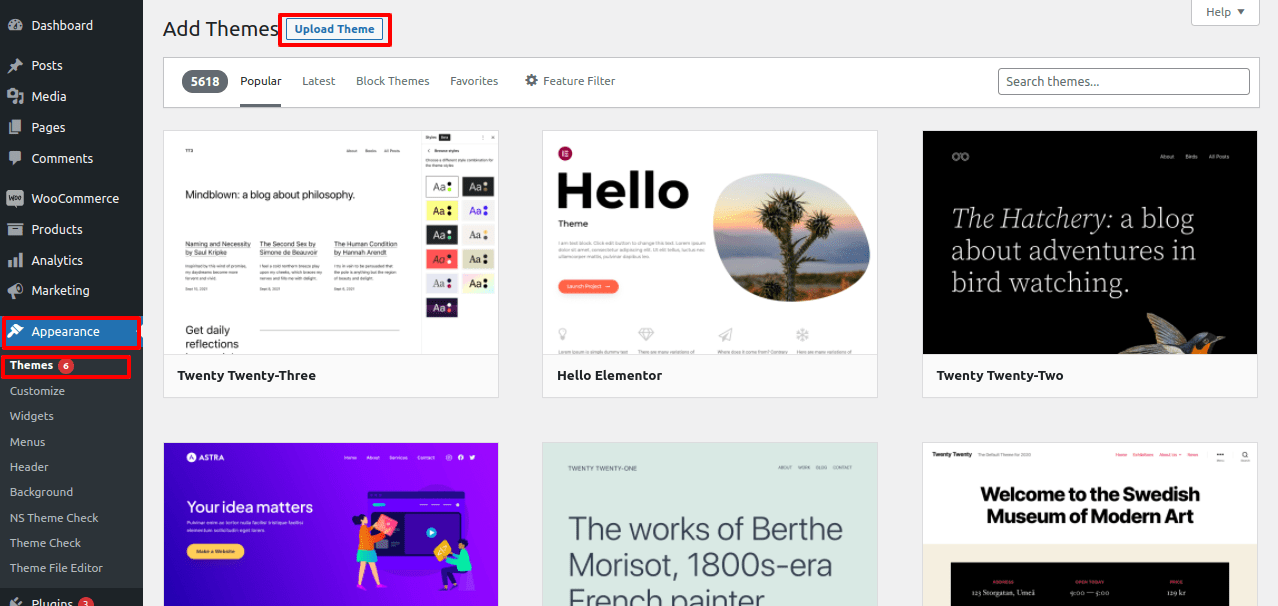
3. Toggle the Browse link then select your handyman-cleaner.Zip the theme, then select "Install Now."

4. Now,Install and Activate theme
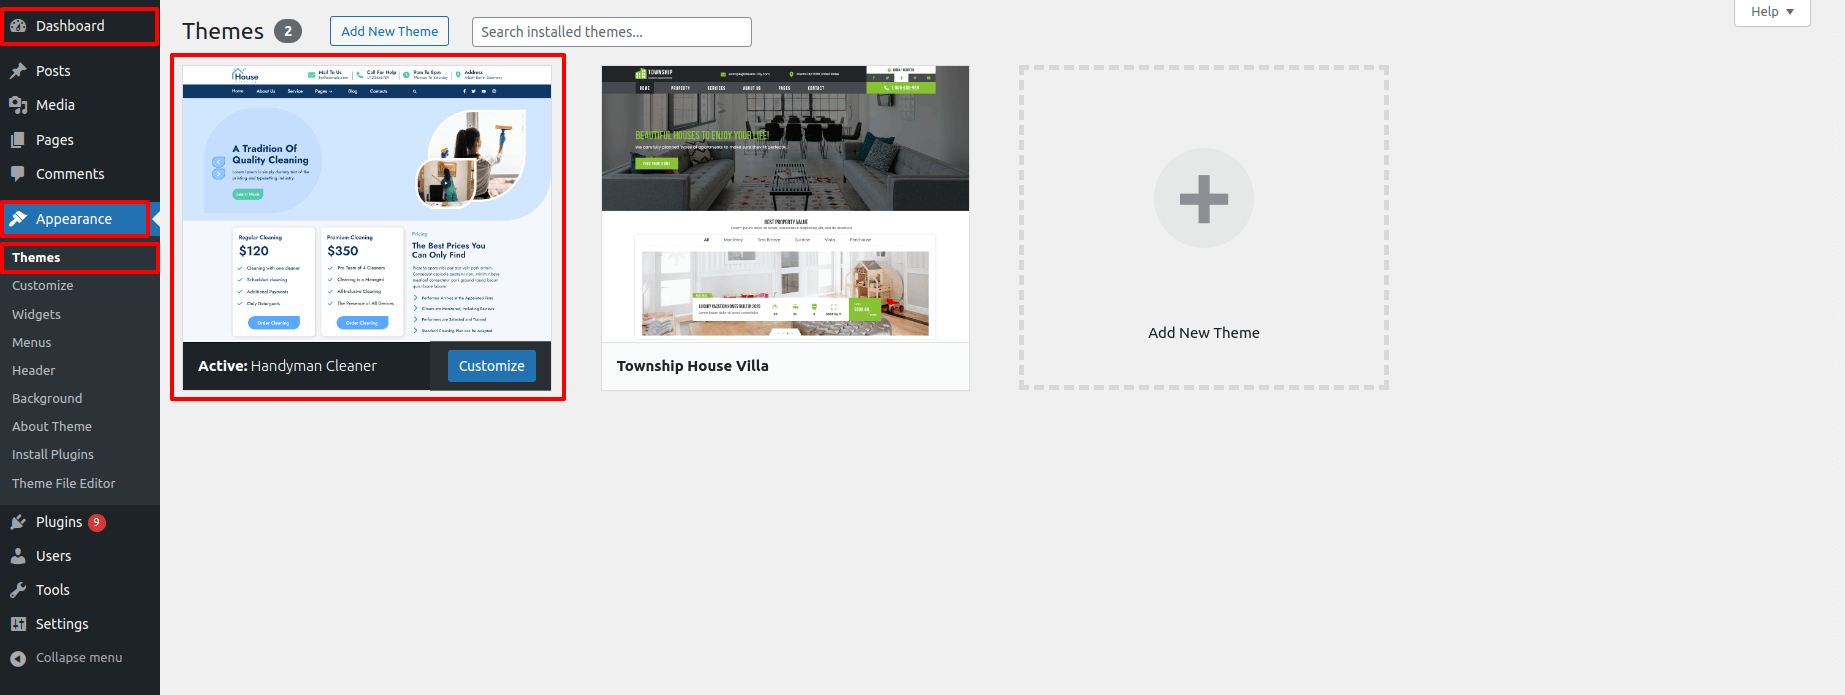
Congratulations! You've properly installed your theme.
For importing the theme demo.
Visit Dashboard >> Appearance >> Theme Demo Import >> Click on Run Import

With importing theme demo Ace Post Type Builder and needed plugin installed.
Now Click on View Site Button.

This theme supports the default Site Identity provided by the WordPress and we have integrated some options in this theme in this part.
Follow these instructions to setup front page.
Name it "Frontpage" or whatever you desire to wish. Then select template "home-page" from template dropdown.
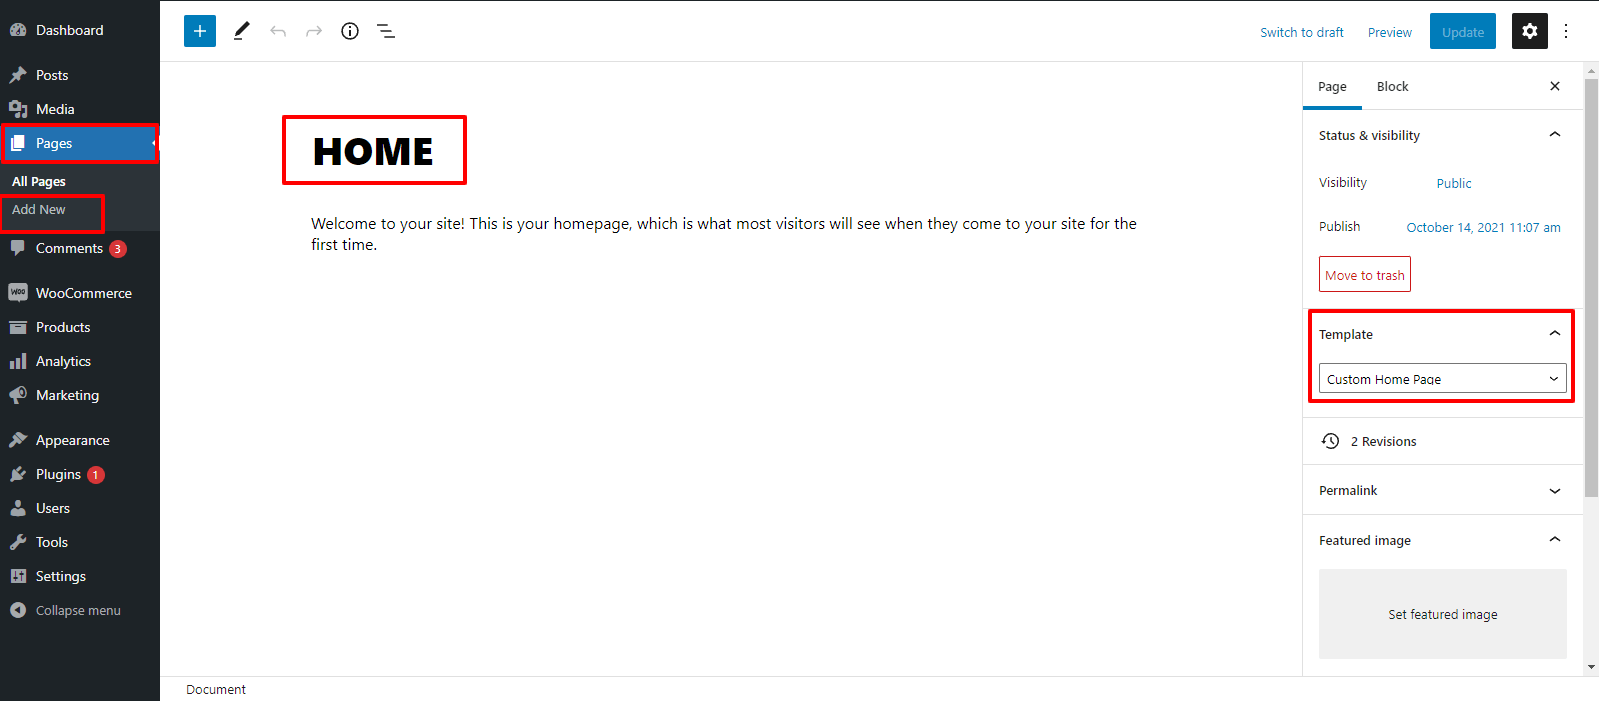
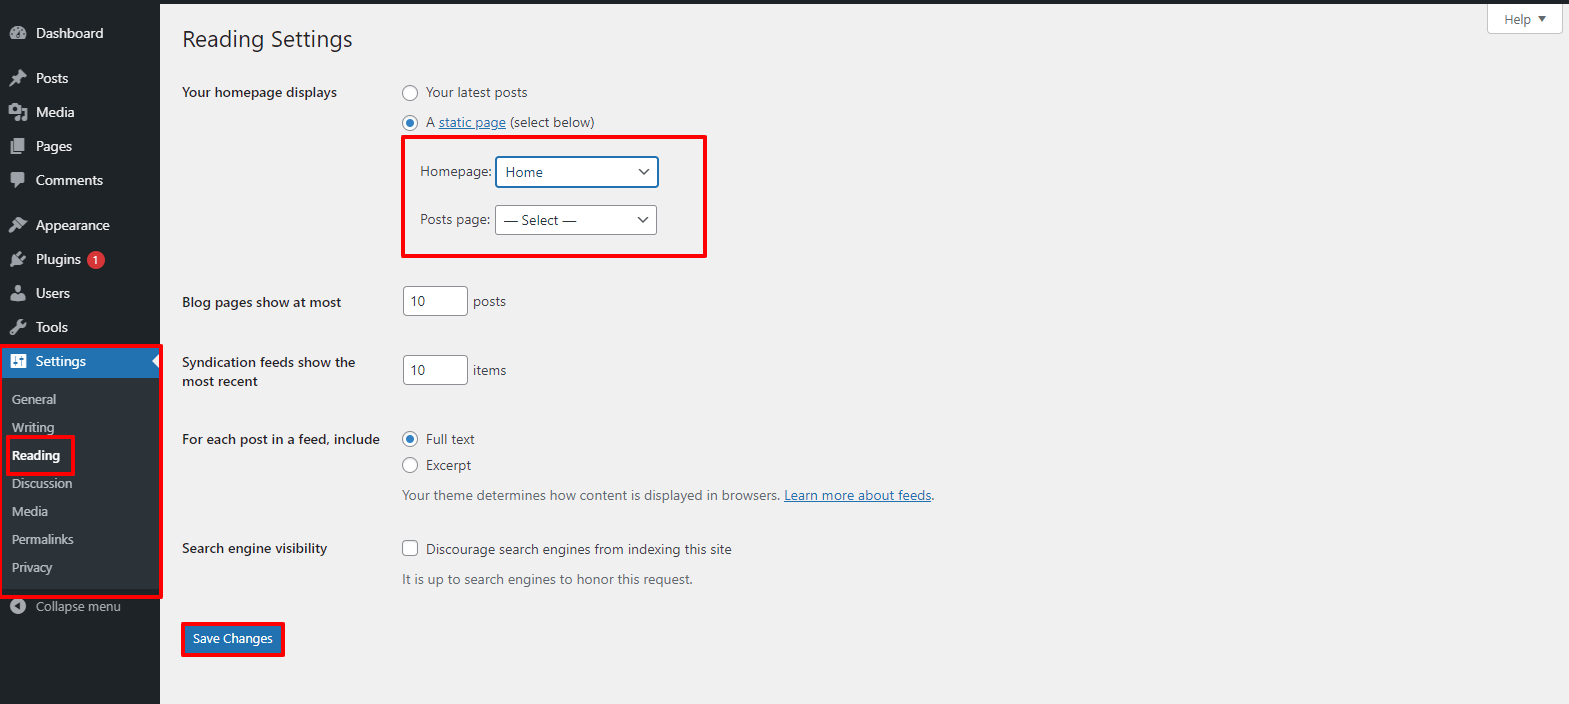
Once you are done with this, you can see all the demo material on front page.
See this screenshot for better understanding.

For Logo :
To Continue with Header Logo, follow the step below
visit Appearance >> Customize >> Site Identity
1. Here you select the logo and size for logo of the theme
2. add you Site tagline and title for the theme
3. enable / disable site title and tagline for the theme, just click the checkbox for the theme.
4. select the size for site title and tagline for the theme.
this is how you can setup header.
To Continue with Topbar Section,
Visit Appearance >> Customize >> click on >> Theme Settings Topbar
1. Enter Email Address Text: Here You have options to add Email Text.
2. Enter Email Address: Here You have options to add Email.
3. Enter Phone Text: Here You have options to Enter Phone Text.
4. Enter Phone No: Here You have options to Enter Phone Number.
5. Enter Time: Here You have options to Enter Time.
6. Enter Day: Here You have options to Enter Day.
7. Enter Location Text: Here You have options to Enter Location Text.
8. Enter Location: Here You have options to Enter Location.
9. Show / Hide Search: Here You have options to Show / Hide Search

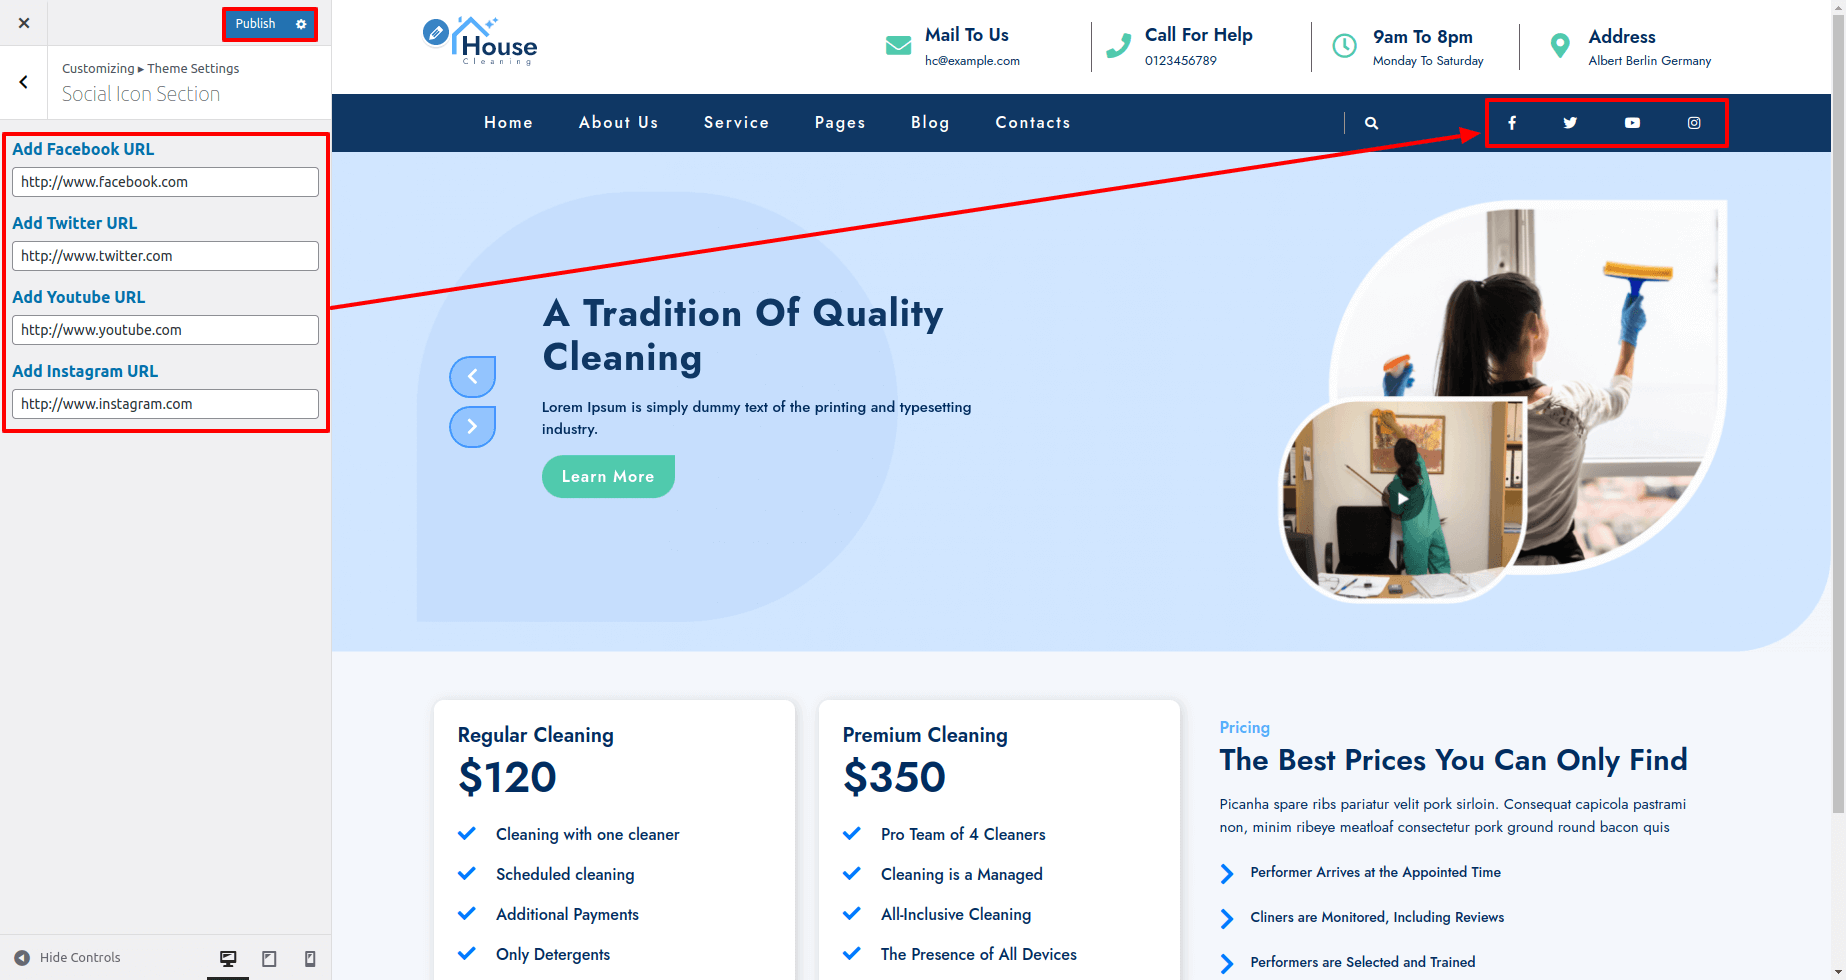
To Continue with Social Icon Section,
Visit Appearance >> Customize >> click on >> Theme Settings Topbar
1. Add Facebook URL: Here You have options to Add Facebook URL.
2. Add Twitter URL: Here You have options to Add Twitter URL.
3. Add Youtube URL: Here You have options to Add Youtube URL.
4. Add Instagram URL: Here You have options to Add Instagram URL.
This allows you to include top header section.

To setup, adhere to the procedures below the Slider
visit Dashboard >> Pages >> Add New >>
visit Appearance >> Customize >> Theme Settings >> Slider Section
1. enable / disable slider, just click the checkbox.
2.Select the pages created for slider
3. Add slider small text.

After doing this, You'll observe the slider on the home page.

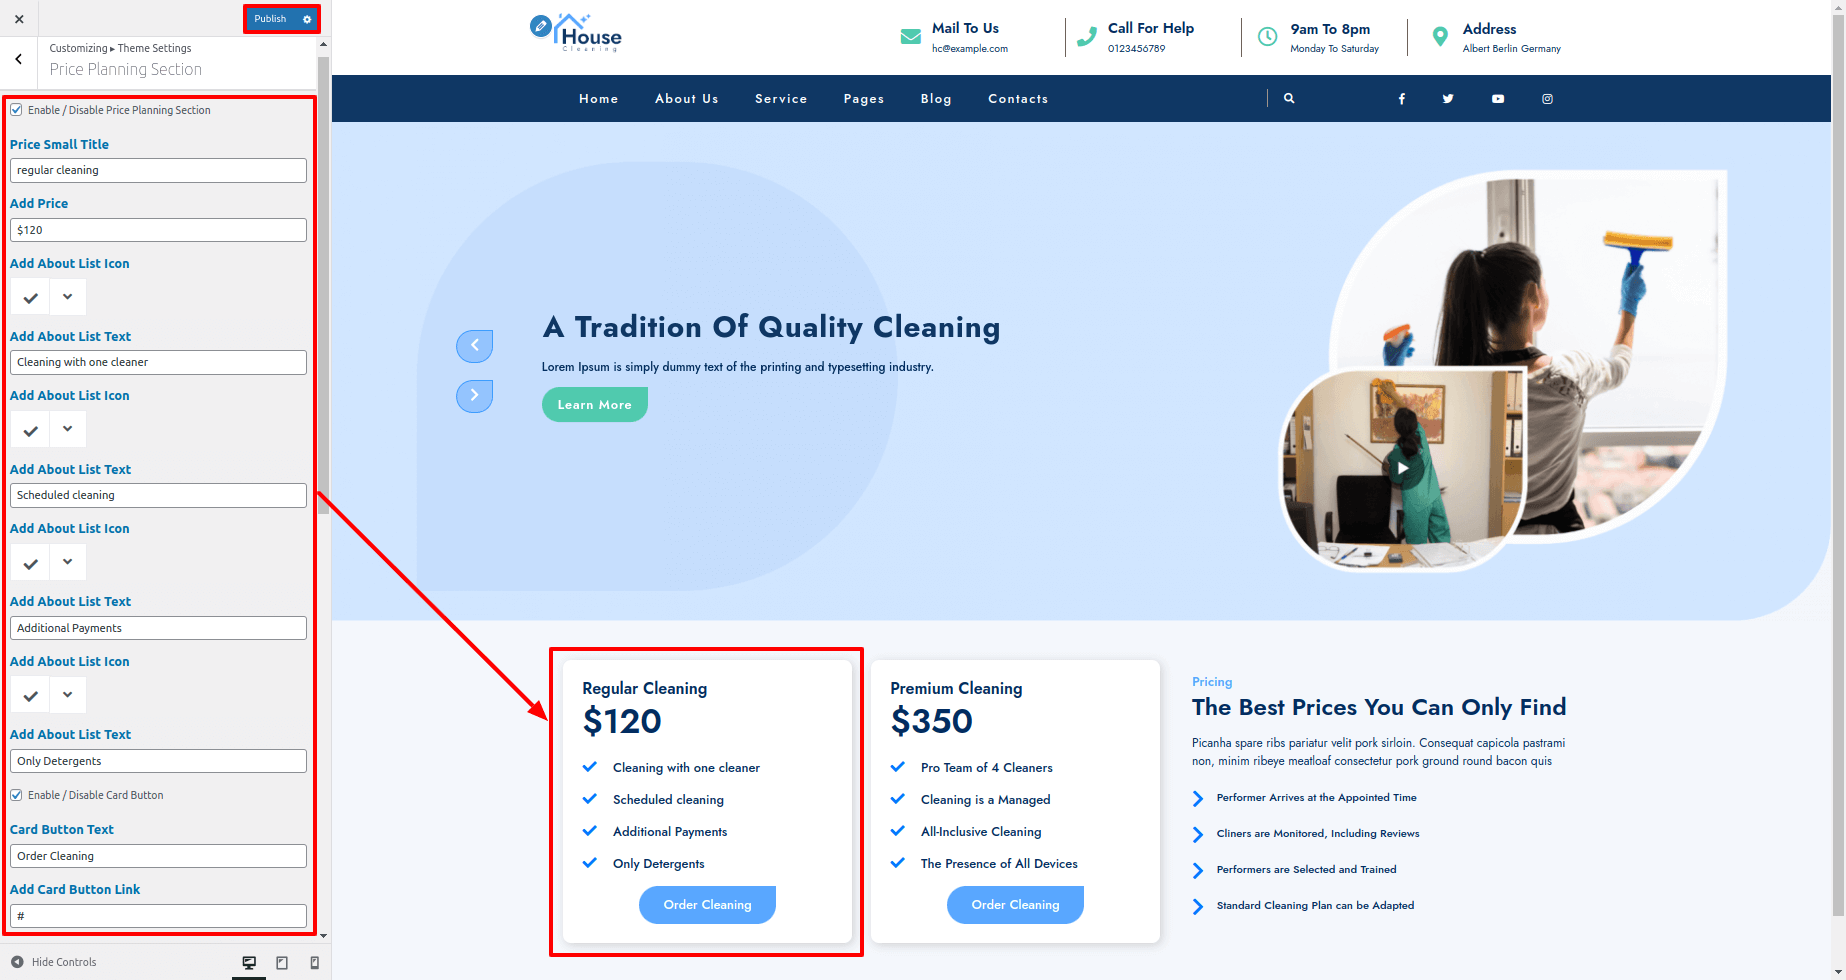
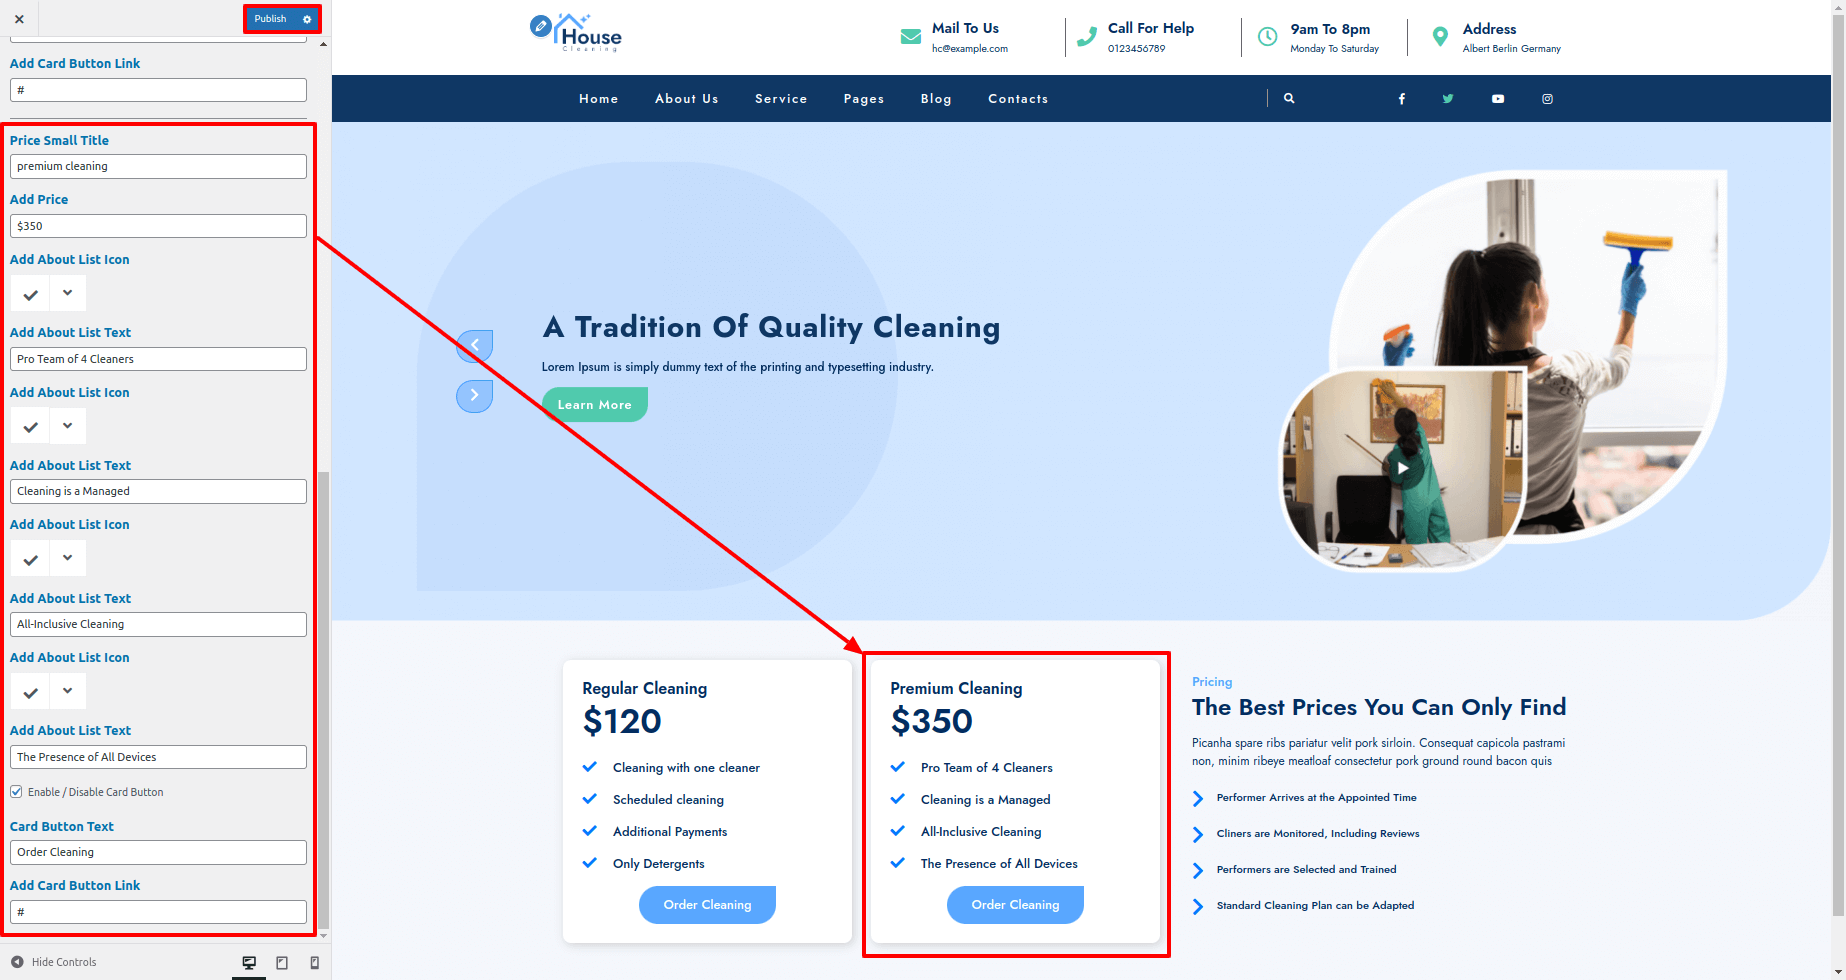
To be able to Price Planning Section, the following instructions.
visit Appearance >> Customize >> Theme Settings >>Price Planning Section.
To be able to Pricing Section, the following instructions.
visit Appearance >> Customize >> Theme Settings >>Pricing Section.

It will appear like this at the front.

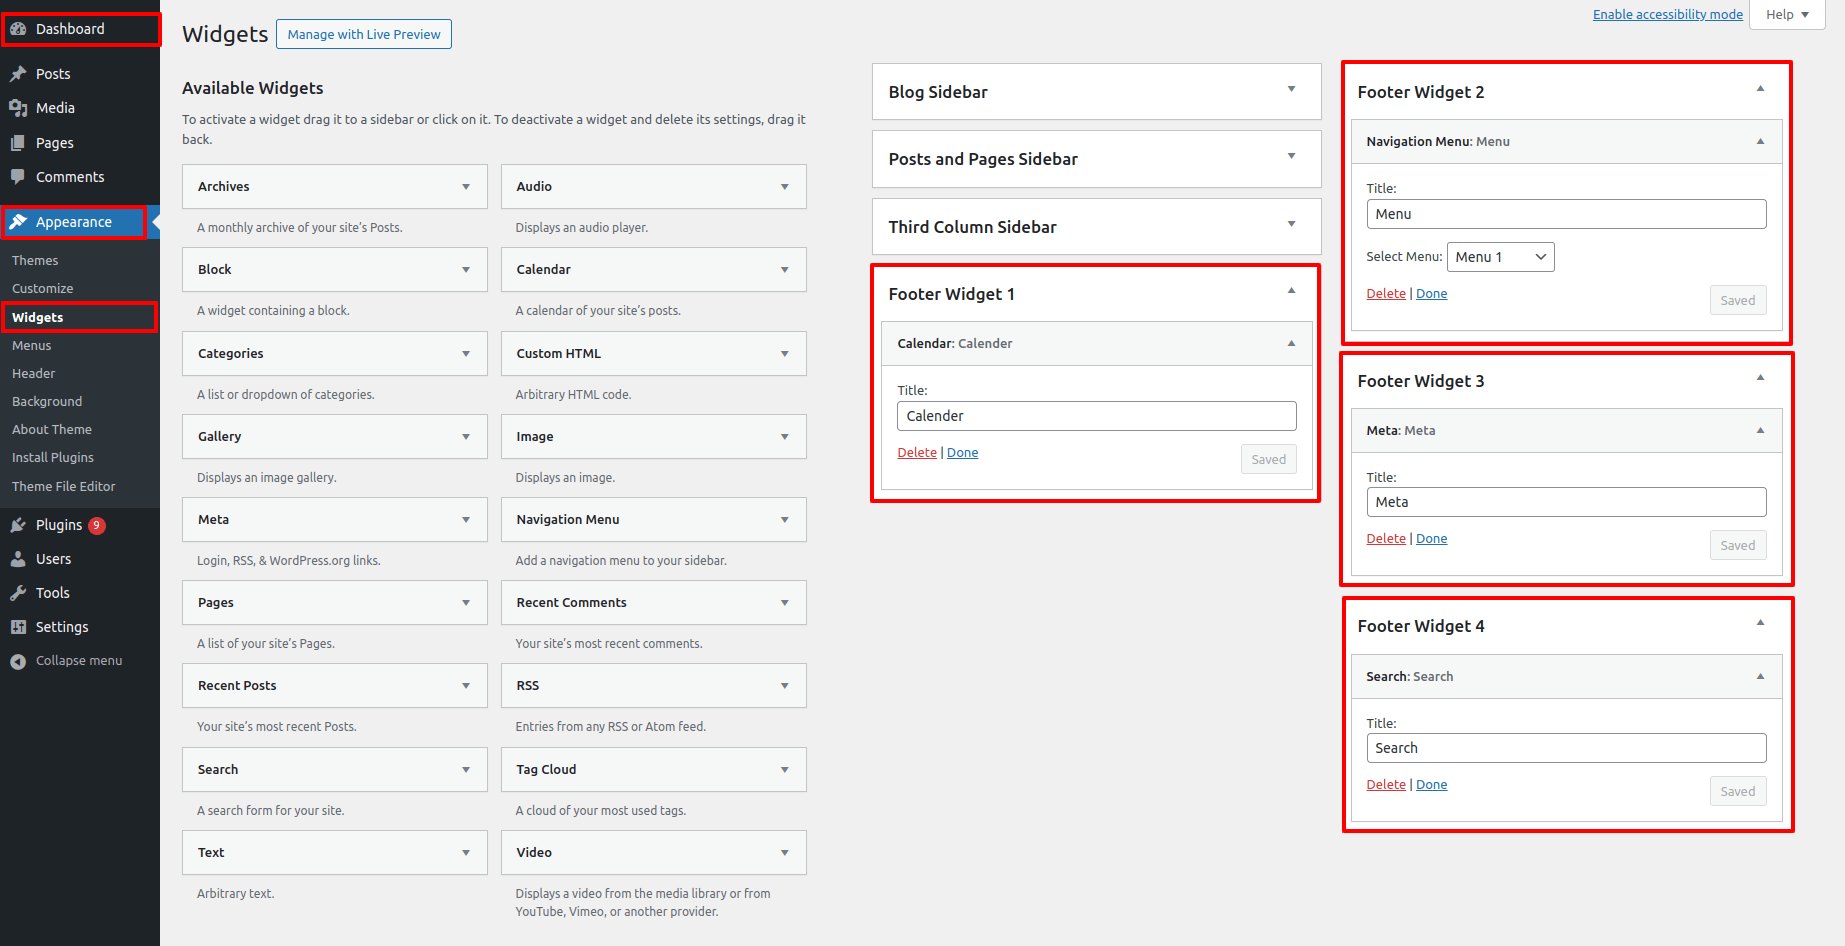
It has four columns in the footer. There, any widget may be inserted.
1. visit Access Appearance >> Select Widgets
The screenshot below shows how To include widgets in the footer.
You can choose extra footer columns to be added, but to do so, you must pick text-based widgets, picture, gallery, etc. that let you add text or images as needed. which allows you to add text or image based on your choice with ease.
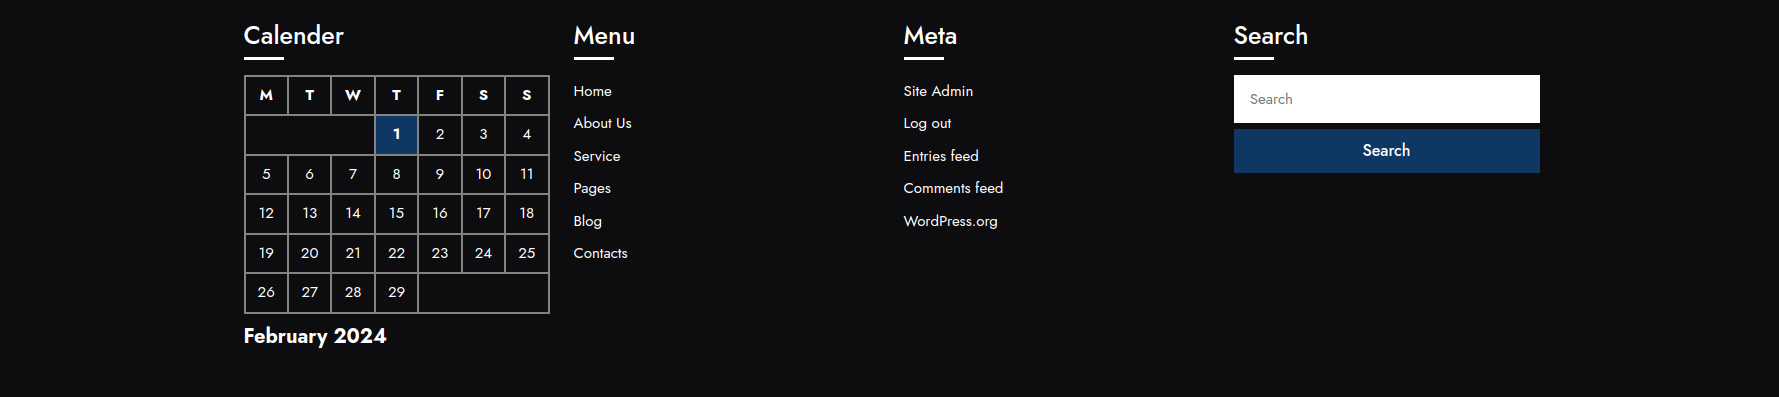
Your footer will like this if you add widgets to it,
visit Access Appearance >> Customize >> Theme Settings >> Footer Text.
1. Here you may select the number of widget areas in the footer.
2. Here you may select the Footer Widget Background Color and Footer Widget Background Image for the themes.
3. Here you may select the Scroll to top button icon.
4. Here you may select the Scroll to top icon button size.
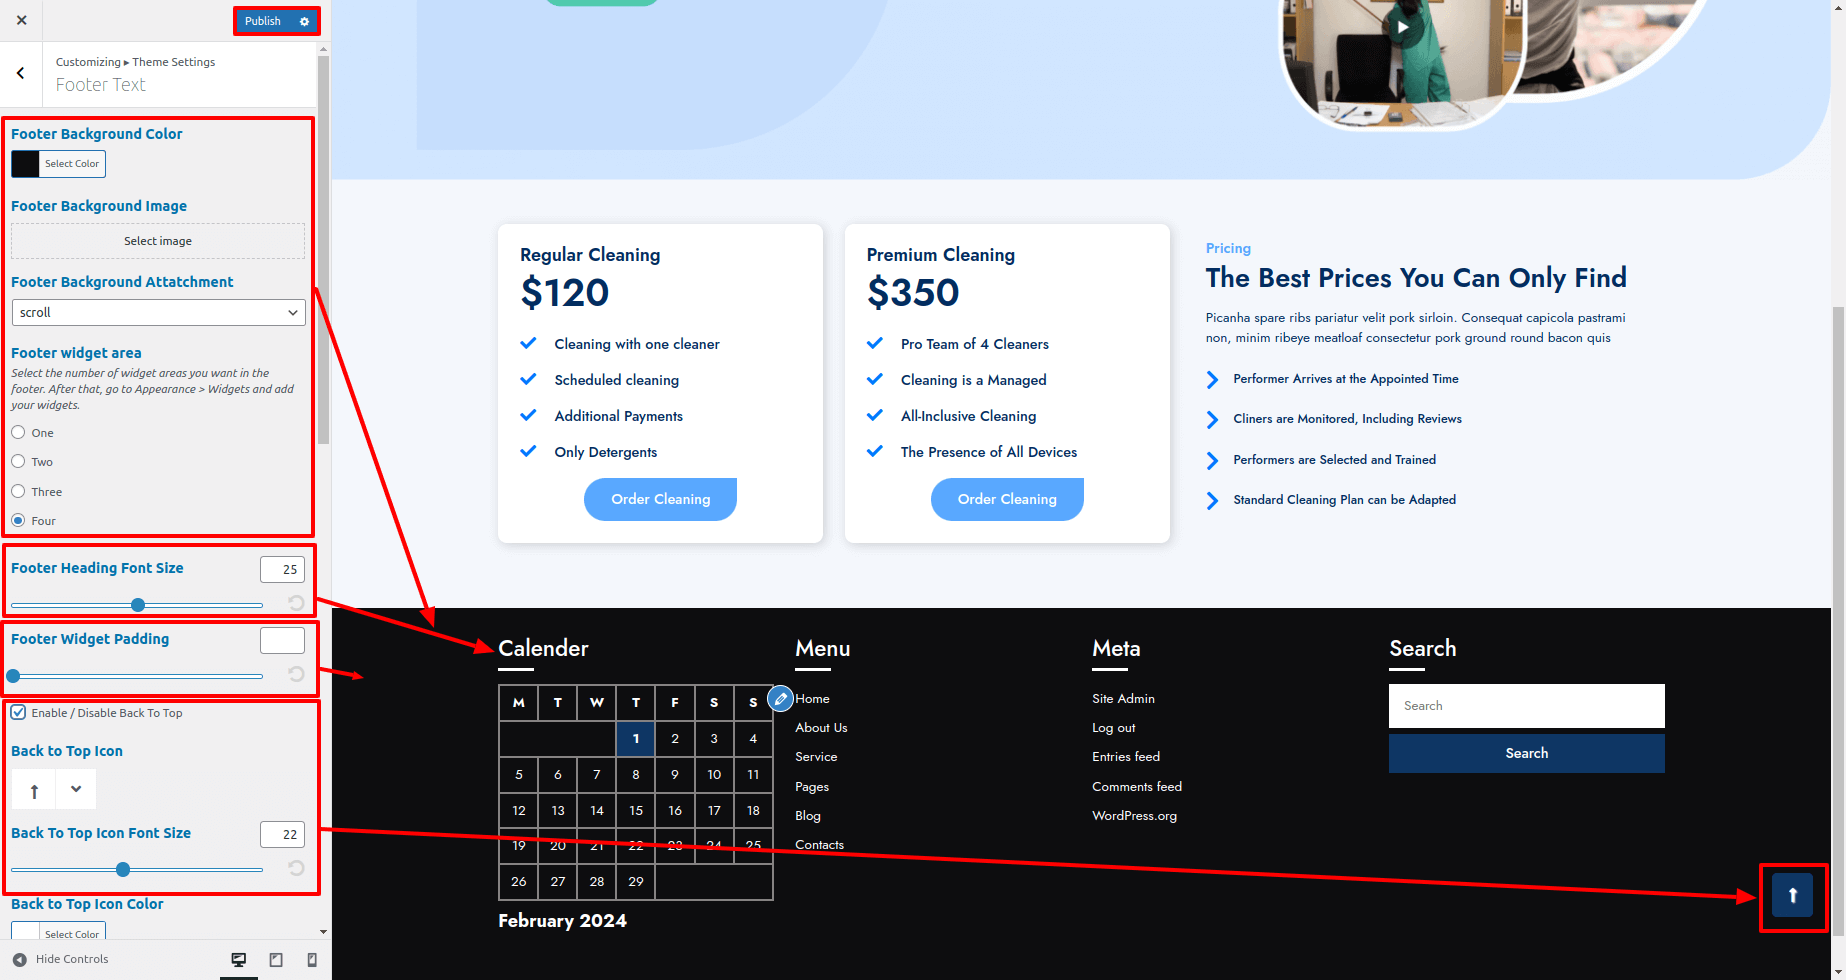
This allows you to include footer section.
To continue with the footer Text section, follow the directions below.
visit Access Appearance >> visitCustomize >> Settings >> Footer Text.
Here you may add copyright text, copyright text font size, padding and select the text alignment.
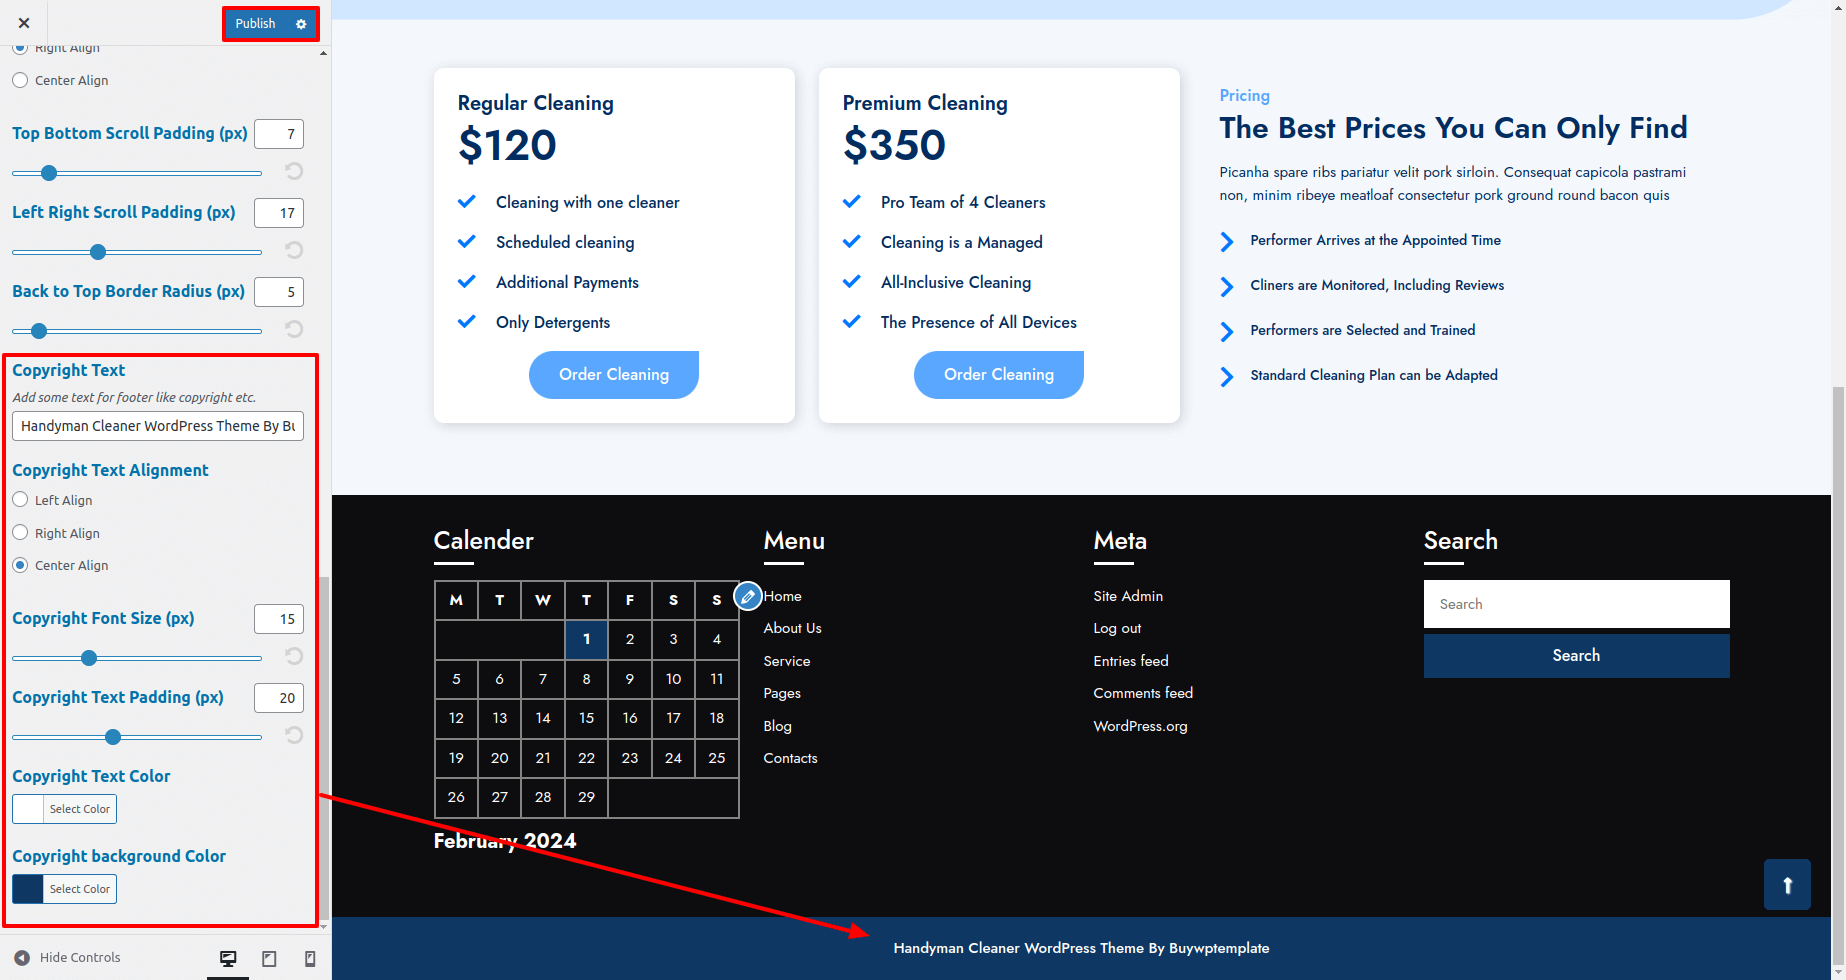
It will appear like this at the front.

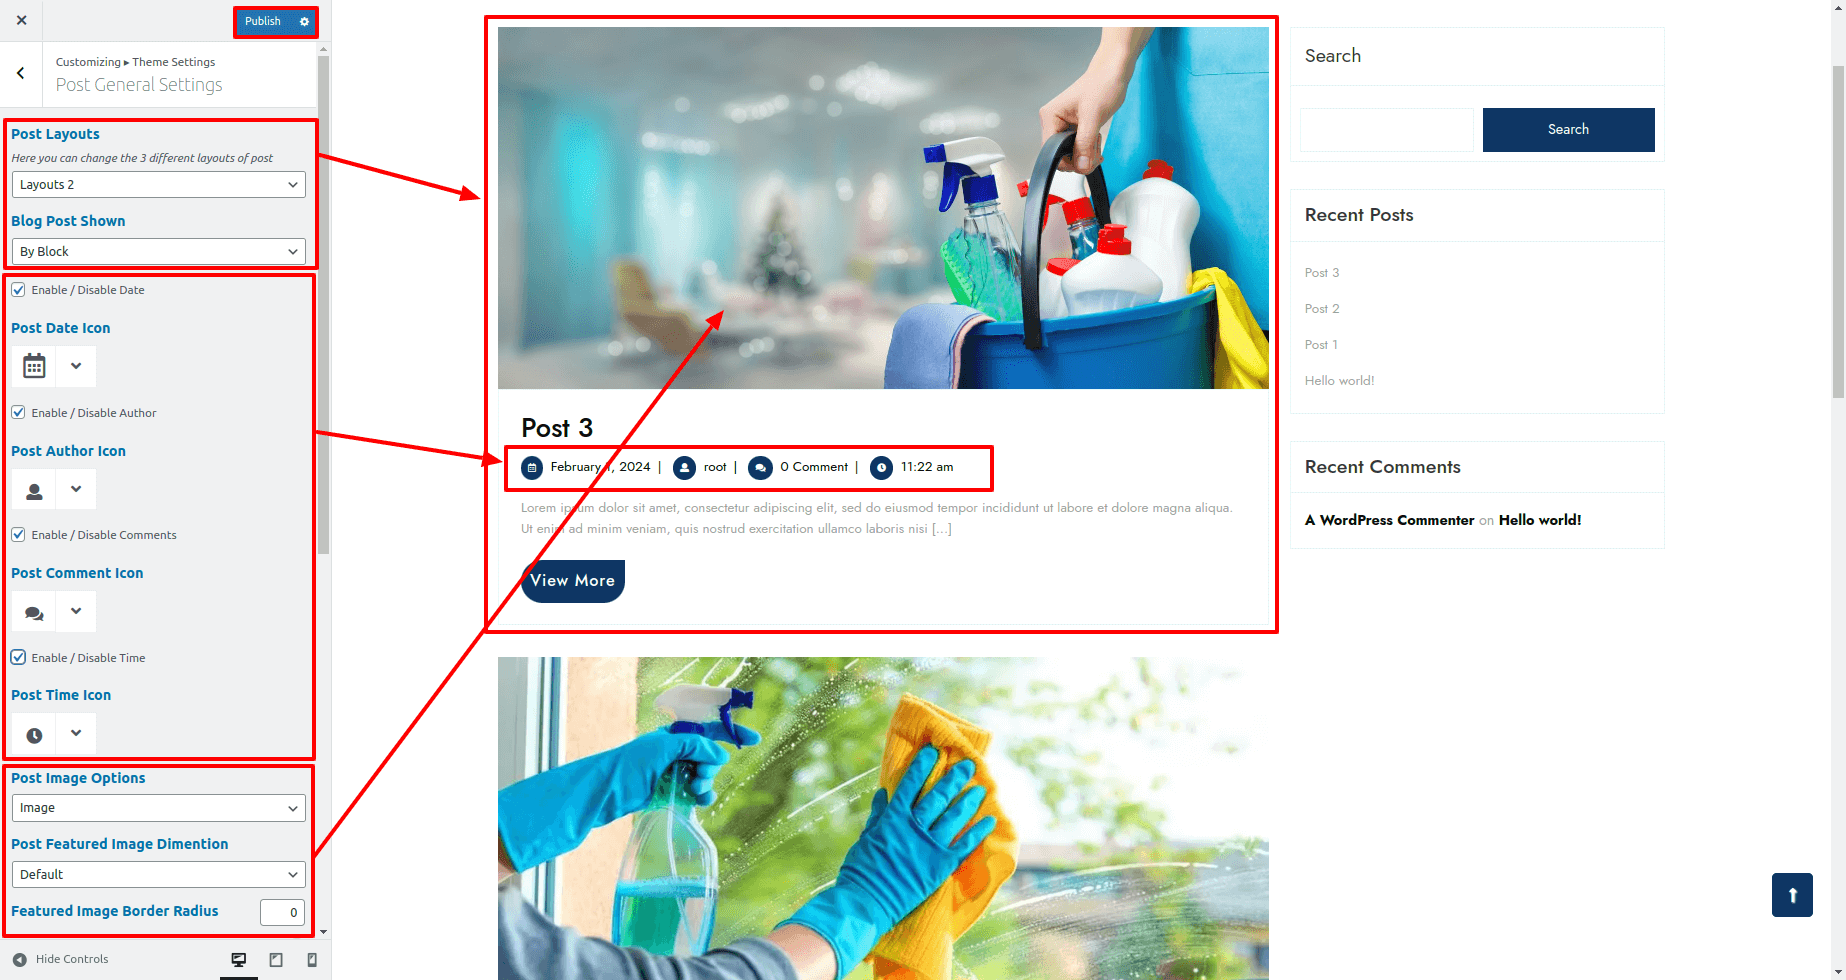
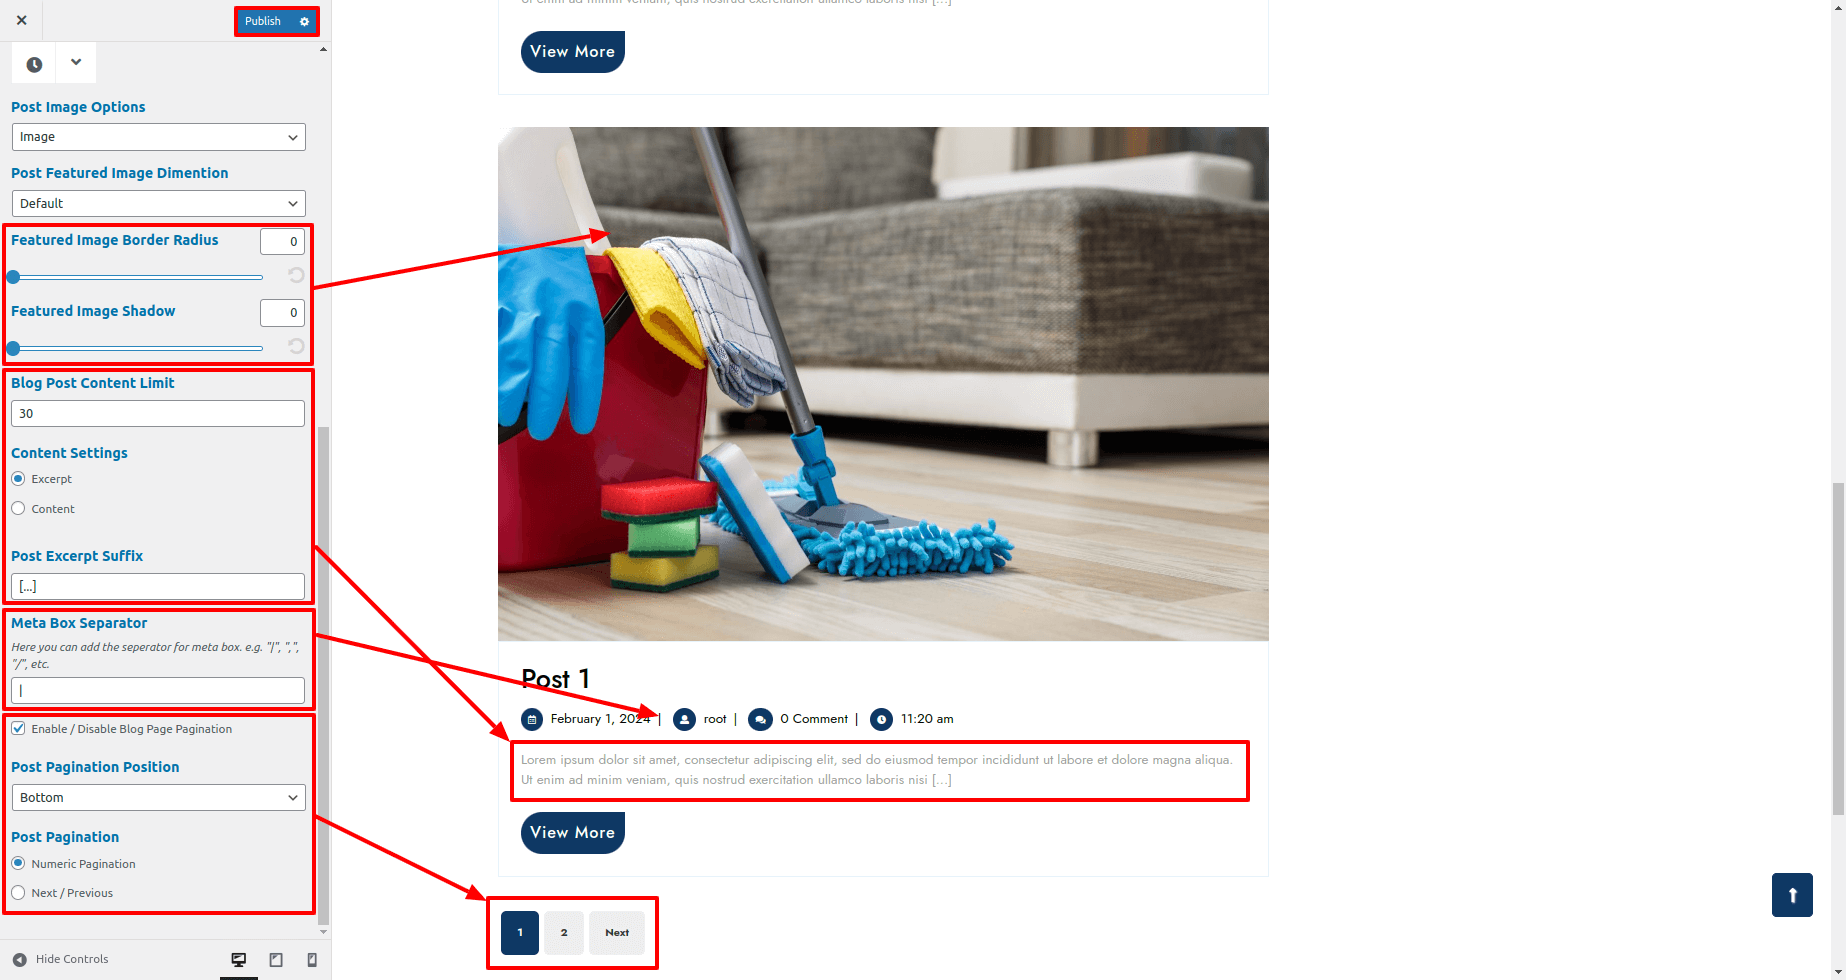
To Continue with Post General Settings, follow the directions below.
visit Appearance >> Customize >> Theme Settings >>Post General Settings
1.Here you may select the layout for blog post
2.Here you have options, For Show / Hide Date,Author,Comment,Time by just click checkbox and select the icons respectively.
3.Here you may select the content limt for blog post
4.Here you may give the button text for blog post
5.Here you may select the top-bottom,left-right padding and border radius for post blog
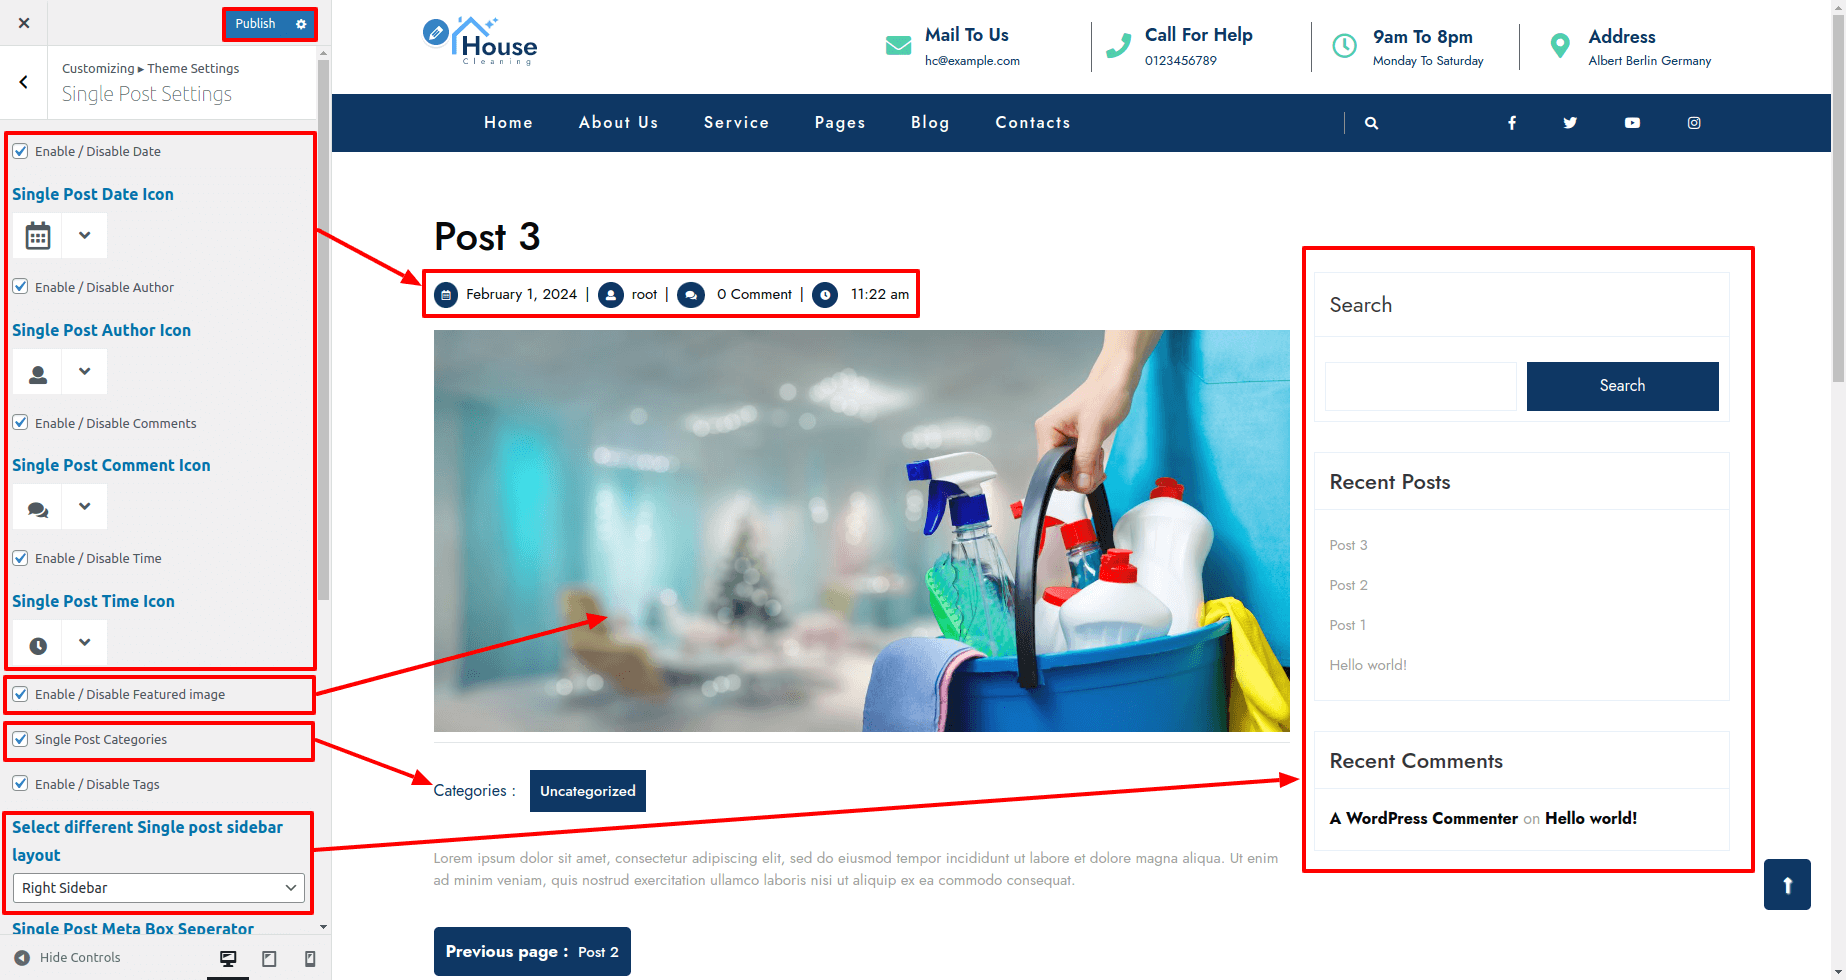
To Continue with Single Post Settings, follow the step below
visit Appearance >> Customize >> Theme Settings >>Single Post Settings.
For show / hide single post tags and single post image, just click the checkbox for the theme.
For further details on adding categories, look at the following article.: http://codex.wordpress.org/Manage_Categories_SubPanel


Copyright © 2024 Buy WP Templates. All Right Reserved.