Construction Real Estate Pro

Help and Support

Click here for support:
Support

File Structure

There are multiple folders in the template package that you downloaded. Let's examine what is in each folder:

  • Screenshots -   contains template screenshot. Not for production.
  • theme -contains wordpress theme files
  • "transport-movers-pro.zip" -this folder contains all the necessary files for the theme.
  • "license.txt" -contains license details
  • "readme.txt" -contain information about theme images path, font use and usage script

BWT Key Activation

The steps for activating a BWT key are as follows.

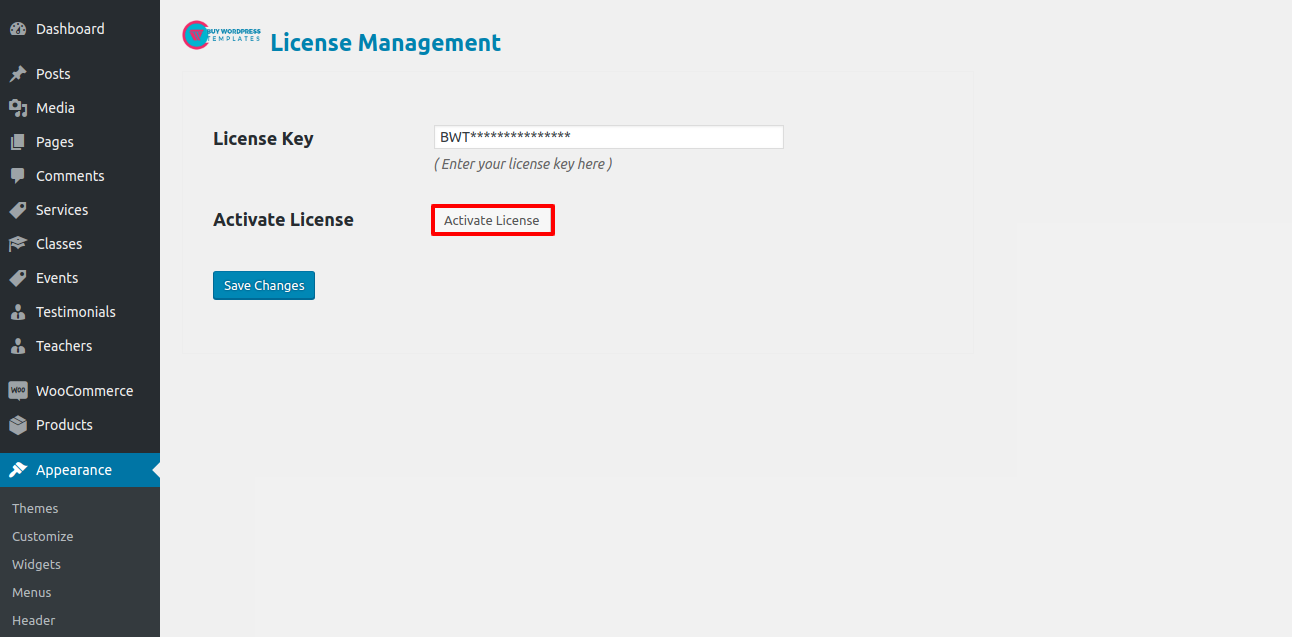
As you will get the License Key on your Email, use that key to Activate License.

Follow the following Process to Activate License.

Go to Dashboard >> Appearance >>BWT Key Activation>>Enter Key>>Save Changes.


After Entering The Key >> Activate Licence.

After you Activate Licence,the key will be active and then you can Getstarted with the Theme.
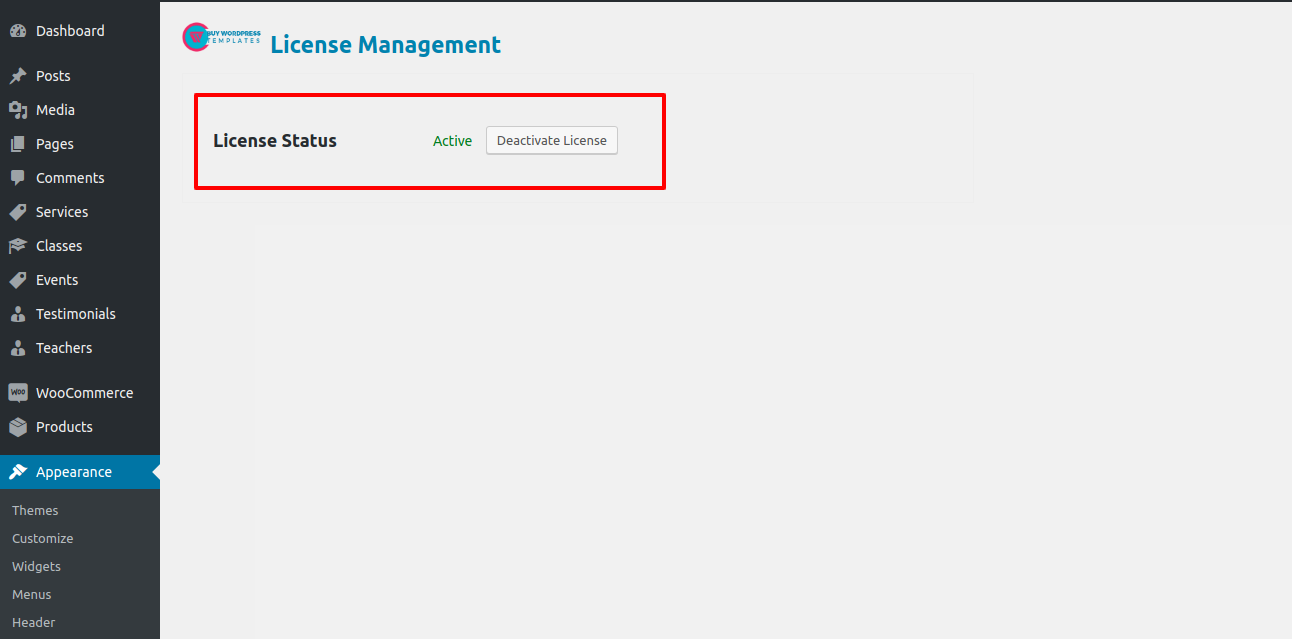

In this way you can activate your Licence Key.

Template Installation

Installing a template is a simple process. There are two ways to complete the installation process.

1-Using WordPress admin, install a theme.

The first step is to log in to your WordPress admin dashboard. then click on

1.Go to the menu Appearance >> Themes
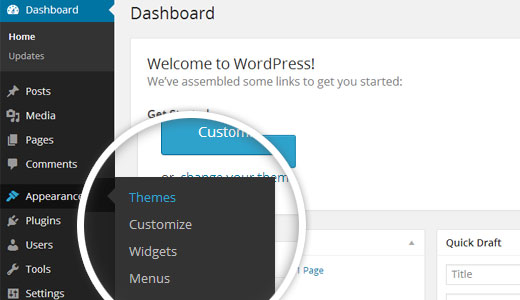
2. Once there, select Add New from the top menu of the themes page.

3. To upload a theme, click the button.

4. Choose your bwt-construction-realestate.zip theme by clicking the Browse button, then hit the Install Now button..

5. Your theme will now be installed by WordPress, and you will see a success message with a link to activate or view a live preview.

Congratulations your theme have been successfully installed

Section Color/Font Pallette

The method of changing the colour or font is quite simple. These choices are available in all customizer areas. It is a comprehensive graphic that demonstrates the typeface and colour palette. You can change the colour and font of the headings, paragraphs, and buttons with a single quick click.

Depending on the number of options accessible in each area, there is an option to change the colour scheme for the headings, title/text, paragraphs, button text, and button background.
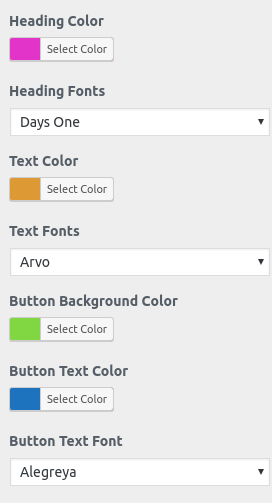
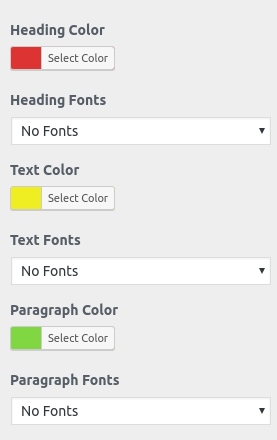
Default Color/Font settings

Fetch Demo content

This theme supports the standard Site Identity area that WordPress provides, and we have added some options to this section.

Follow these instructions to setup Home page.

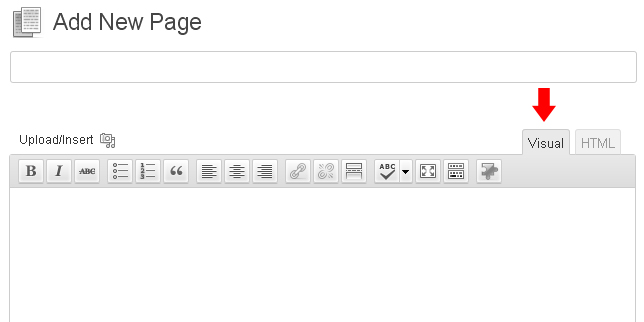
  • 1. Create Page to set template: Go to Dashboard >> Pages >> Add New Page.

    Whatever you want to call it, label it "home." then pick "home-page" in the template dropdown.
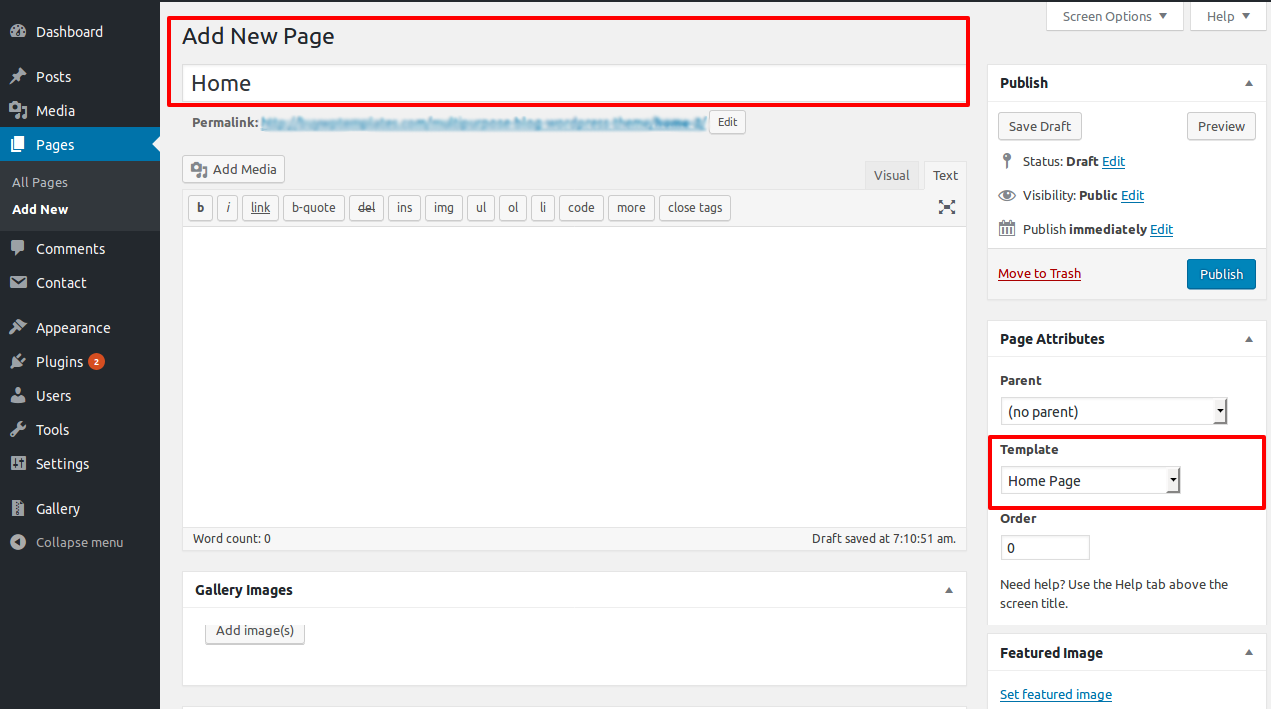
  • 2. Set the front page: Go to Setting -> Reading --> Set the front page display static page to home page

    When you're finished, you can view the entire demo on the top page.

Color/Font Settings

The simple method for setting or modifying the site's color and fonts is called "color/fonts setting."

Go to Appearance > Customize > Theme Settings> Color/Font Settings

The options integrated in this section are:

1. Headings (h1, h2, h3, h4, h5, h6) Font family

This area offers the ability to change the font family used for paragraphs and other website content.

2. Paragraph and other content Font family

This section allows you to choose the font family for all of your website's headings.

Now, click on Publish button.

Default Color/Font settings

How to set up Home Page

Setup "Home page".

Create Page to set template:Go to Dashboard >> Pages >> Add New Page.

You can label it anything you like, such as "home." then pick the "home-page" template from the template menu.

Set the front page:Go to Setting -> Reading --> Set the post page display static page to home page
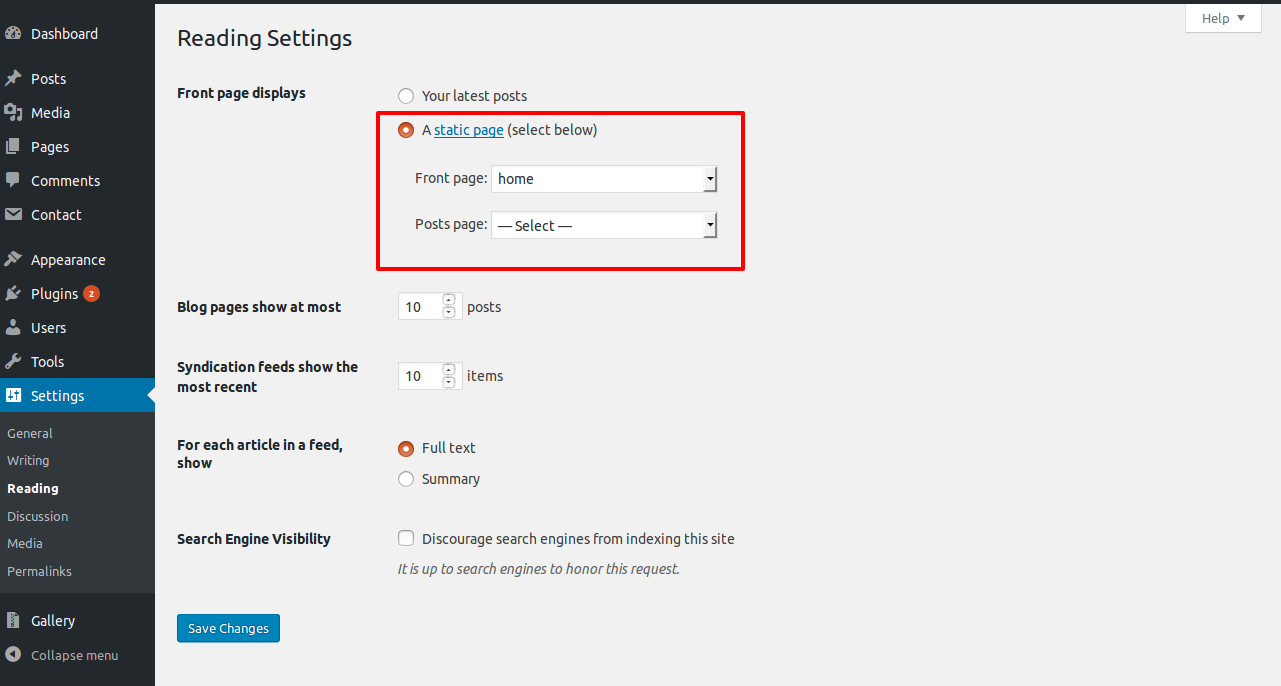
When you're finished, you can view the entire demo on the top page.


Setup Top Bar

In order to continue with Top Bar,

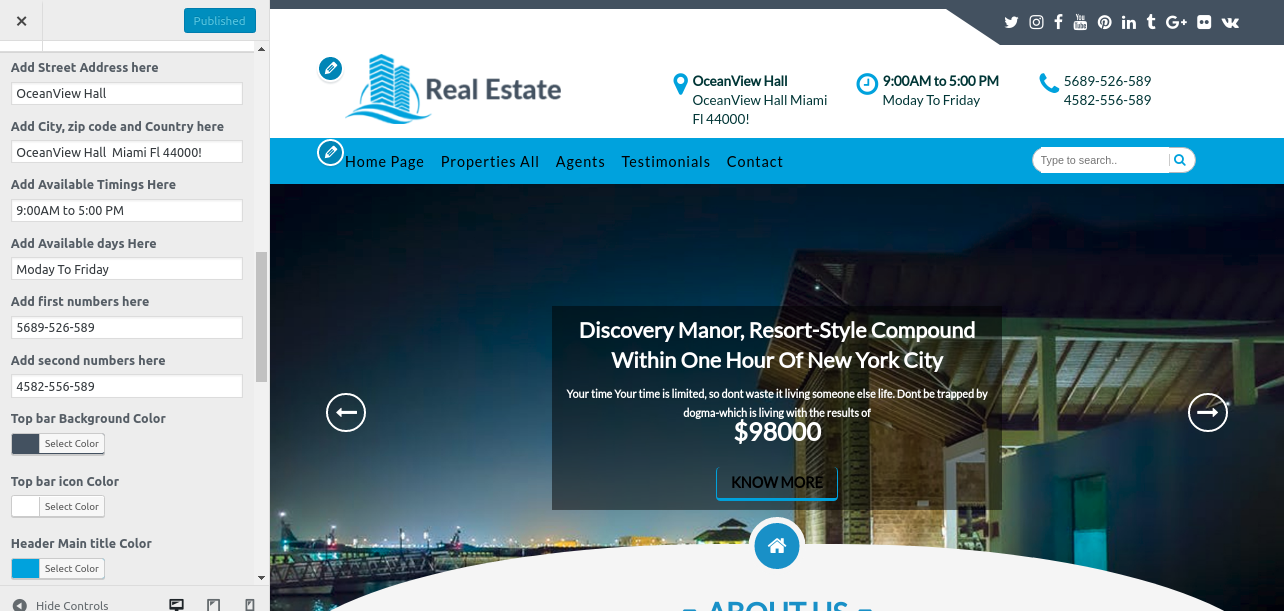
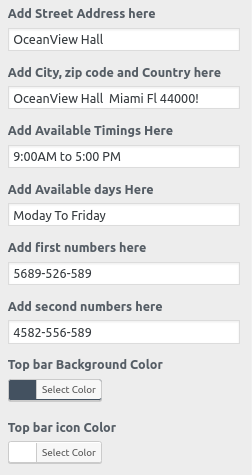
Go to Appearance >> Customize >> Theme Settings >>Top bar/Header section
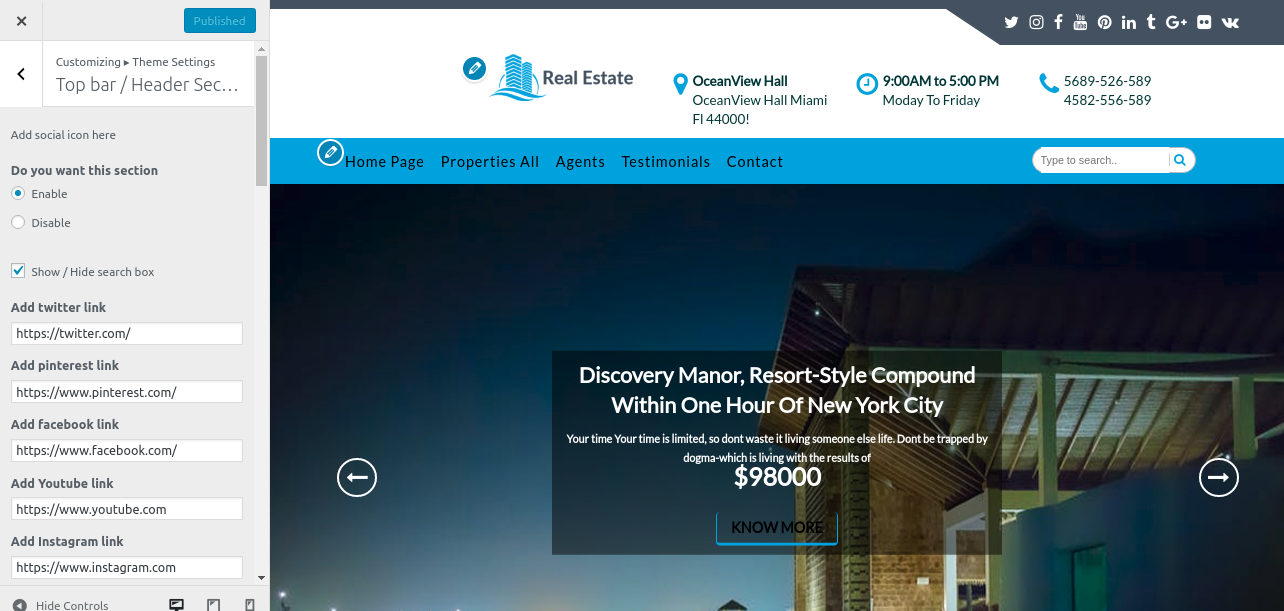
Follow these instructions to setup top bar.
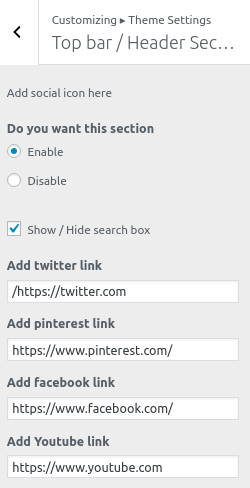
  • Add twitter link : You may use this option to add a link to Twitter to your website's top bar. The Twitter icon is added to your site's top bar when you add a link to Twitter.
  • Add Pinterest link : This option allows you to add pinterest link. Adding twitter link adds twitter icon in the top bar of your site.
  • Add Facebook Link: You can add facebook link here and the facebook icon will be displayed in the top bar of your site.
  • Add Instagram Link: You can add instagram link here which will add instgram icon to the top bar.
  • Add Linkedin Link: You can add linkedin link here which will add linkedin icon to the top bar of you site through which visitors on your page can connect to your linkedin page.
  • Add GooglePlus Link: You can add GooglePlus link here.
  • Add Flickr Link: You can add Flickr link here.
  • Add VK Link: You can add VK link here.

Setup Slider

Follow the below steps to setup the slider

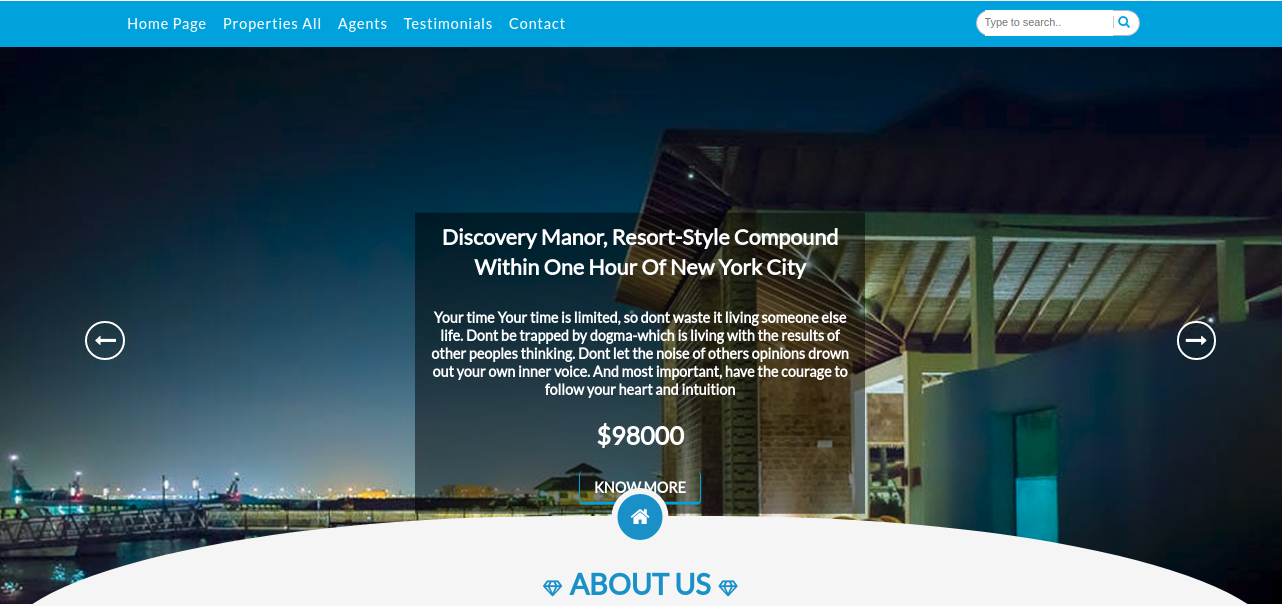
Go to Appearance >> Customize >> Theme Settings >>Slider Settings
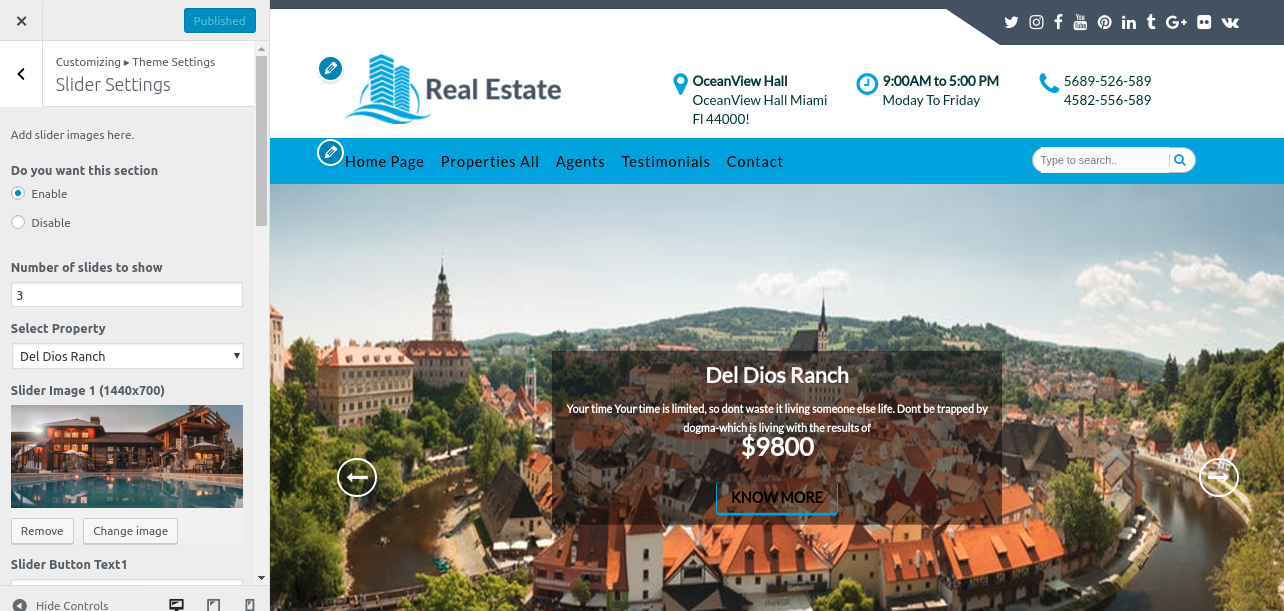
Select Property: You can choose a property from the list here. When you choose a property, the slider of your website will show the Property Title, its description, and its price. You must add a property from the dashboard in order to use this option. Go to the dashboard, select Properties from the slider, and from there you may update and add properties. These properties that you add show up in the drop-down menu when selecting a property. With this option, you can choose the Attributes that you wish to display on the slider.
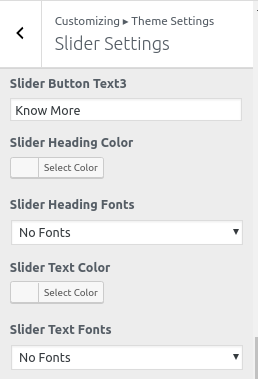
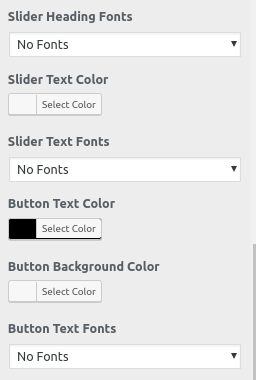
  • Setting Options : Contains options for the option to enable/disable service display. You can enable or disable this part using this parameter. This environment is crucial. If you want this section to show on your website, leave the option enabled; if you don't, pick the disable option, and this section will no longer be visible on your website.
  • Number of Slider To Show: Give you the option to choose how many sliders to display.
  • Slider Image: Give you the option to choose how many sliders to display.
  • Slider Button Text: Here, you may choose how the text will appear on the button.
  • Slider Heading Color: Allow you to customise the slider's heading color.


  • Slider Heading Fonts: With this option, you may change the font for the Slider heading.
  • Slider Text Color:The colors of the slider text can be changed with this option.
  • Slider Text Fonts: With this option, you may change the font for the Slider text.
  • Button Text Fonts: You can customise the button's text font with this feature.

Setup About us

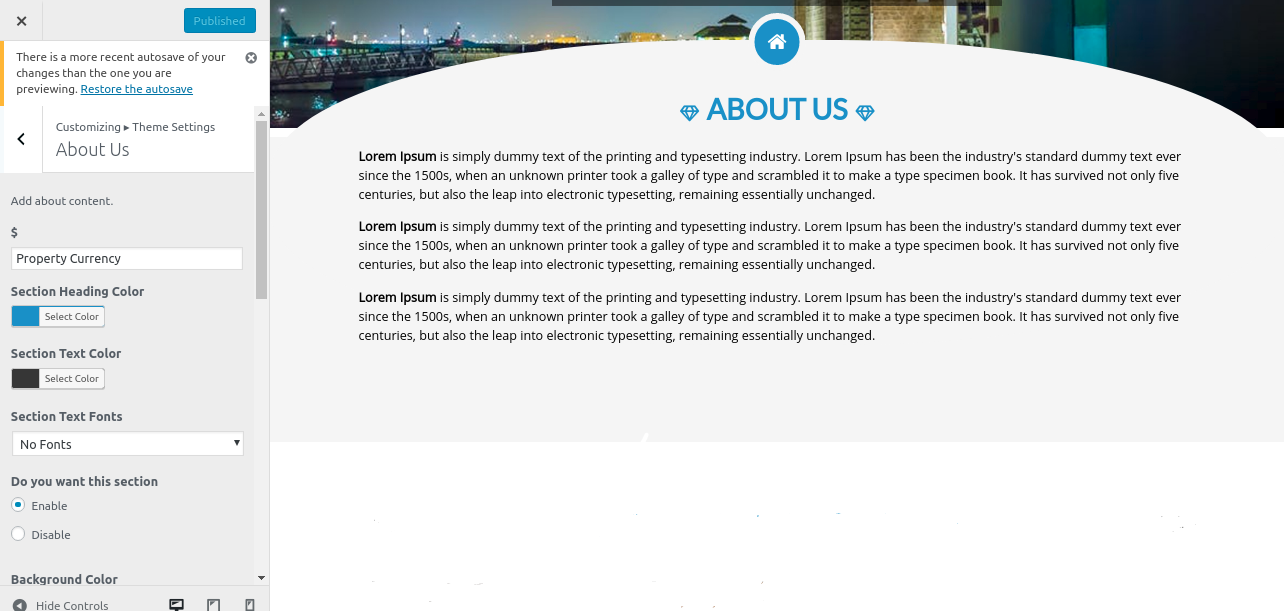
Go to Appearance >> Customize >> Theme Settings >> About Us

  • Setting Options : You can choose a property from the list here. When you choose a property, the slider of your website will show the Property Title, its description, and its price. You must add a property from the dashboard in order to use this option. Go to the dashboard, select Properties from the slider, and from there you may update and add properties. These properties that you add show up in the drop-down menu when selecting a property. With this option, you can choose the Attributes that you wish to display on the slider.
  • Section Heading Color: You can choose the heading color for the "About Us" section.
  • Section Text Color: Allows you to choose the About Us section's text color.
  • Section Text Fonts: The font family for this area can be chosen from here.
  • Background Color: You can customise the background color for this section.
  • Background Image: In this section, you can set a background image.
  • Title: Here, you can add the title of the section titled "About Us".
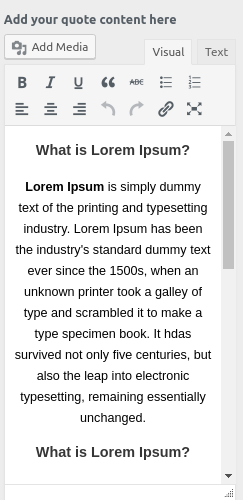
  • Add your quote contents here: You can add contents of About Us sectio here. This option also provides you to add image in this section.
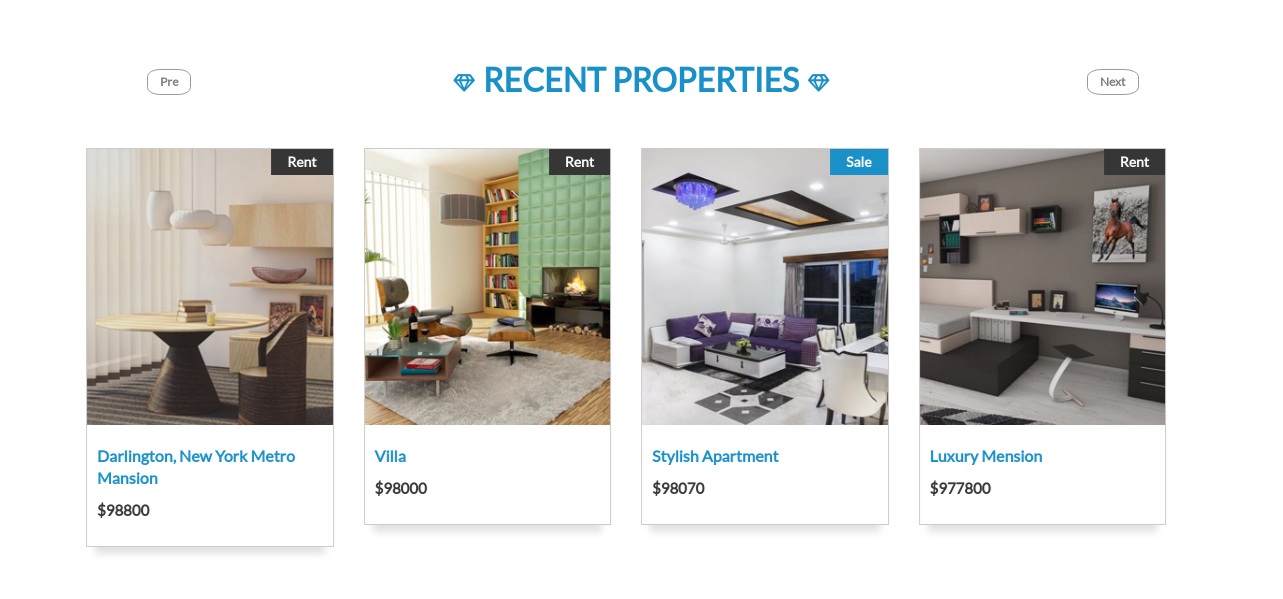
  • B: You can see this option in image beside. On clicking on this option, contents of About-us section will become bold.
  • I: On clicking on I option, contents of About Us section will be displayed italic..
  • link: With this option, you can edit or add any link in this section. For that, you need to click on link,then it will show you to add url.
  • b_quote:It specifies a section that is quoted from another source.
  • ins:It defines a text that has been inserted into a document.
  • This option allows you to add image in this section.
  • ul: You can click on this option if you want to show your about us content in an unordered list.
  • ol: You can click on this option if you want to show your about us content in an ordered list.
  • li: By clicking on this option, you can put the contents of the list.

Setup Recent Properties

In order to continue with Recent Properties,

Go to Appearance >> Customize >> Theme Settings >>Recent Properties
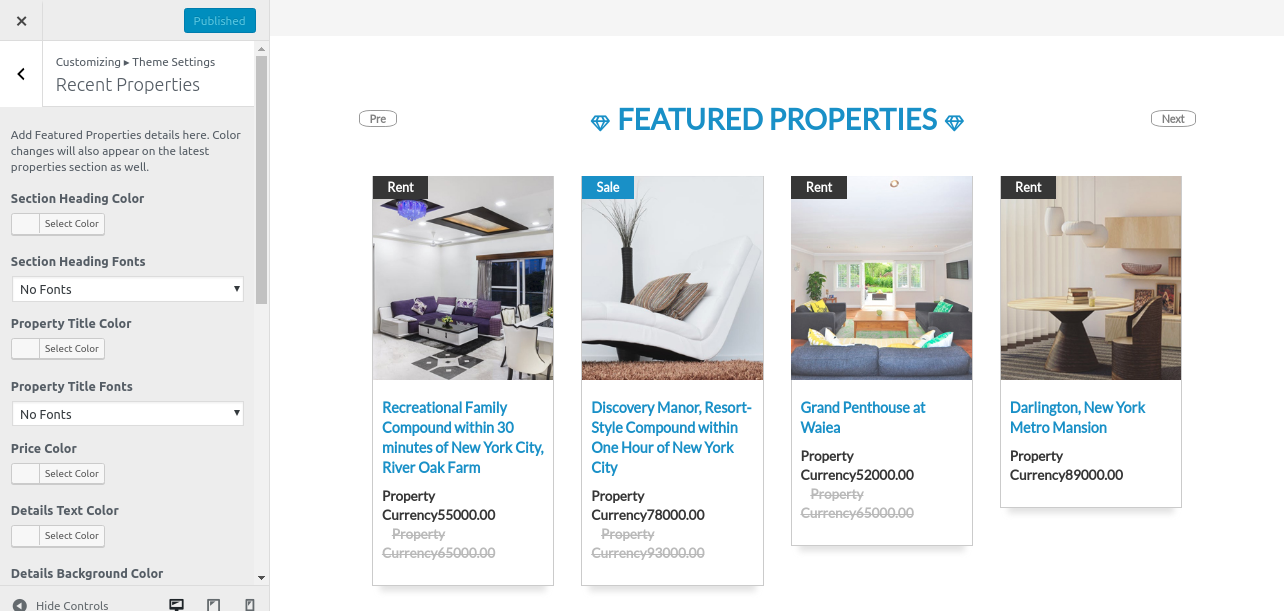
Follow these instructions to setup Recent Properties.
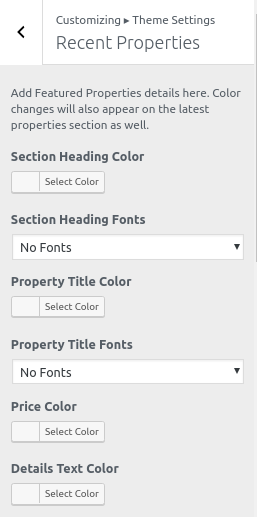
  • Section Title: Here, you can set the title of this section.
  • Select Category: You can select category like Best Sellers, Featured Properties, Recent Properties from here.
  • Section Heading Color : This option allows you to set heading color of section.
  • Property Title Color: Here, you can set the font of the Propery title which appears below the property image.
  • Property Title Fonts: Here, you can set the text color of the Propery tiltle which appears below the property image..
  • Price Color: Here, you can set the text color of price of the property.
  • Details Text Color: This option allows you to set the text color of details of the property.
  • Details Background Color: Here, you can set the background color of Details Section
  • Details Text Fonts: Here, you can set the font of Property Details.
  • Sale Text Color: Here, you can set the text color of sale.
  • Sale Background Color:Here, you can set the background color of sale.
  • Sale Text Fonts: Here, you can set the font of text.

Setup Services Section

In order to continue with Services Section,

Go to Appearance >> Customize >> Theme Settings >>Services Section
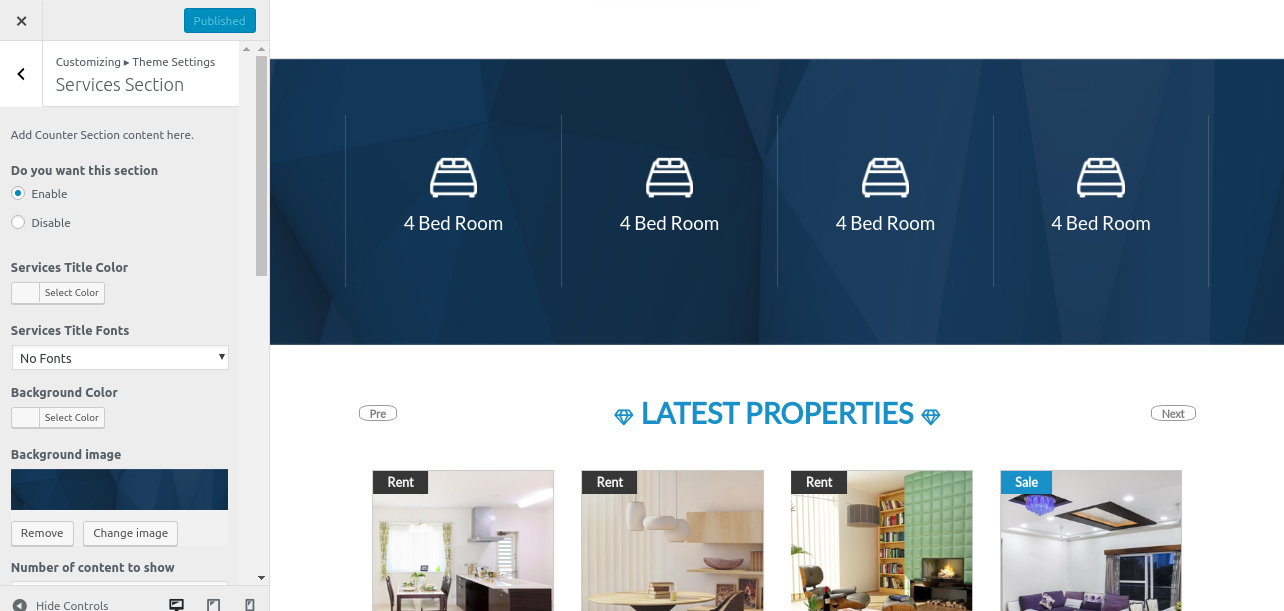
Follow these instructions to setup Services Section.
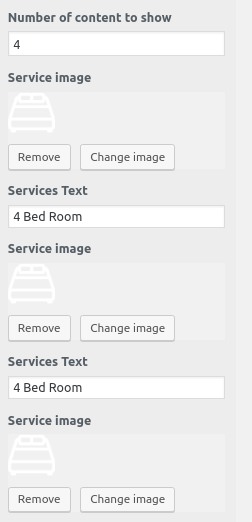
  • Setting Options: Here, you can select property from the list. Whenever you select any property, it will display Property Title, its description and its Price on the slider of your site. For this option, you need to add property from dashboard. For adding properties, go to dashboard, then click on Properties from slider, you can edit and add properties from there. These properties that you add appears in select property opiton in dropdown. You can select Properties which you want to show on slider with this option.
  • Number of content to show: Here, you can put the no. of contents you want to put in this section.
  • Services Title Color: Here, you can set the text color of title of the services section.
  • Services Title Fonts: Here, you can set the font of title of the services section
  • Number of content to show: Here, you can put the no. of contents you want to put in this section.
  • Background Color: This option allows you to set the background color of this section.
  • Background Image: Here, you can set the backgrounf image for services section if you want.
  • Number of content to show: Here, you can put the no. of contents you want to put in this section.
  • Service Image: This option allows you to remove or change the Service Image.
  • Services Text: This option allows you to put the text which will be displayed below service image as shown in image.

Setup Latest Properties Section

In order to continue with Latest Properties

Go to Appearance >> Customize >> Theme Settings >>Latest Properties
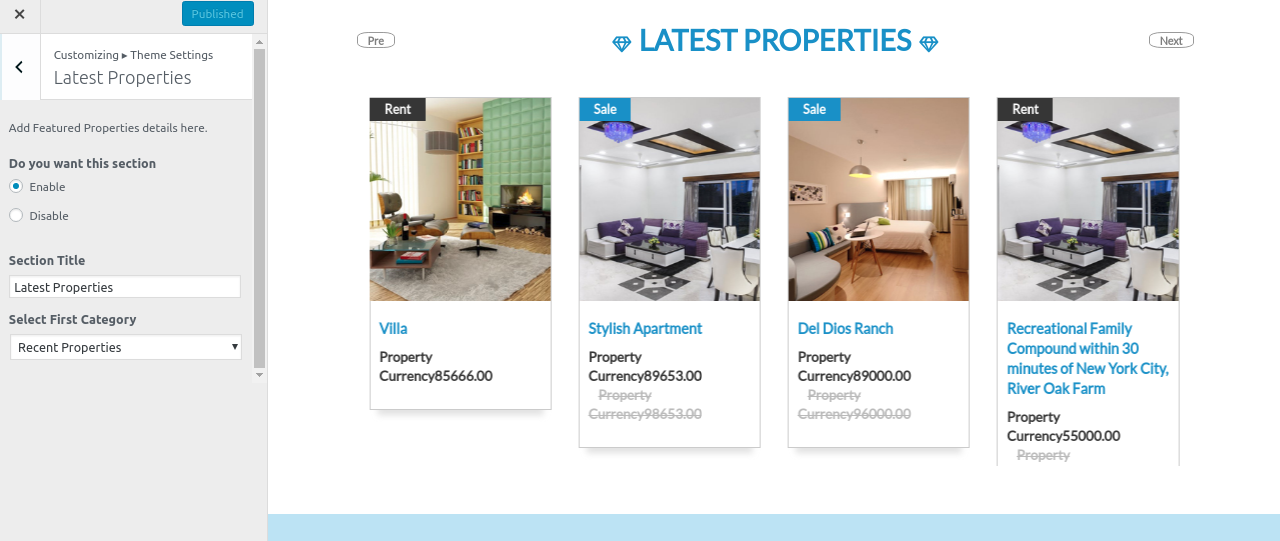
Follow these instructions to setup Latest Properties.
  • Setting Options: Includes settings for Service display enable / disable option.
  • Section Title: Section Title
  • Section First Category: Section First Category

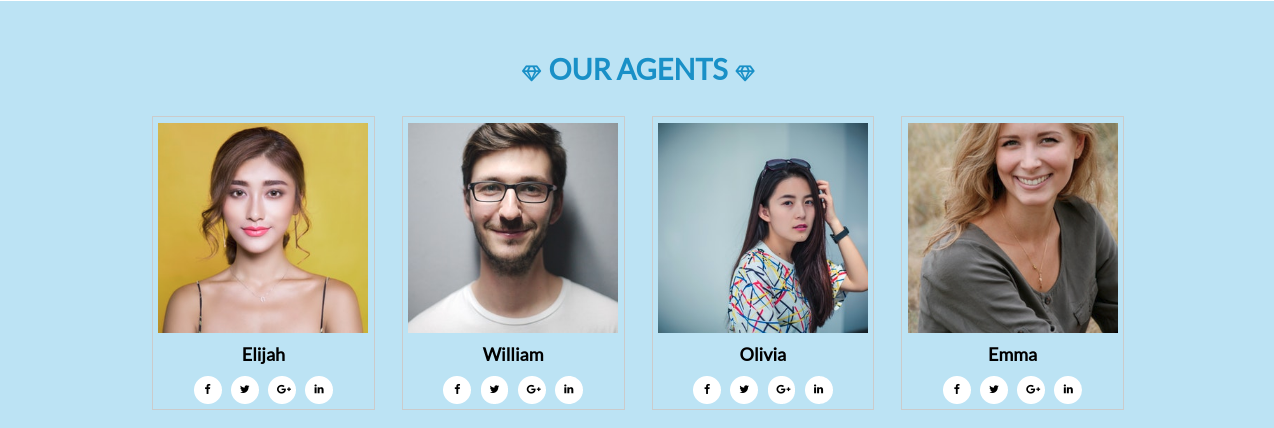
Setup Agents

Follow the below steps to setup the slider

Go to Appearance >> Customize >> Theme Settings >>Agents
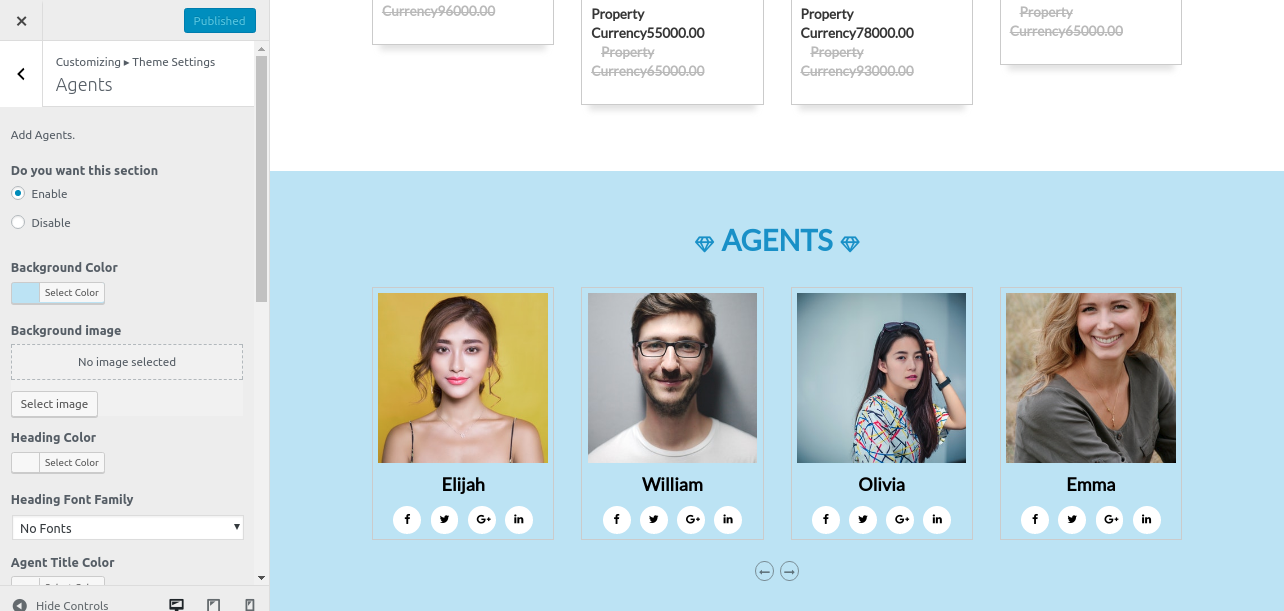
  • Setting Options : Includes settings for Service display enable / disable option.
  • Background Color This option allows you to set the background color of this section.
  • Background Image: This option allows you to set th background image for this section..
  • Heading Color: This option allows you to set the text color of heading.
  • Heading Font Family: Allows you to set the font family of heading.
  • Agent Title Color: Allows you to set the title color of Agent Section. family of heading.
  • Agent Title Font Family: Allows you to set the font familt of title of this Section.

You can see the image above in which there is settings option. This is a very important option because you need to select this option if you want to display any agents info on your homepage. To enable this option, go to dashboard, click on agents from admin navigation, this option will appear, just enable it with a blue tick.
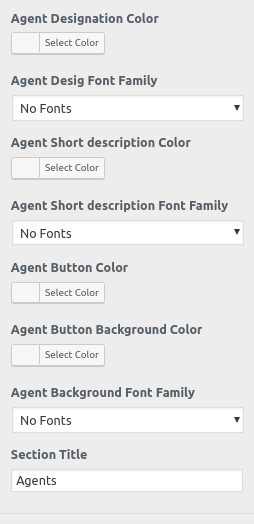
  • Agent Designation Color: Allows you to set the text color of Agent Designation.
  • Agent Designation Font Family: Allows you to set the font family of Agent Designation.
  • Agent Short Desription Color: Allows you to set the text color for Agent Short Description.
  • Agent Button Color: Allows you to set the color of text which will be displayed on button.
  • Agent Background Font Family: Allows you to set the font family of the text which will be displayed on background i.e when you hover on image.
  • Section Title: Allows you to set the ftitle of this section.

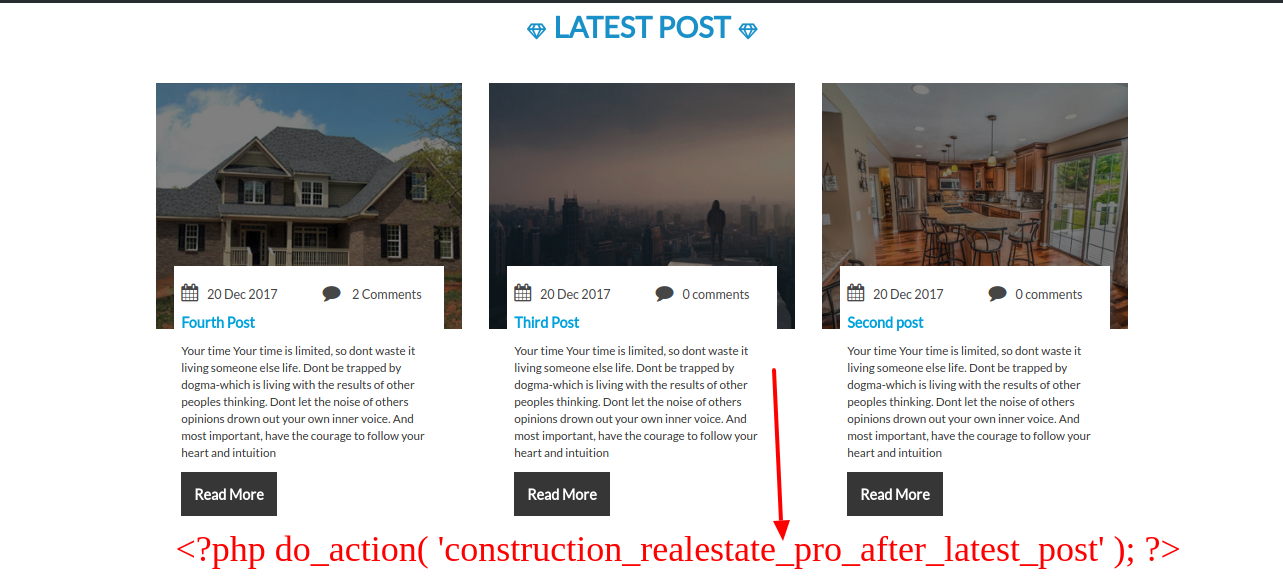
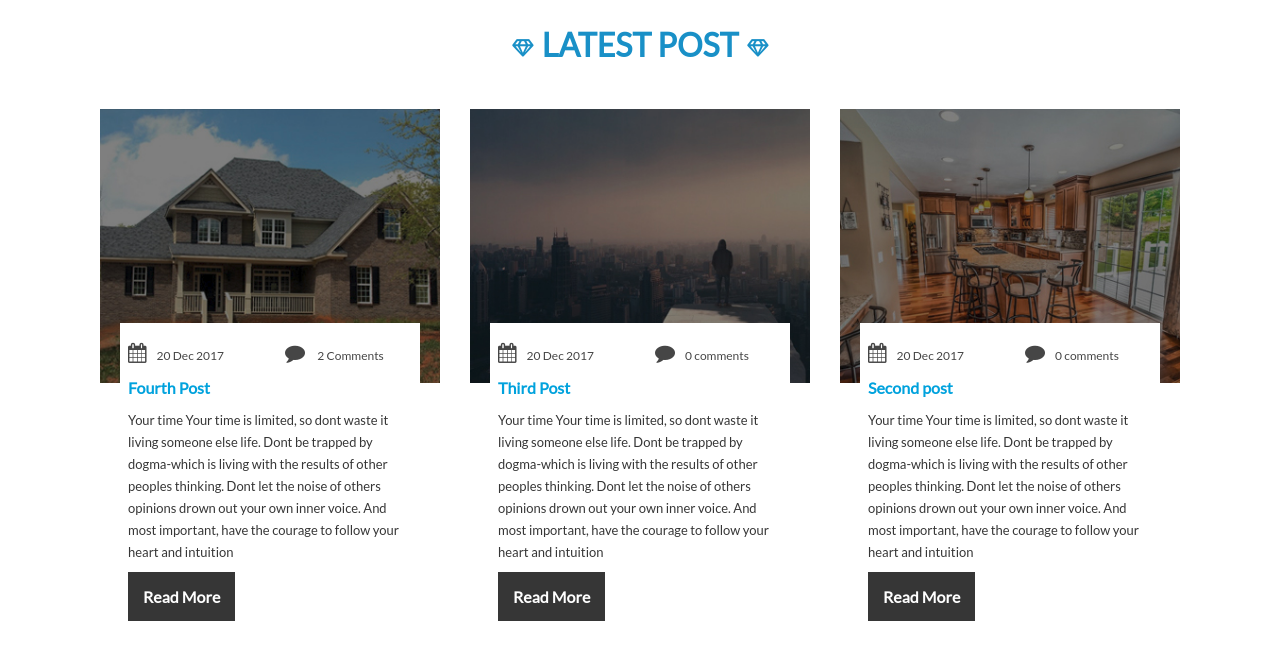
Setup Latest Post Section

In order to continue with Top Bar,

Go to Appearance >> Customize >> Theme Settings >>Latest Post
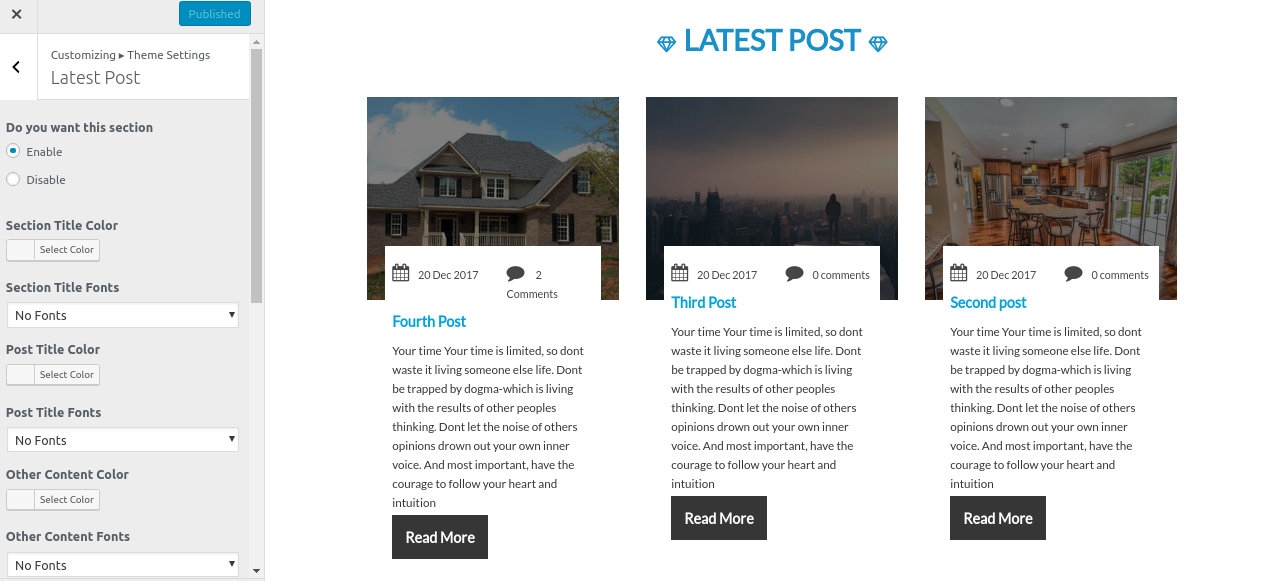
Follow these instructions to setup latest post section.

To add/edit post, you need to click on posts on admin navigation. You can add/edit posts that will be displayed on your homepage.
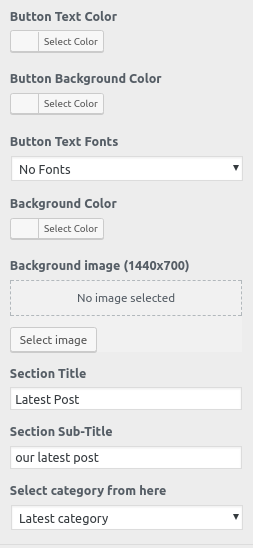
  • Select Category: You can select category of post with this option.
  • Setting Options : Includes settings for Service display enable / disable option.
  • Section Title Color: Here, you can set the title color of this section.
  • Section Title Fonts: You can set the font family of title of this section here.
  • Post Title Color: You can set the color of post title ussing this option.

Similar to post title fonts, other content colours and fonts, button text colours and fonts, button backgrounds and images, background colours, section titles, and section sub-titles can all be changed using the available options.
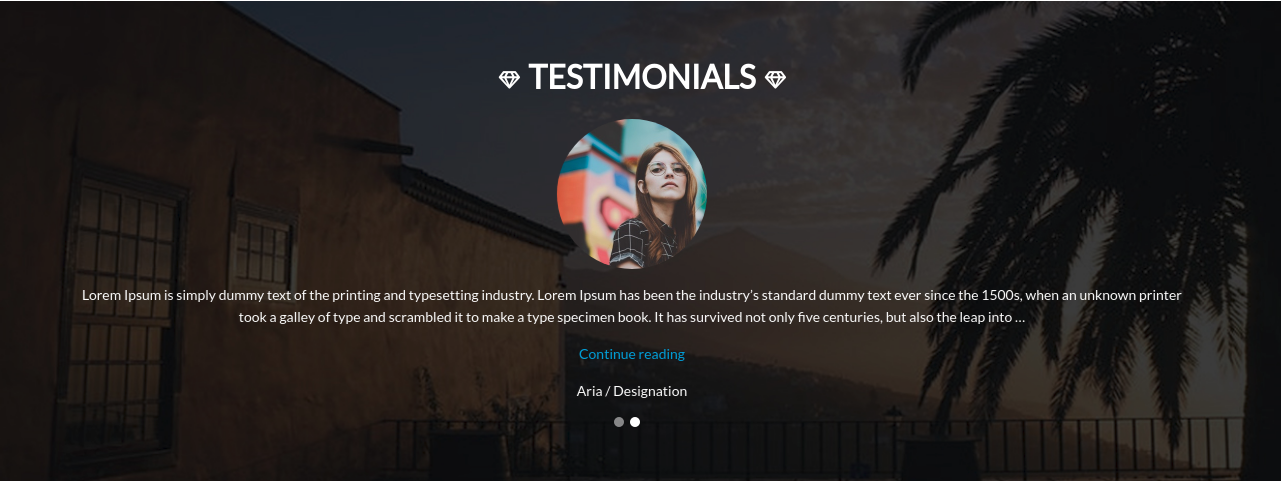
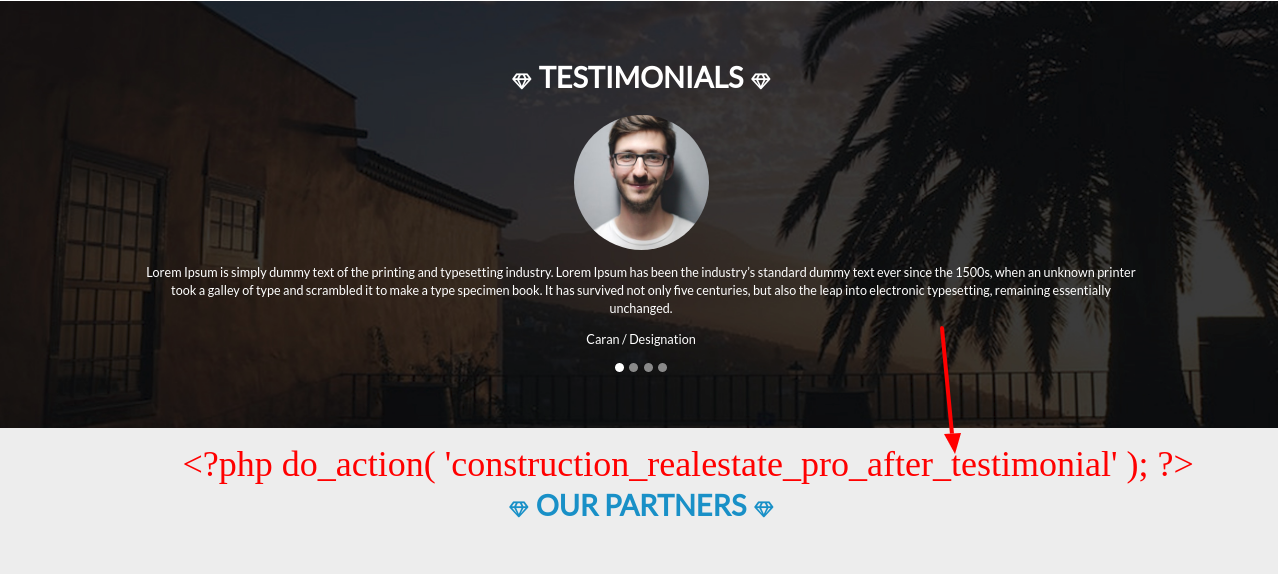
Setup Testimonial Section

In order to continue with Testimonial Section

Go to Appearance >> Customize >> Theme Settings >>Testimonial
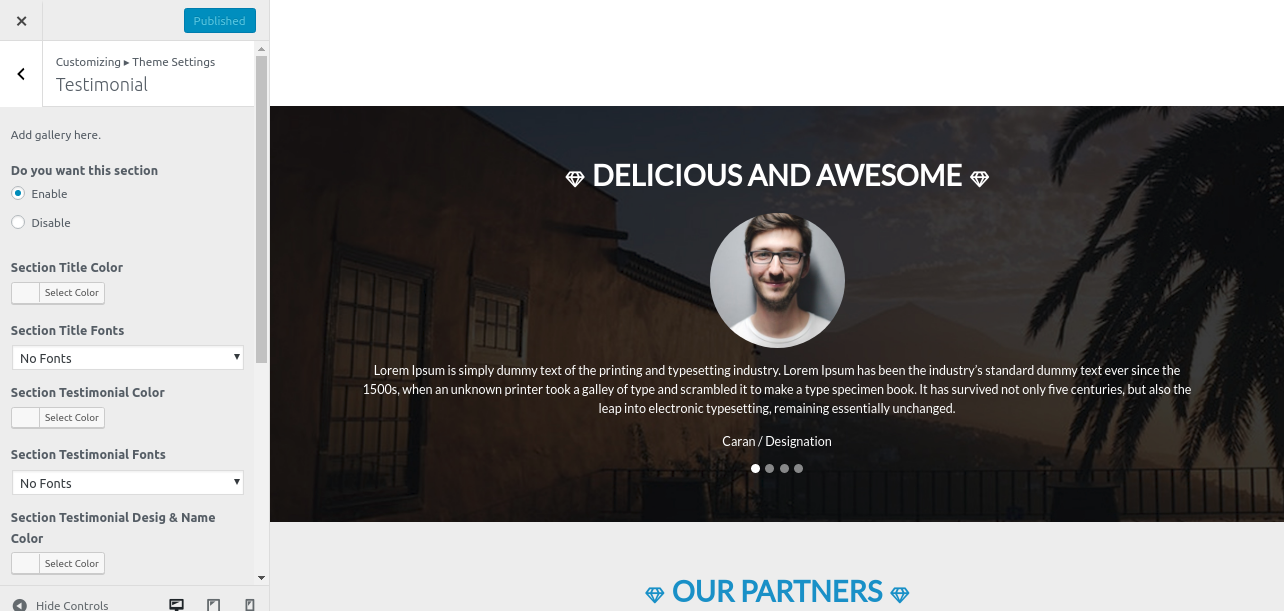
Follow these instructions to setup Testimonials.

You must navigate to the dashboard and select testimonials in order to add testimonials. Like this, you can add or change testimonials.

  • Setting Options: Includes settings for Service display enable / disable option.
  • Section Title Color: Here, you can set the text color of title for this section.
  • Section Title Fonts: Here, you can set the font family of title for this section.
  • Section Testimonial Color: Here, you can set the text color of testimonial for this section.
  • Section Testimonial Fonts: Here, you can set the font family of testimonial for this section.
  • Section Testimonial Desig and Name Color: Here, you can set the text color of testimonial Designation and Name.
  • Section Testimonial Desig and Name Color Here, you can set the font family of testimonial Designation and Name
  • Background Color: Here, you can set the background color for this section.
  • Background Image: This option allows you to set the background imagee of this section.
  • Section Title: Here, you can put up the title for this section.

Setup Partners Section

In order to continue with Partners,

Go to Appearance >> Customize >> Theme Settings >>Partners Section
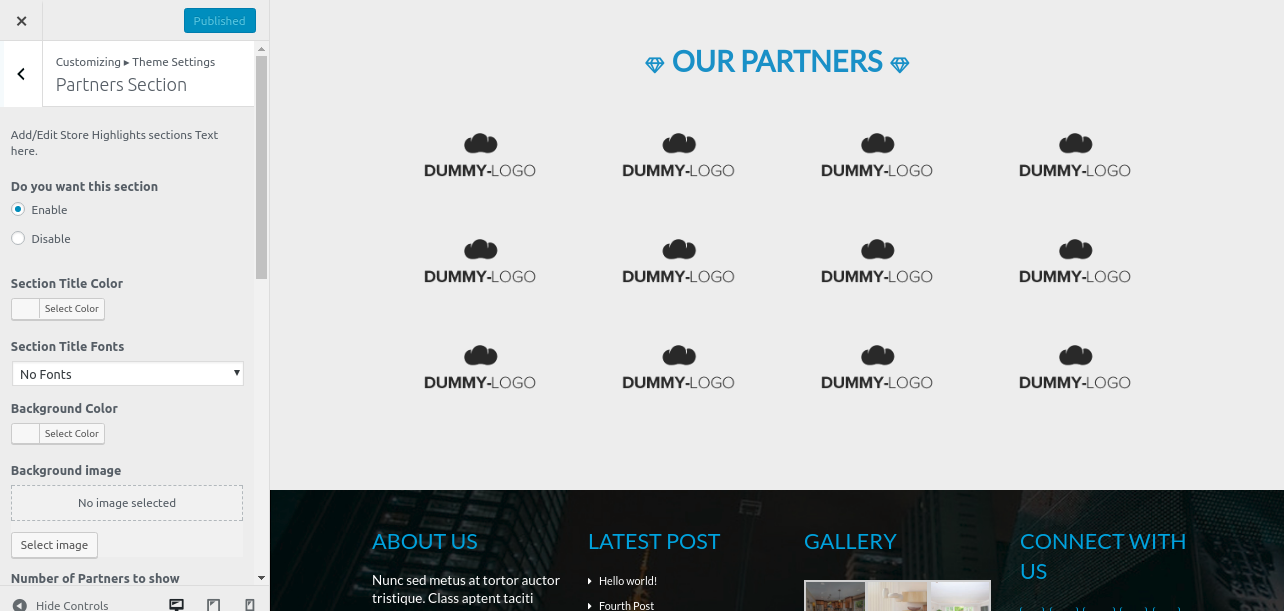
Follow these instructions to setup Partners Section.

  • Setting Options: Includes settings for Service display enable / disable option.
  • Section Title Color: Here, you can set the text color of title for this section.
  • Section Title Fonts: Here, you can set the font family of title for this section.
  • Background Color: Here, you can set the text color of testimonial for this section.
  • Background Image: Here, you can set the font family of testimonialfor this section.
  • Number of Partners to show: Here, you can set the text color of testimonial Designation and Name .
  • Sponsor Image Here, you can set the font family of testimonial Designation and Name .

Plugins

The functionality that already exists in WordPress can be expanded and improved via plugins.

How to activate plugins

If you want these features in your theme, you must activate the plugin. In order to activate the plugin in your theme, follow these instructions.

Go to Plugins >> Installed Plugins >> Real Estate Construction >>Activate

When you enable the plugin, three additional options—Properties, Agents, and Testimonials—will appear in your admin navigation. Because the plugin is active, you may see these three options in the image's admin navigation.

Once you enable the plugin, these three sections are instantly added to your website. This is a screen image of the same.
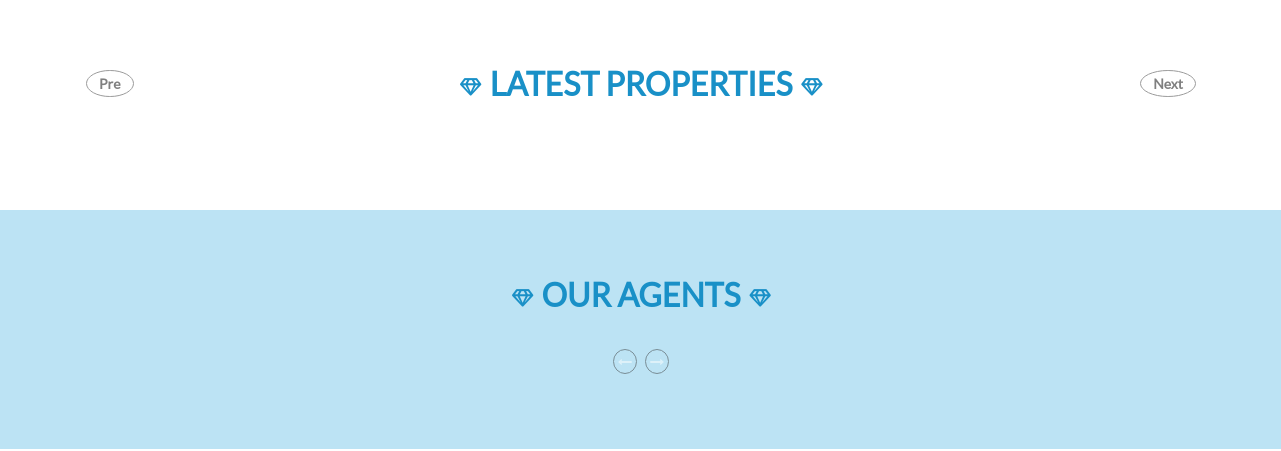
You can see that some sections have been added, but their contents are missing. Use these guidelines when adding content to these areas.

To add properties Go to Properties >> Add new
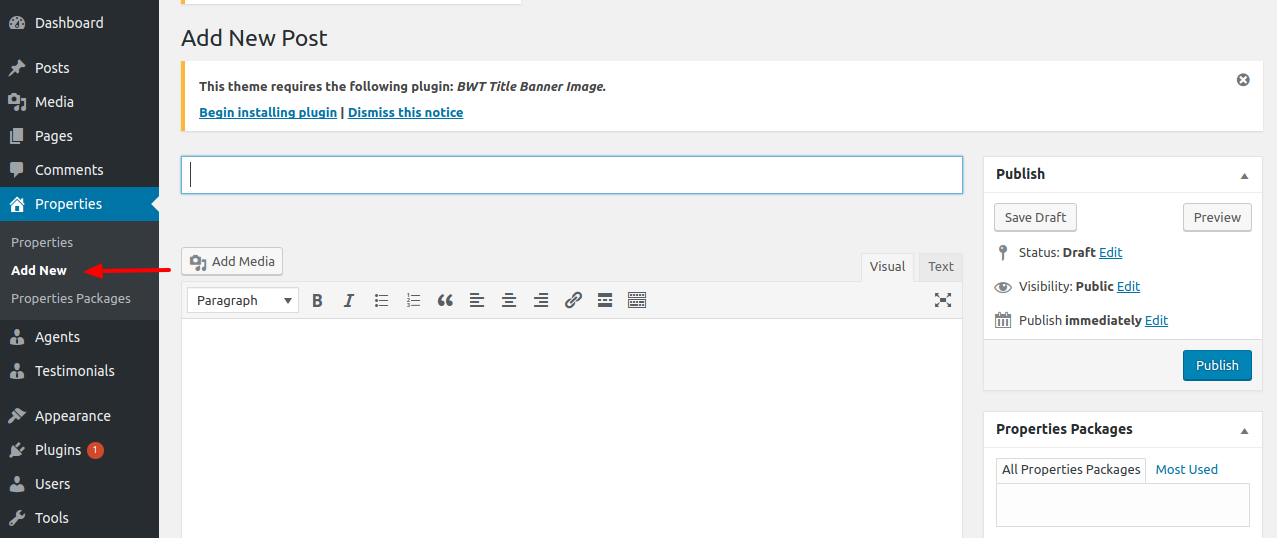
The Add Media option, which is visible in the screenshot, allows you to add photographs to these sections, which are instantly uploaded in Recent Properties in accordance with the particular property you add.

You can now add the property's title and description as indicated in the above image.

Details on properties can be added here
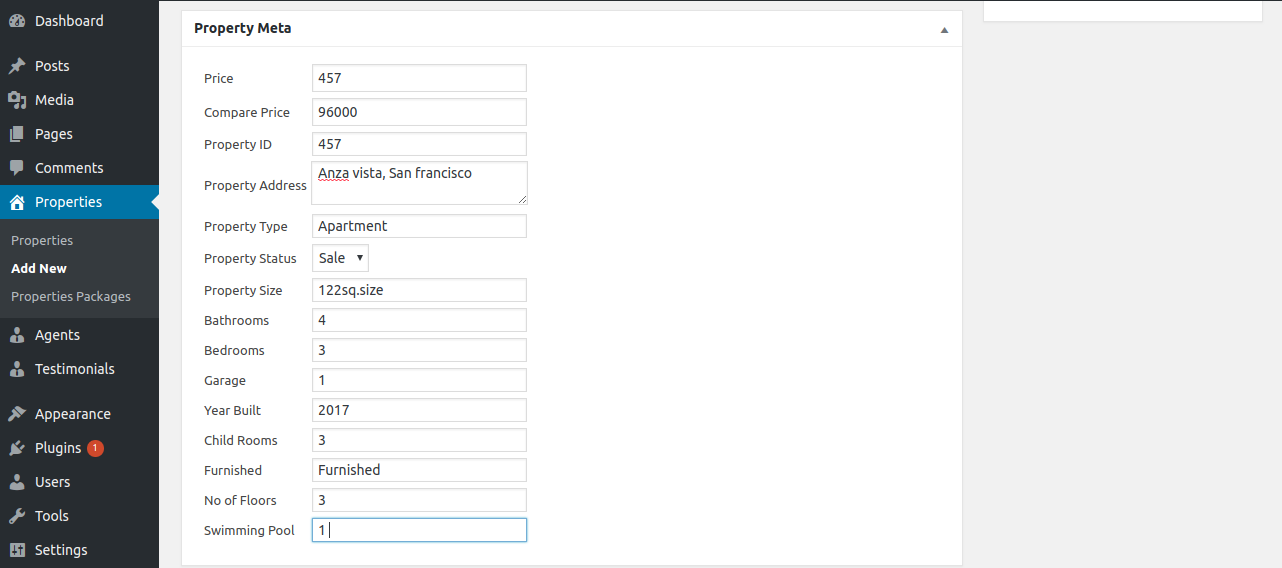
  • Price: You can enter Price of Property here.
  • Compare Price: You can add compare price here.
  • Property ID: You can add Property Id here.
  • Property Type: You can add property type here.i.e Apartment, etc
  • Property Status: You can add property status here.i.e Rent or Sale
  • Property Size: You can add property size here.
  • Bathrooms: You can specify no. of bathrooms in property here.
  • Bedrooms: You can specify no. of bathrooms in property here.
  • Garage: You can specify no. of garages present in property here.
  • Year Built: Here, you can specify the year in which the property is built.
  • Child Rooms: You can specify no. of Child Rooms in property here.
  • Furnished: You can specify here if the property is furnished or Not.
  • No. of floors: Here, you can specify no. of floors in a property.
  • Swimming Pool: Here, you can specify how many swimming pools are there in a property.

As soon as you begin, add properties details similar to this. The information about this property will automatically appear on your website

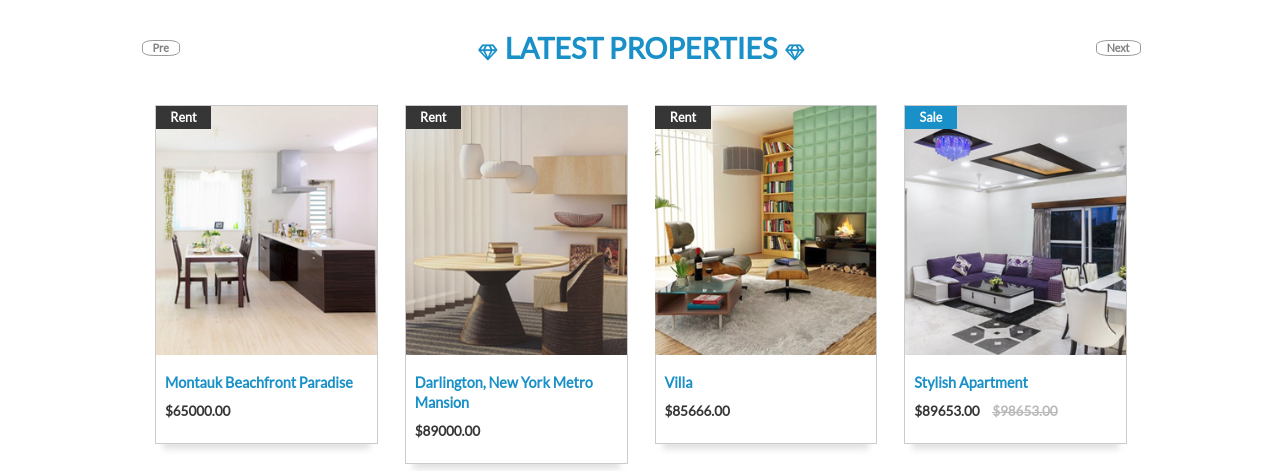
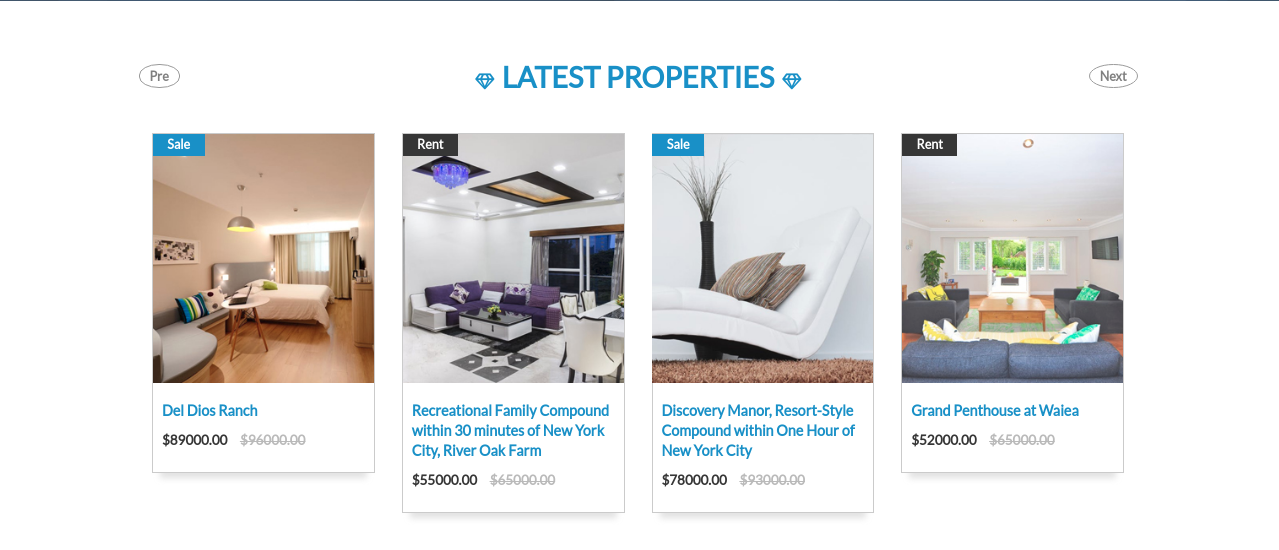
When you are finished adding properties, you may view the most recent properties here.

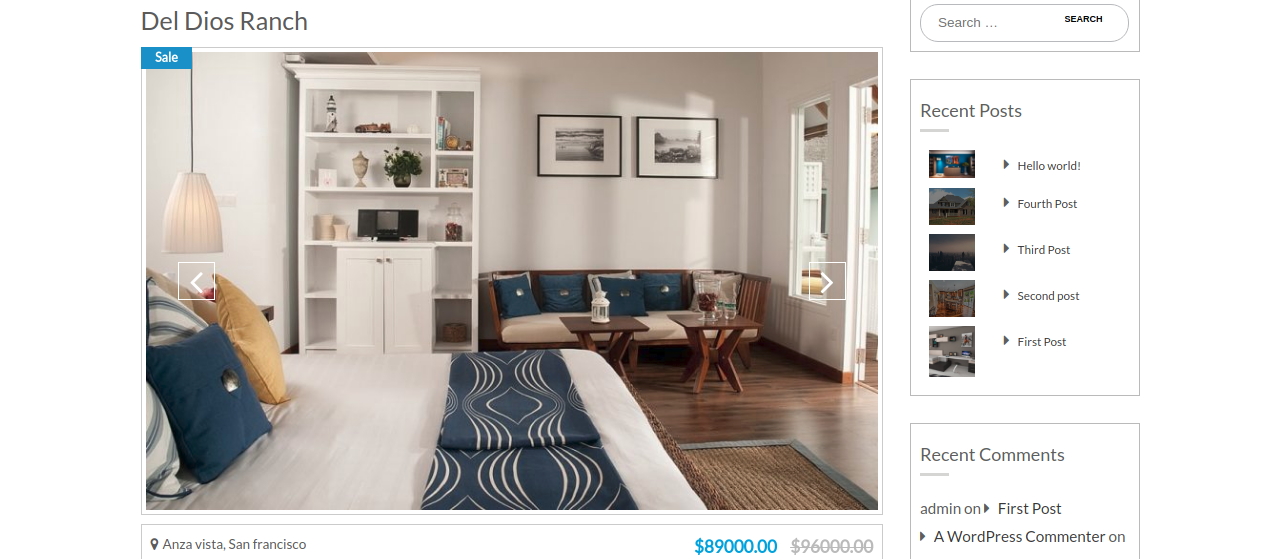
With the option to add images to a gallery, you can add specific property images.

As seen in the screenshot below, the images you add using this option are displayed in the Property Web Page's Image Slider.
The image below, which includes all the details of the Properties you added, will appear when any user clicks on the details button on the properties image. Here are a few images
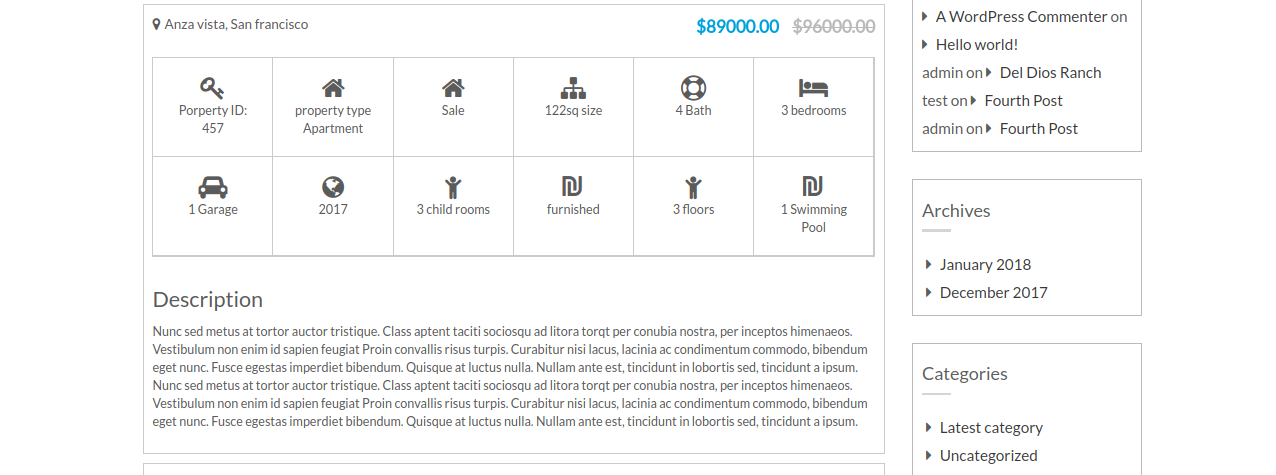
In this way, you can set up Latest Properties.

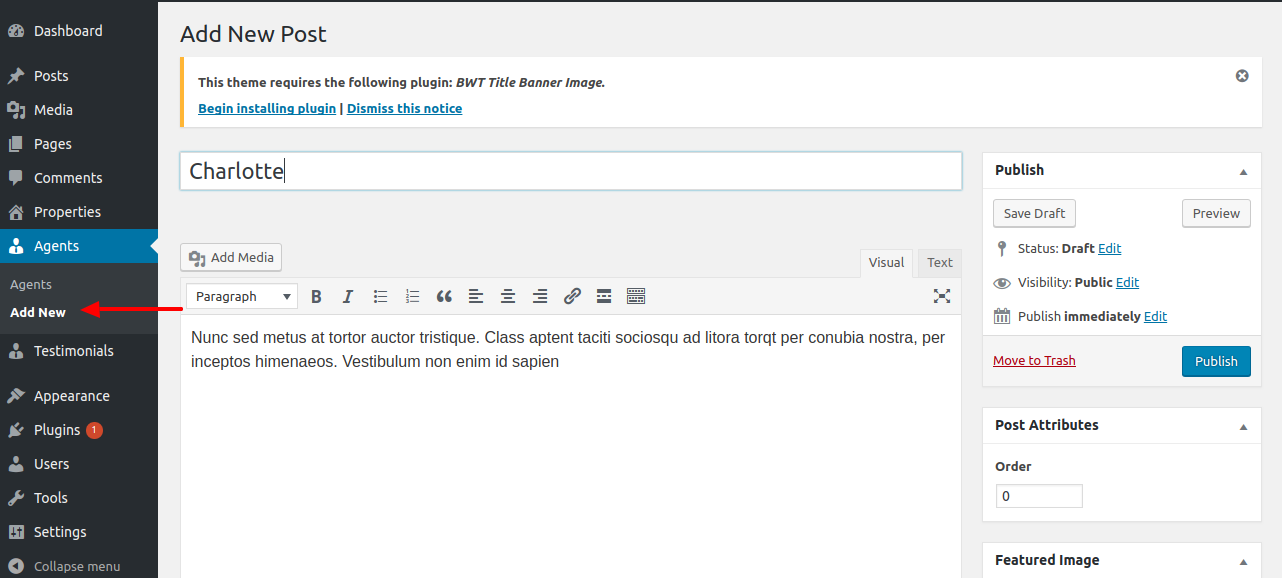
To add Agents Go to Agents >> Add new

By using the Add Media option, which is seen in the screenshot, you may add an agent image to this area, which will immediately be posted to the Agents Section in accordance with the particular agent details you enter.

Now, you can add Name of Agent and description as shown in image below.

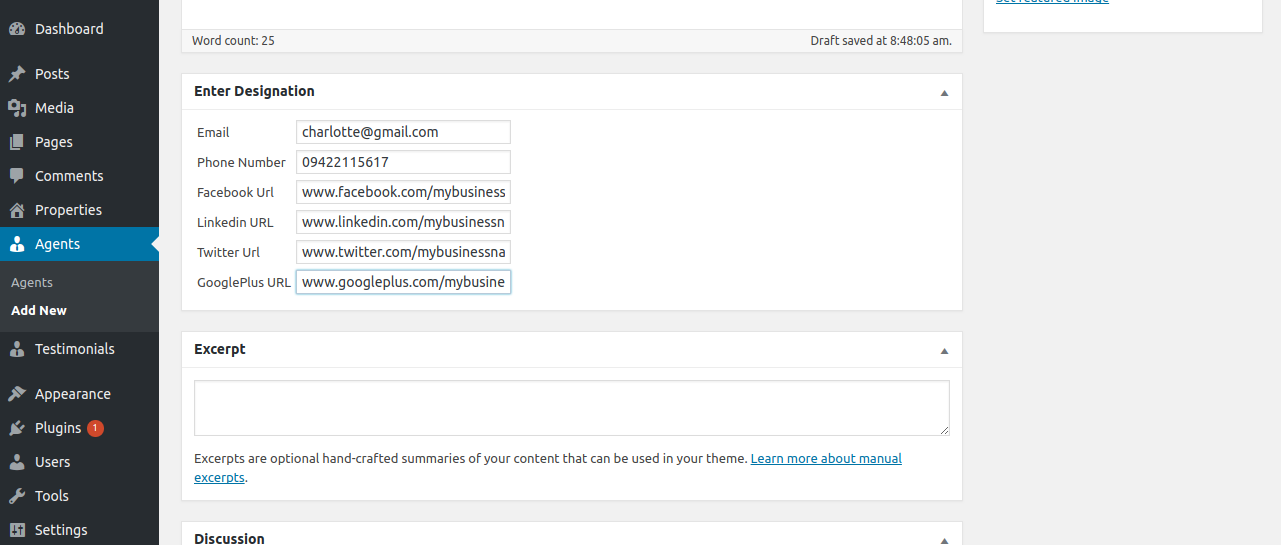
You can add Agent details here
  • Email: You can enter Email Id of an agent here.
  • You can enter Email Id of an agent here..
  • Facebook url: You can enter facebook url of an agent here.
  • Linkedin url: You can enter linkedin url of an agent here.Apartment, etc
  • Twitter url: You can enter twitter url of an agent here. Rent or Sale
  • GooglePlus url: You can enter GooglePlus url of an agent here.

Once, you start adding Agent detalis like this. This Agent details will automatically appear in your website,

Once you have finished adding the agents' details, you may look at the agents section here.

When any user click on the read more button on Agents image, then the Agent's Page will appear. The screenshot of the same is as follows.
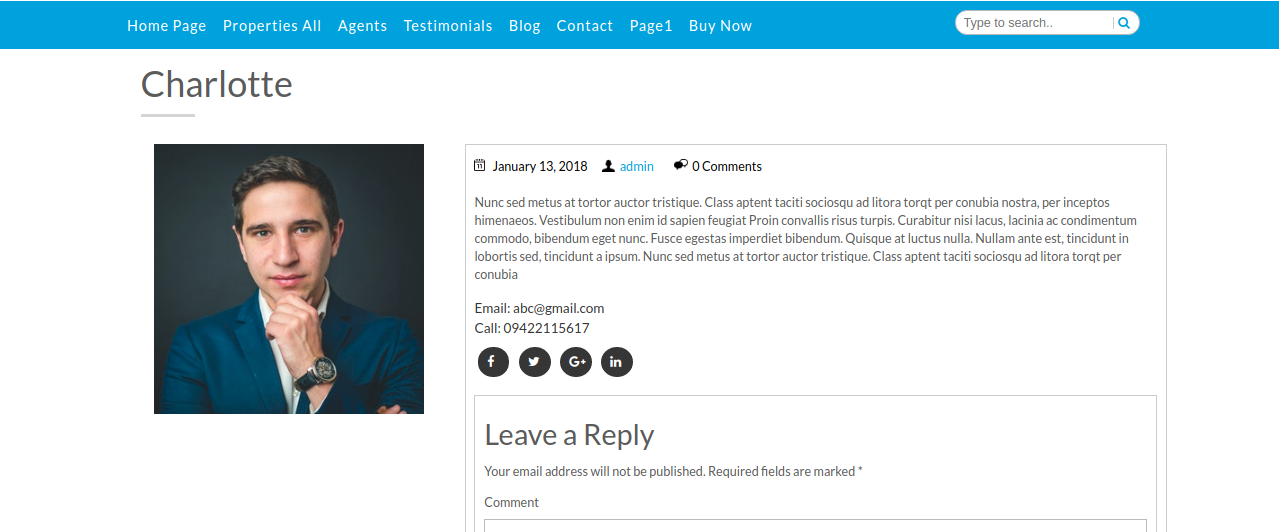
In this way, you can set up Agents Section.

To add Testimonials Go to Testimonials >> Add new
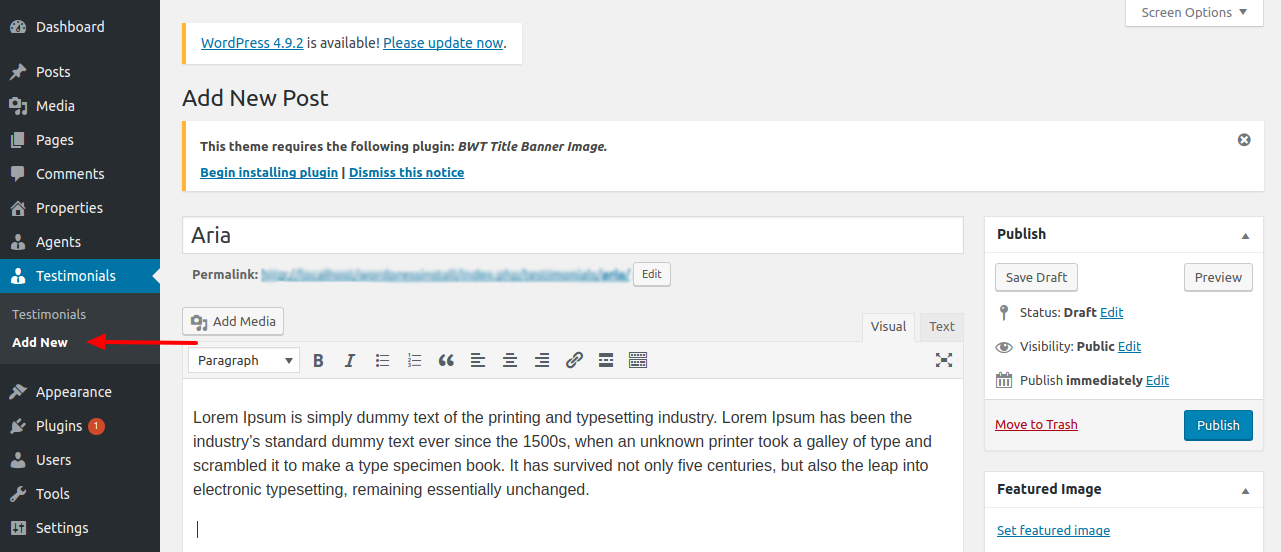
You can add testimonials images to this section using Add Media option, which is shown in the snapshot. These images will immediately upload to the testimonials section.

Now, you can add name of the Person and testimonial here.

You can add Designation of person here

Designation: You can enter Designation of testimonial person here.

You can add an image of a testimonial subject, which is immediately uploaded in the Testimonials area in accordance with the particular testimonial you provide, using the Add Media option that you can see in the snapshot.

You can see the same thing on your website after posting testimonials. Check out these screenshots.

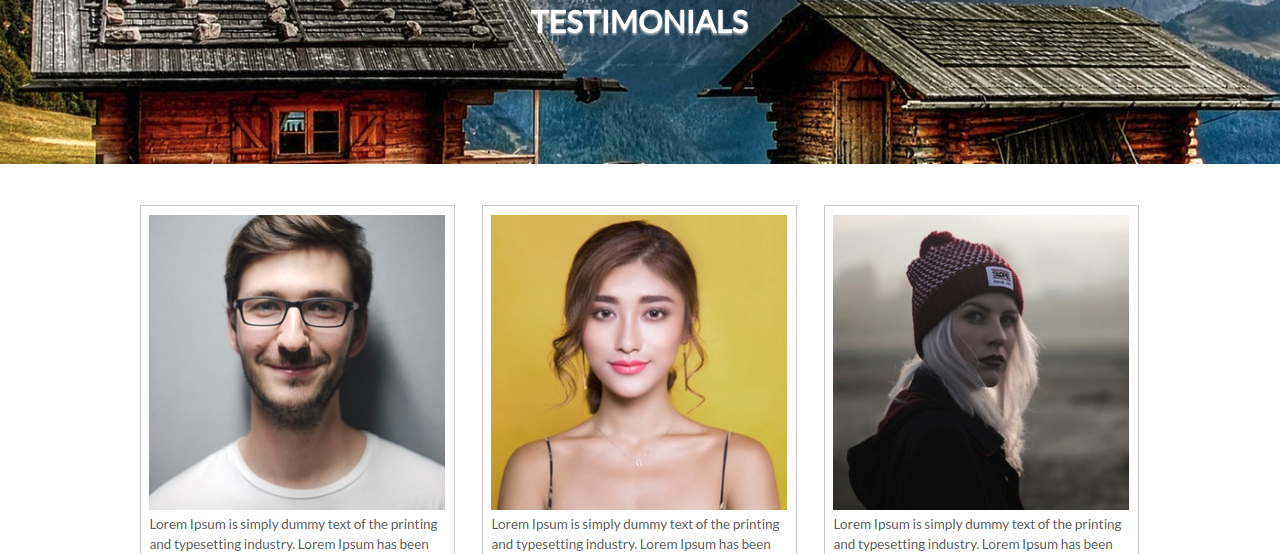
In this way, you can set up testimonials.

Child Themes and Hooks

The process of editing a website using a custom theme editor is simple. If you need to add a section, you can do so by simply editing the child theme and then changing the parent theme.

Hook Code above top bar

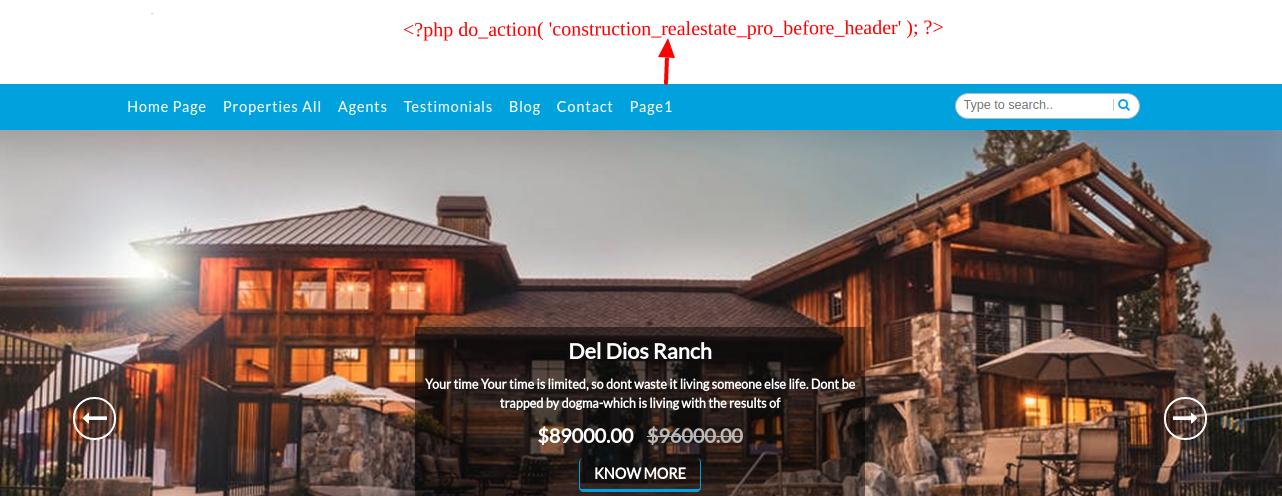
Hook Code above header

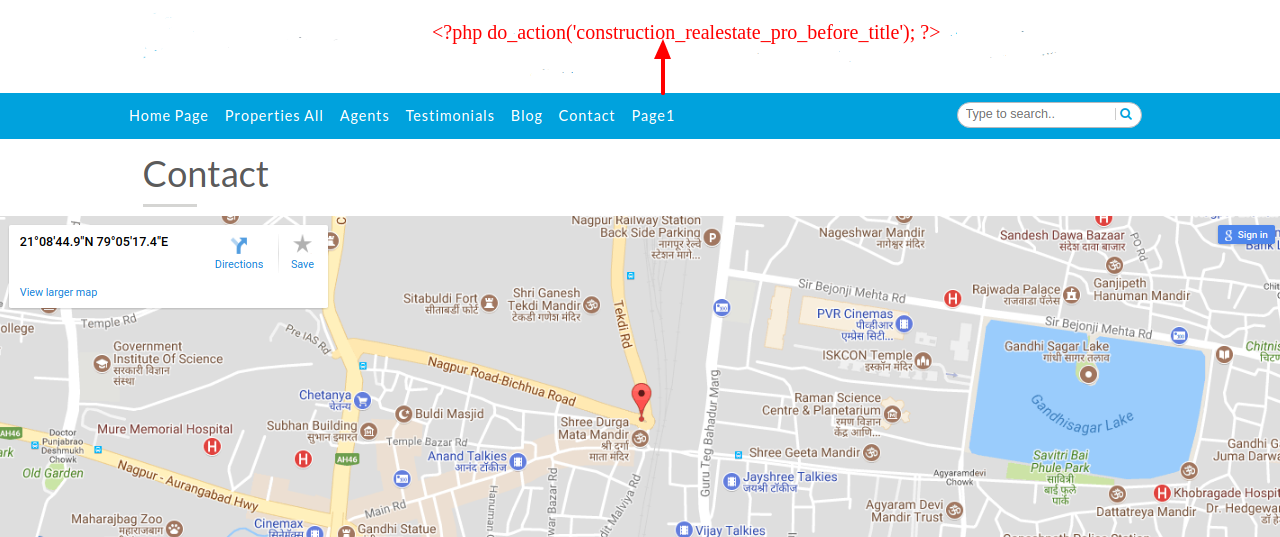
Hook Code above title

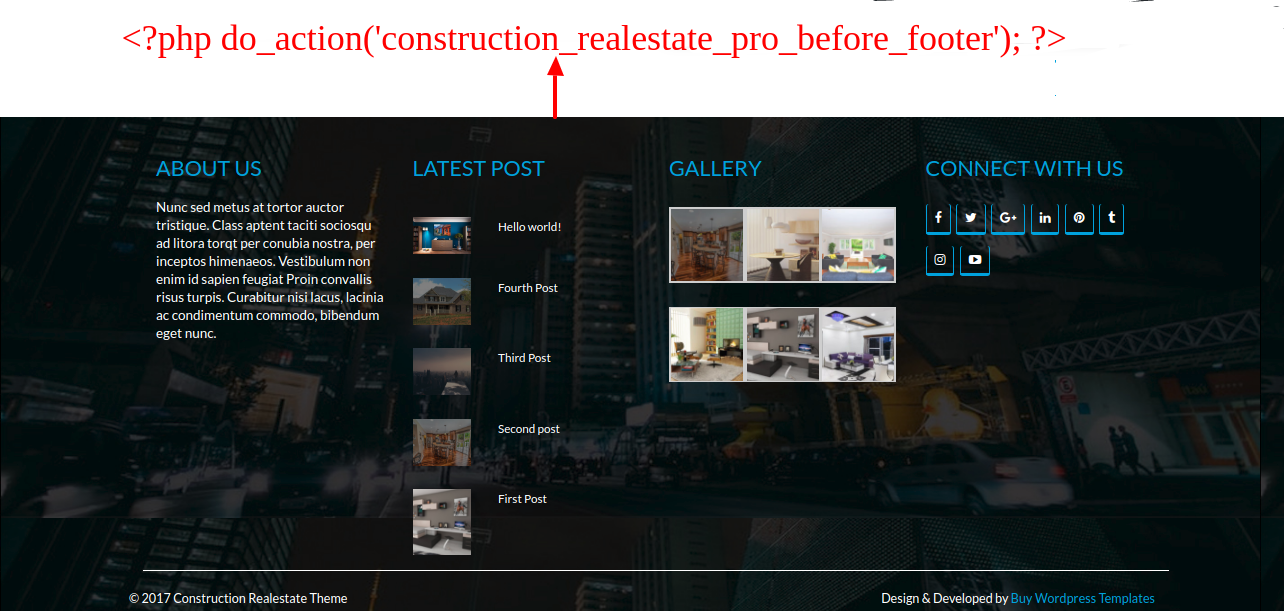
Hook Code Above Footer

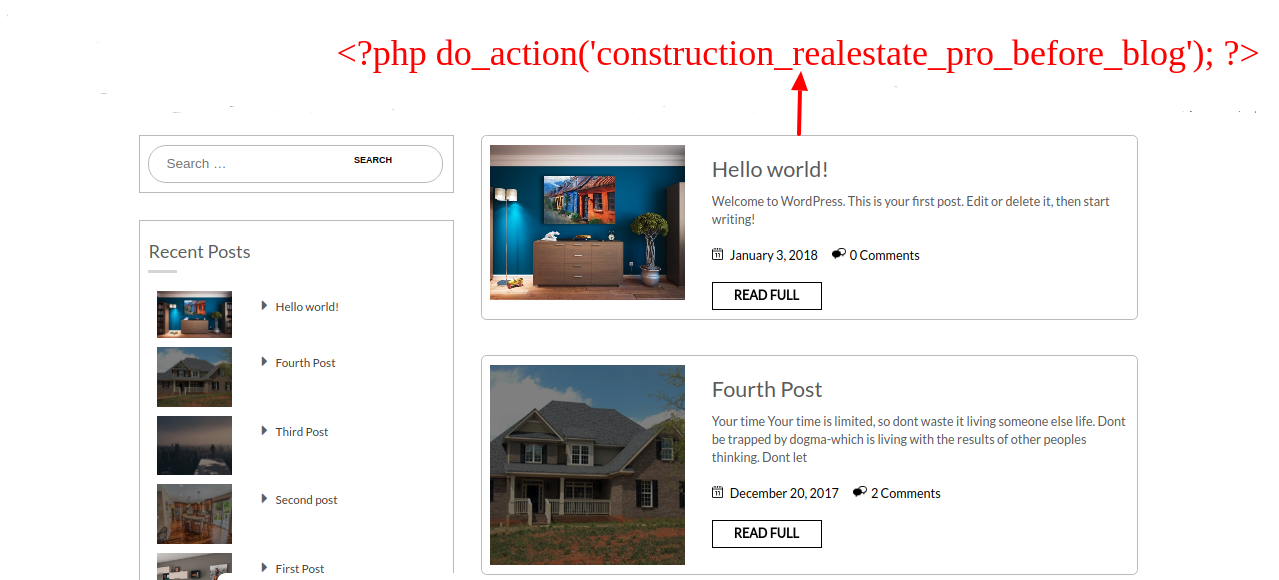
Hook Code Above Blog

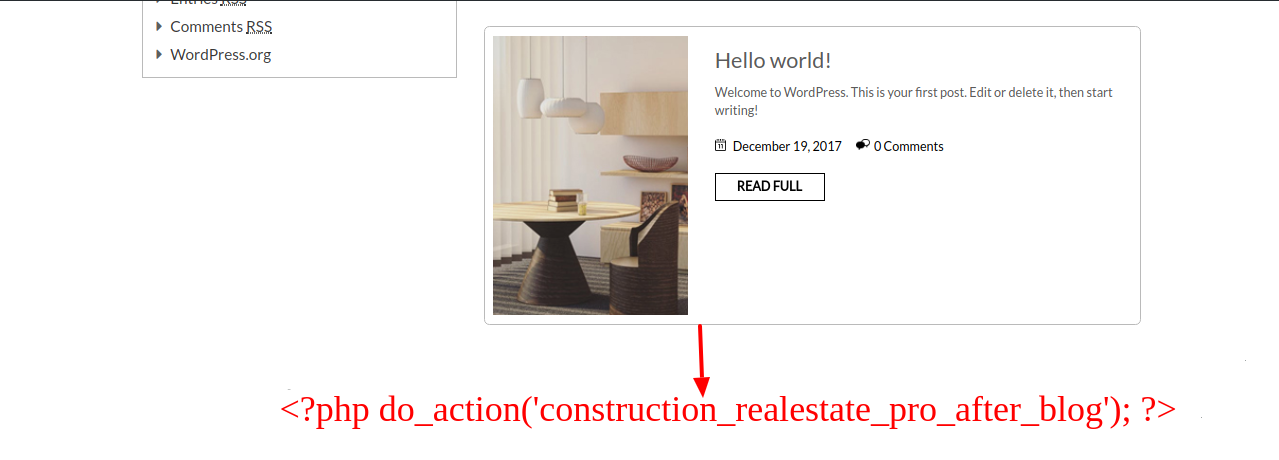
Hook Code Below Blog

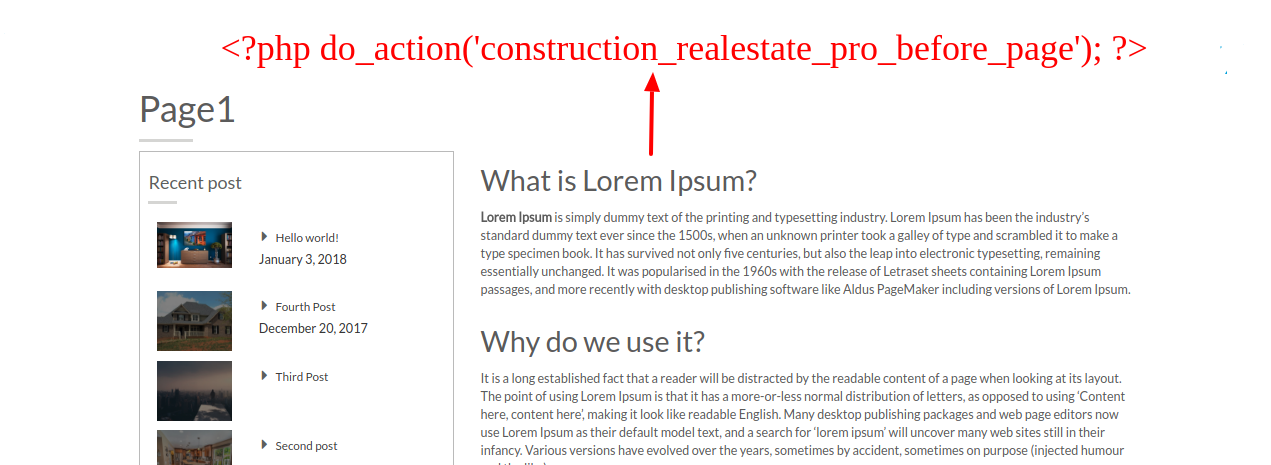
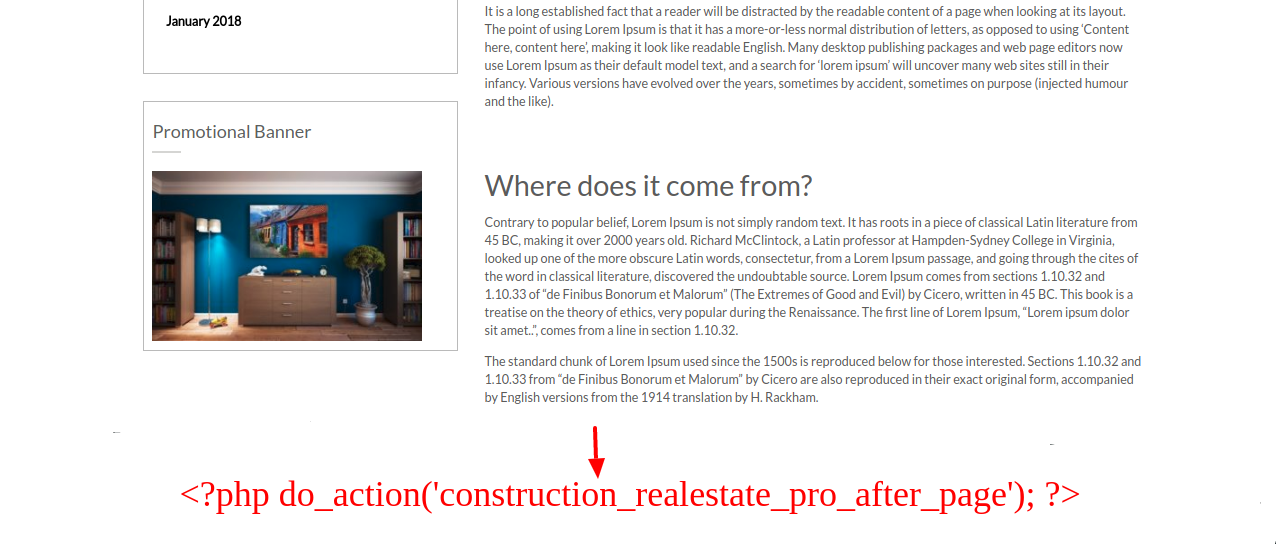
Hook Code Above Page

Hook Code Below Page

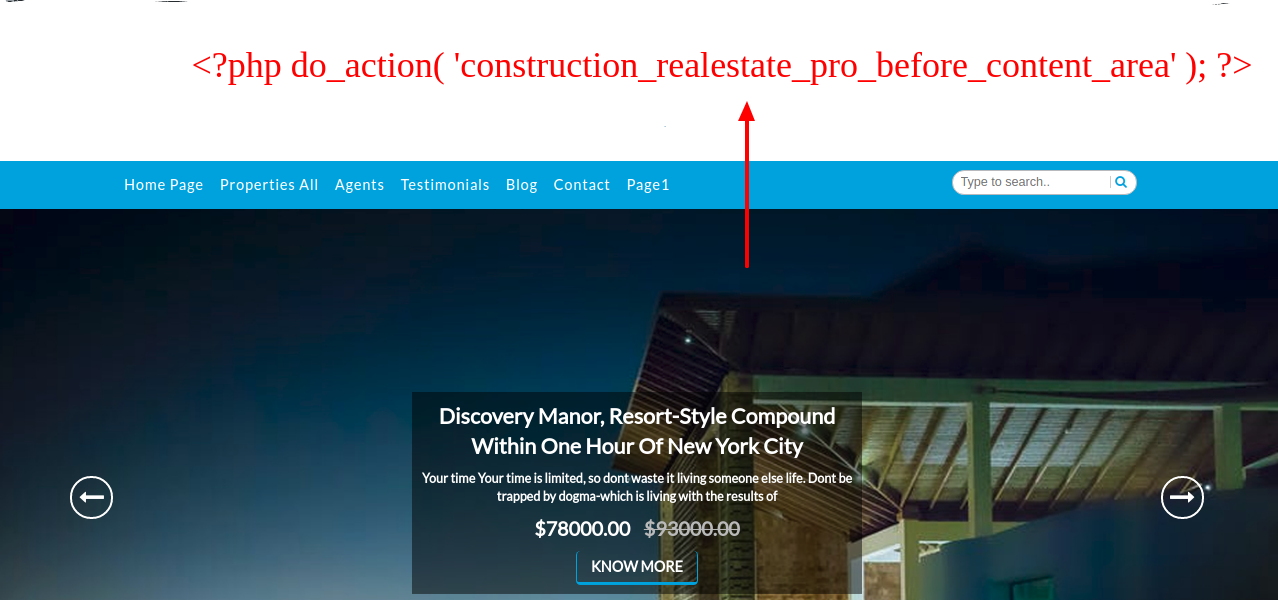
Hook Code Above Content Area

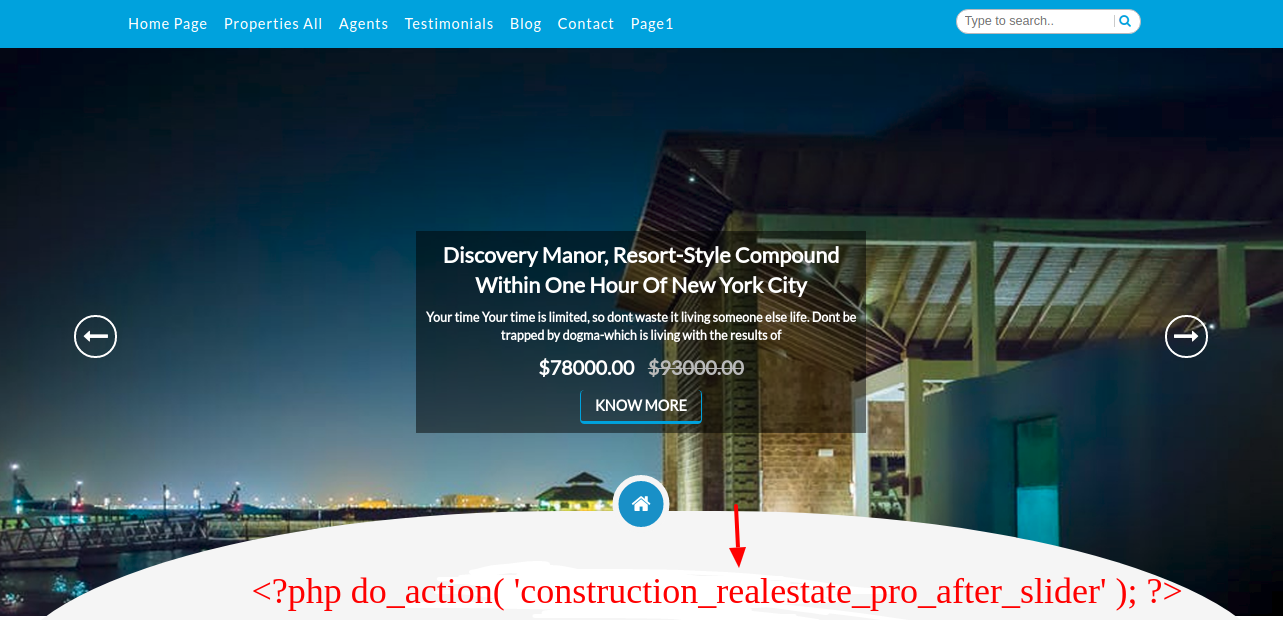
Hook Code Below Slider

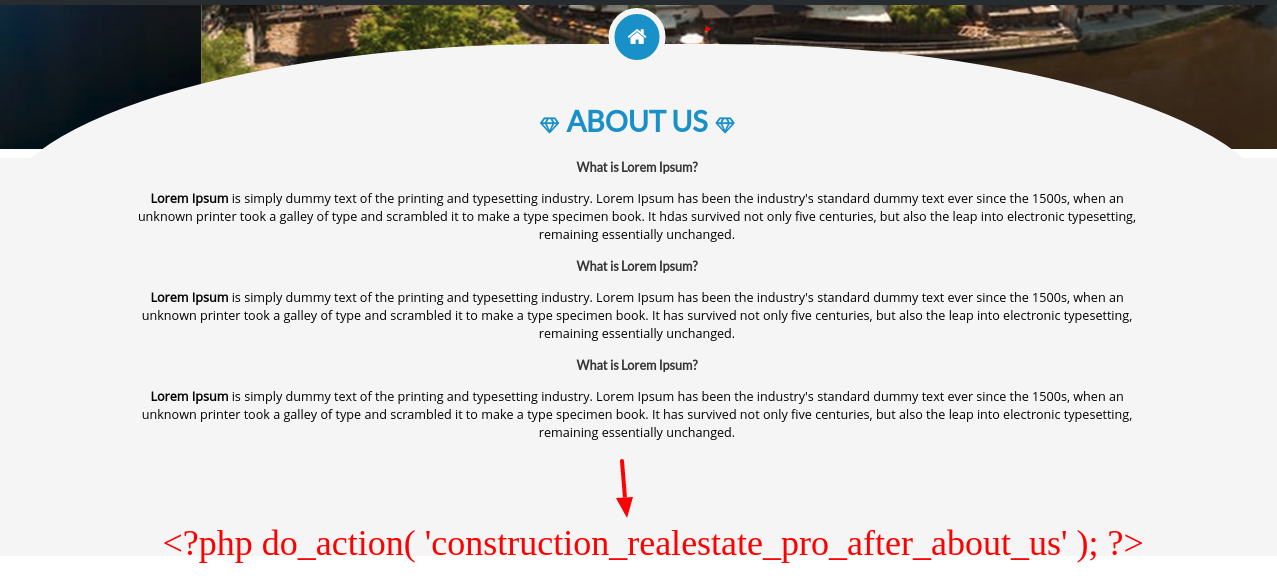
Hook Code below About Us

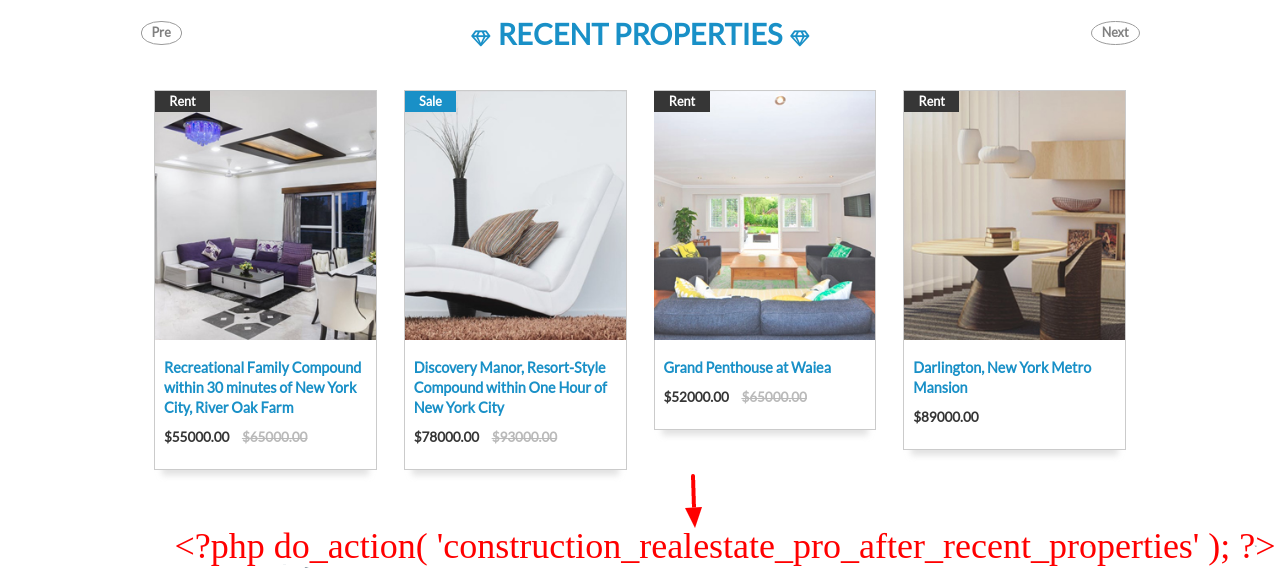
Hook Code after Recent Properties

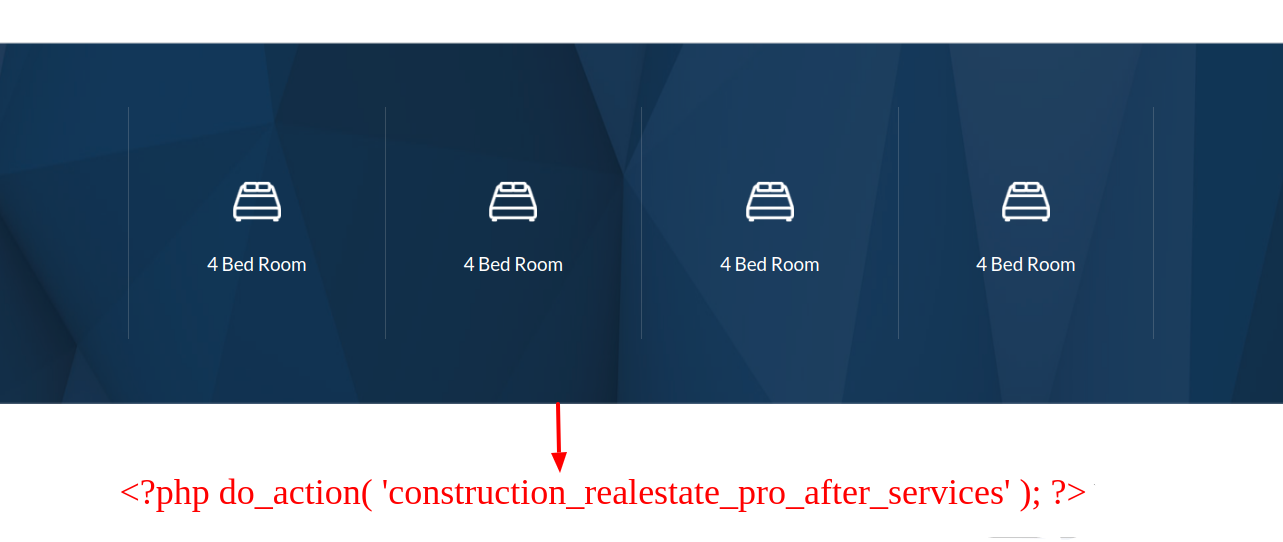
Hook Code Below Services

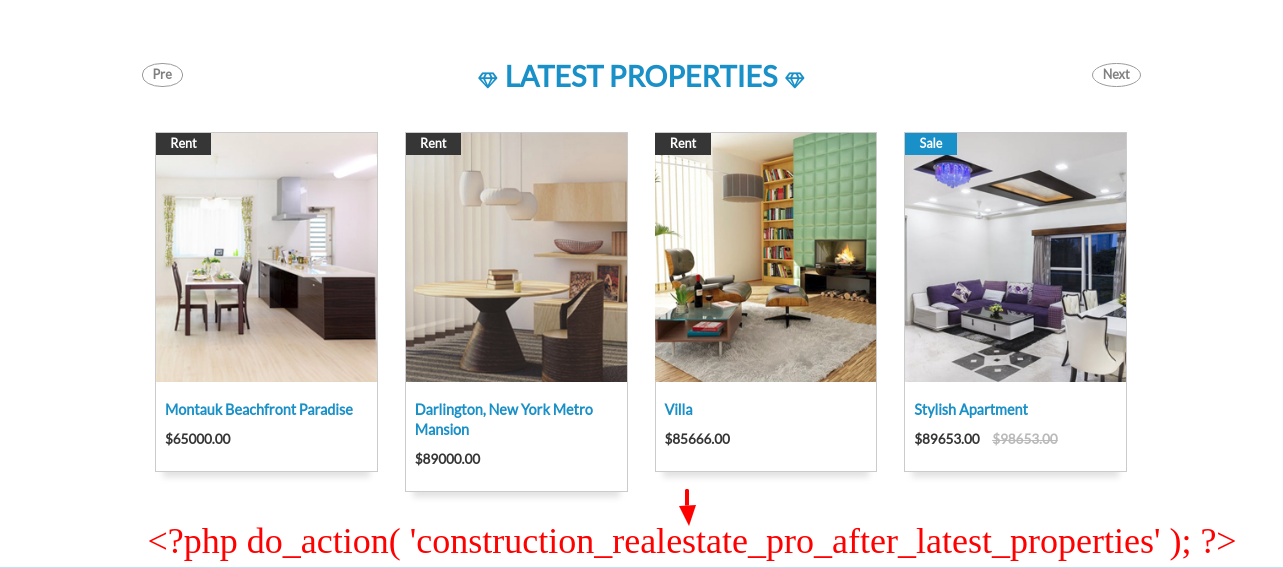
Hook Code Below Latest Properties

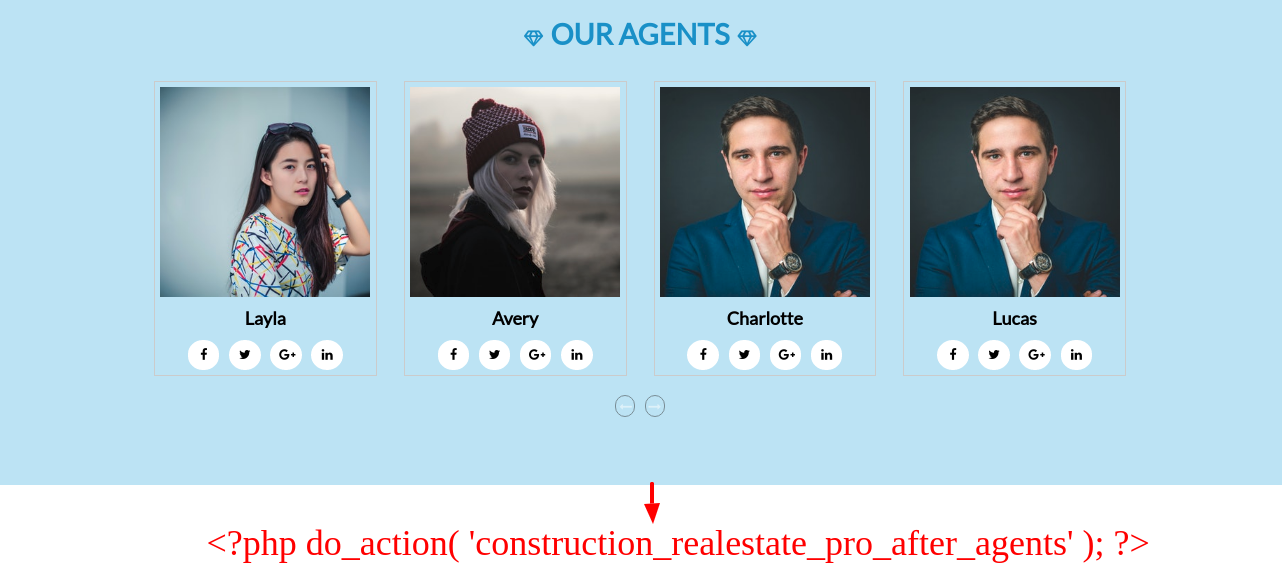
Hook Code Below Agents

Hook Code below Latest Post

Hook Code after Testimonials

Page Templates and sidebars

Page Templates

  • Default Template (the default page template with a right sidebar position)
  • Page (Left Sidebar) (a page templates with left sidebar position)
  • Page (Right Sidebar) (a page template with right sidebar position)
  • Blog (Full Width) (a blog templates with one column without sidebar)
  • Contact Template (the default Contact template with no sidebar position)
  • Home Page Template (the default home page template with right sidebar position)

Post, Categories and Post Formats

Adding category

Here is the list of created categories
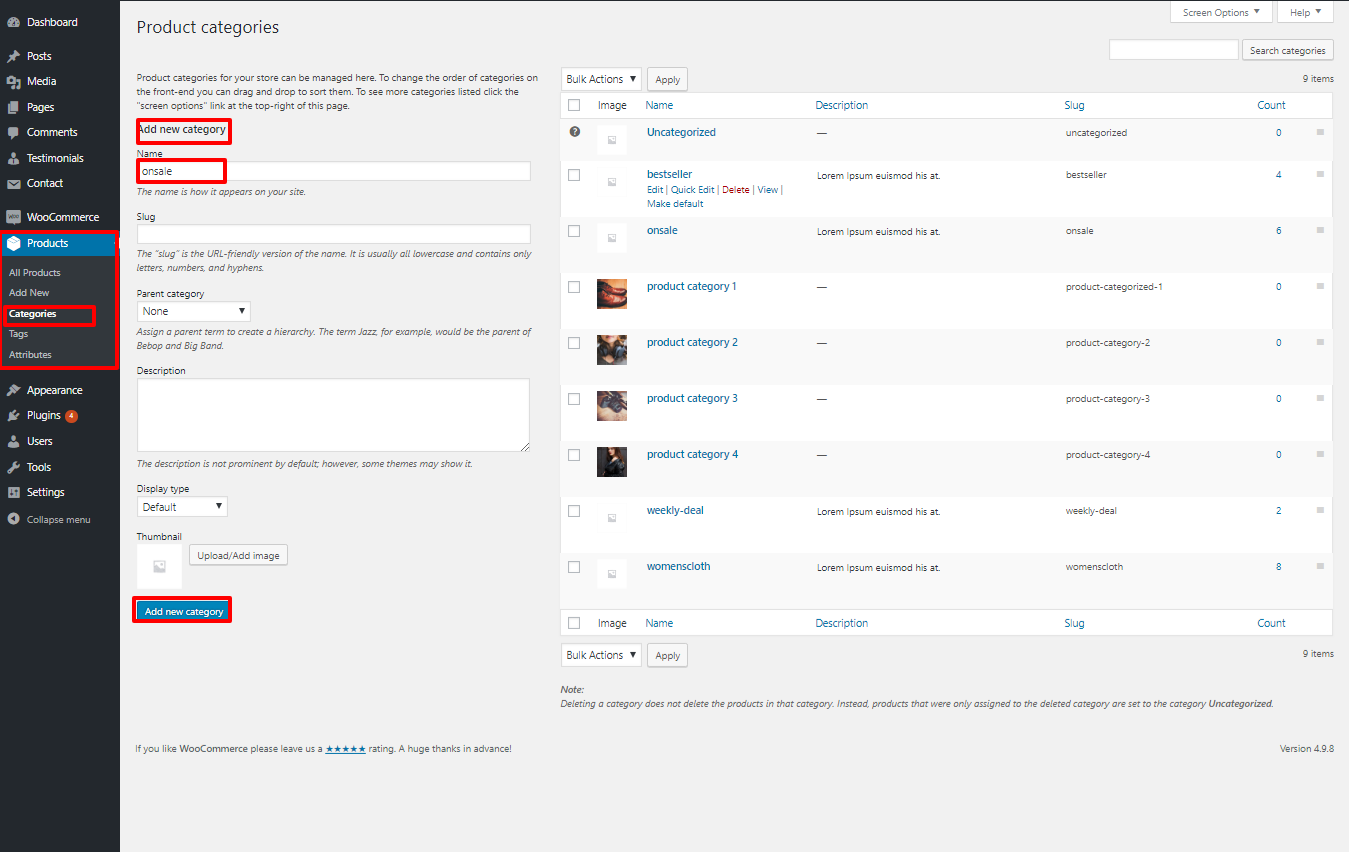

  1. Log into your WordPress Administration Panel (Dashboard).
  2. Click the Posts tab.
  3. With that done, click Categories for blog posts.
  4. Type in the name of your new category.
  5. After that, click the Add New Category button.
Click the Publish button.

Creating a Blog post

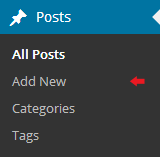
  1. Log into your WordPress Administration Panel (Dashboard).
  2. Click the Posts tab.
  3. Click the Add New tab.
  4. Type in your post content.

Shortcodes

Check out the Themes' list of available shortcodes:

Fetch All the Properties: [all_properties]

Fetch All the Properties By Categpory: [properties_by_cat cat_name="Add category slug"]

Fetch All the Agents: [agents]

Fetch All the Testimonials: [testimonials]
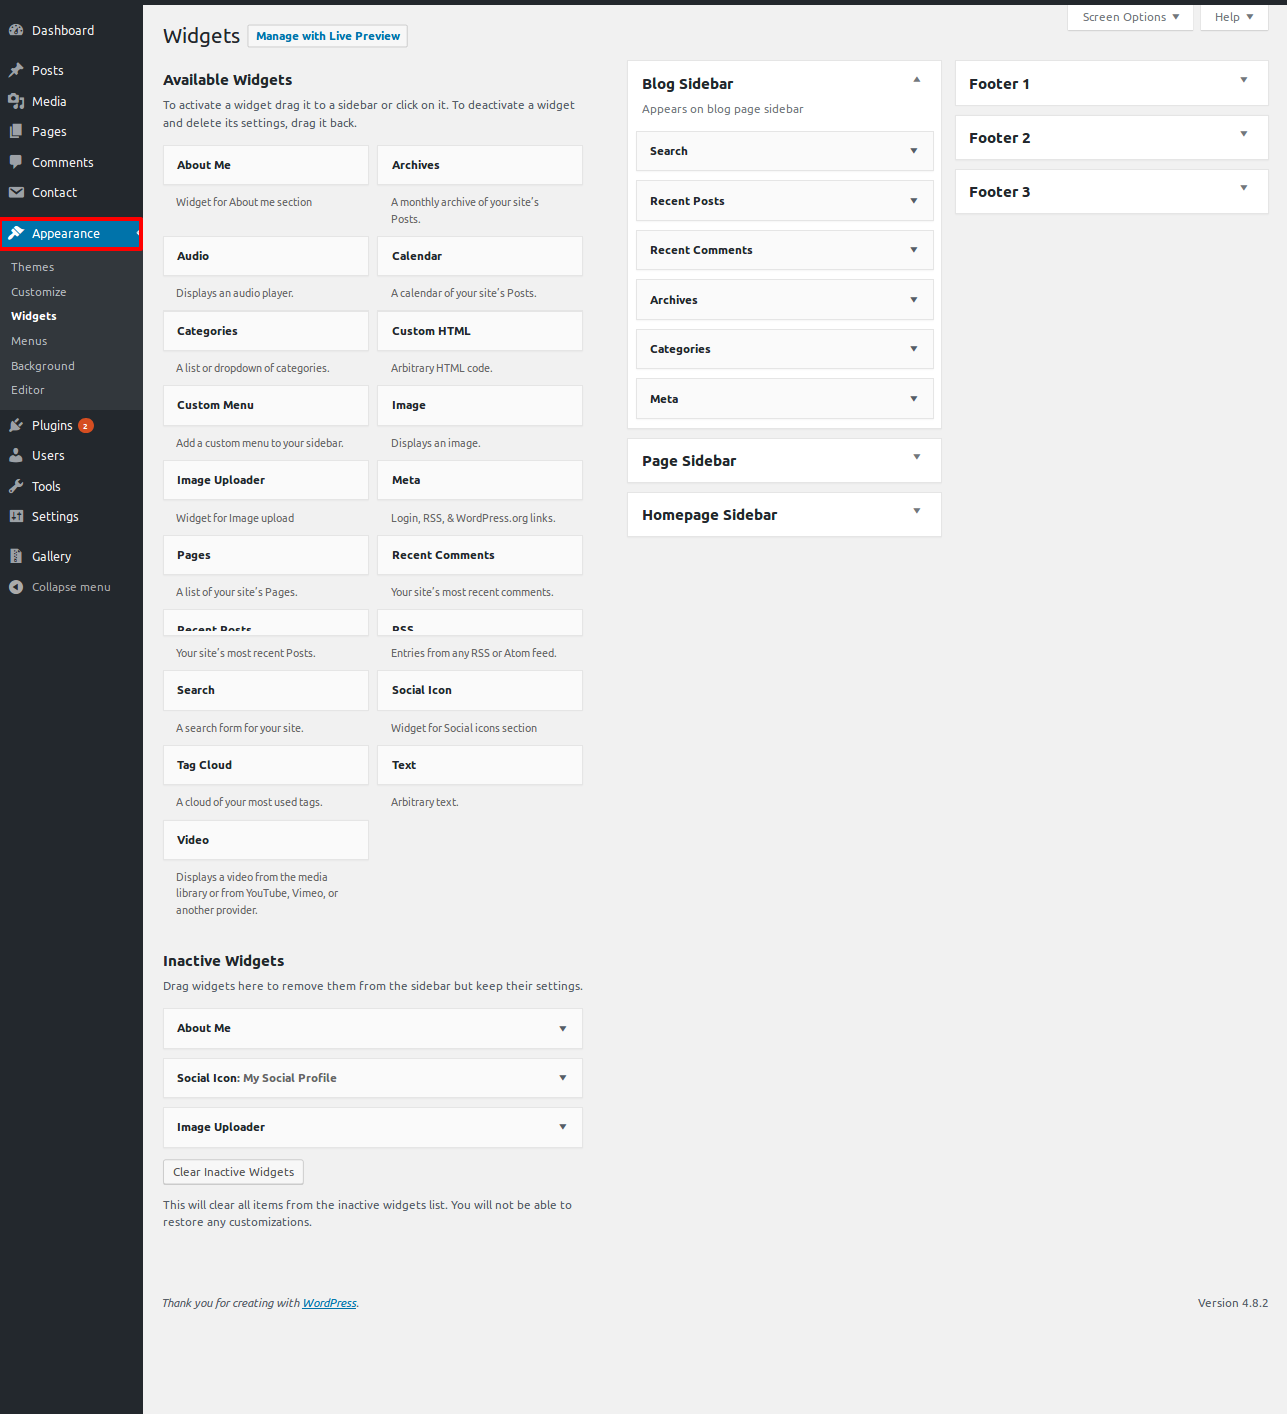
Widgets

Additional Theme Addons

 How to Setup Additional Theme Addons
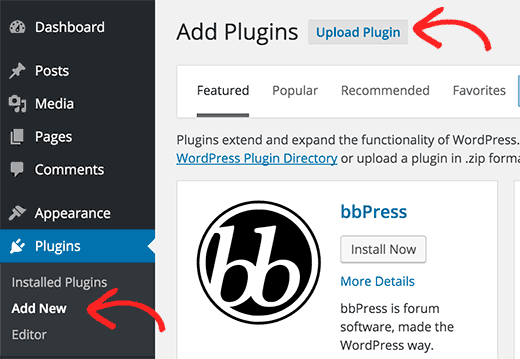
  • 1. First, you need to download the plugin from the source (which will be a zip file (bwt-title-banner-image.zip and bwt-gallery-images.zip)). Next, you need to go to WordPress admin area and visit Plugins » Add New page.
  • 2. After that, click on the Upload Plugin button on top of the page.
  • 3. This will bring you to the plugin upload page. Here you need to click on the choose file button and select the plugin file you downloaded earlier to your computer.
  • 4. After you have selected the file, you need to click on the install now button.
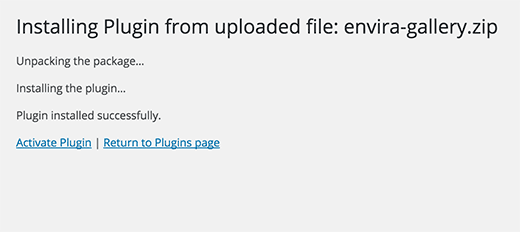
  • 5. WordPress will now upload the plugin file from your computer and install it for you. You will see a success message like this after installation is finished.
  • 6. Once installed, you need to click on the Activate Plugin link to start using the plugin.