Car Rental Pro wordpress theme Documentation
Introduction
Thank you for buying our WordPress Theme. The complete procedure to configure and manage a WordPress Website from the beginning is shown in this documentation in different portions.
What is WordPress CMS?
WordPress is an open source tool which is based on PHP and MySQL to create websites. It is a completely free content management system(CMS) and a strong blogging platform. With this CMS, you can develop websites and solid online apps. You hardly require any knowledge or technical capability to manage it. WordPress has become the most accepted website development software available because of it’s varied aspects like it’s easy usage and flexibility. Learn More
What is a WordPress template
A WordPress template serves as the skin for websites built using the WordPress content management system. A WordPress template is incredibly simple to setup. You may quickly modify the appearance of your WordPress website by installing a new template. A WordPress template comes with all the necessary source files, and you are free to change and expand it however you see fit.
Help and Support
Files structure
The template package you have downloaded consists of several folders. Let's see what each folder contains:
-
Screenshots : contains template screenshots. Not for production.
-
Theme : contains WordPress theme files.
-
alt-car-rental-pro.zip: this folder content all the necessary files for the theme.
-
license.txt : contains license details.
-
readme.txt : contain information about theme images path and font use and usage scritps.
Key Activation
This is how the key activation procedure can be carried out.
Use the License Key that you will receive via email to activate your licence.
The process to activate a licence is as follows.
Go to the Dashboard Appearance TC Key Activation Enter Key Save Changes.
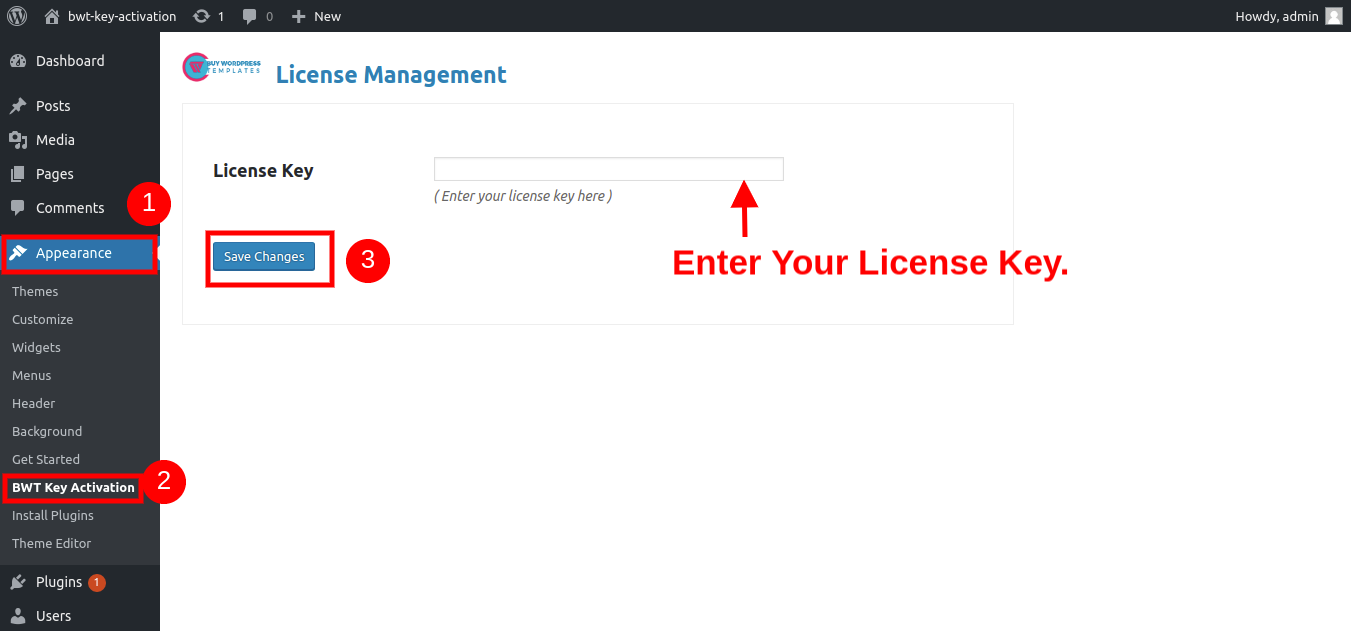
After Entering The Key Activate Licence.

After you Activate Licence,the key will be active and then you can Getstarted with the Theme.

In this way you can activate your Licence Key.
My site was working fine before? Who changed the File Permissions?
WordPress may be unable to create directories, upload photos, or execute some scripts if file permissions are set incorrectly.
To manage files and make folders on the server, WordPress requires permissions.
- Next, choose "File Permissions" from the context menu when you right-click on all of the folders in the main directory.
- wp-config >> permissions dialog box >> click on checkbox read and write >> Click on the OK button to continue
- Repeat the same procedure for the wp-content subdirectory.

Template Installation
Template installation is very easy process.
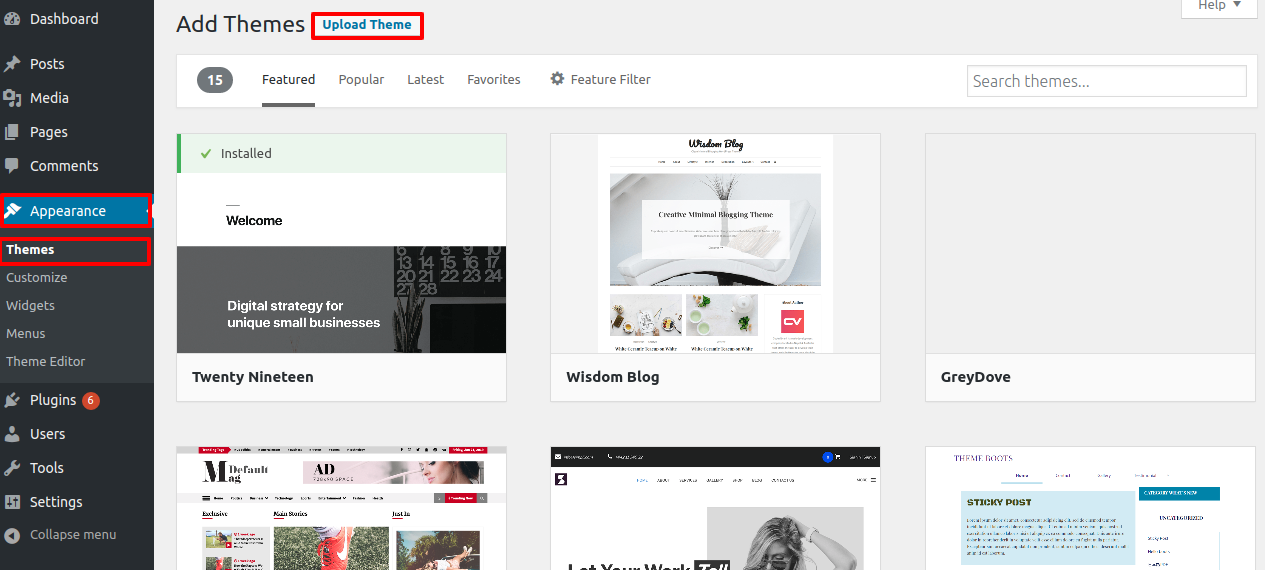
Step 1. Utilize the WordPress admin to install a theme
The first step is to log in to your WordPress admin dashboard. then click on
Go to the menu Appearance Themes

When arriving at the themes page, select Add New from the menu at the top.

Click on upload theme button.
Choose your alt-mobile-app-pro.zip theme by clicking on the Browse button, and then click the Install Now option.
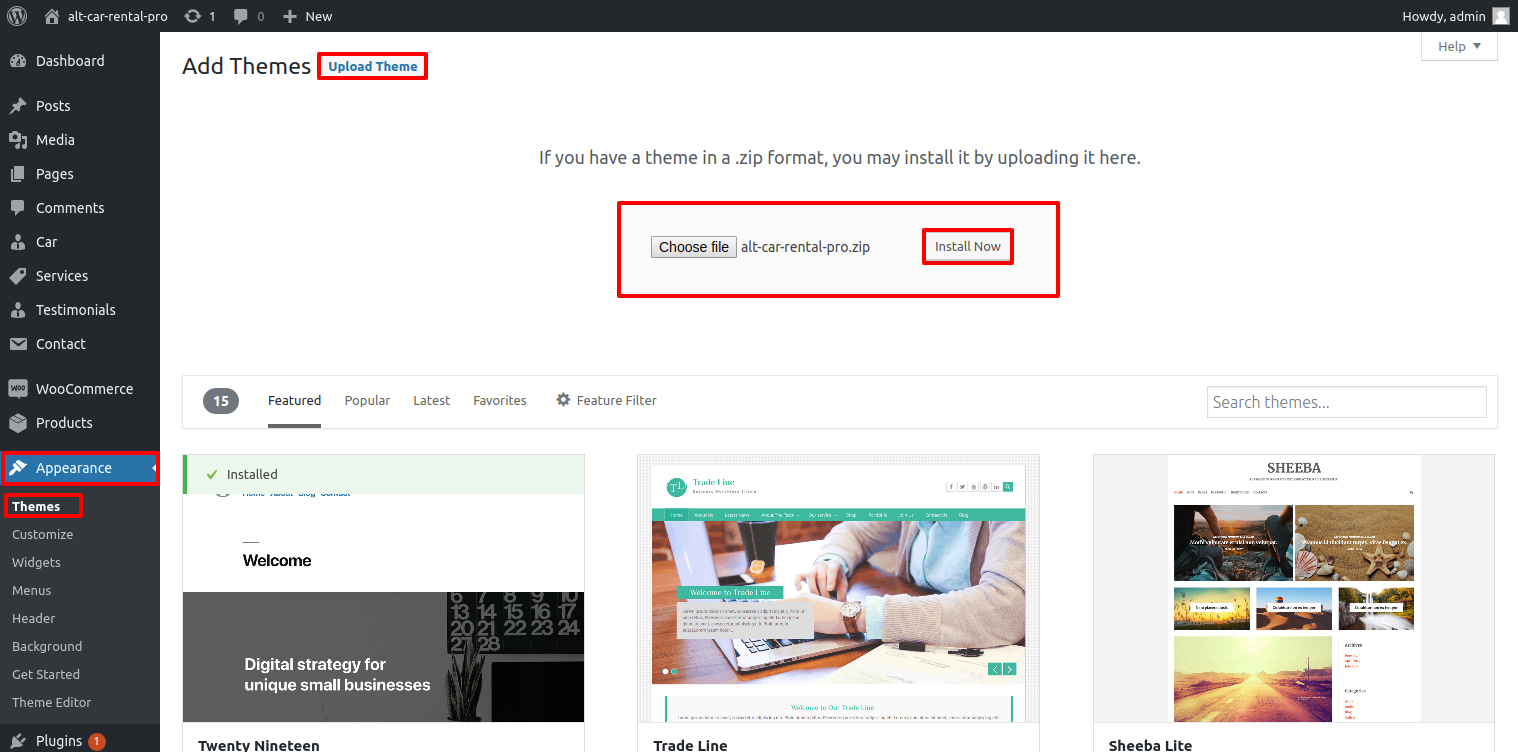
WordPress will now complete the installation of your theme and display a success message and a link to activate or view a live preview.
Step 2. Install a Theme using FTP
The theme can be uploaded using FTP, which is your second installation option. To use this method, first log into your website using FTP and navigate to the wp-content/themes folder. Just extract the Total folder from the theme file you got and upload it to your server.
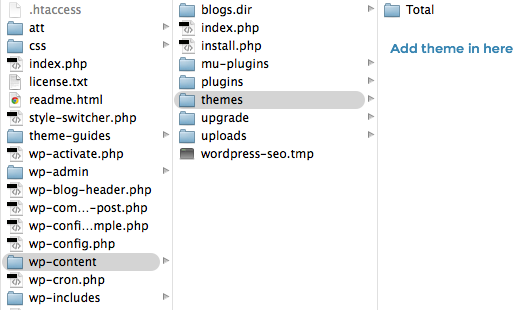
Next log into your WordPress site and navigate to Appearance Themes to activate total folder.
Plugin Installation.
Using plugins, you can increase and expand the usefulness of WordPress.
How to turn on plug-ins You must enable the plugin if you want to include these features in your theme. In order to activate the plugin in your theme, follow these steps.
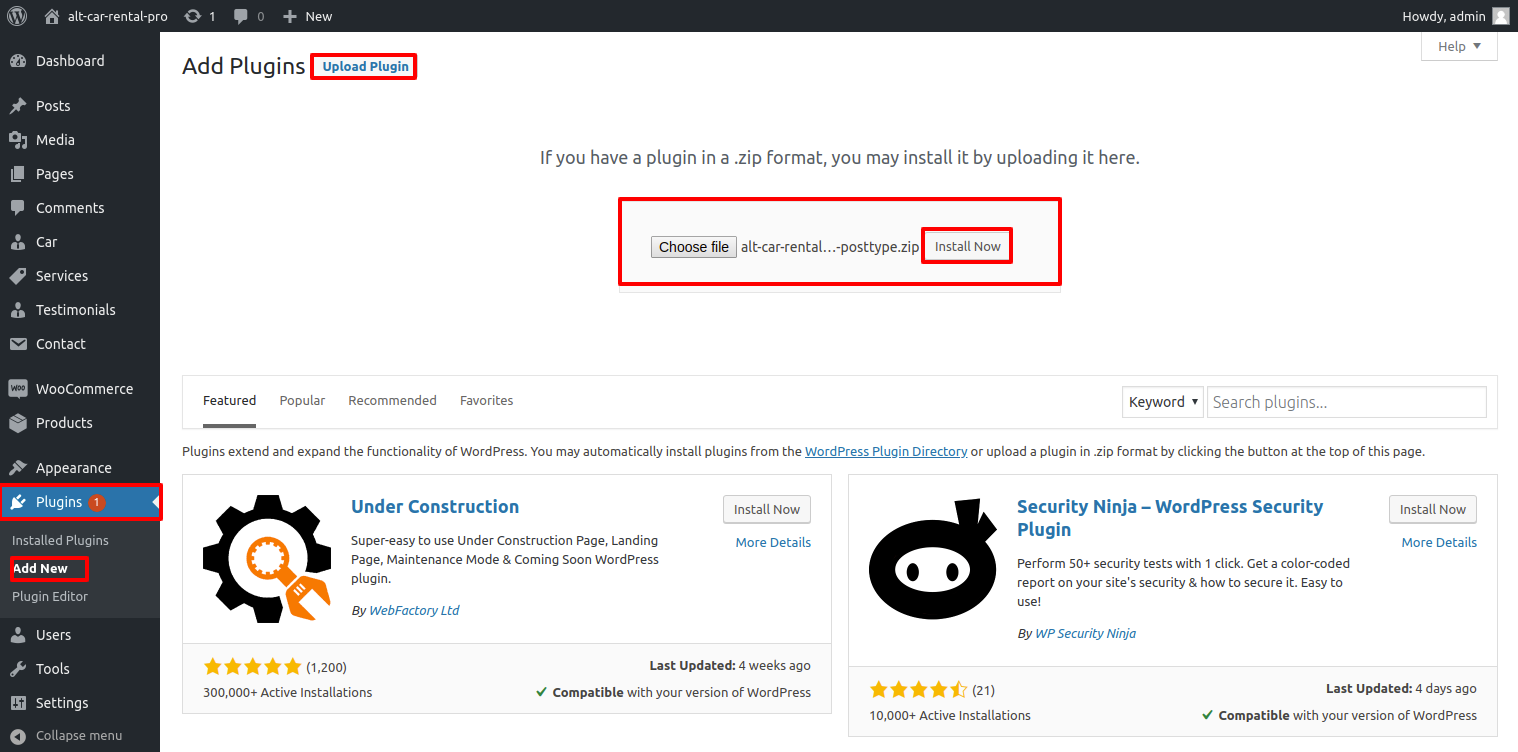
The following instructions for uploading a plugin can be used to directly install a WordPress plugin from a.zip archive.
Install Required Plugins:
Mobile App Pro Posttype plugin, Contact Form 7
Mobile App Pro Plugin must be installed and activated before using the Event Planner theme; otherwise, your site's information will not be visible.
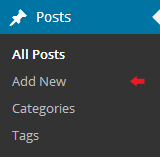
1.Add Plugin : Go to Dashboard Add New Upload plugin..

enable the install button after clicking it.
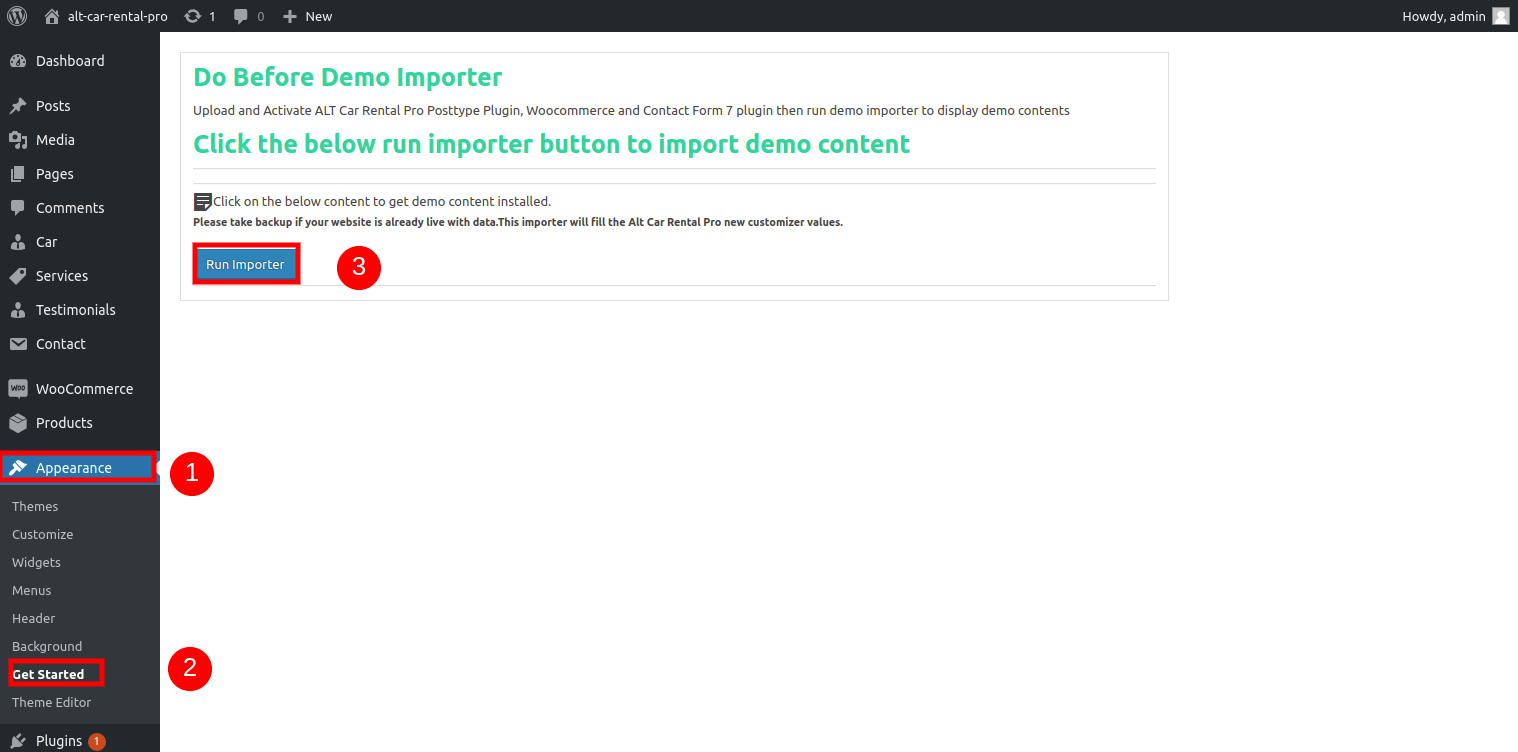
One-Click Demo Content Importer
To set up your theme, simply select to import sample content. You can follow the instructions in this content to create your website for website creation.
Go toDashboard >> Appearance >> Get started
Click on"Demo Content Importer" and then "Run Importer".
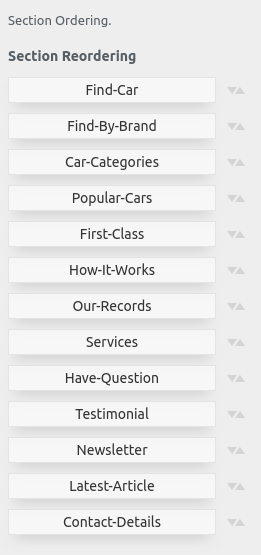
Section Ordering
How to Arrange and Reordering Section
To reorder an area simply means to arrange it according to our needs. Drag the section to the top or bottom as necessary in order to continue with this part. When you drag a section to the top or bottom, your front view will alter in accordance with the customizer's settings.
You can reorder sections by simply dragging and dropping the choices into the desired order.
In order to continue with Section Ordering.
Step 1 Go to Dashboard >> Appearance >> Customizing >> Plugin Setting >> Section Ordering
After selecting "Demo Content Importer," click "Run Importer."
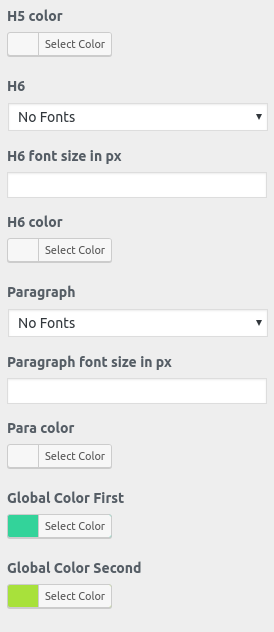
Typography / General settings
The procedure of changing the colour or font is very simple. These choices are available in all customizer sections. It is a full image that demonstrates the colour and font palette. You can change the colour and font of the headings, paragraphs, and buttons with a single look or click.
Depending on the amount of options available in each section, each one has the option to customise the colour scheme for the headings, title and text, paragraphs, button text, and button background.
Proceed to Typography / General options now.
Go toDashboard >> Appearance >> Customizing >> Typography / General settings

How to set up homepage
The index page with the most recent post will be visible when you visit your site after activating the theme. You must now configure the home page template so that it displays the entire demo area on your front page.
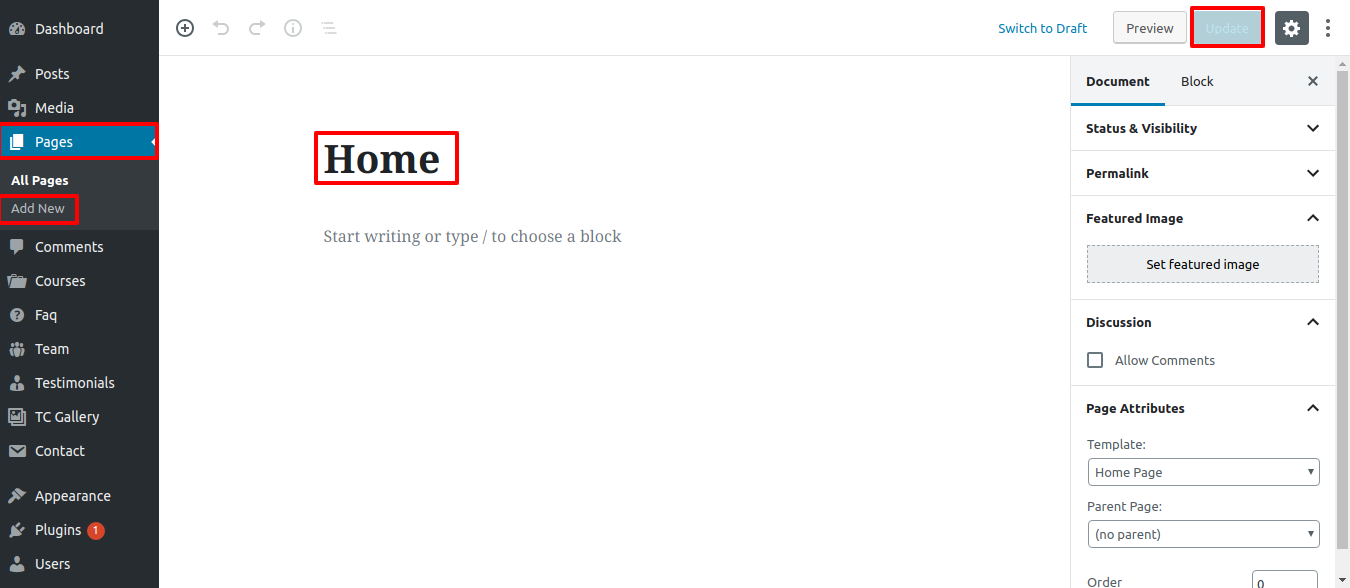
Setup Home Page
Use these guidelines to create Home page.
1. Create Page to set template : Go to Dashboard Pages Add New Page.
Select the template.
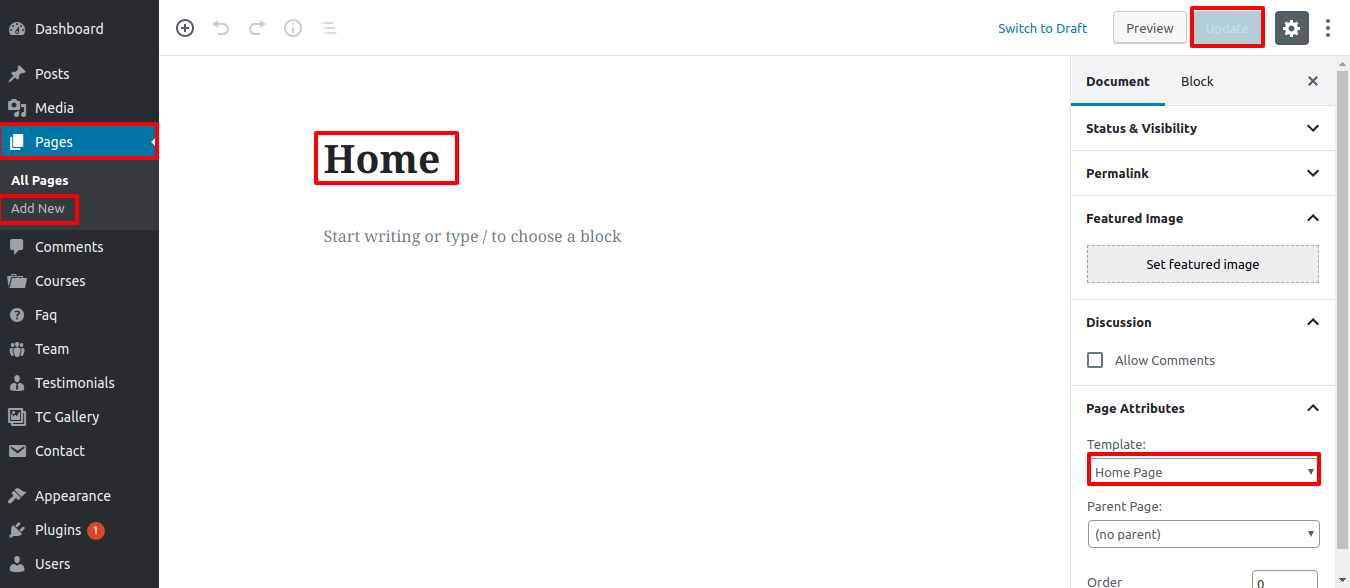
2. Set the front page: Go to Setting Reading Set the front page display static page to home page.
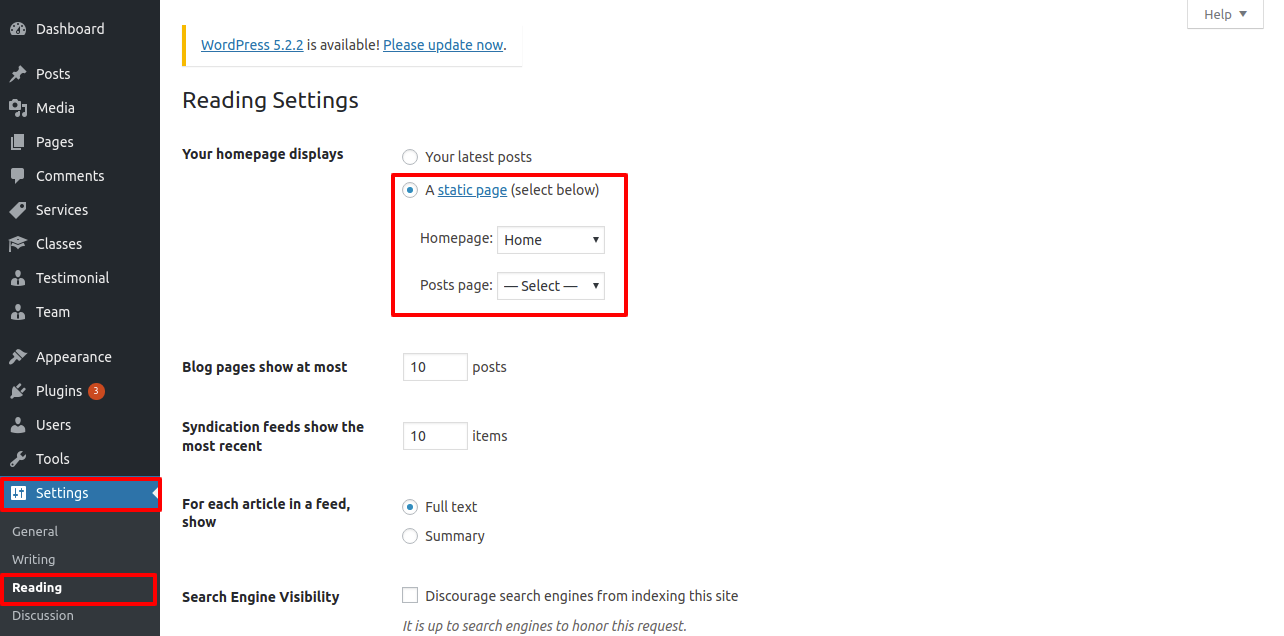
When you're finished, you can view the entire demo collection on the front screen.
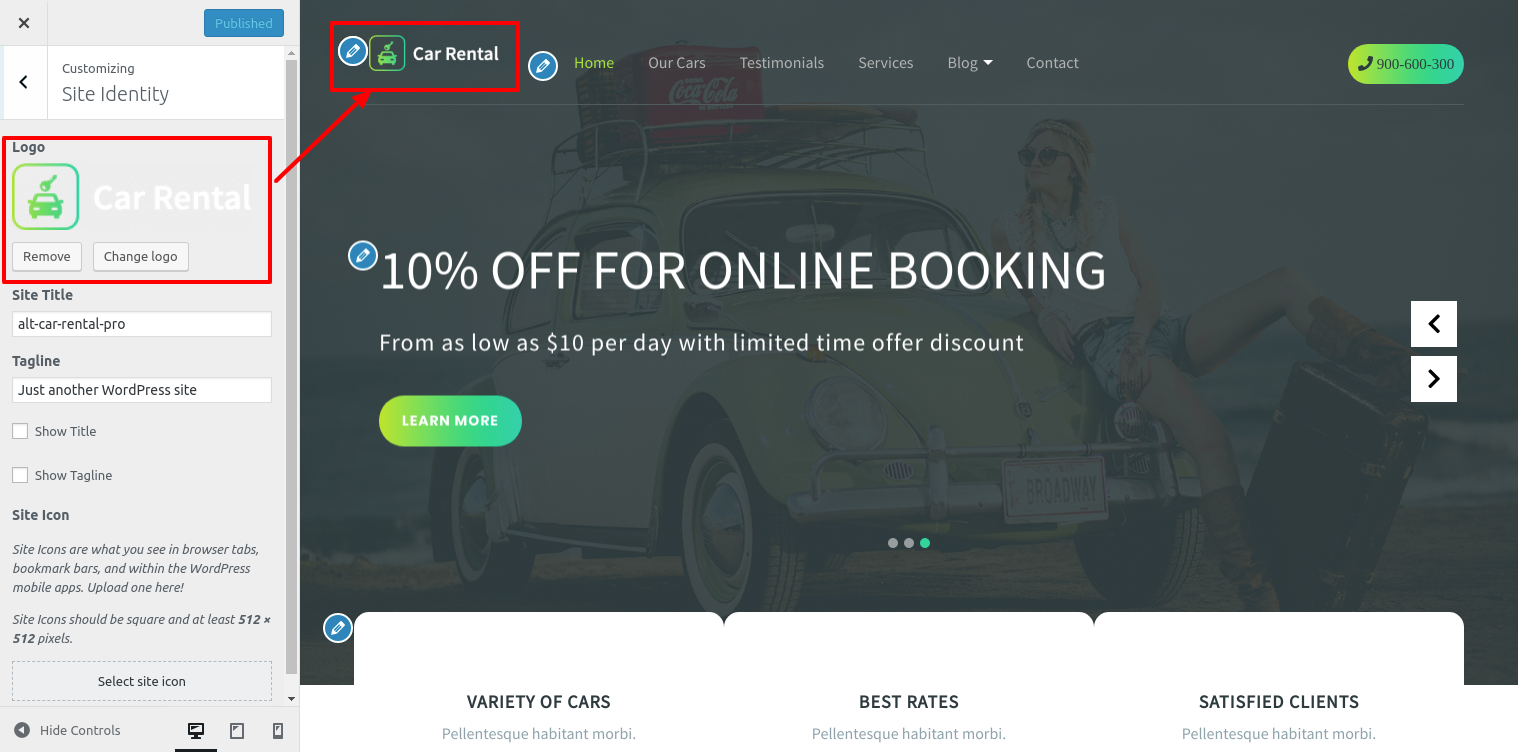
Site Identity
Follow these instructions to continue with Site Identity.
Site Identity
Go to Appearance Customize Site Identity .
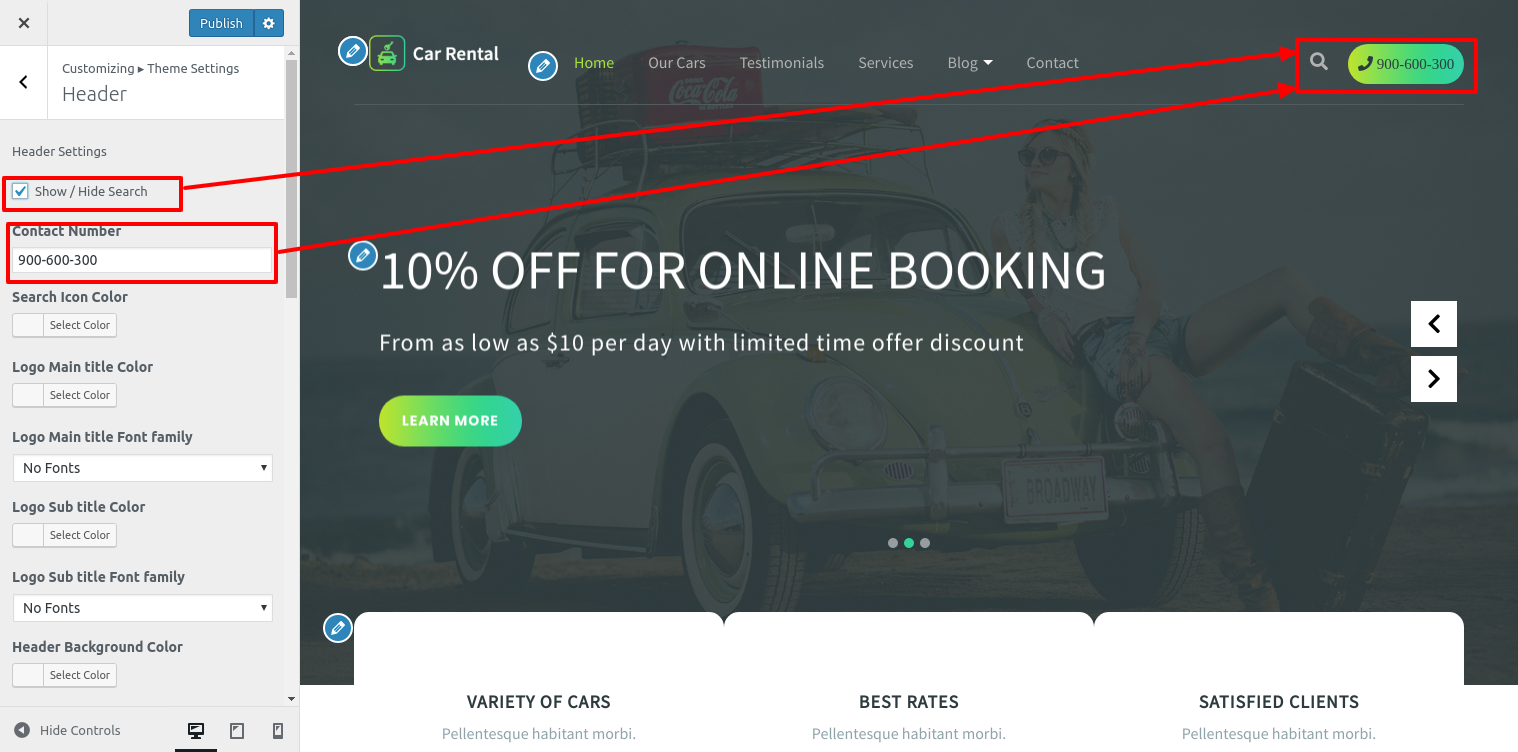
Setup Header
Follow the instructions below to set up the header..
Go to Dashboard Pages Add New
You must build a menu and add menus from scratch for menus. Insert menu elements.

Go to Appearance Customize Theme Settings Header.
If you want to add more pages, follow the same procedure again.
This allows you to include the Header section.

Setup Slider
In order to continue, with slider.
Go to Appearance Customize Theme Settings Slider Section.
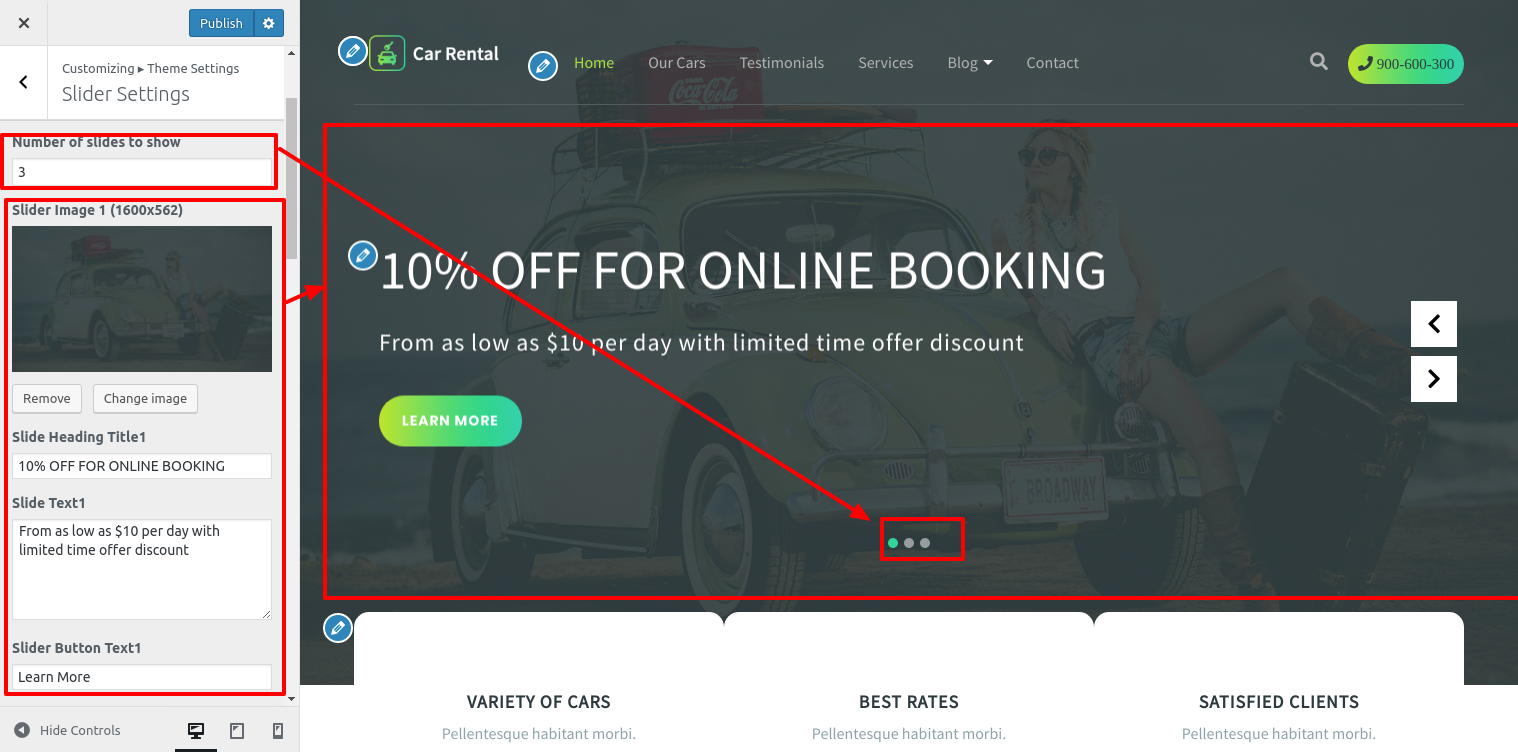
This allows you to include the slider section.
Setup Our Goals Section
In order to continue, with Our Goals Section.
Refer to the images below for additional setup instructions.
Go to Appearance Customize Theme Settings Our Goals Section.

This will enable you to build up Our Goals Section

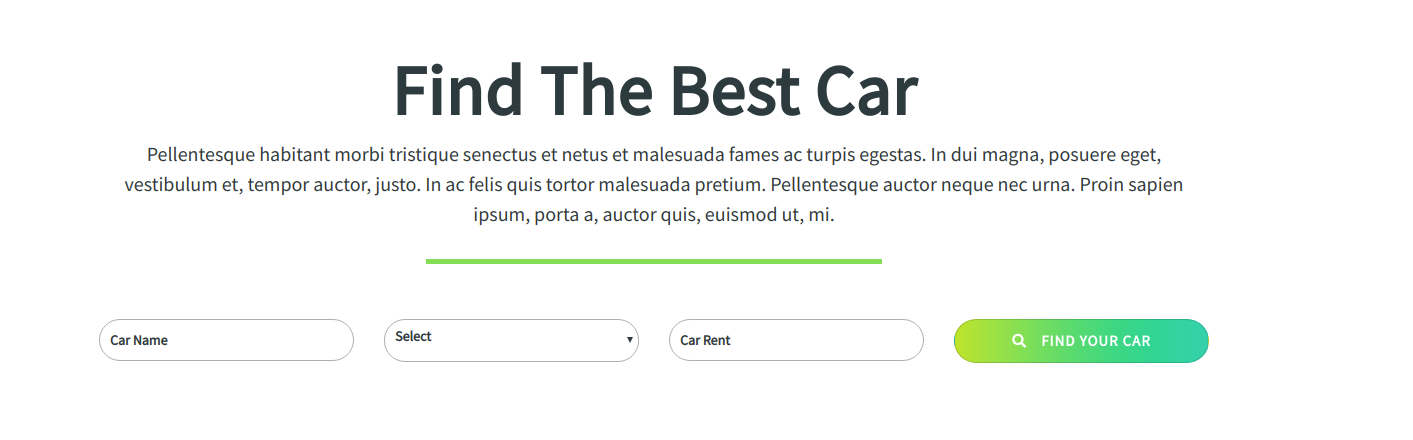
Setup Find Best Car Section
In order to continue, with Find Best Car Section.
Refer to the images below for additional setup instructions
Go to Appearance Customize Theme Settings Find Best CarSection.
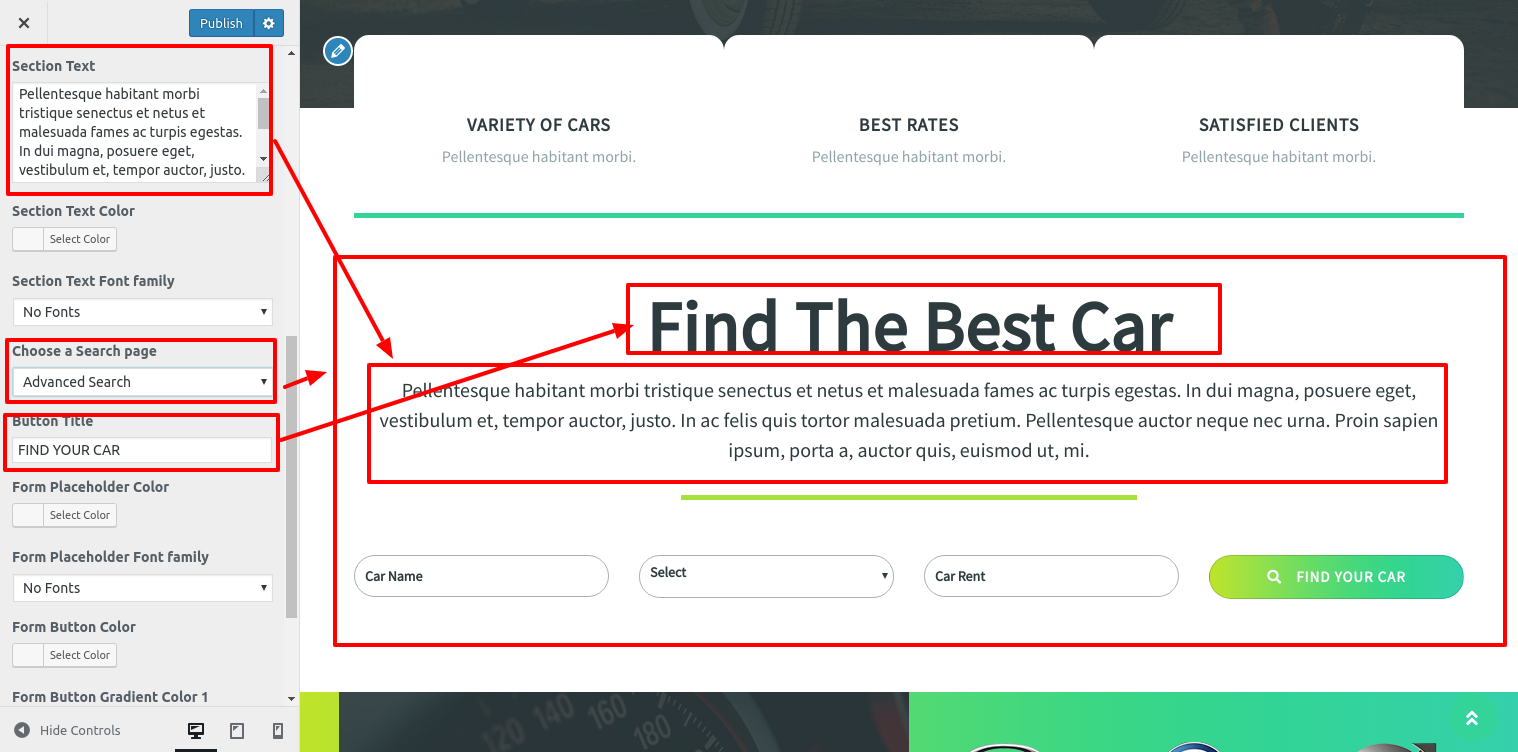
This will enable you to build up Find Best Car Section
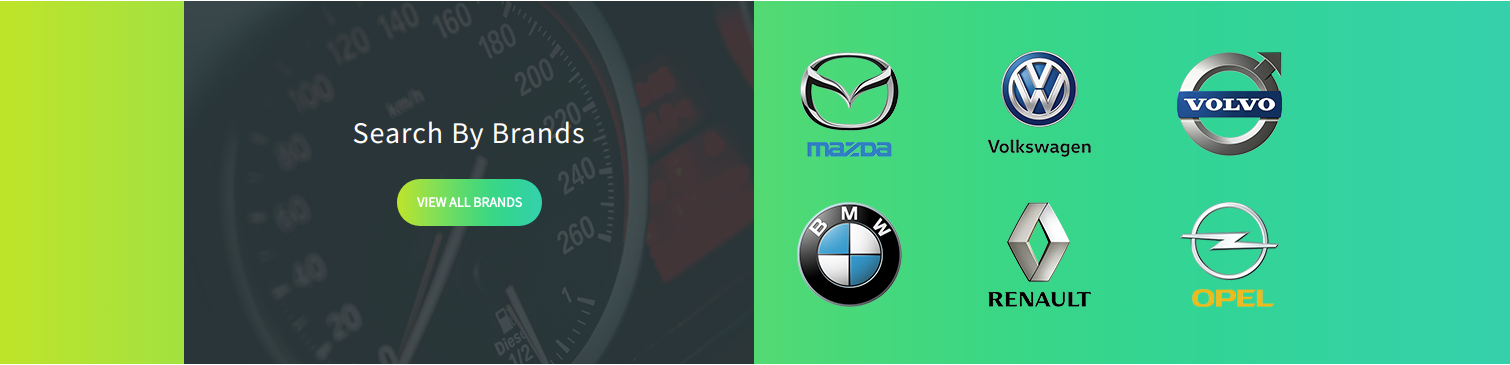
Setup Search By Brands Section
Refer to the images below for additional setup instructions
Go to Appearance Customize Theme Settings Search By Brands Section.
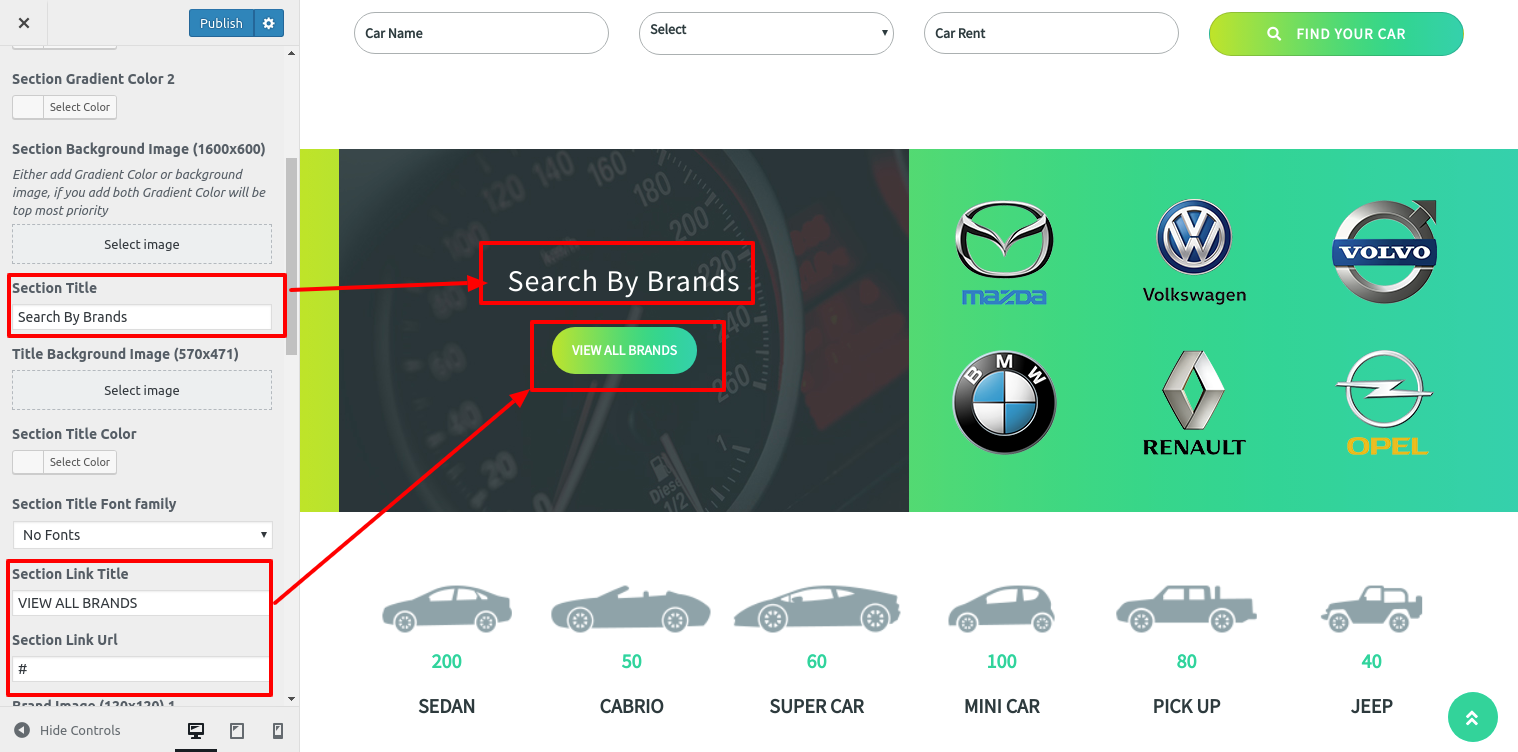
This will enable you to build up Search By Brands Section
Setup Car Categories Section
In order to continue, with Car Categories Section,
Go to Appearance Customize Theme Settings Car Categories Section.
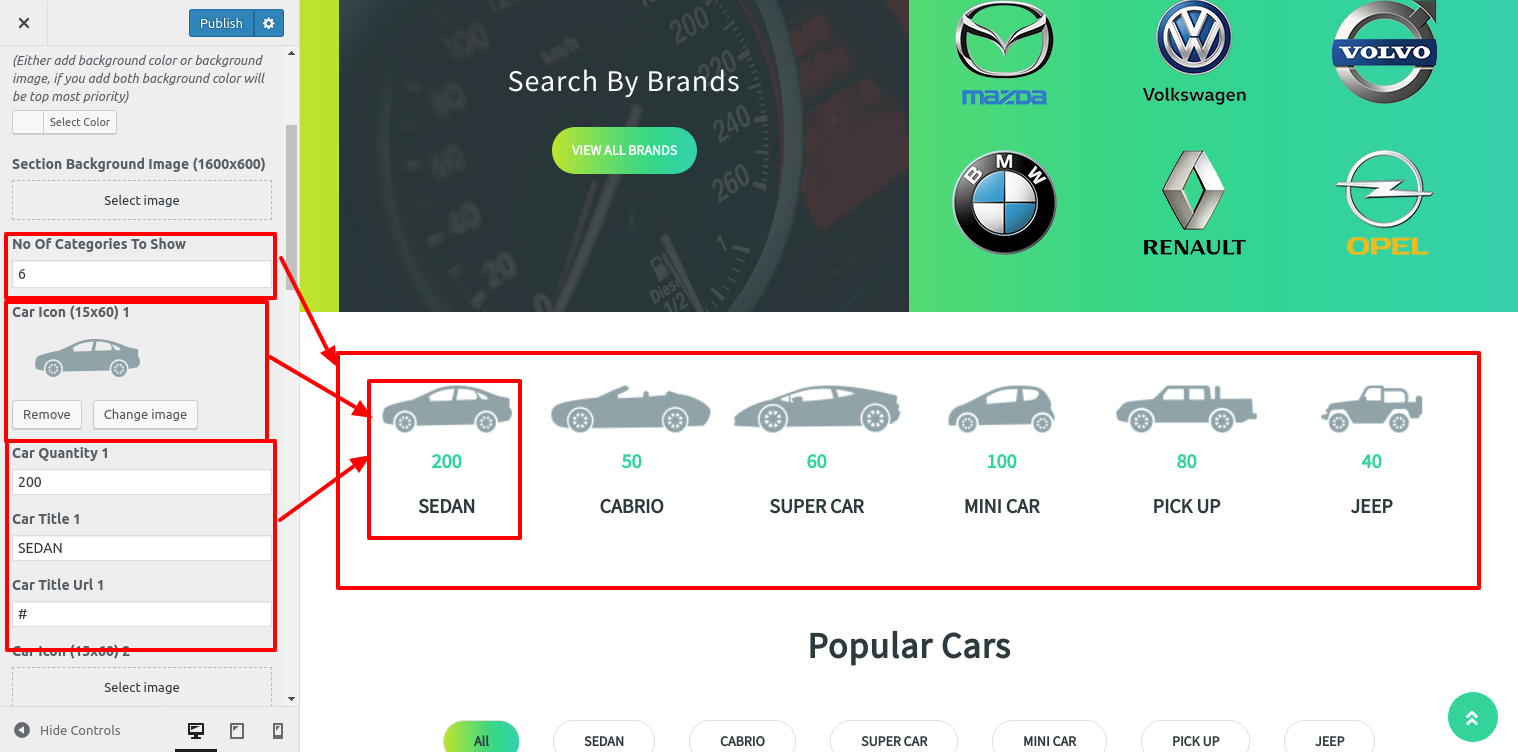
This will enable you to build up Car Categories Section.

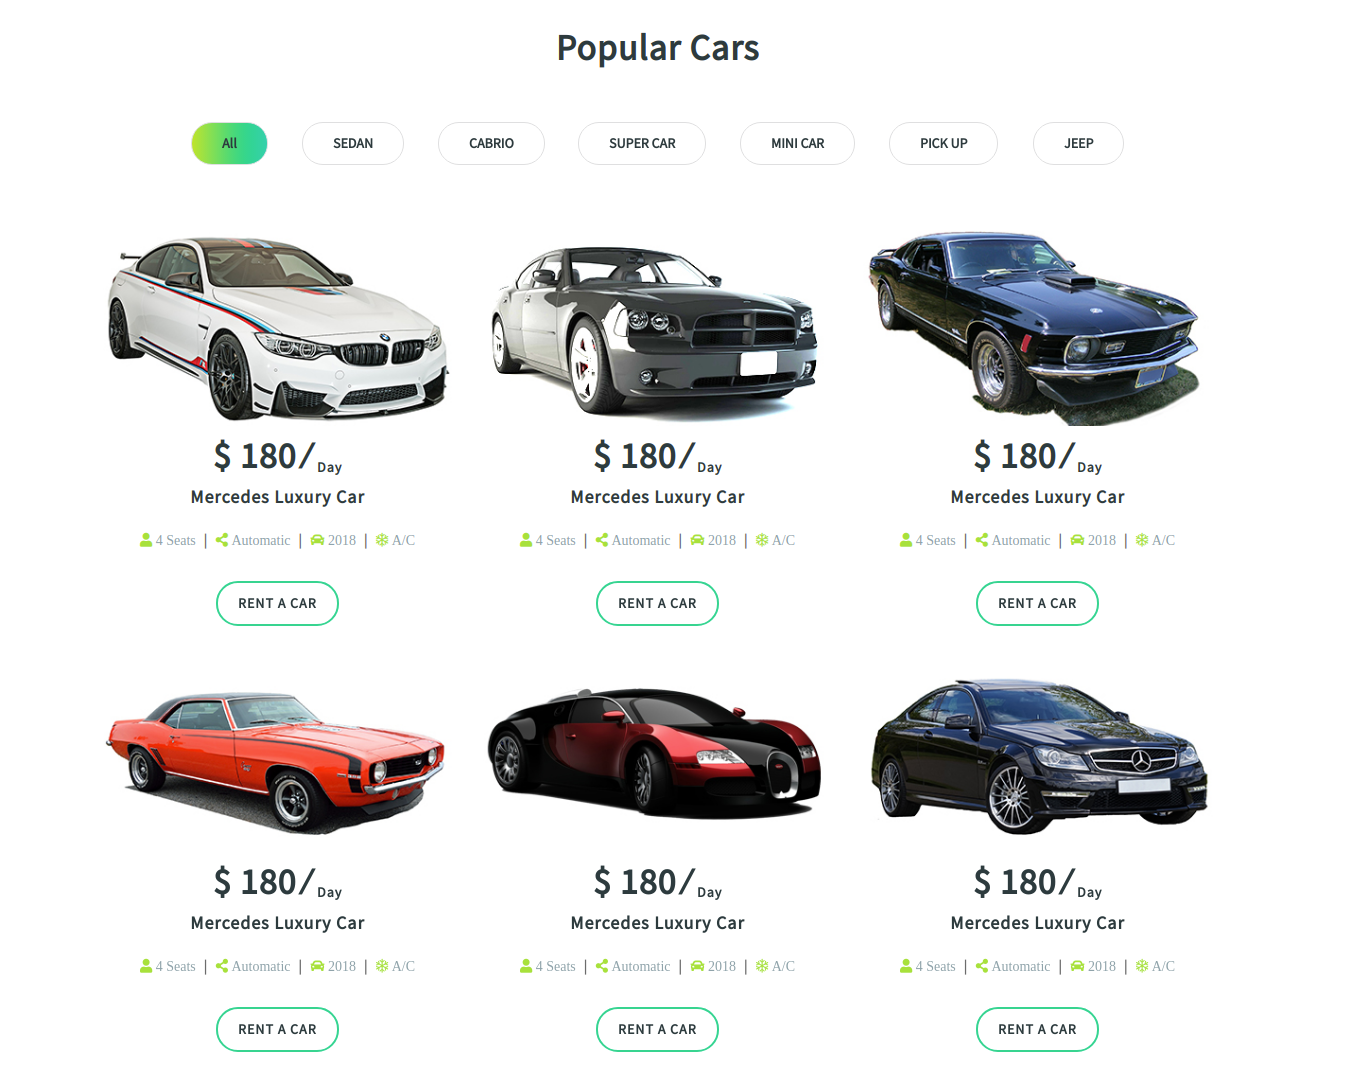
Setup Popular Cars Section
Use these guidelines to create Popular Cars Section.
The Car Rental Pro Posttype Pro component must first be uploaded and activated.
The dashboard will display a Car choice after installation.
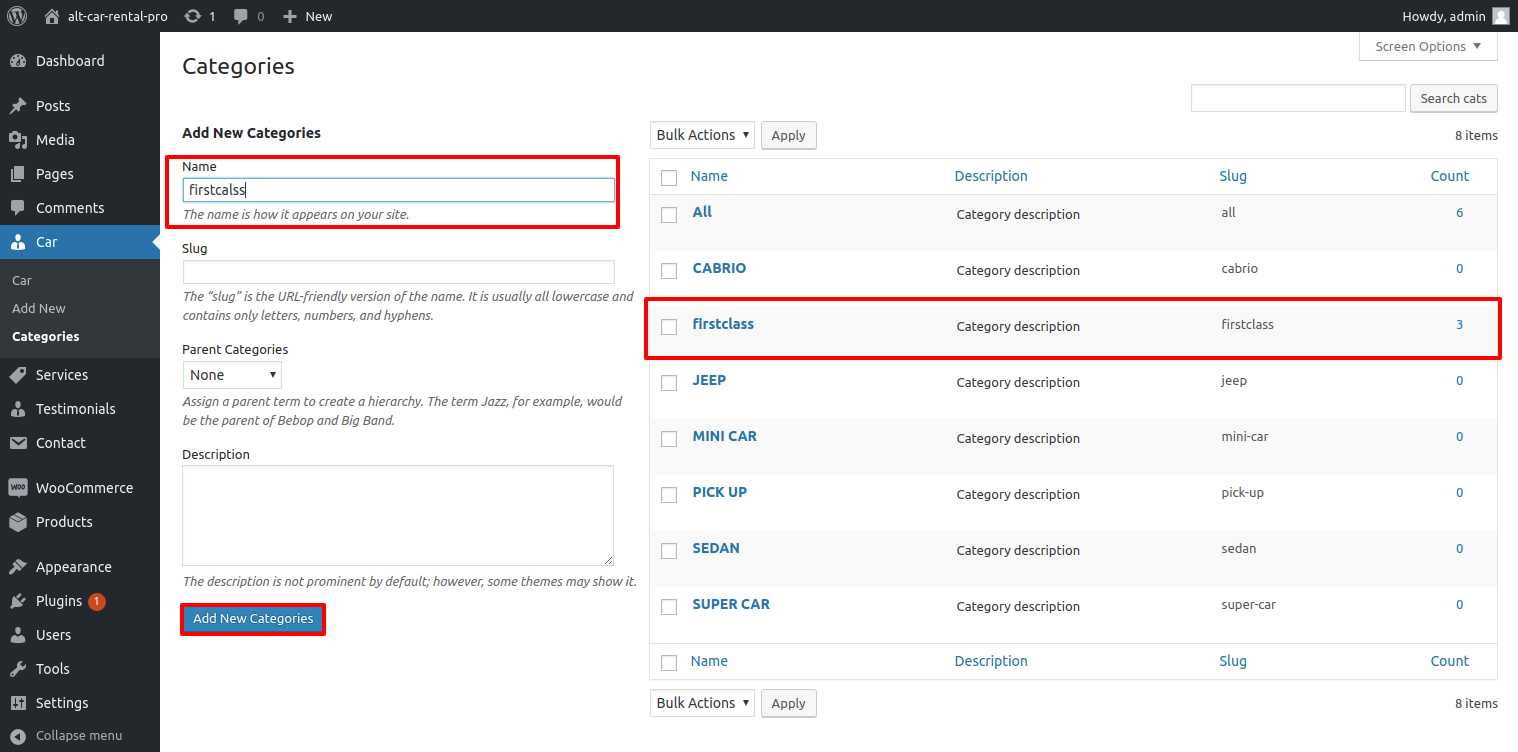
Go to Dashboard car Categories Add New .

Go to Appearance Customize Theme Settings Popular Cars .
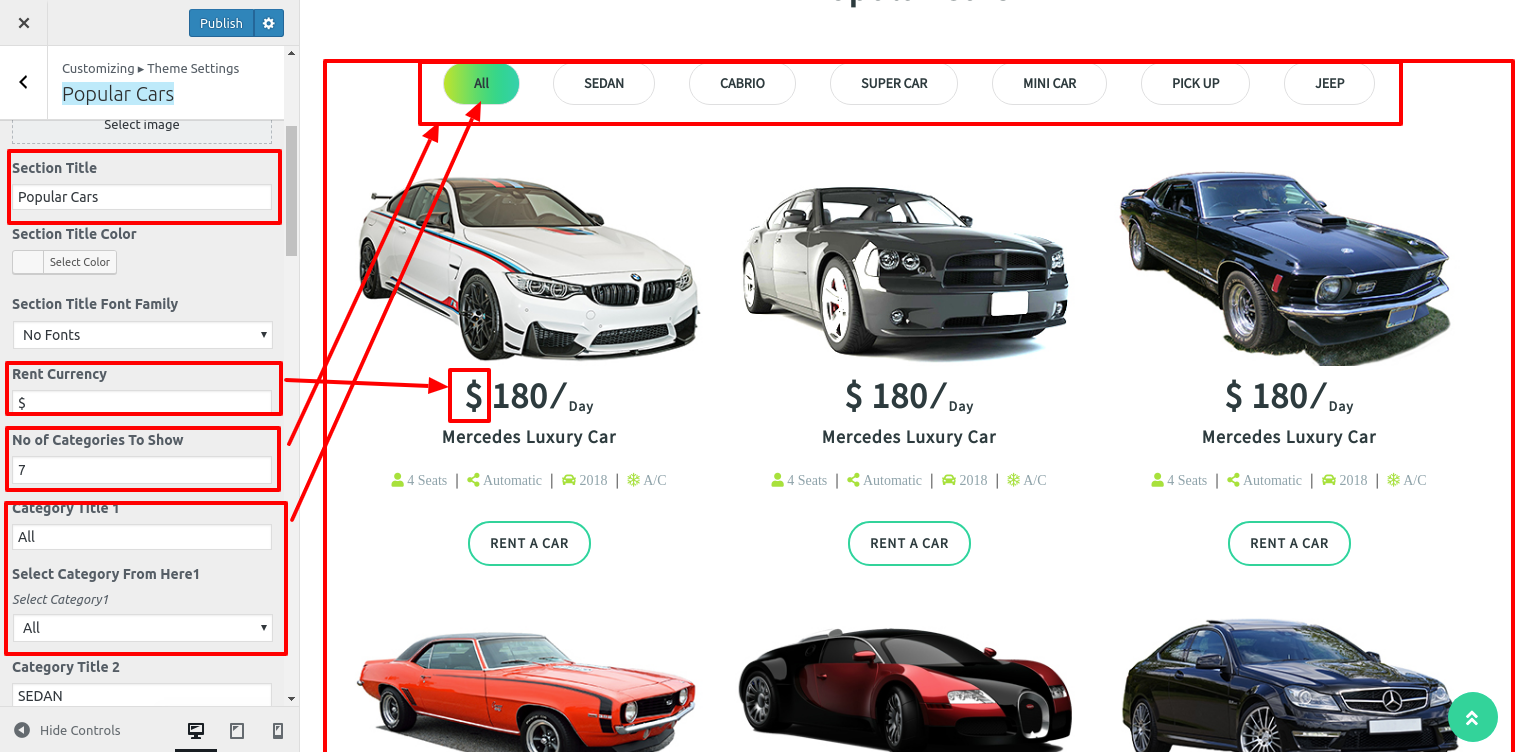
In this way you can Popular Cars Section.
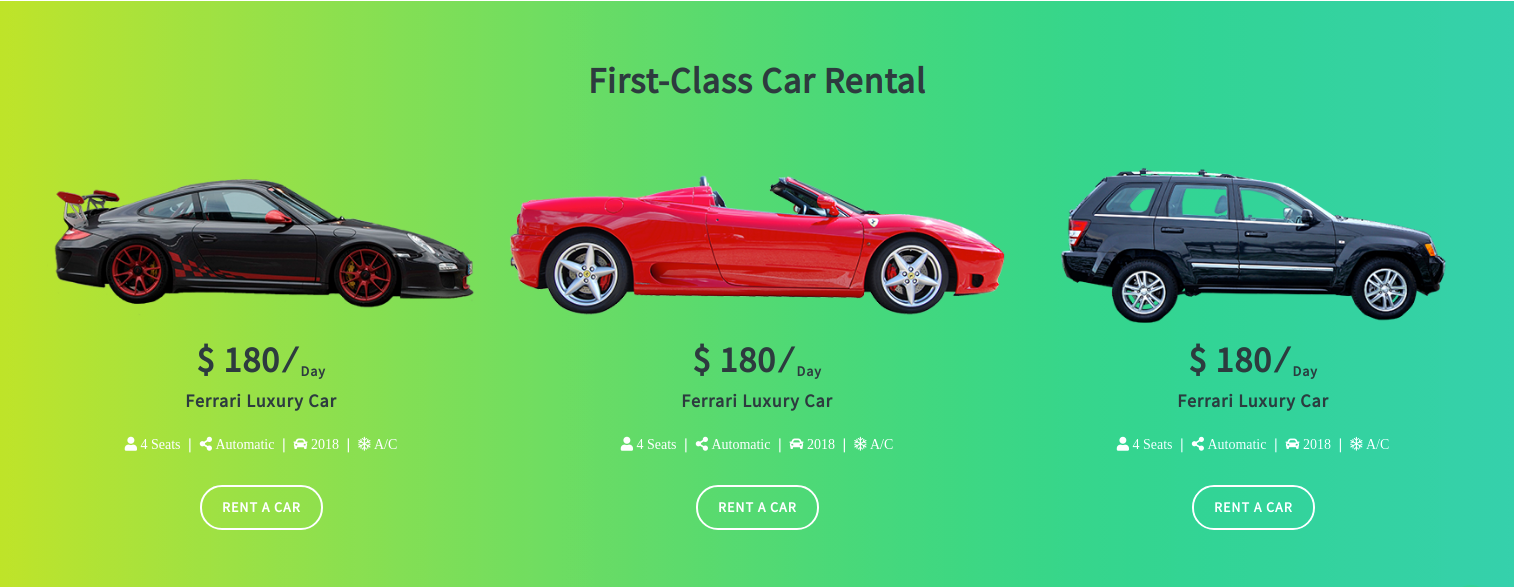
Setup First Class Car Rental Section
In order to continue, with First Class Car Rental Section.
The Car Rental Pro Posttype Pro component must first be uploaded and activated.
The dashboard will display a Car choice after installation.
Go to Dashboard car Categories Add New .
Go to Appearance Customize Theme Settings First Class Car Rental Section.
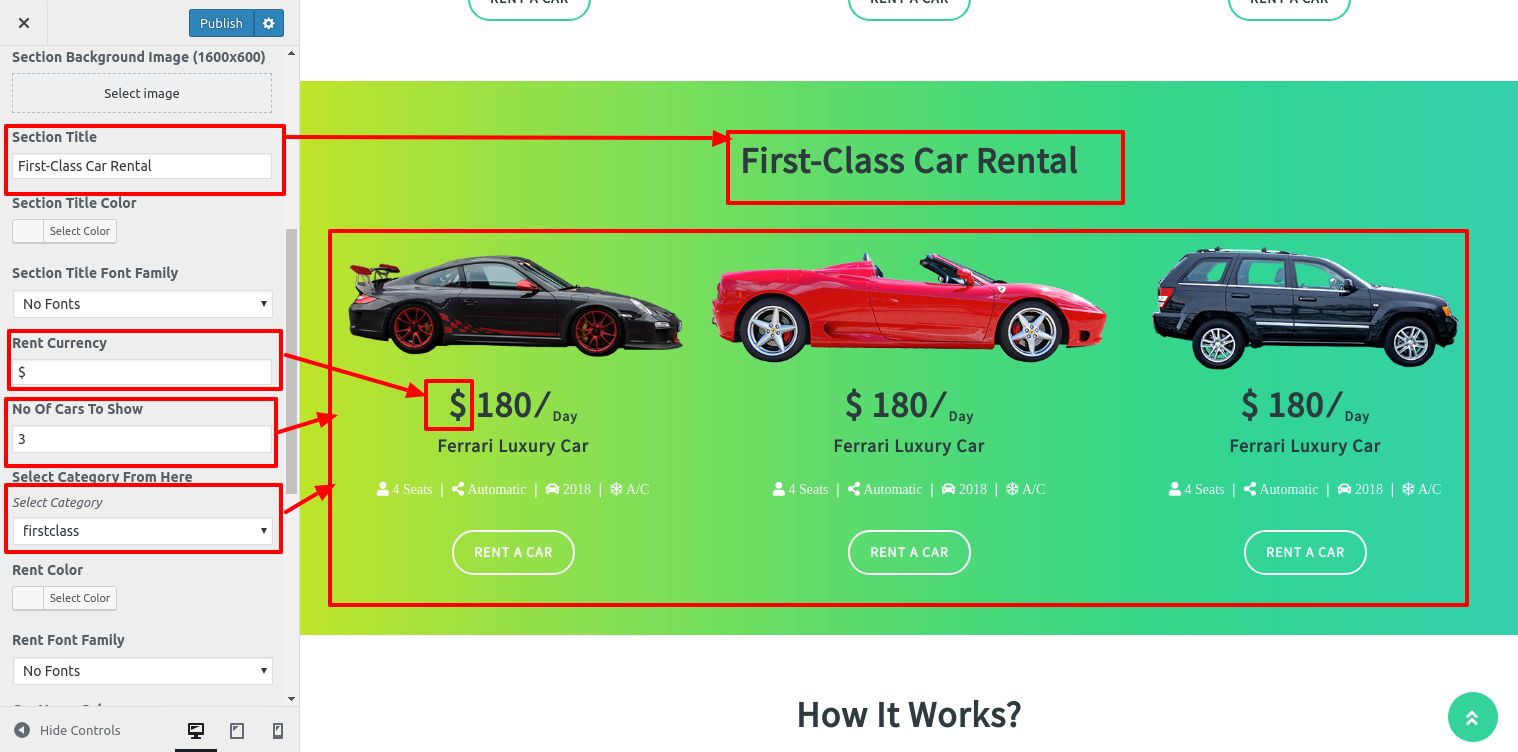
This will enable you to build up First Class Car Rental Section
Setup How It Works Section
In order to continue, with How It Works Section.
Refer to the images below for additional setup instructions.
Go to Appearance Customize Theme Settings How It Works Section.
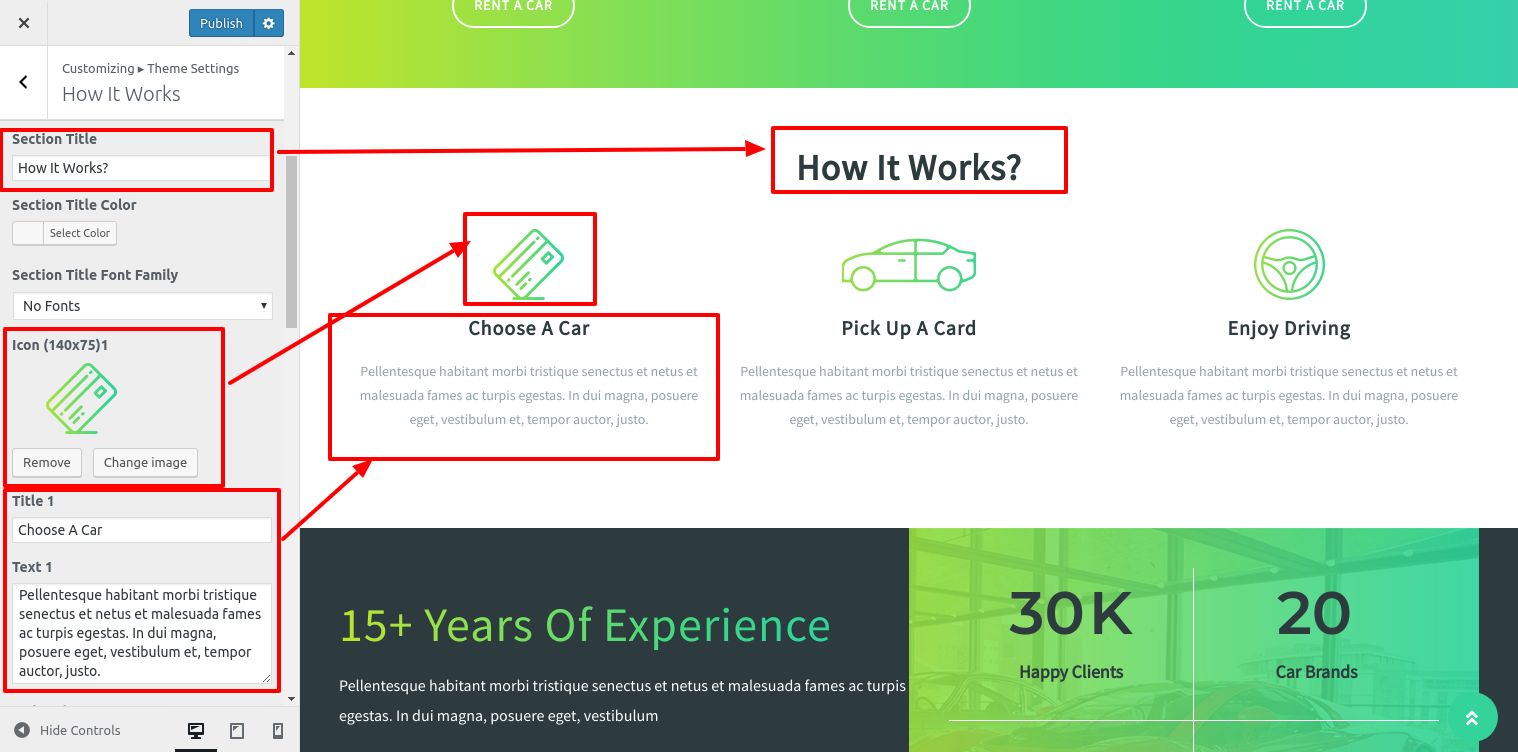
This will enable you to build up How It Works Section

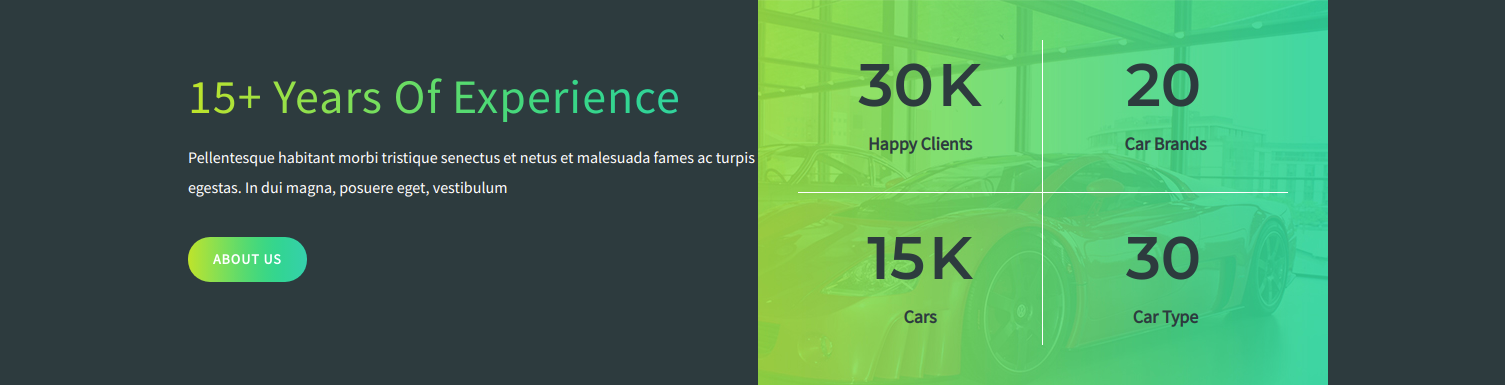
Setup Our Records
In order to continue, with Our Records.
Refer to the images below for additional setup instructions.
Go to Appearance Customize Theme Settings Our Records.
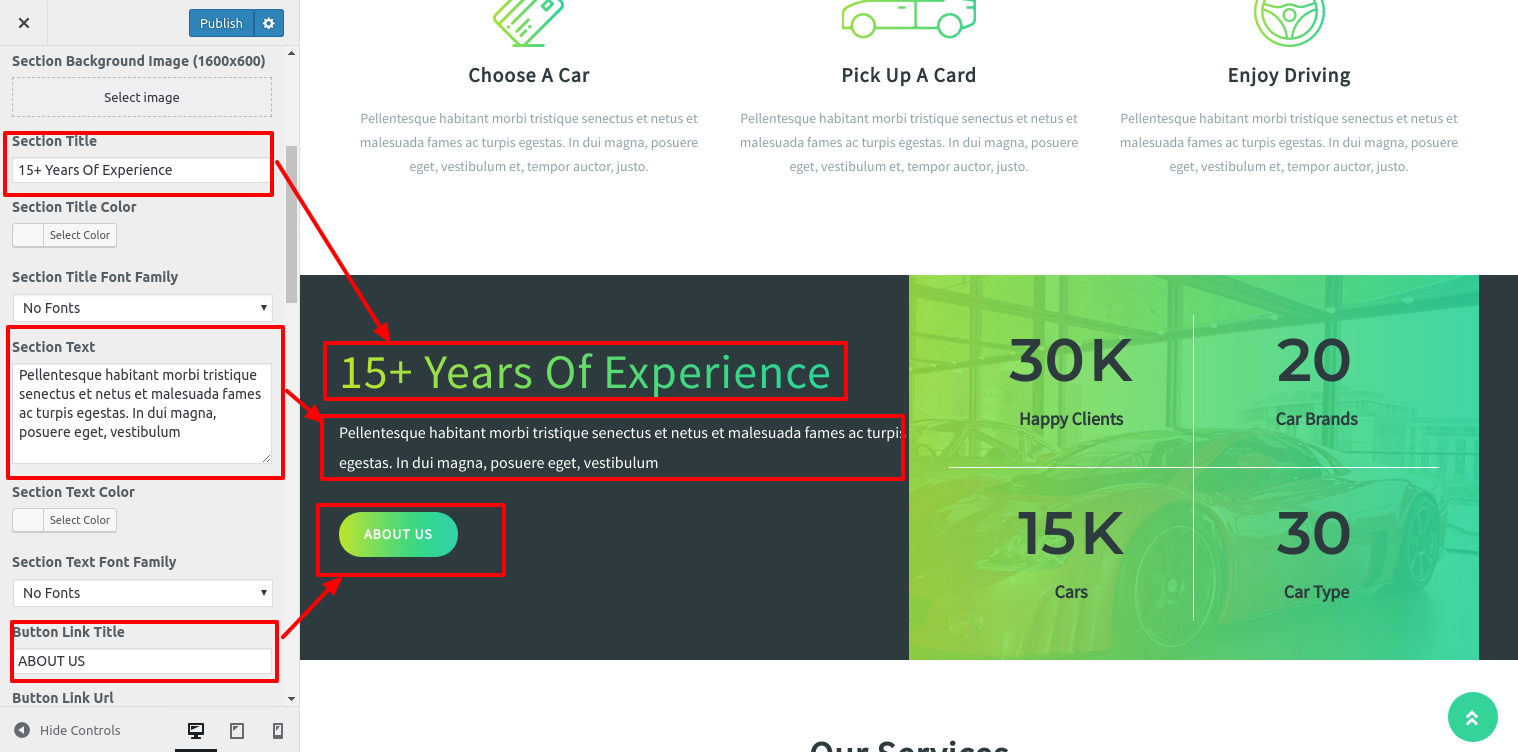
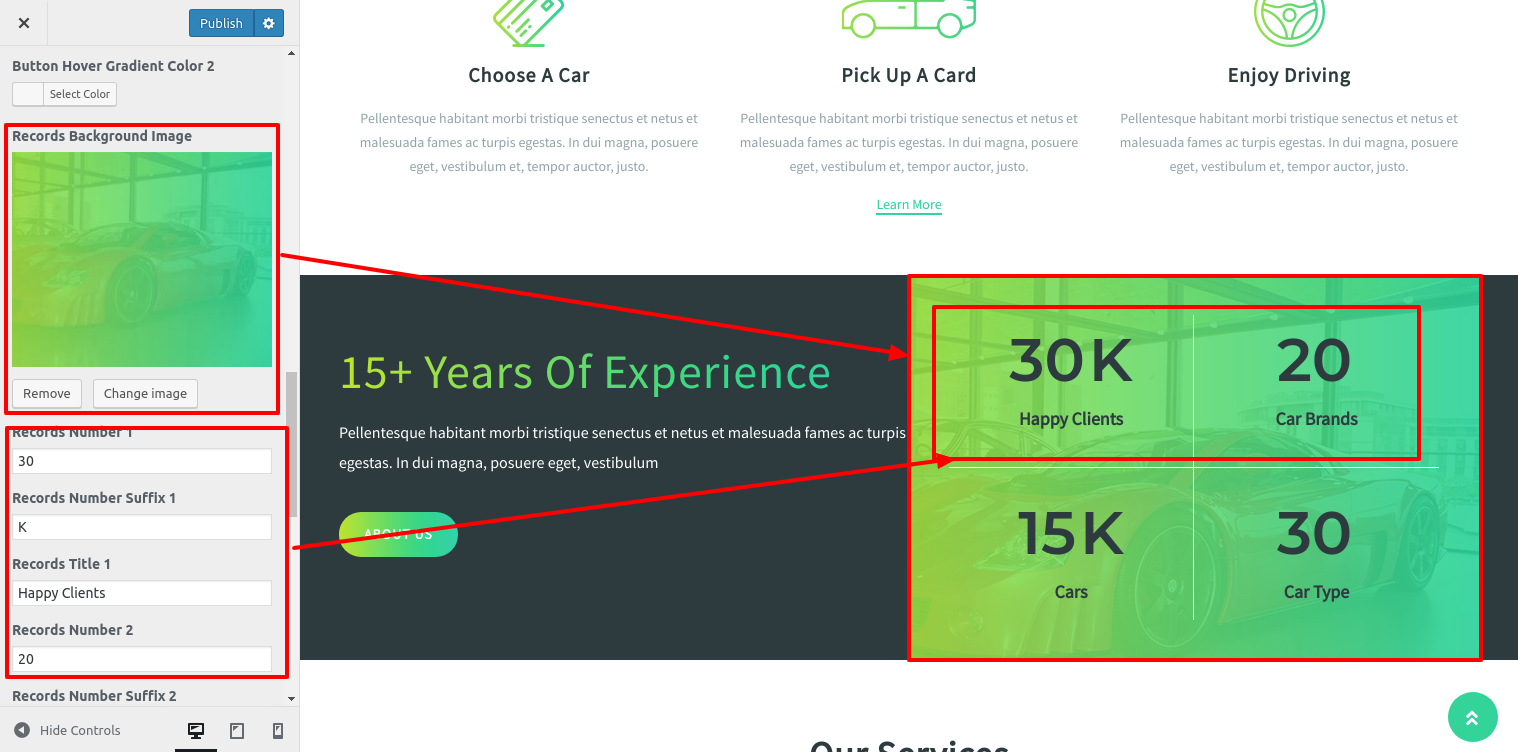
This will enable you to build up Our Records
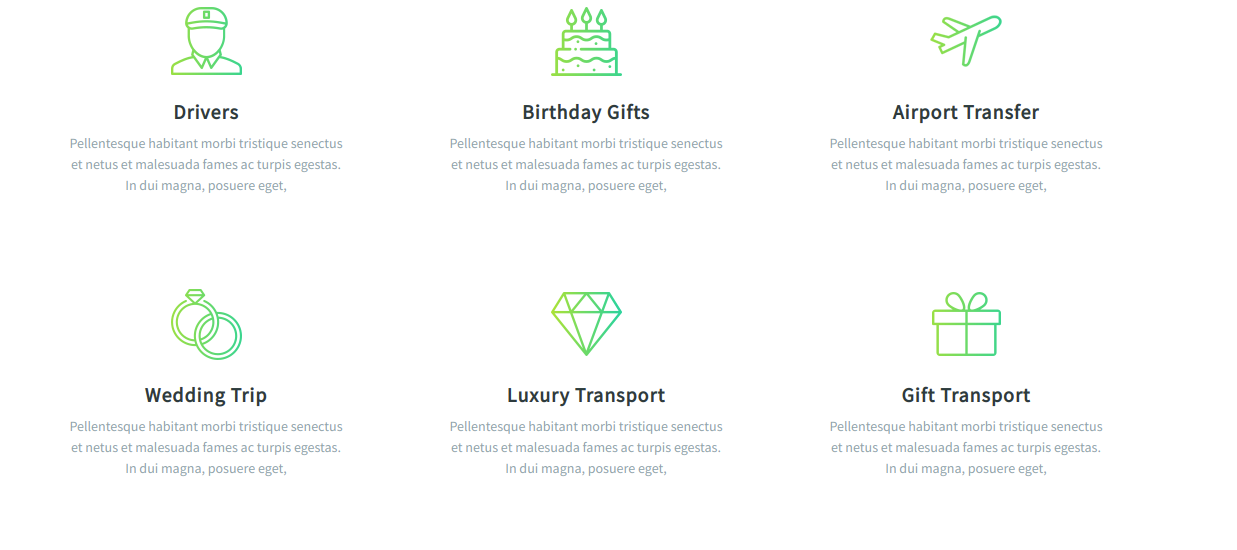
Setup Our Services Section
In order to continue, with Services Section.
Refer to the images below for additional setup instructions, Initially, you must upload and enable the Car Rental Pro Posttype plugin.
A Ser choice will show up on the dashboard following installation.
Go to Dashboard Services Add New.

Go to Appearance Customize Theme Settings Our Services Section.

This will enable you to build up Our Services Section
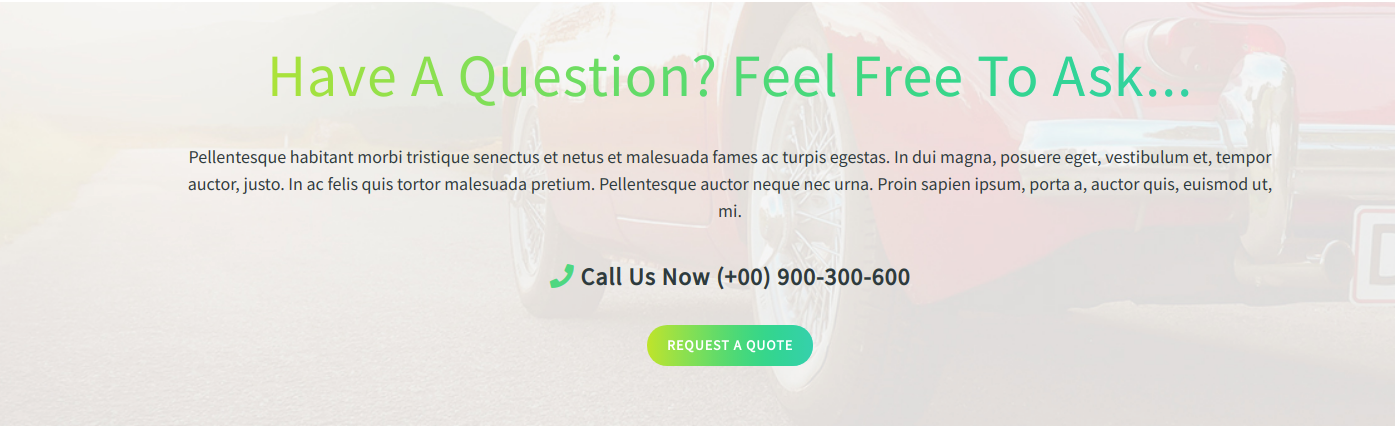
Setup Have A Question Section
In order to continue, with Have A Question Section.
Refer to the images below for additional setup instructions.
Go to Appearance Customize Theme Settings Have A Question.
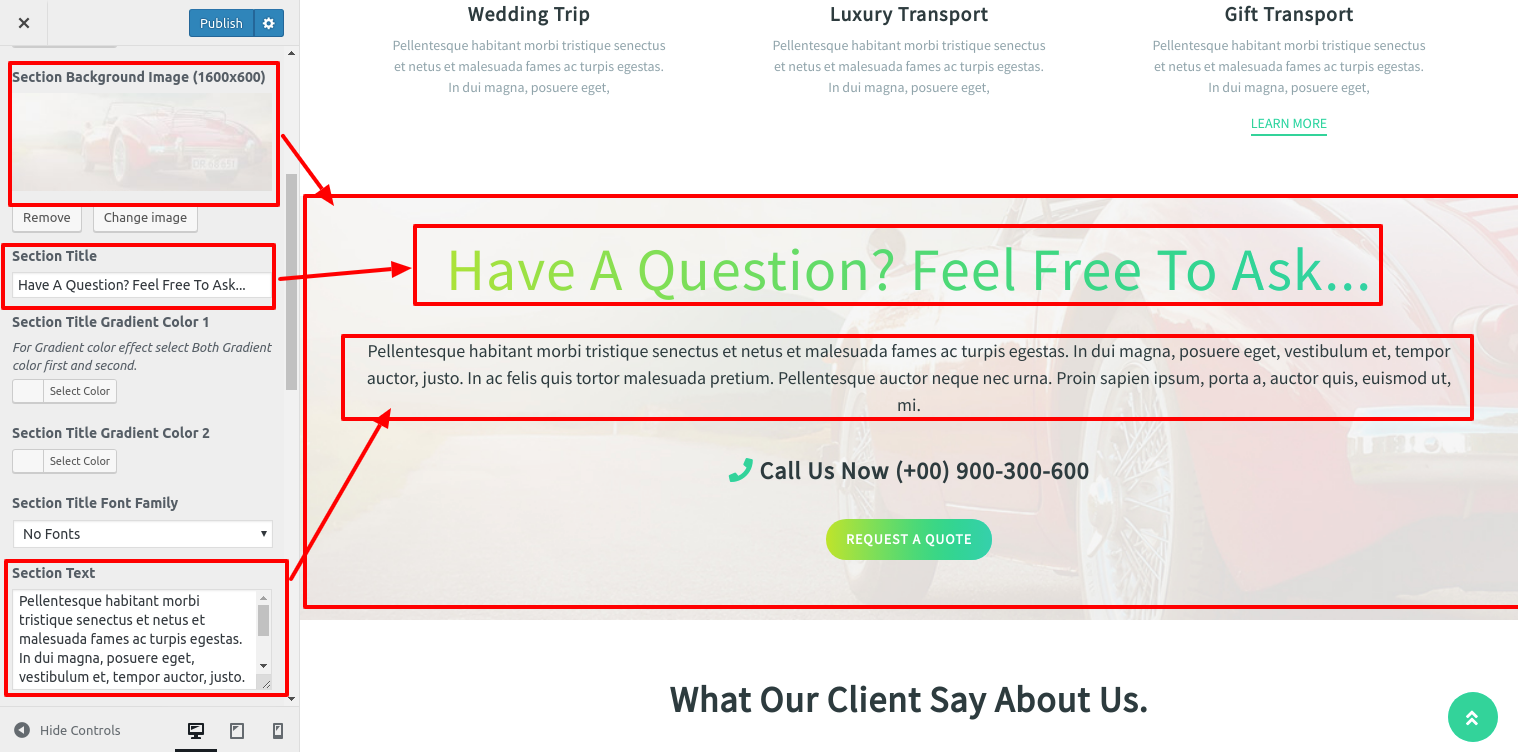

This will enable you to build up Have A Question Section
Setup Testimonial
In order to continue, with Testimonial,
Refer to the images below for additional setup instructions, Initially, you must upload and enable the Car Rental Pro Posttype plugin.
The Testimonial option will show on the dashboard following installation.
Go to Dashboard Testimonial Add New .

Go to Appearance Customize Theme Settings Testimonials.
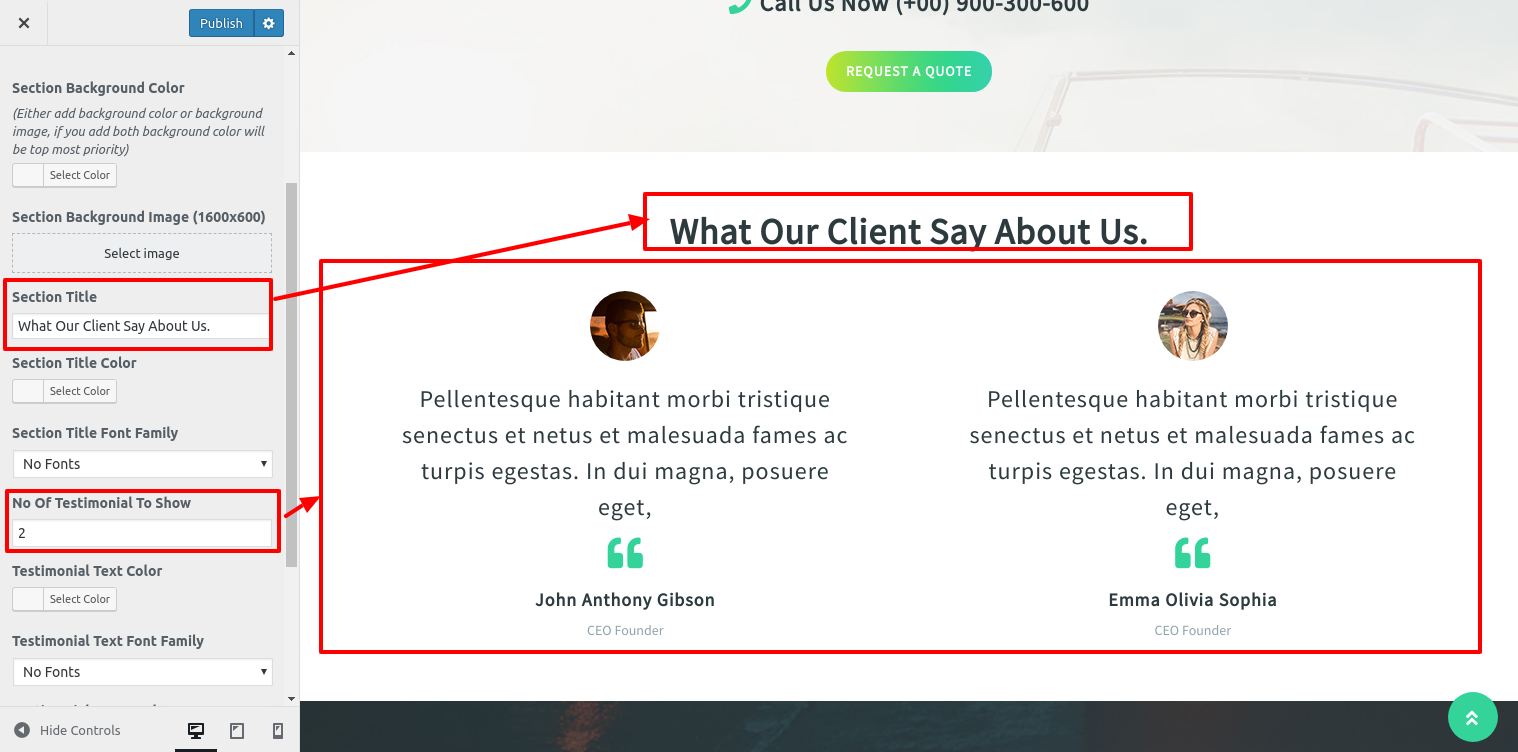
This will enable you to build up Testimonial.

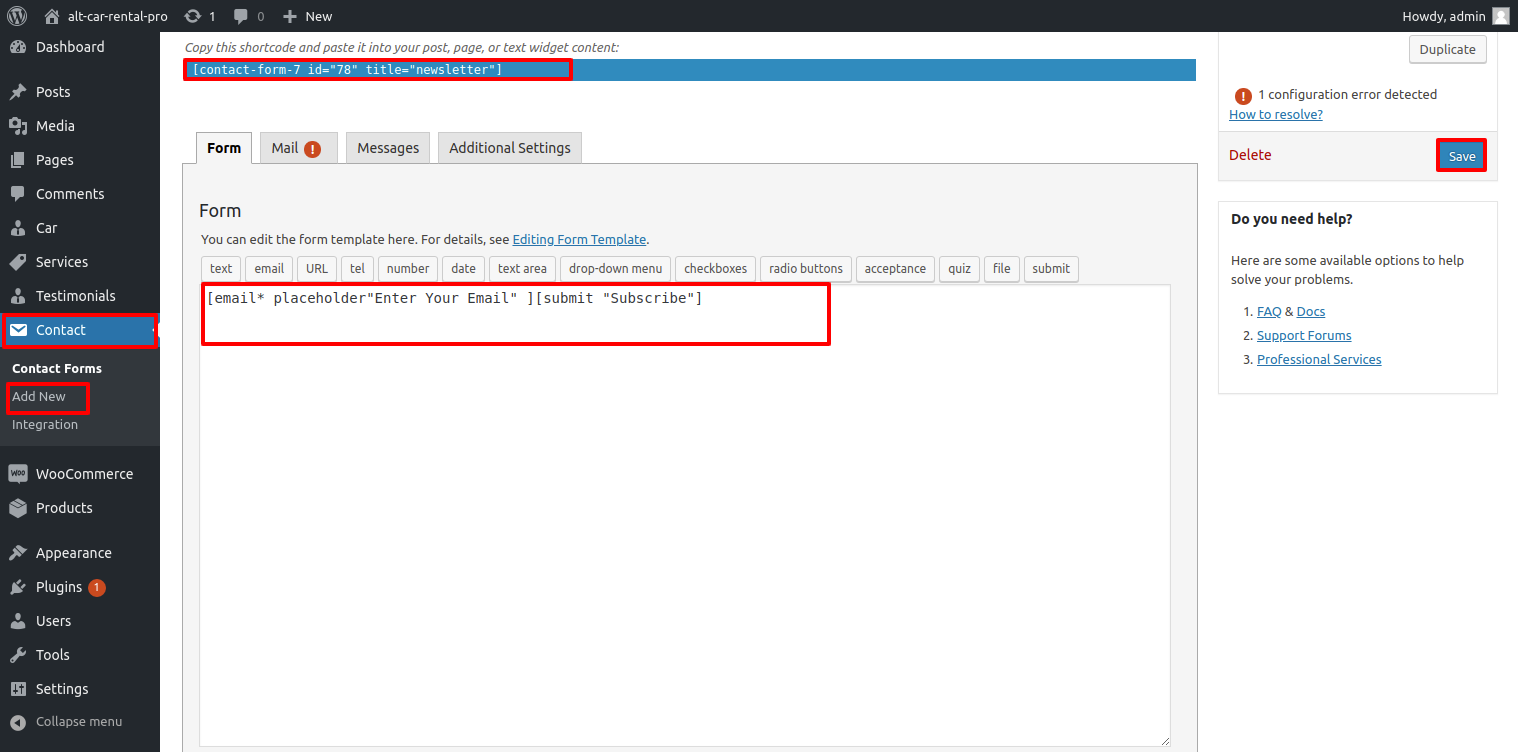
Setup Newsletter
In order to continue, with Newsletter Section.
Follow these instructions to make the newsletter section. To begin, upload and activate the contact form 7 plugin.
Go to Dashboard Contact Add New .
Go to Appearance Customize Theme Settings Newsletter.
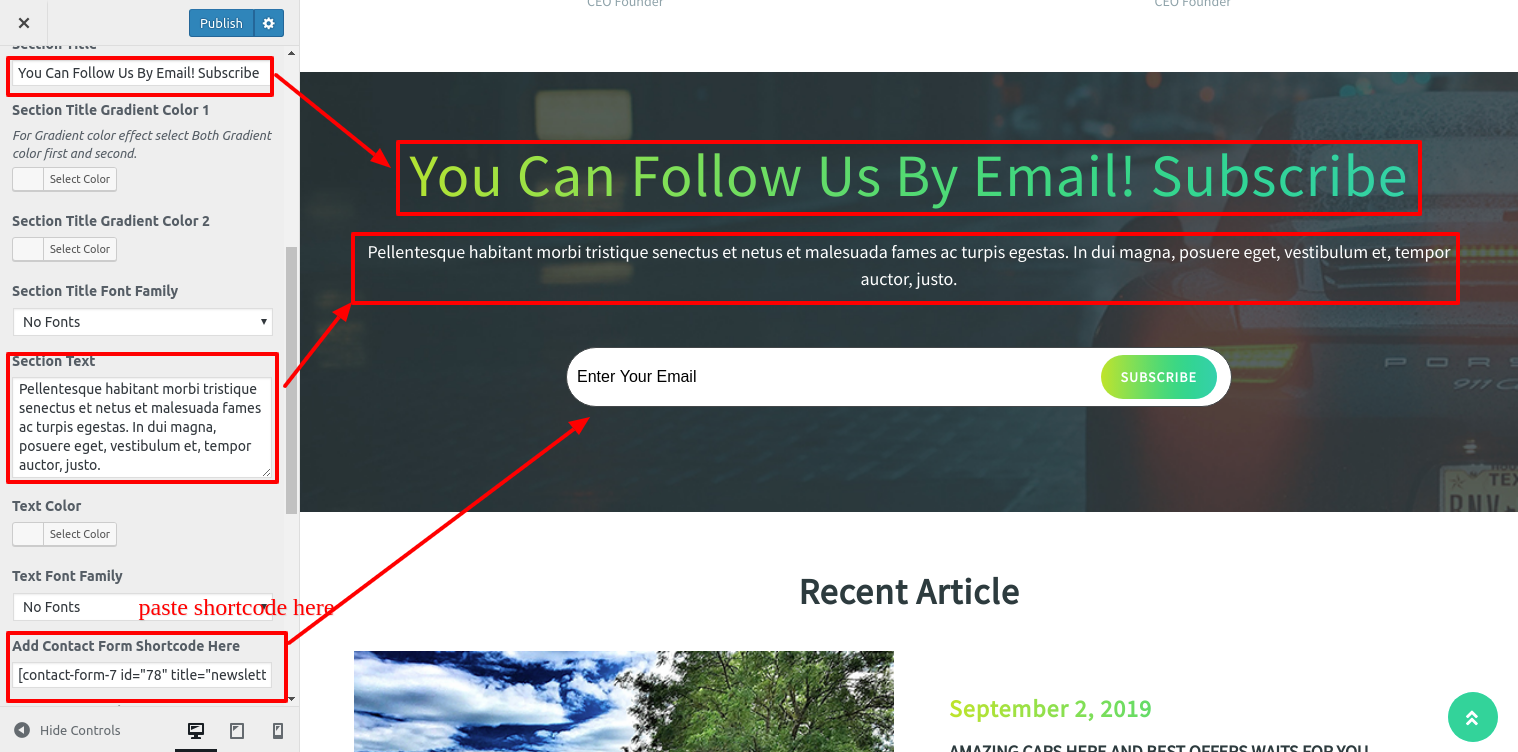
In this way you can Newsletter Section

Setup Recent Article Section
In order to continue, with Recent Article Section,
Refer to the images below for additional setup instructions.
Go to Dashboard Posts Add New .
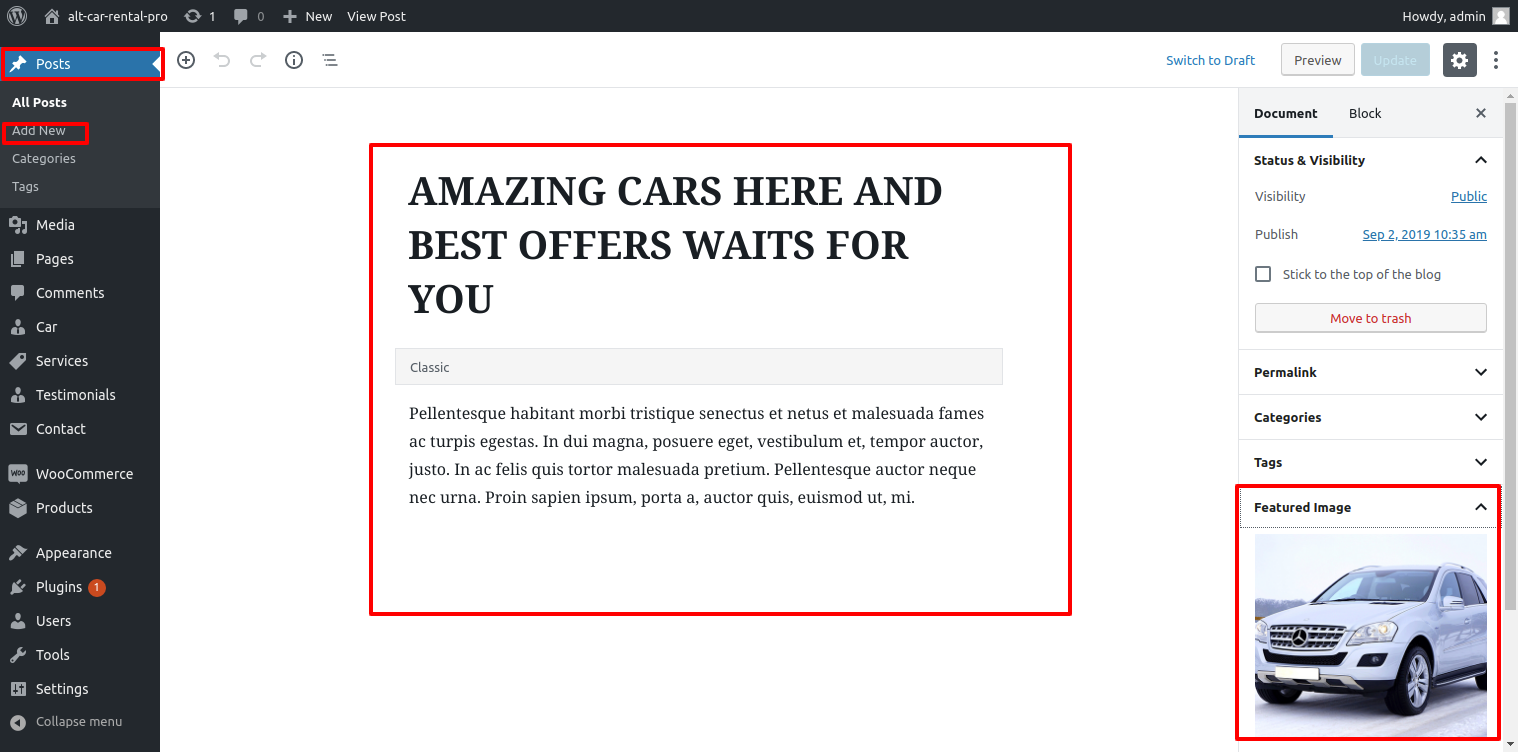
Go to Appearance Customize Theme Settings Recent Article Section.
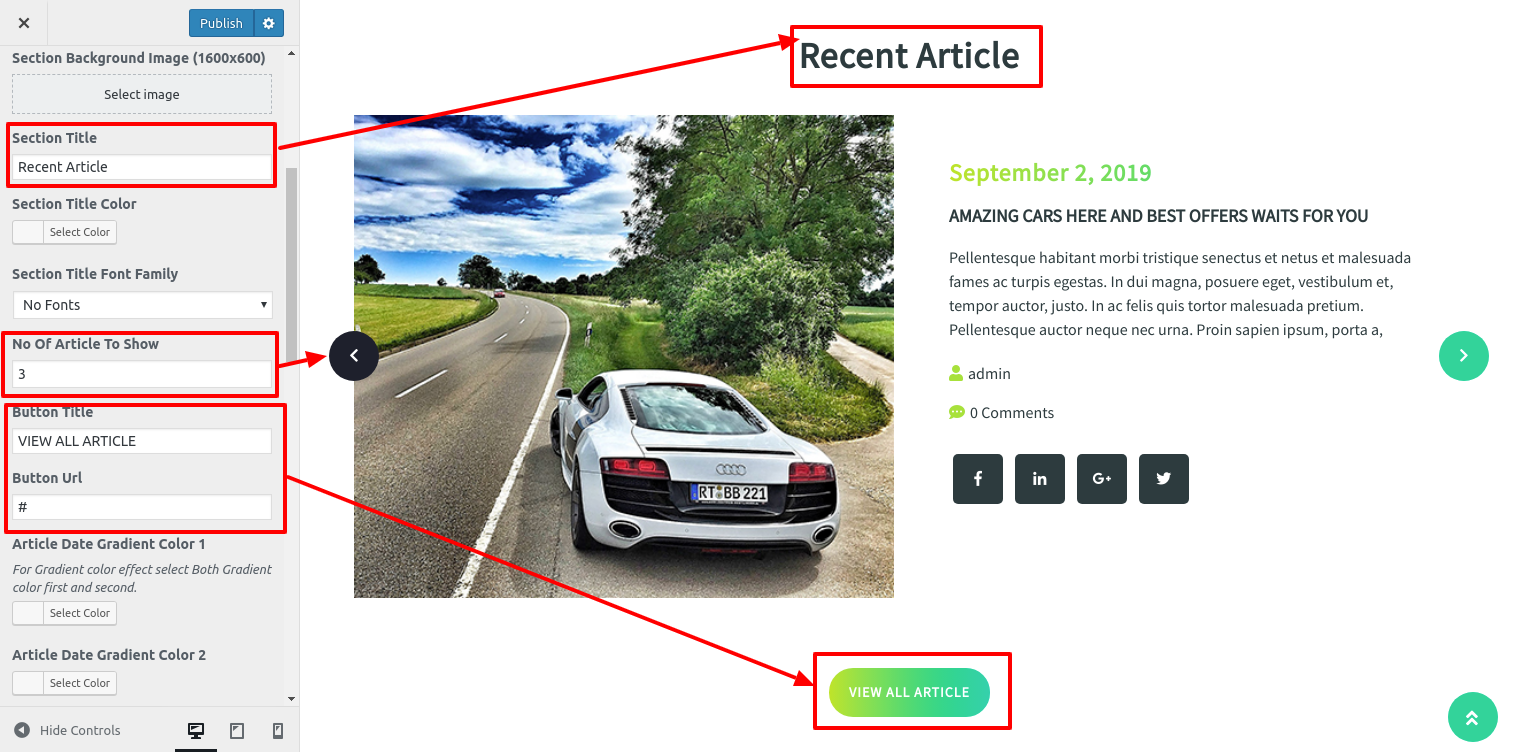
This will enable you to build up Latest Post Section.

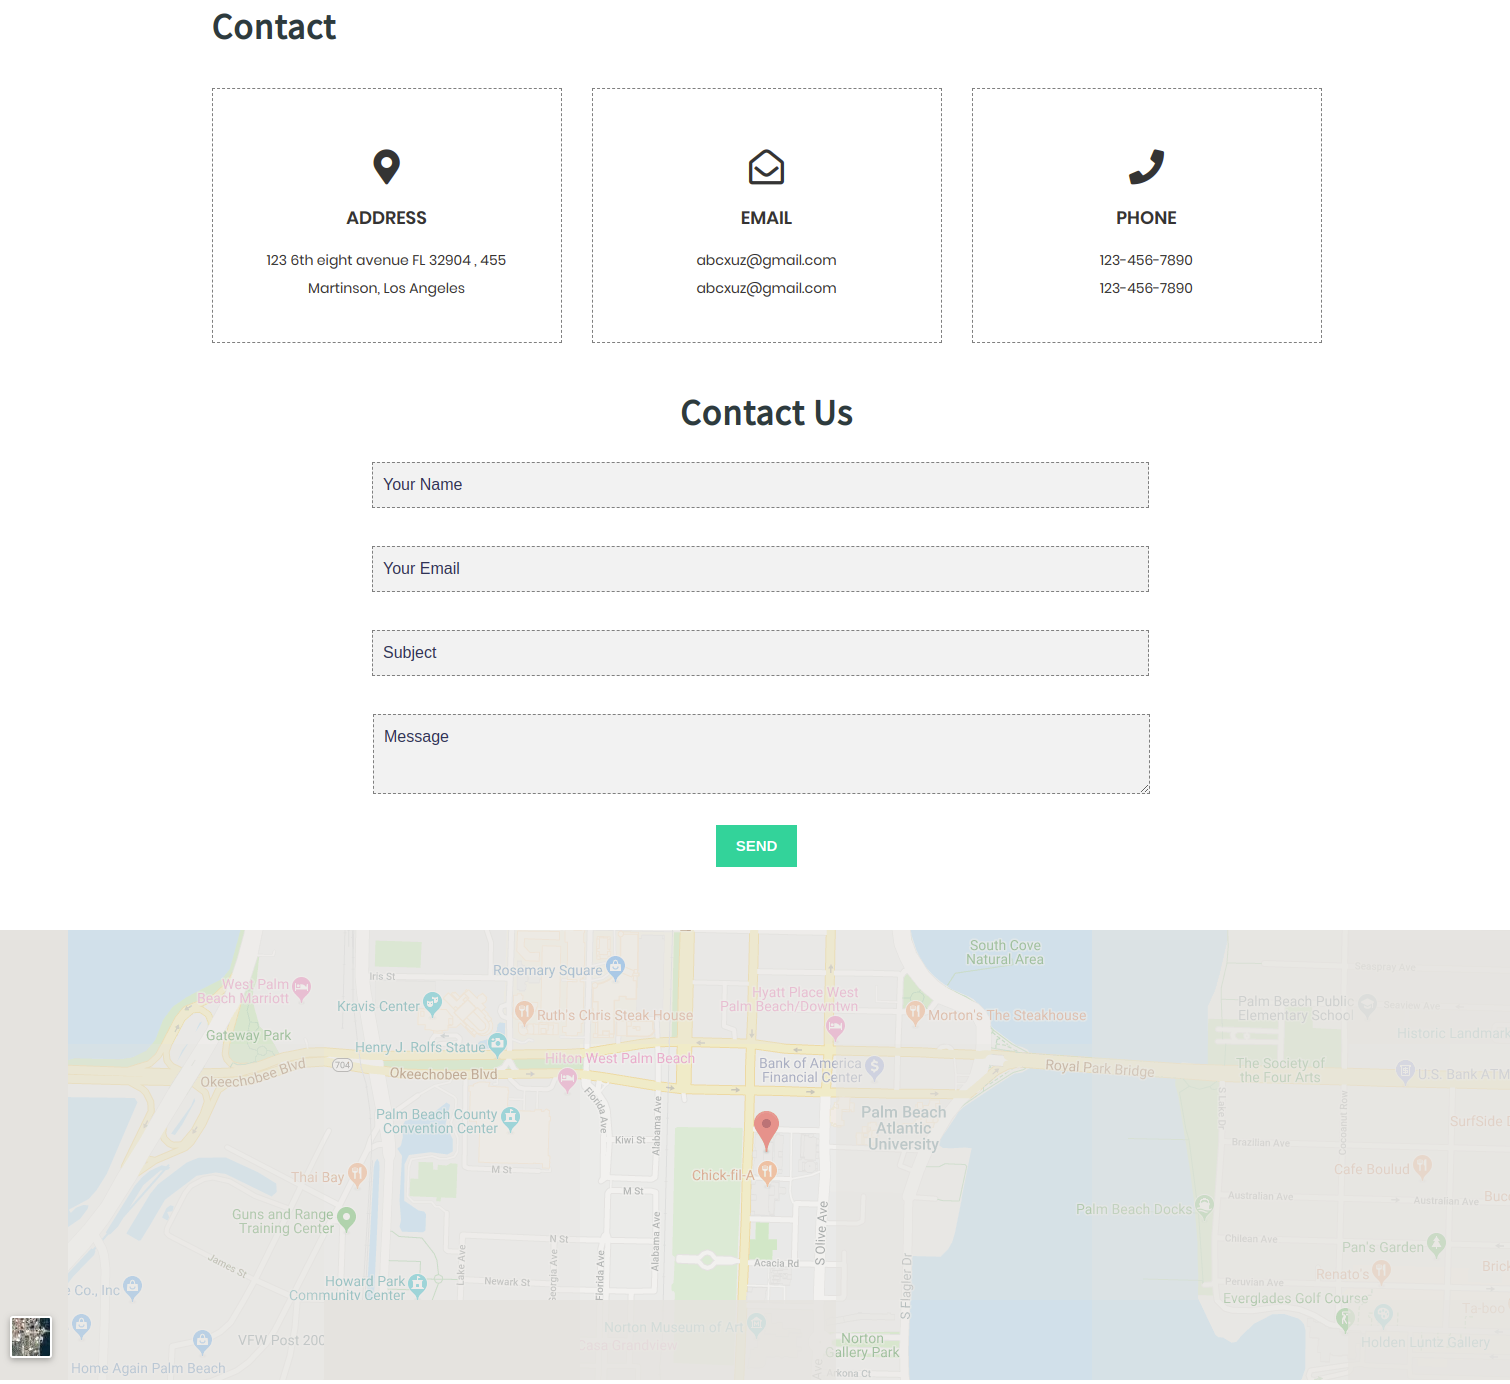
Setup Contact Details Section
You must download and enable the contact form 7 plugin in order to set up the Contact Details.
The Contact choice will show up on the dashboard following installation.
Go to Dashboard Contact Add New .

Refer to the images below for additional setup instructions.
Go to Appearance Customize Theme Settings Contact Details Section.
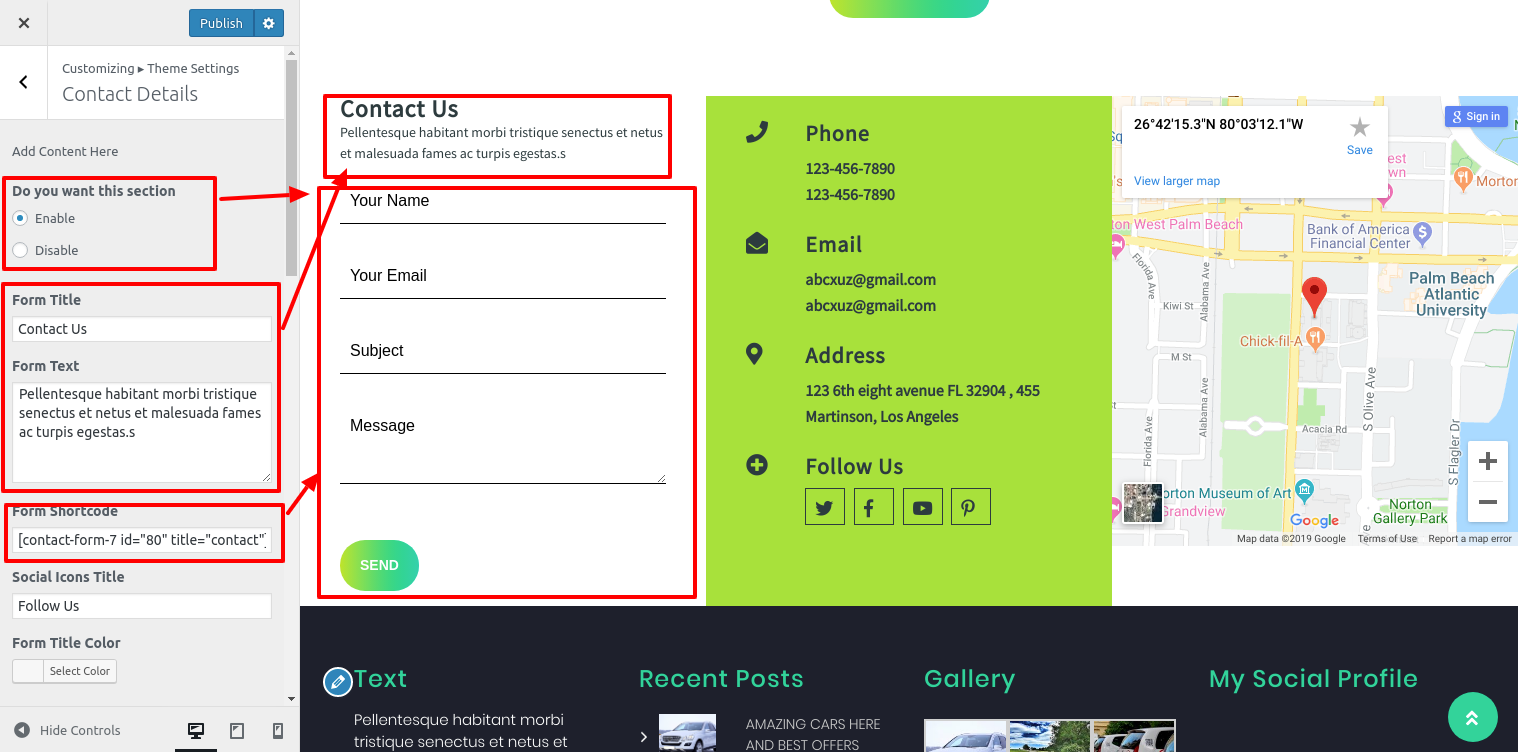
This will enable you to build up Contact Details Section

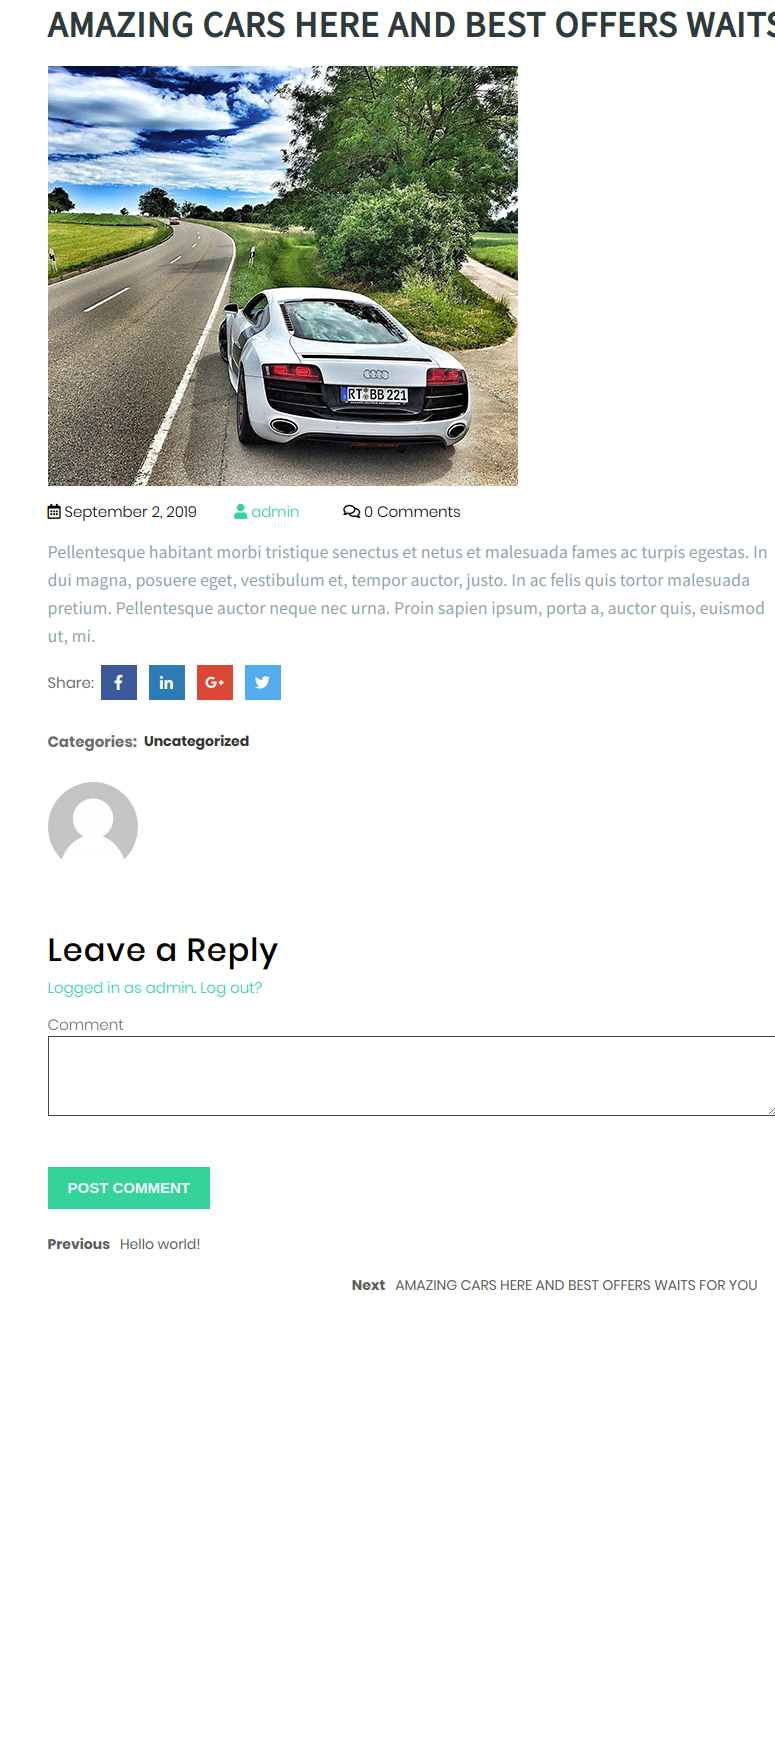
Setup Single Post Settings Section
Refer to the images below for additional setup instructions.
Go to Appearance Customize Theme Settings Single Post Settings .
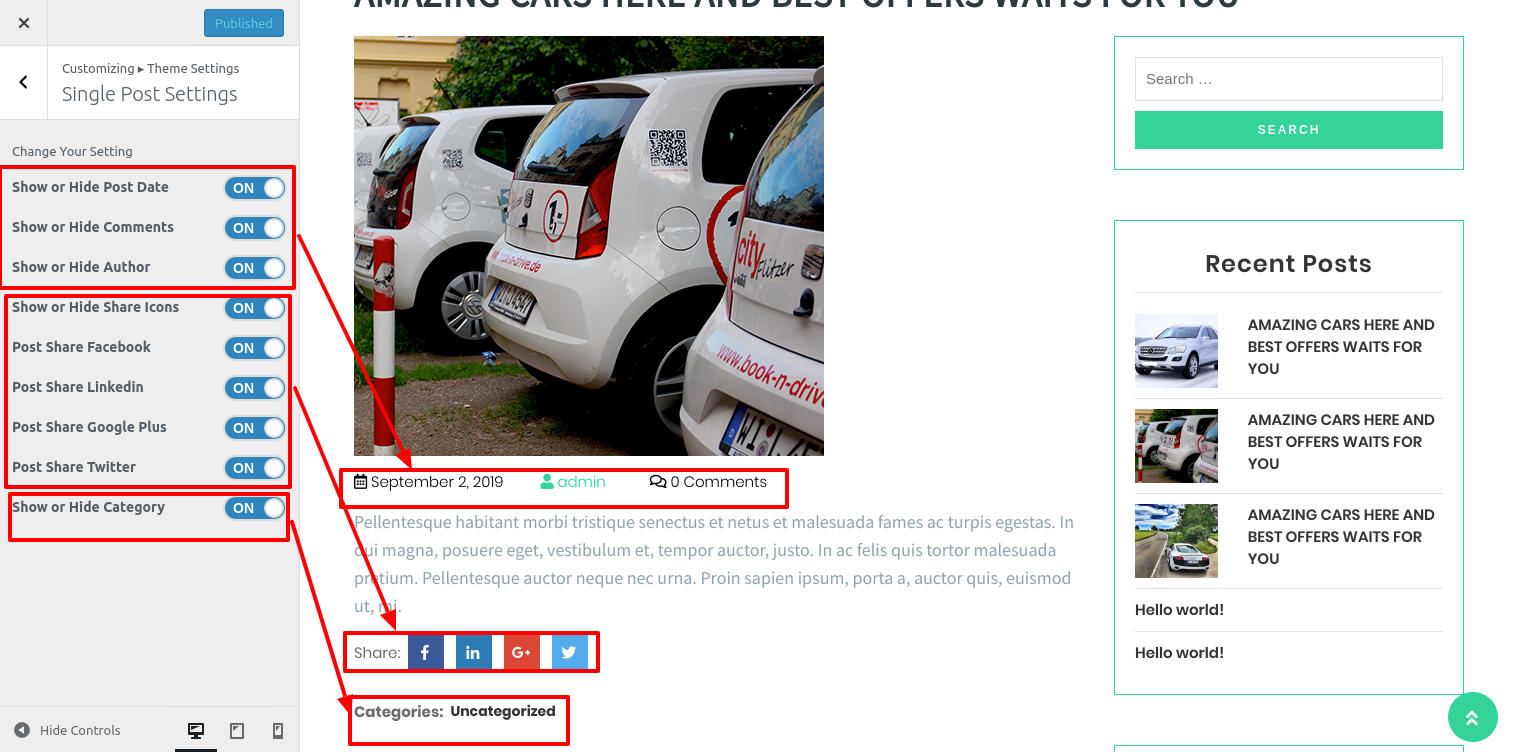
This will enable you to build up Single Post Settings.
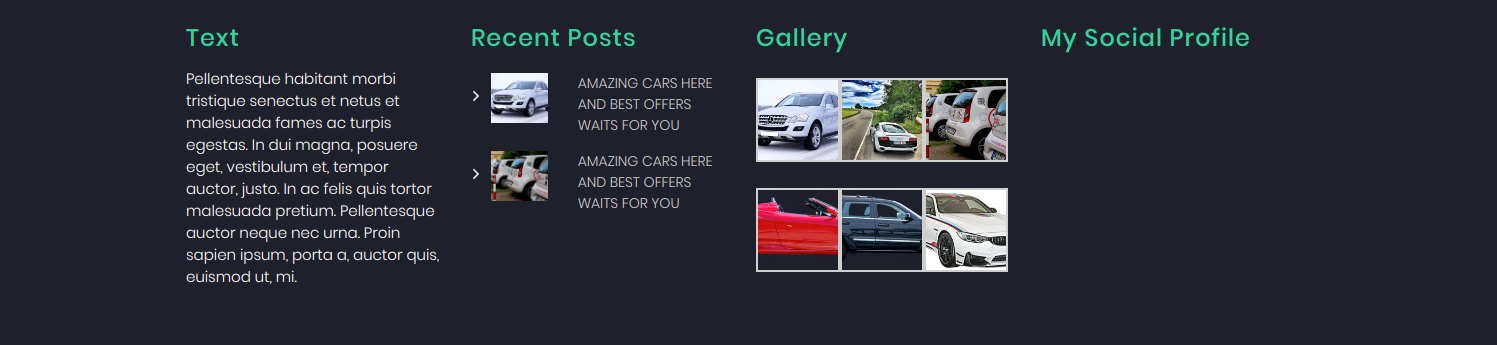
Setup Footer Widgets Section
In order to continue, with Footer Widgets Section,
Refer to the images below for additional setup instructions
The Footer Widgets have four sections. Different elements can be displayed in each section. The admin panel widget section will be used to build up these sections. You can change the widget by including any additional widgets.
Dashboard >> Appearance >> Widgets.
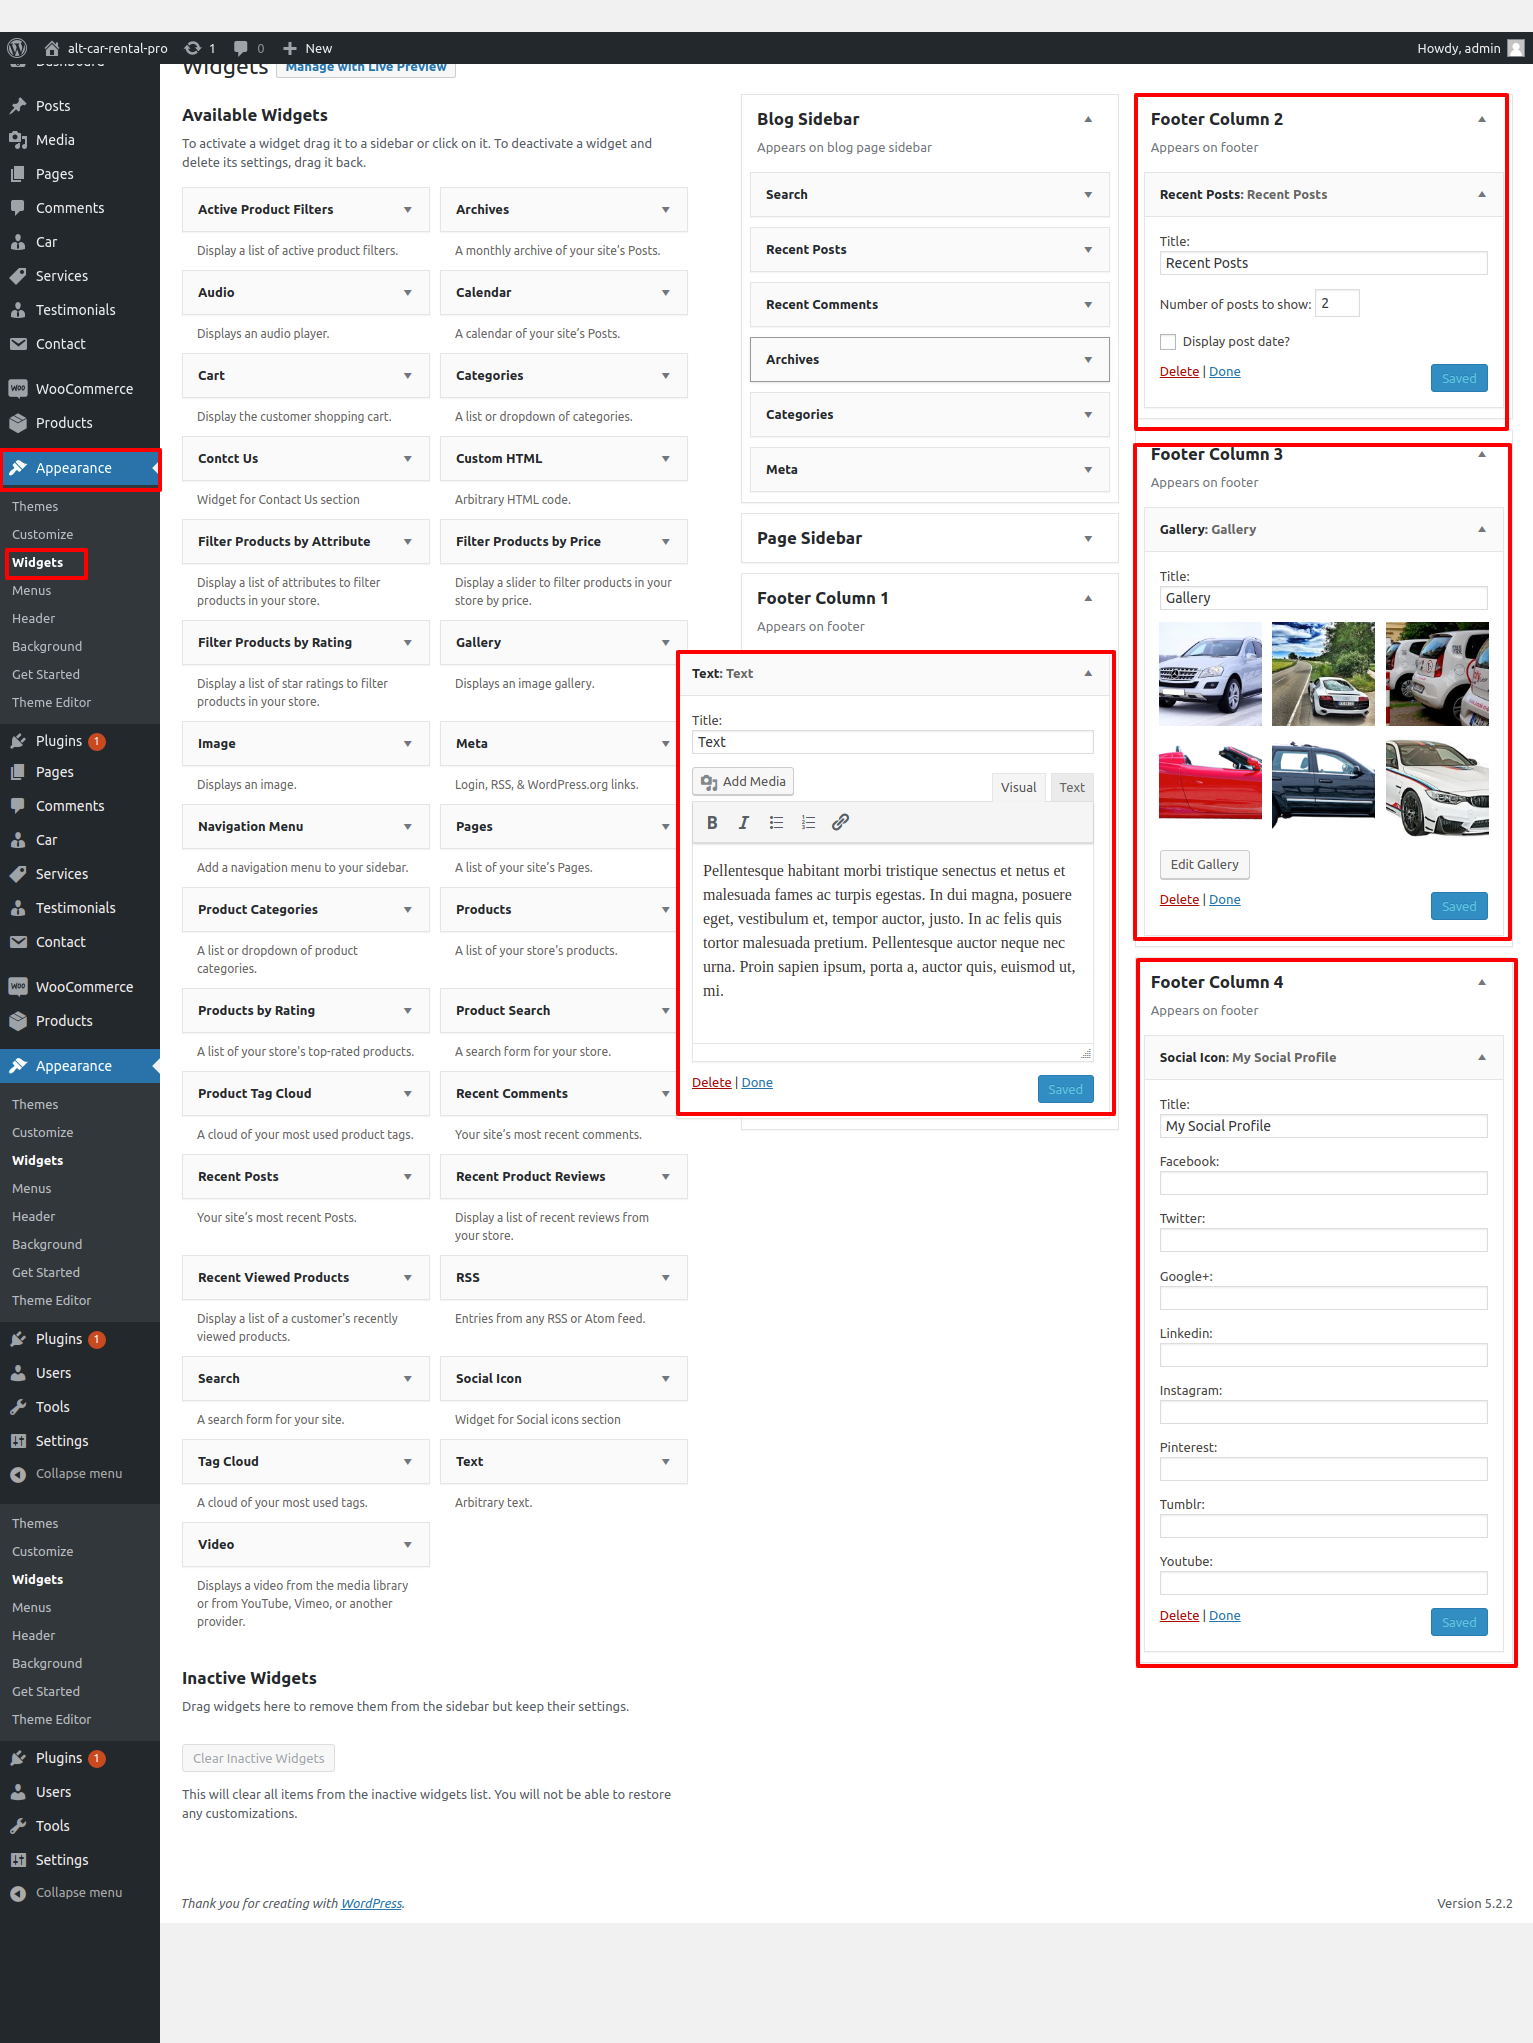
Go to Appearance Customize Theme Settings Footer.

On this screen, footer widgets will appear.
Footer Text
In order to continue, with Footer Text section,
Go to Appearance Customize Theme Settings Footer Text.
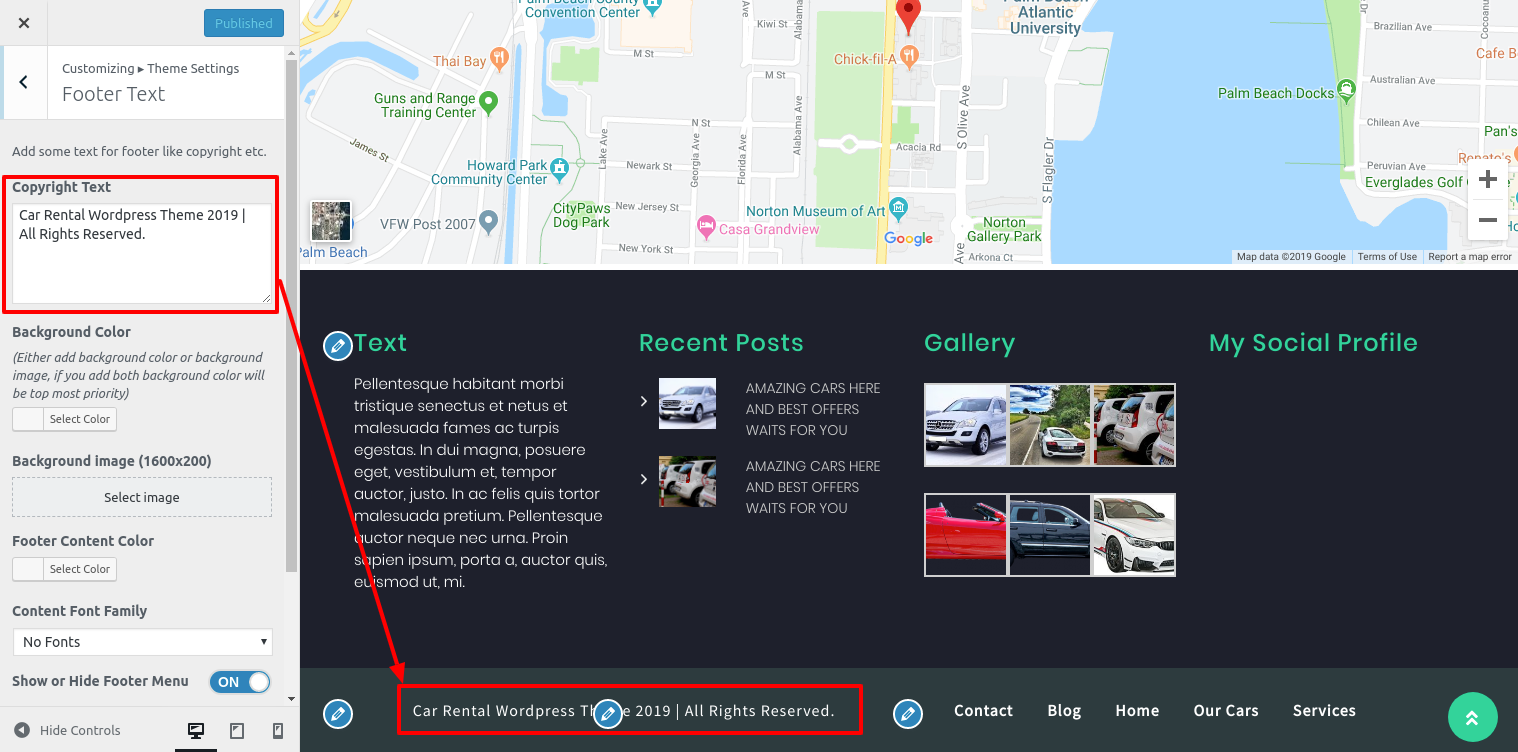
In footer text section,select copyright text.
Footer text section will be Appear on page like this.

Setup Contact Page
You must download and enable the contact form 7 plugin in order to set up the Contact Page.
After installation Contact option will appear on the dashboard.
Go to Dashboard Contact Add New .
Go to Appearance Customize Theme Settings Contact.
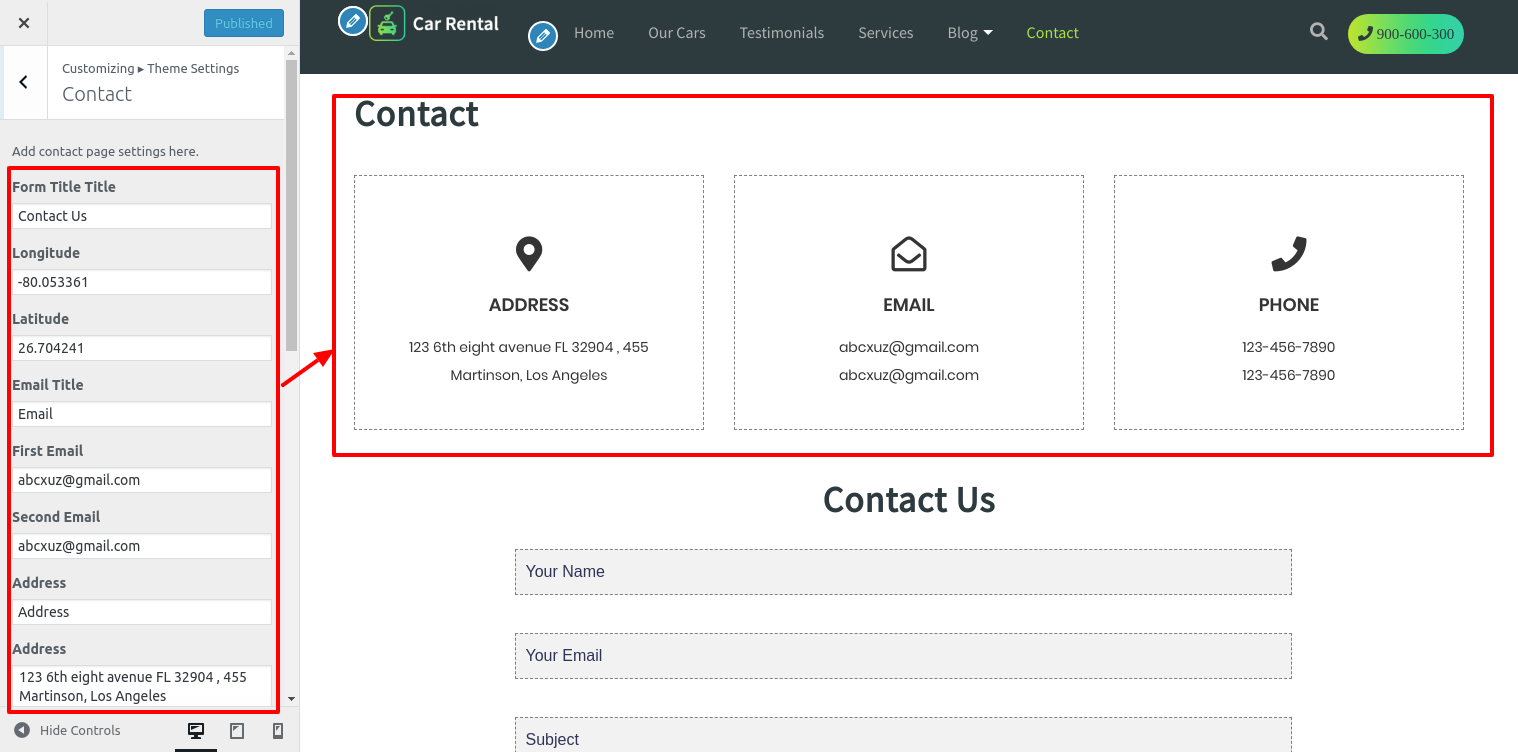

On this website, there will be a contact page.
Themes Plugin
-
Using plugins, you can increase and supplement the capability that already exists in WordPress.
You must enable the plugin if you want to include these features in your theme. Use these guidelines to enable the plugin in your theme.
How to activate plugins
Go to Plugins Installed Plugins book-store-pro-Posttype. Activate

Setup Navigation
-
First of all create pages from Go to Dashboard Pages Add New Page.
-
Go to Appearance Menu.
-
To create a new menu entry, click.
-
Give your menu a name in Menu name, then select the Save Menu button.
-
after creating a selection. Pages must be added by checking the appropriate options. You can drag and drop the menu selection into position after adding it.
-
Choose the position of the menu theme from the checkboxes below.
View this image to get a greater understanding.
Page Templates and Sidebars
Page Templates
Posts, Categories and Post Formats
Adding category
Review the following article for more information on adding categories: click here

Click the Publish button.
Creating a Blog post
Shortcodes
A shortcode is a powerful content building tool click here Shortcodes are easy to use. First of all, make sure that the editing mode is set to Visual.
Contact Form : [contact-form-7 id="5" title="Contact form 1"]
Testimonial Section : [alt-testimonials]
Author Section : [alt-author]
1) Testimonial Section :[alt-testimonials]
Go to Dashboard Pages Add New.
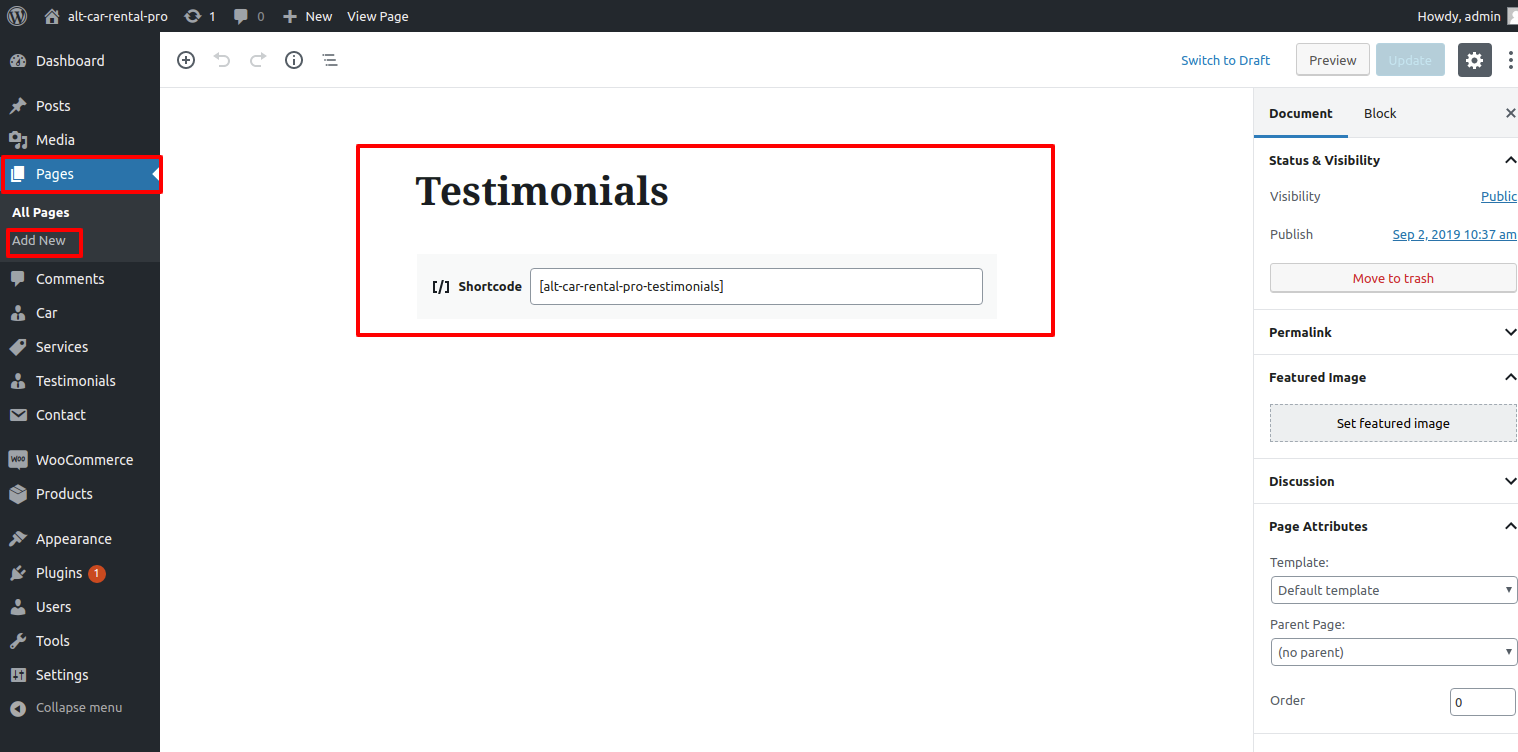
It will be appear on page like this

2) Our Cars Section : [alt-car-rental-pro-car]
Go to Dashboard Pages Add New.

It will be appear on page like this

3) Services Section :[alt-car-rental-pro-services]
Go to Dashboard Pages Add New.

It will be appear on page like this

Custom Widgets
In order to continue, with Widget section,
Go to Dashboard Appearance Widgets.
It will be appear on page like this
How to Setup Additional Theme Add Ons
1.The component must first be downloaded from the source (which will be a zip file). ( Post Type plugin.zip). Next, you must access the WordPress dashboard interface and visit Plugins » Add New page.
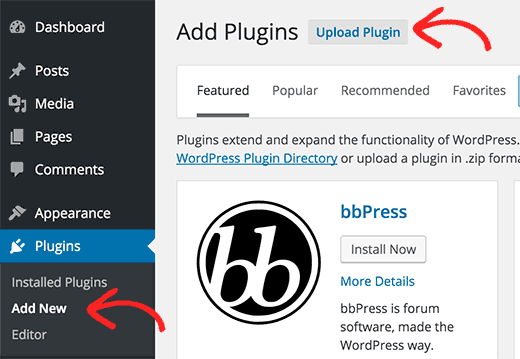
2.After that, select the Upload Plugin button at the top of the screen.
3.You'll arrive at the plugin upload screen after doing this. Here, you must pick the plugin file that you previously downloaded to your computer by clicking the choose file button.
4.To install the file, you must first select it and then hit the install now button.
5.Now WordPress will transfer the plugin file from your computer and perform the installation for you. Once the download is complete, you will see a message like this.
6.Once the plugin has been installed, you must select the Activate Plugin link to use it.
Setup Social Icons
In order to continue, with Social Icons,
Refer to the images below for additional setup instructions.
Go to Appearance Customize Theme Settings Social Icons.
This will enable you to build up Social Icons.