1-Utilize the WordPress admin to install a theme
The first step is to enter in to your WordPress admin dashboard. then select on
1.Go to the menu Appearance >> Themes
The template package that you got is divided into various folders. Let's examine what is contained in each folder:
Screenshots - contains template screenshot. Not for production.
The steps for activating a BWT key are as follows.
Use the License Key that you will receive via email to activate your licence.
The process to activate a licence is as follows.
Go to Dashboard >> Appearance >>BWT Key Activation>>Enter Key>>Save Changes.
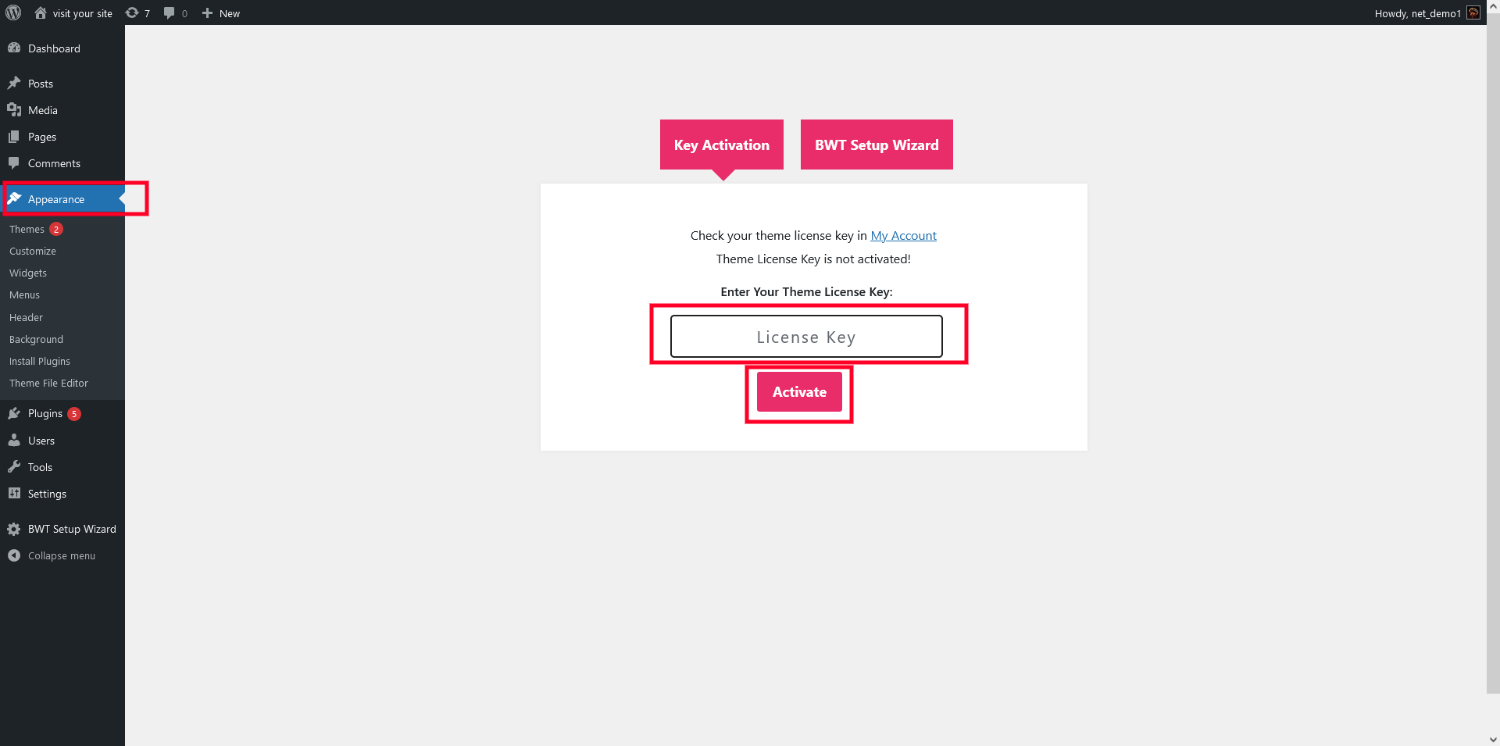
After Entering The Key >> Activate Licence.

After you Activate Licence,the key will be active and then you can Getstarted with the Theme.

In this way you can activate your Licence Key.
The first step is to enter in to your WordPress admin dashboard. then select on
1.Go to the menu Appearance >> Themes

2. When arriving at the themes page, select Add New from the menu at the top.

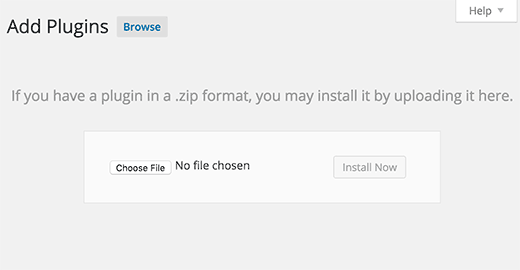
3. Choose the button for theme upload.

4. Choose your bwt-electronics-marketplace-pro.zip theme by clicking the Browse option, then click the Install Now button.
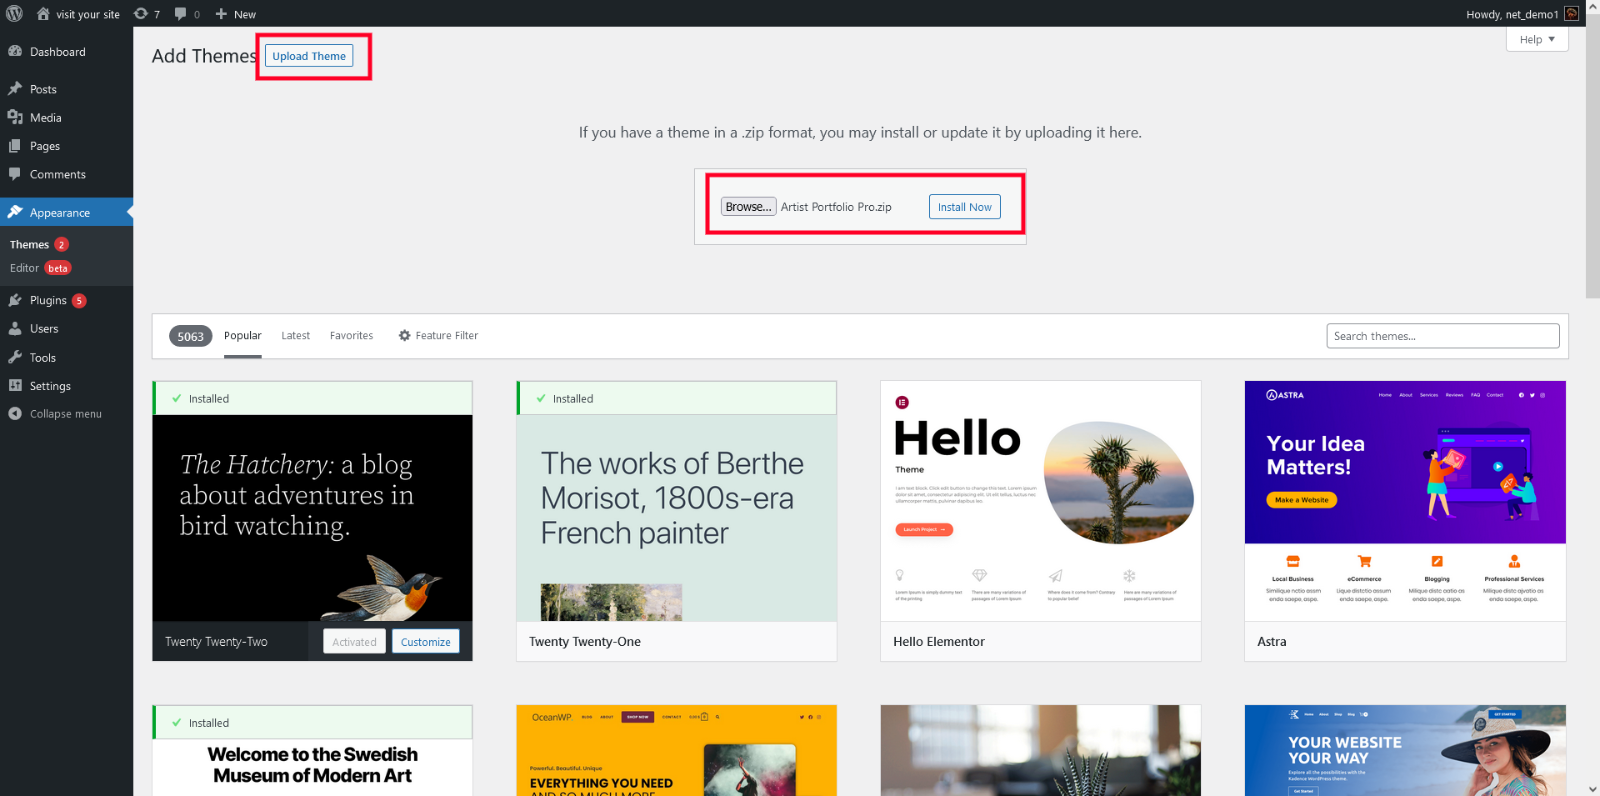
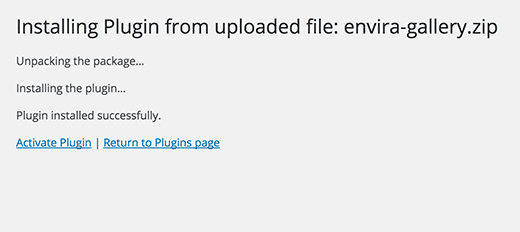
5. WordPress will now complete the installation of your theme and display a success message and a link to activate or view a live preview.

Congratulations!! Your theme has been set up successfully.
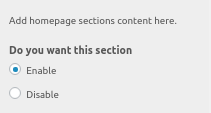
To set up your theme, simply select to import sample content. This information will walk you through creating your website for website development.
Go to Dashboard >> Appearance >> Add New.
You must first install the bwt-artist-portfolio-pro post type plugin and the woocommerce extensions before you can begin.
Click on"Start Now" than "Demo import" .

Color/Fonts Setting up the site's colour scheme and fonts is a simple procedure.
The options integrated in this section are:
This section provides the ability to change the font family used for paragraphs and other website content.
 This section offers the ability to change the font family used for all of your website's headings.
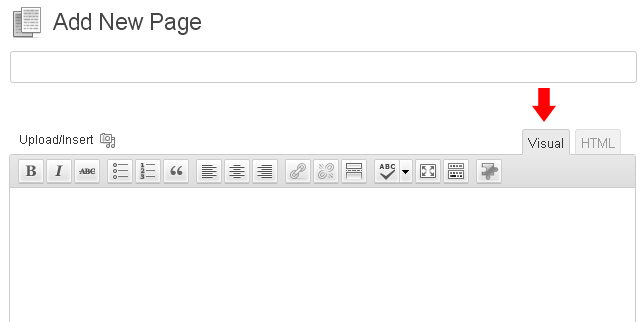
Create Page to set template:Go to Dashboard >> Pages >> Add New Page.
You can label it anything you like, such as "home." then pick template "home-page" from the drop-down list of templates.


Set the front page:Go to Setting -> Reading --> Set the post page display static page to home page
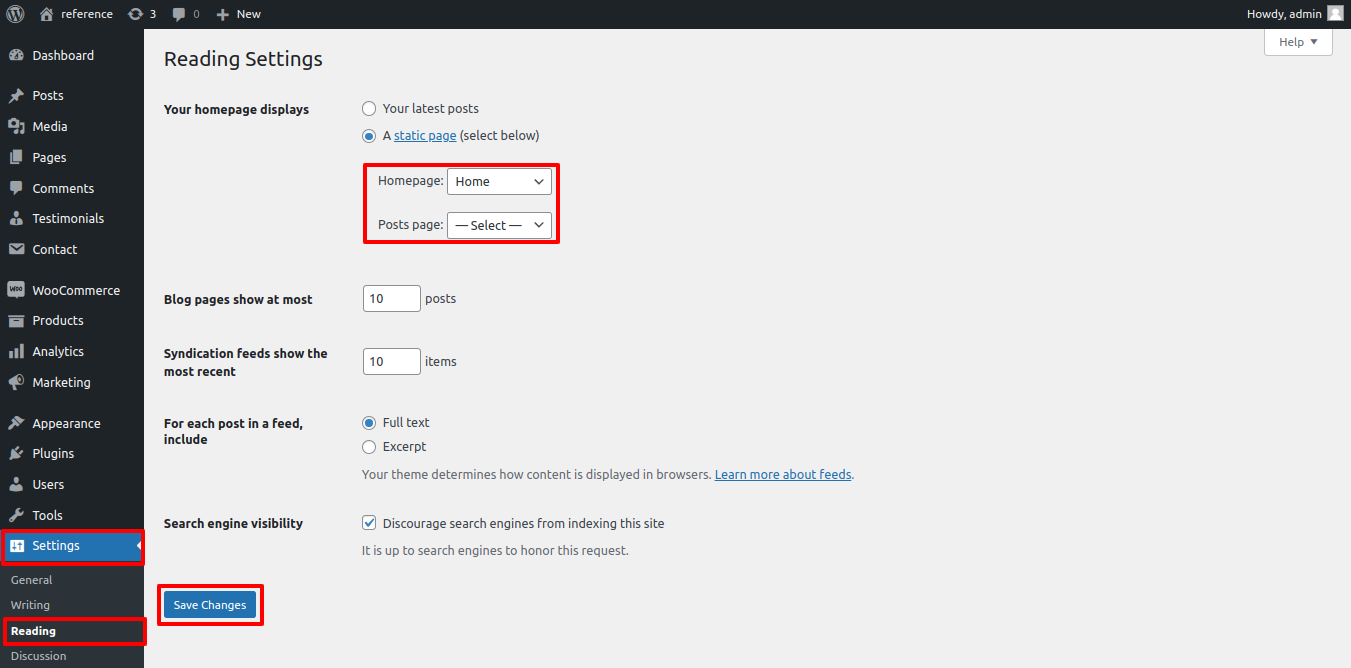
As soon as you're finished, you can view the front page's entire demo of the material.

In order to continue, Topbar,
Go to Appearance >> Customize >> Theme Settings >>Topbar

Contact information is provided in the topbar section
These recommendations will help you develop Topbar.

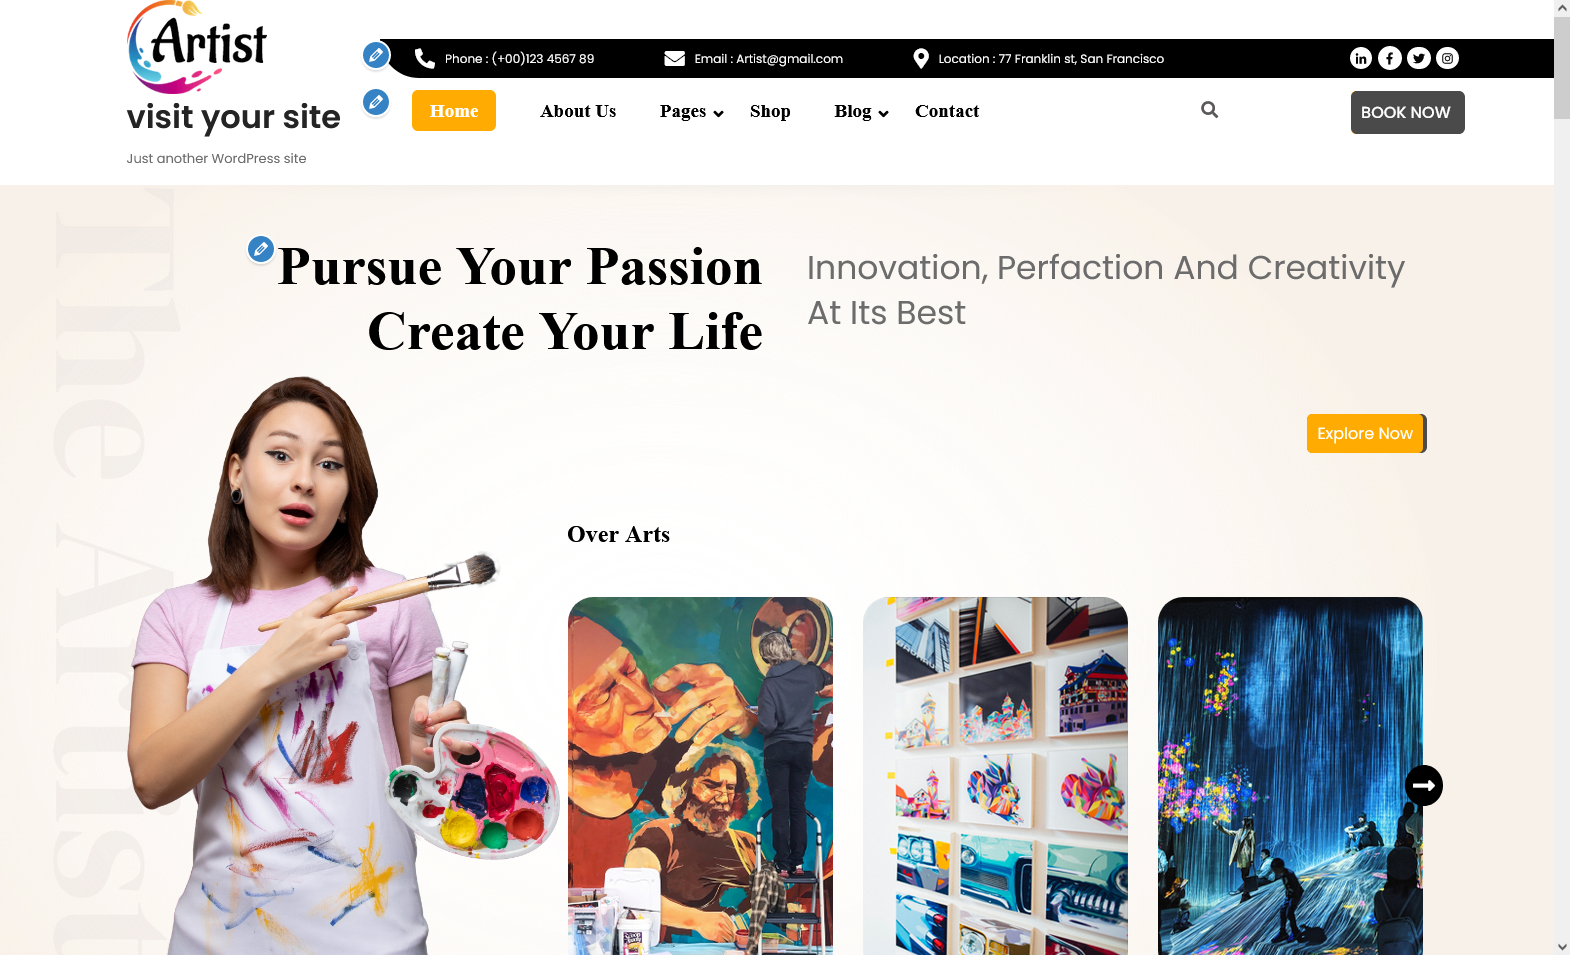
In order to continue, header,
Go to Appearance >> Customize >> Theme Settings >>Header
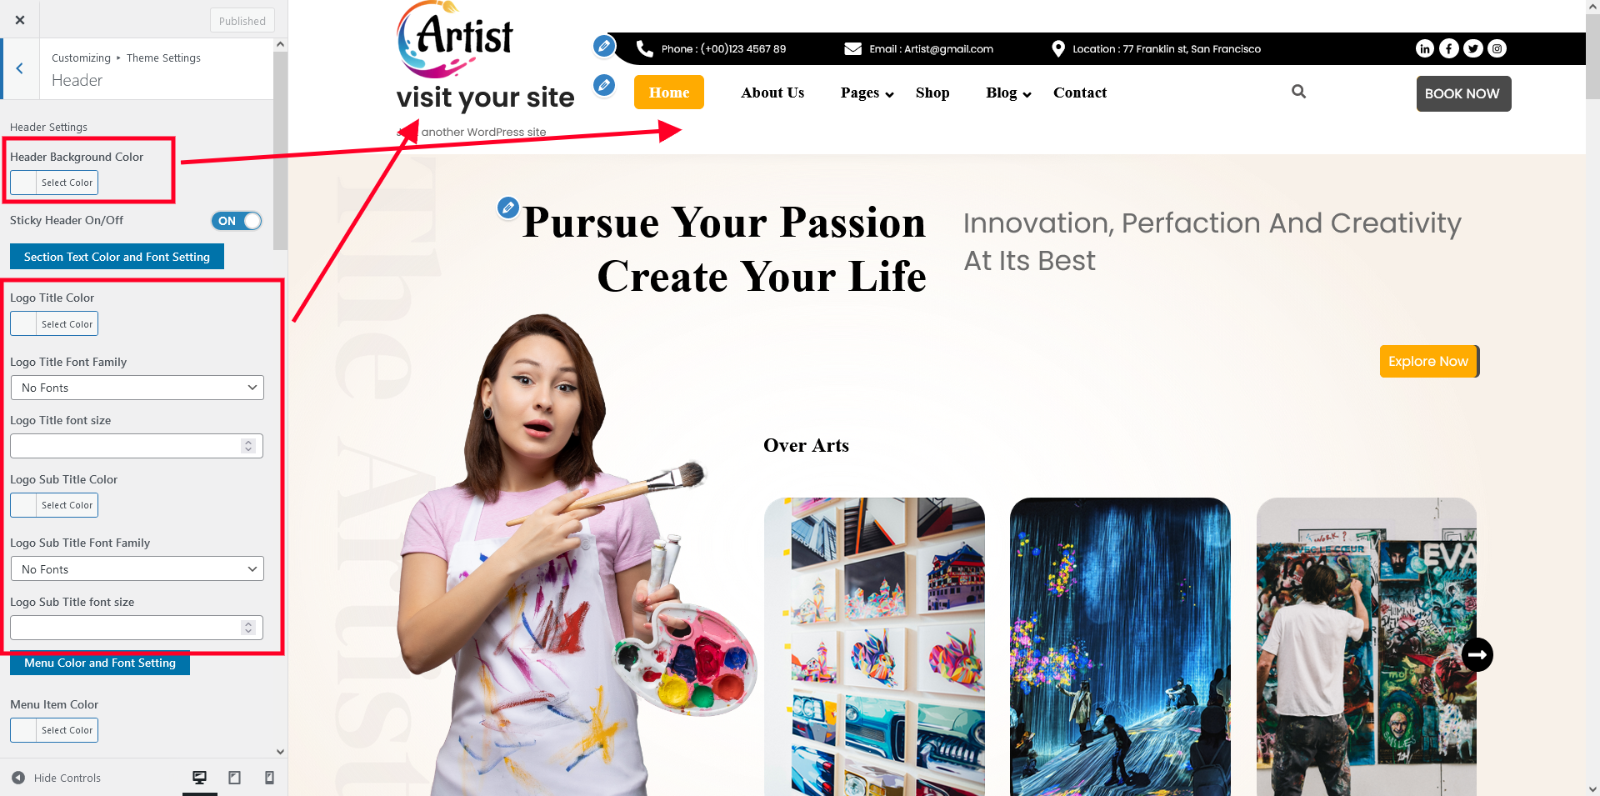

These recommendations will help you develop header.
To setup, adhere to the instructions below the slider
Go to Appearance >> Customize >> Theme Settings >>Slider Settings


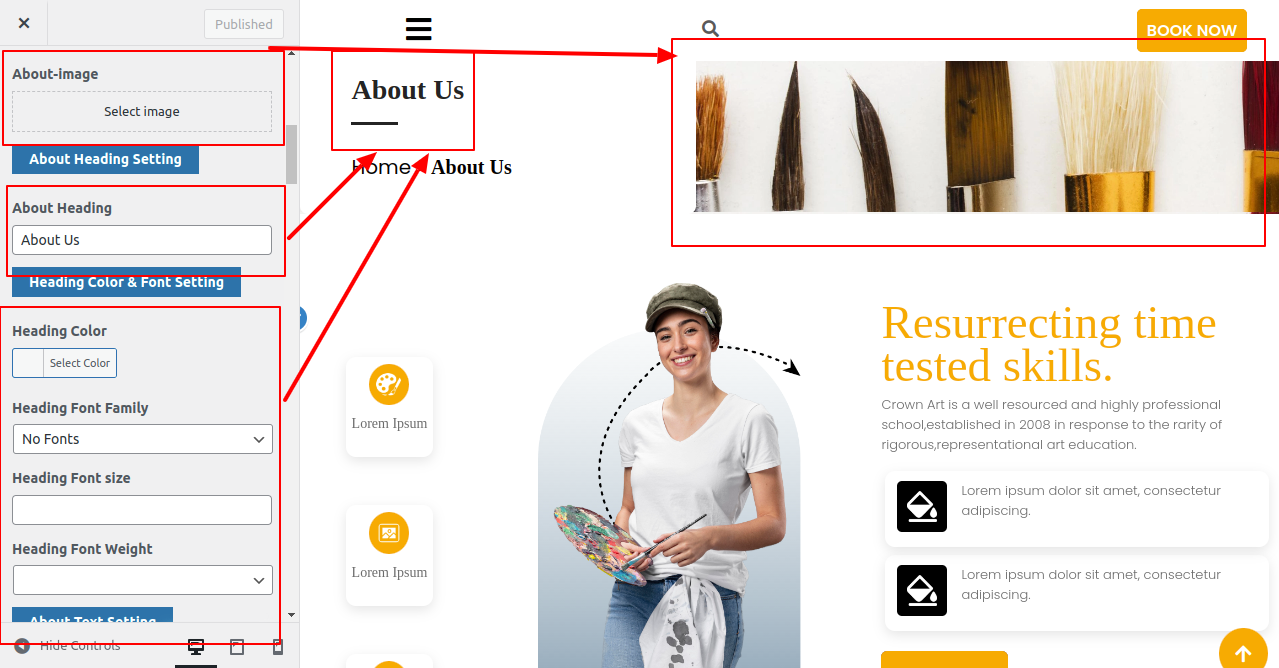
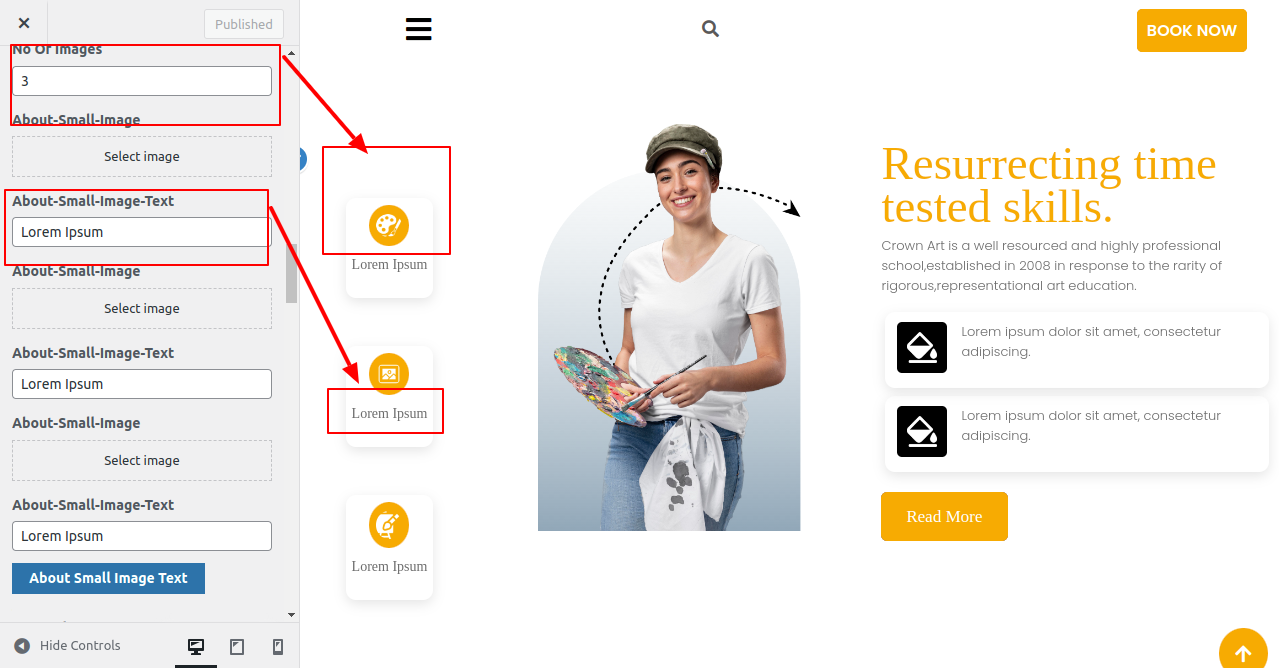
To setup, adhere to the instructions below About Us Section
Go to Appearance >> Customize >> Theme Settings >>About Us


Go to Dashboard >> Service >> Add New

Go to Dashboard >> Service >> Add Post Name, Para and Image.>>

In order to continue, Our Services Section,
Go to Appearance >> Customize >> Theme Settings >> Our Services Section

Go to Dashboard >> Prodcut >> Add Add new.>>

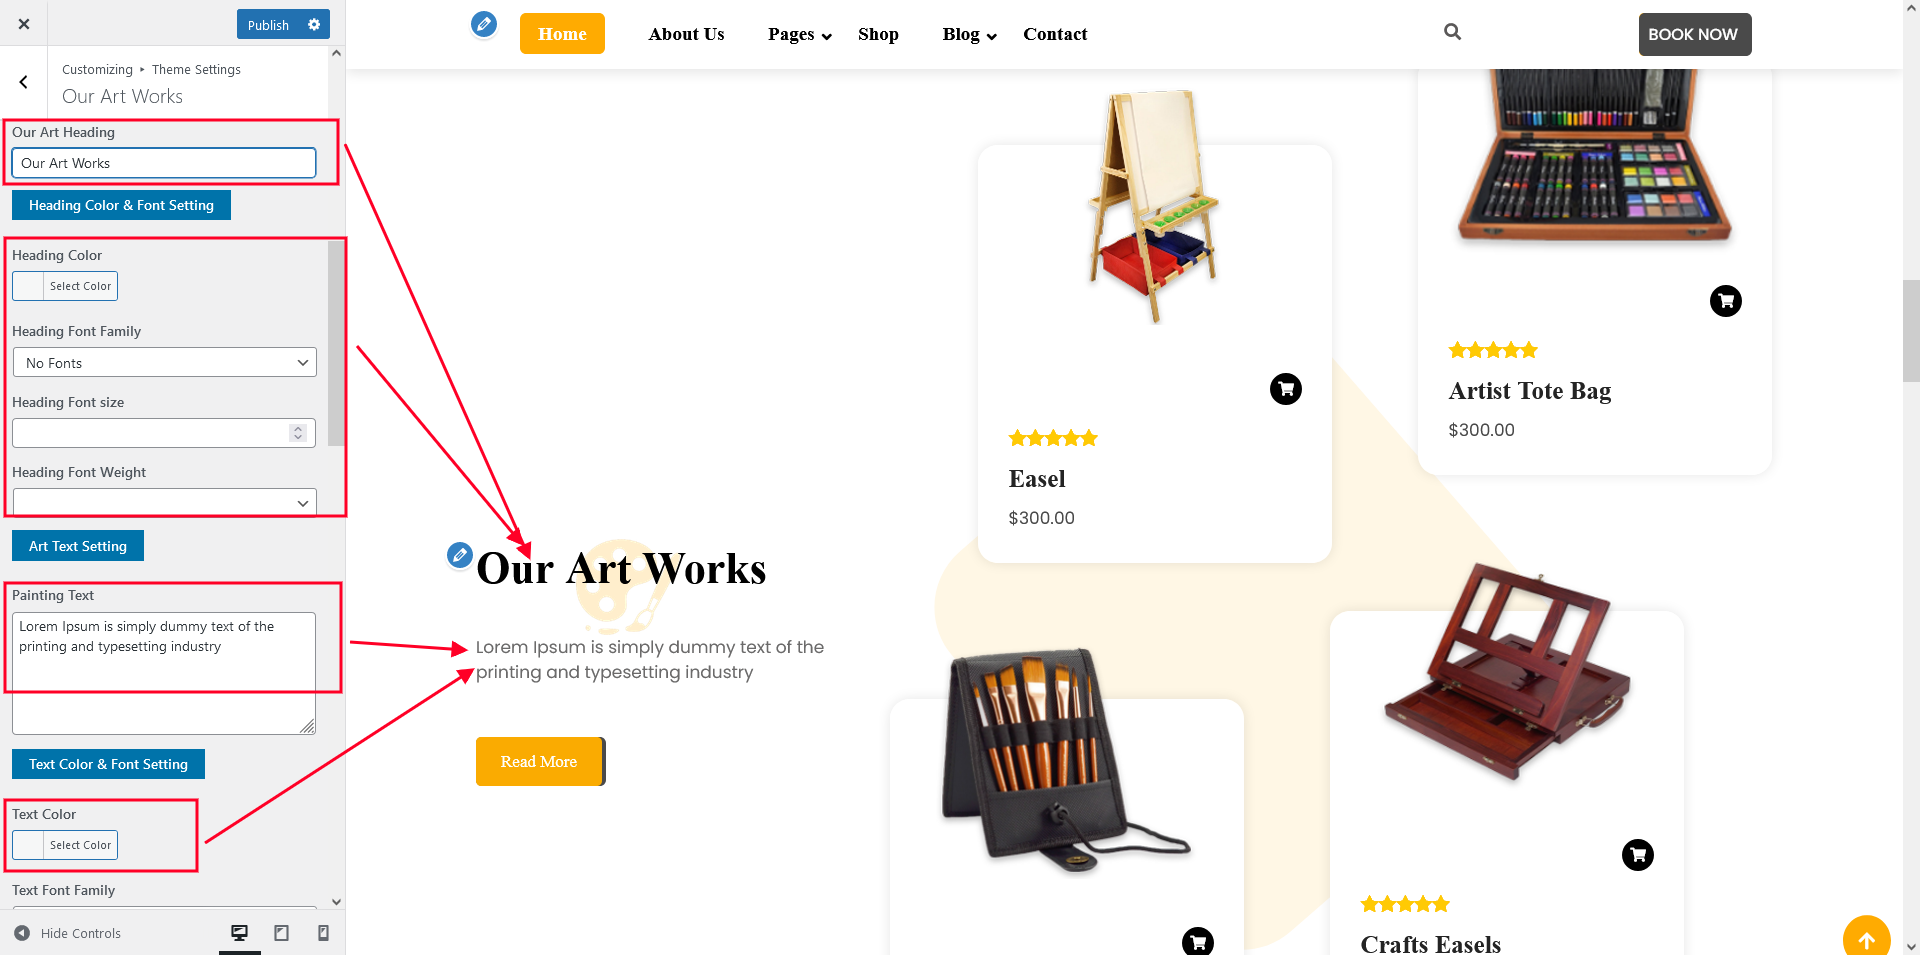
Go to Appearance >> Customize >> Theme Settings >>Our Art Works

The BWT Artist Pro Posttype Plugin must be installed and activated before the Painting Category area can be found in the dashboard.
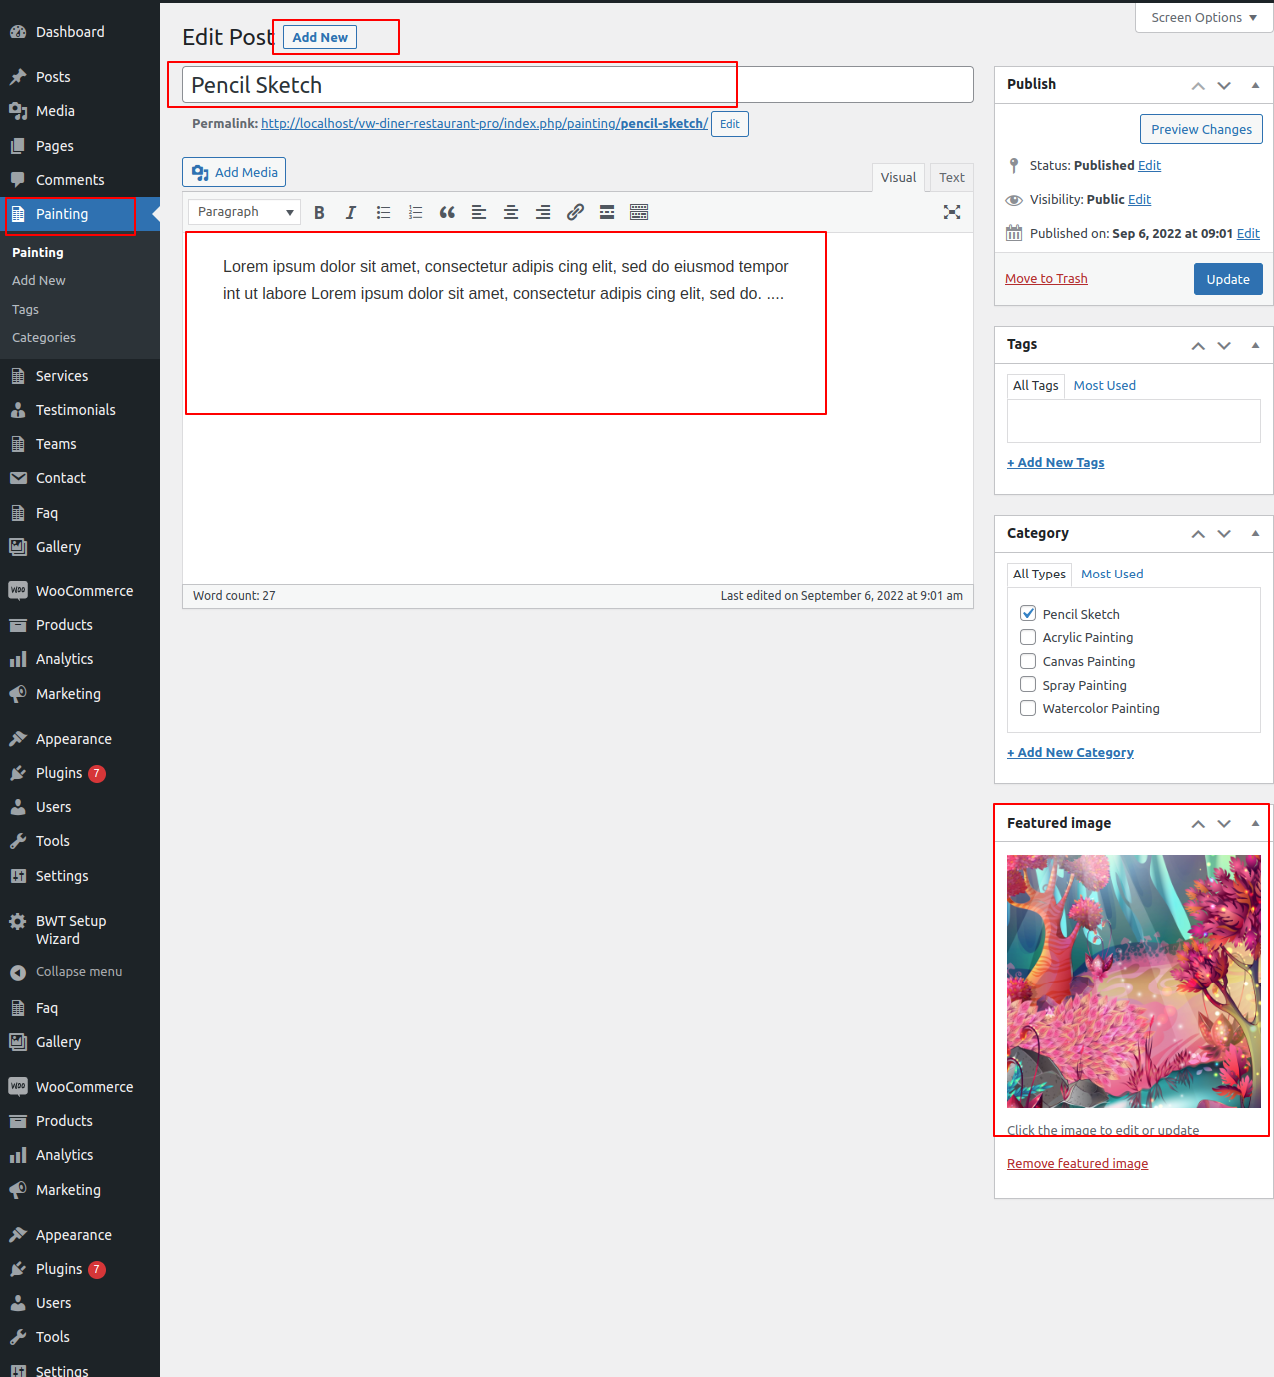
In order to continue, Painting Category Section,
Go to Dashboard >> Painting >> Add New

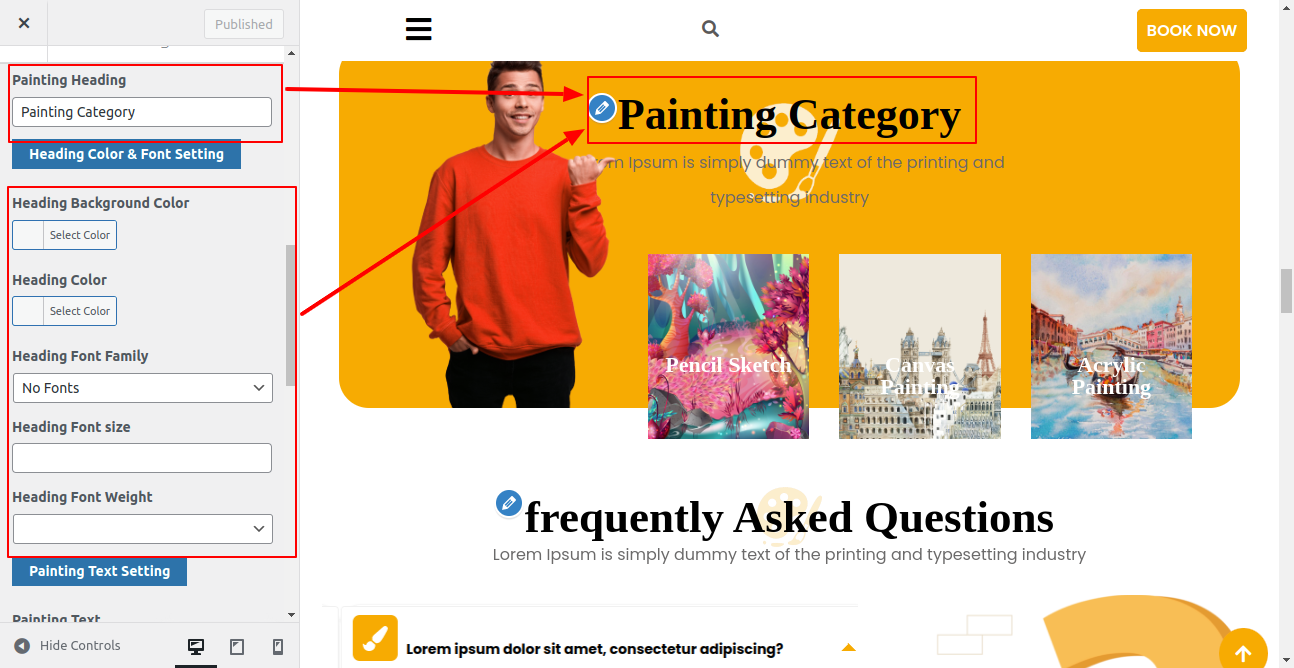
Now Go to Appearance >> Customize >> Theme Settings >>Our Painting


To enter the FAQs from dashboard, we must first set the FAQ Section.
Go to Dashboard >> faq >> Add NEW >>

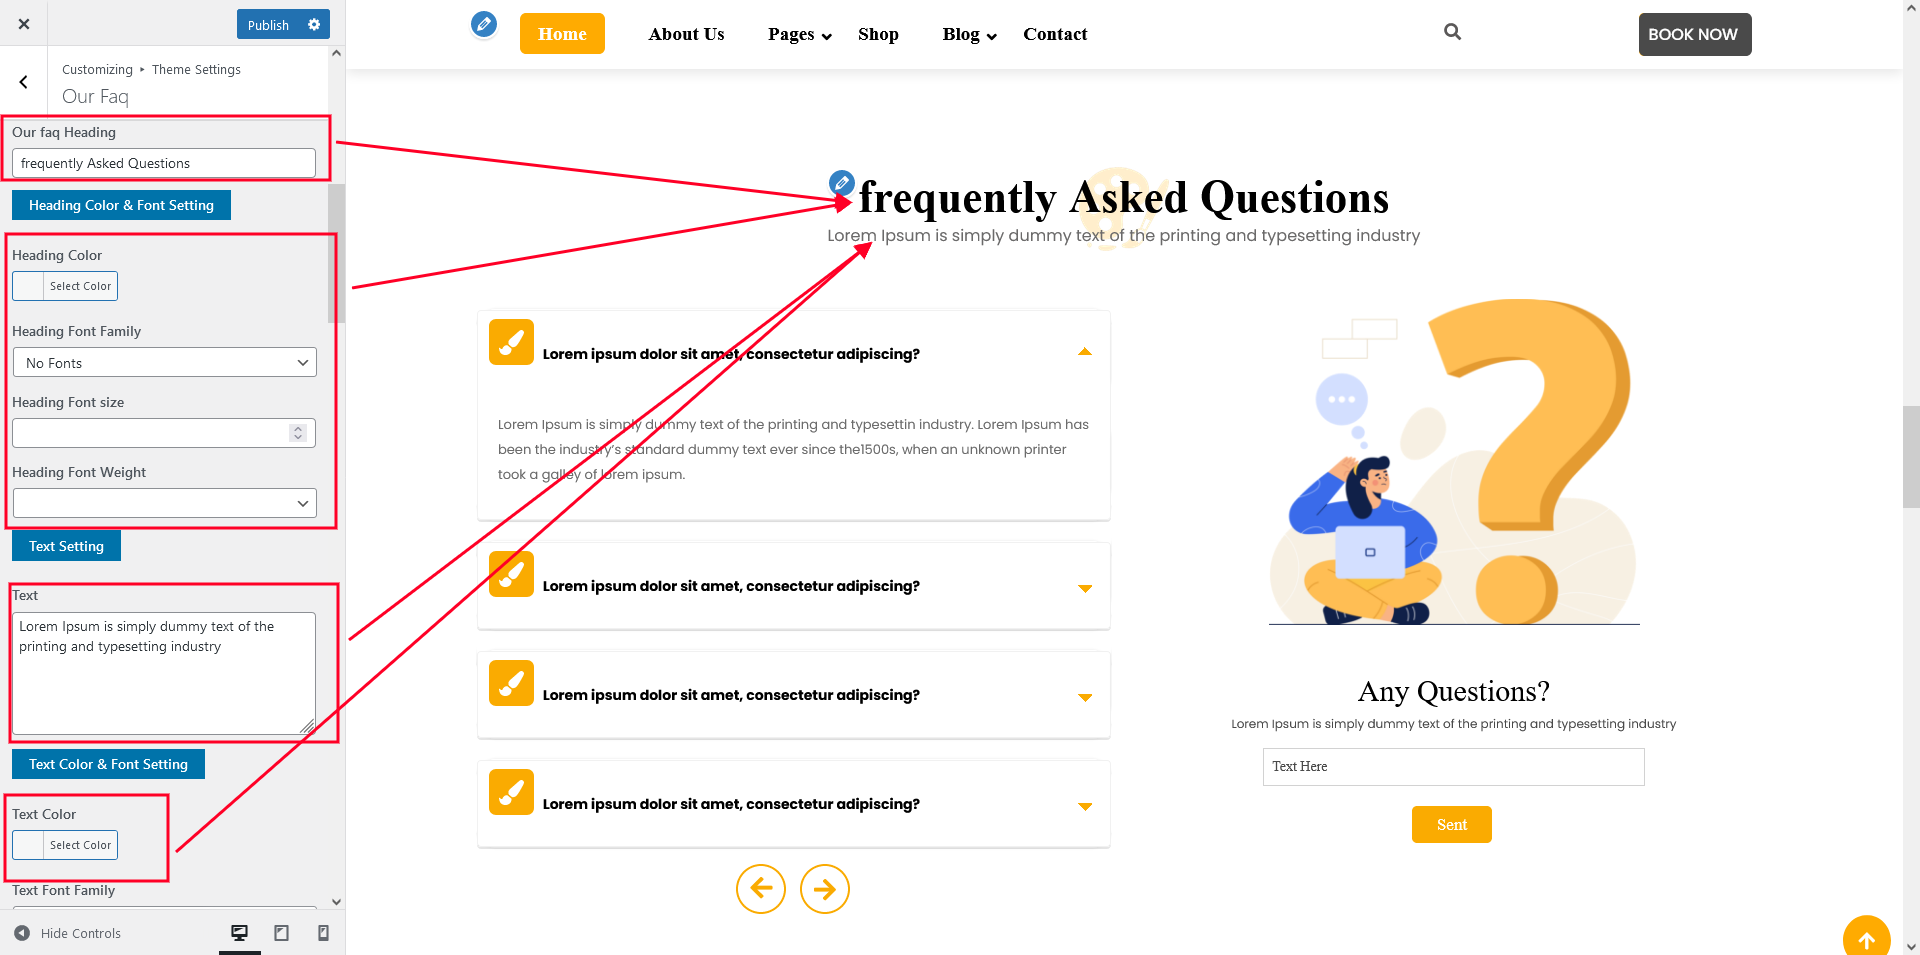
Go to Appearance >> Customize >> Theme Settings >> Our Faq Section

In order to continue, frequently Asked Questions ,
Go to Appearance >> Customize >> Theme Settings >> Our Faq Section

You must first enable the "Gallery Images" plugin in order to build up this section.

Go to Dashboard >> Gallery >>Add new Gallery >> Update.

In order to continue, Our Art Gallery Section ,
Go to Appearance >> Customize >> Theme Settings >> Our Gallery Section


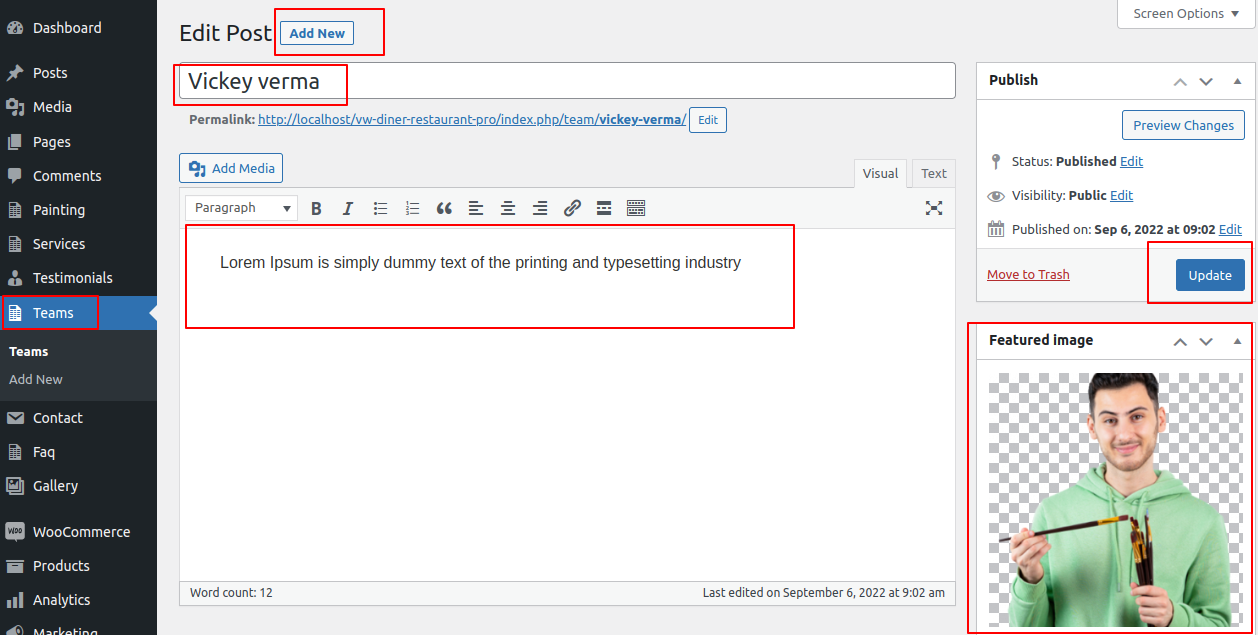
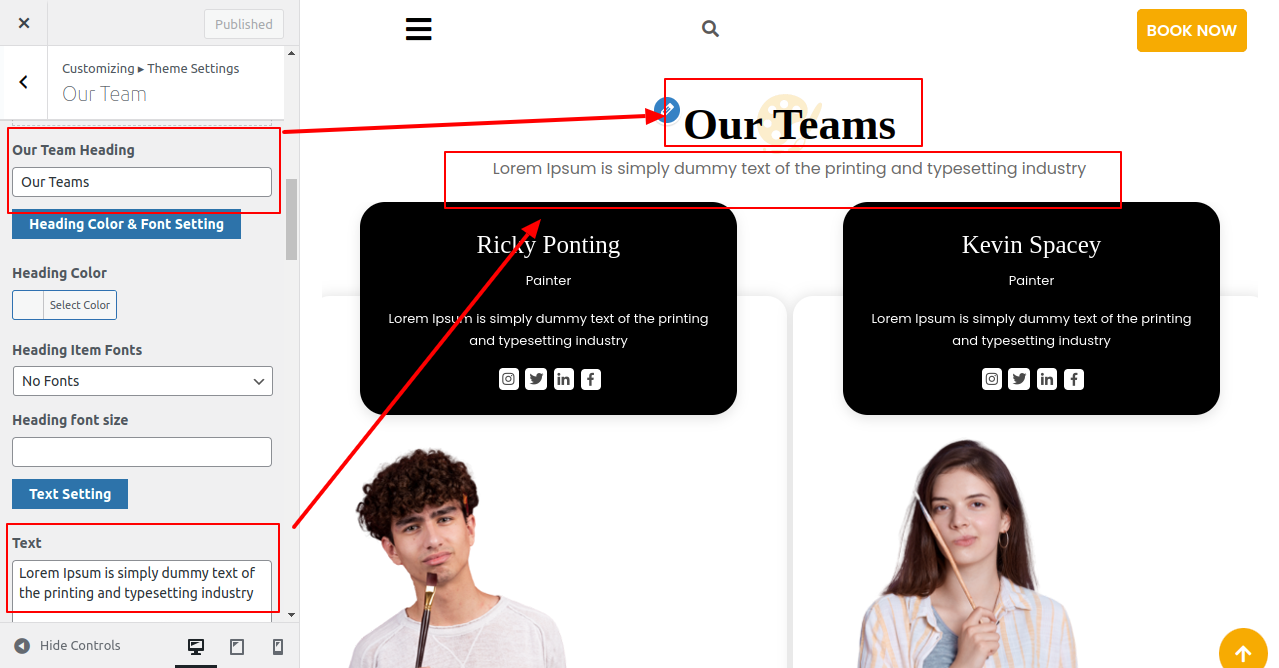
In order to establish Our Teams section
Go to Dashboard >> Teams >>Add New >>


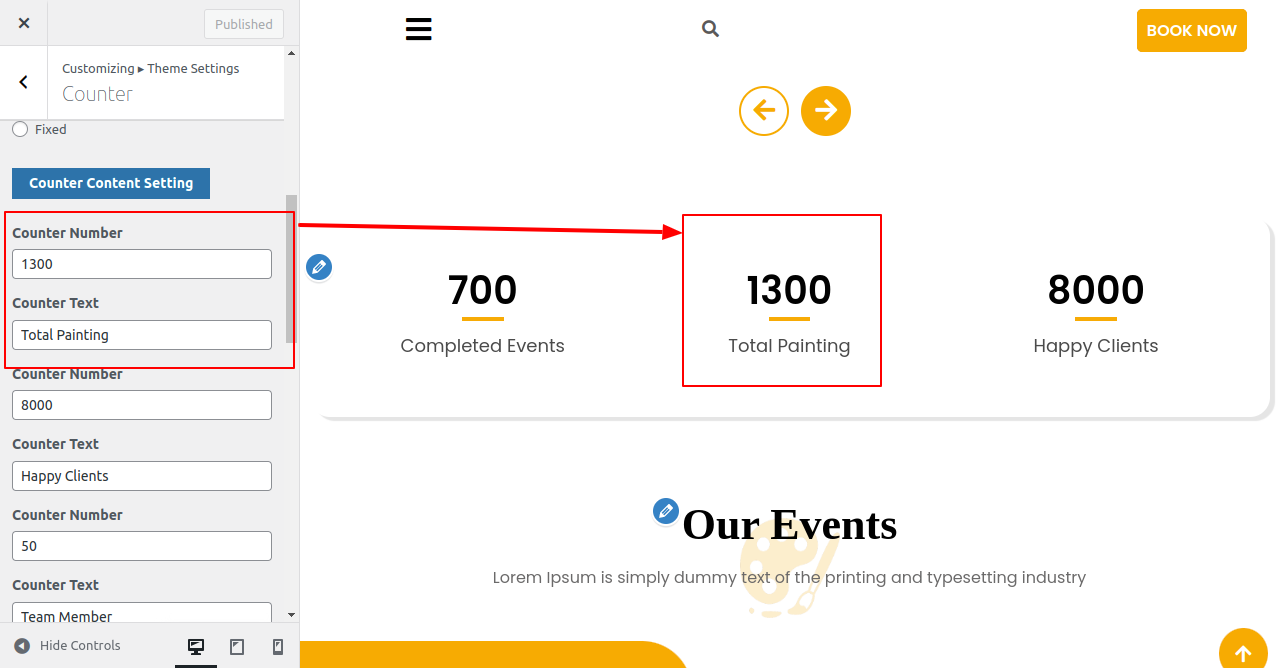
Go to Appearance >> Customize >> Theme Settings >> Counter Section

Go to Appearance >> Customize >> Theme Settings >> Our Event


You must first enable the "Gallery Images" plugin in order to build up this section.After the bwt-artist-pro-posttype plugin has been installed and activated, the testimonials area will show up in the dashboard.
In order to continue, Testimonial Section,
Go to Dashboard >> Testimonial >> Add New Post
There are now a total of 3 posts in the testimonials area.
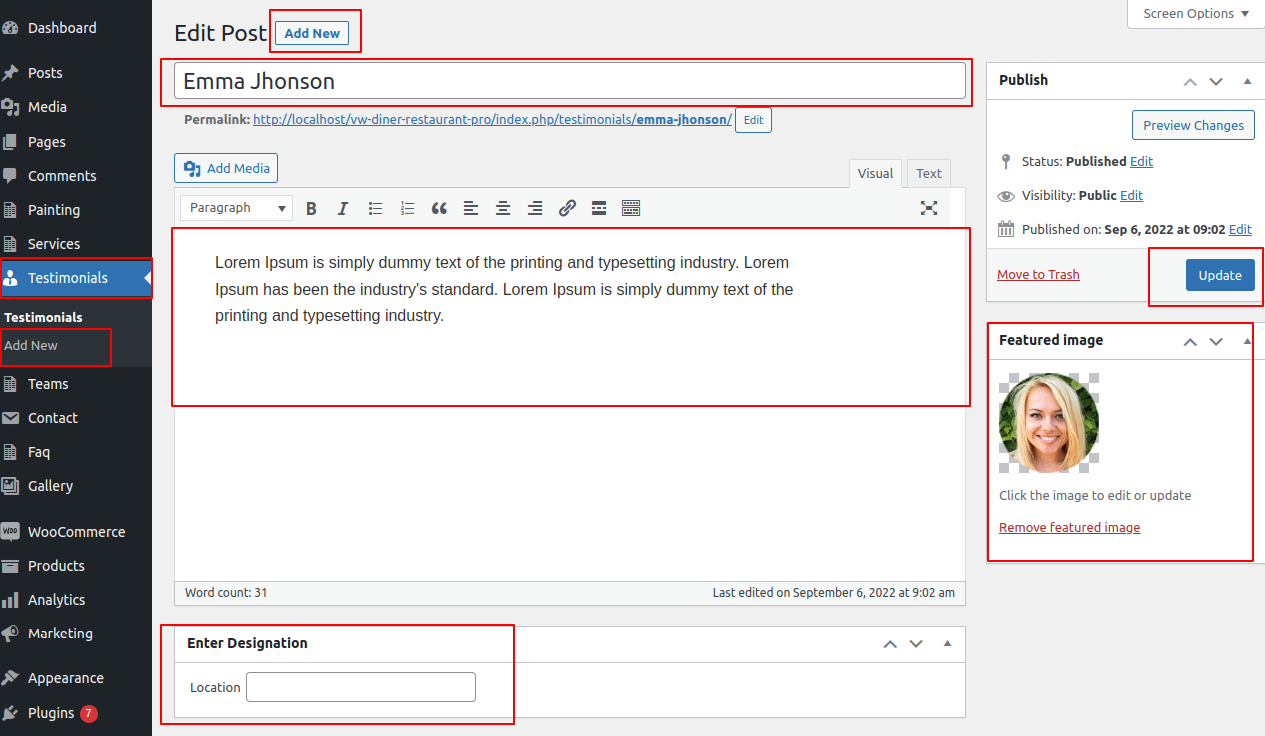
To create testimonials, abide by these rules.
Enter the post name, contents, and featured image in the Testimonials area when adding a new post. then select "Publish."

In order to establish our blog section Go to Dashboard >> Post >> Add New


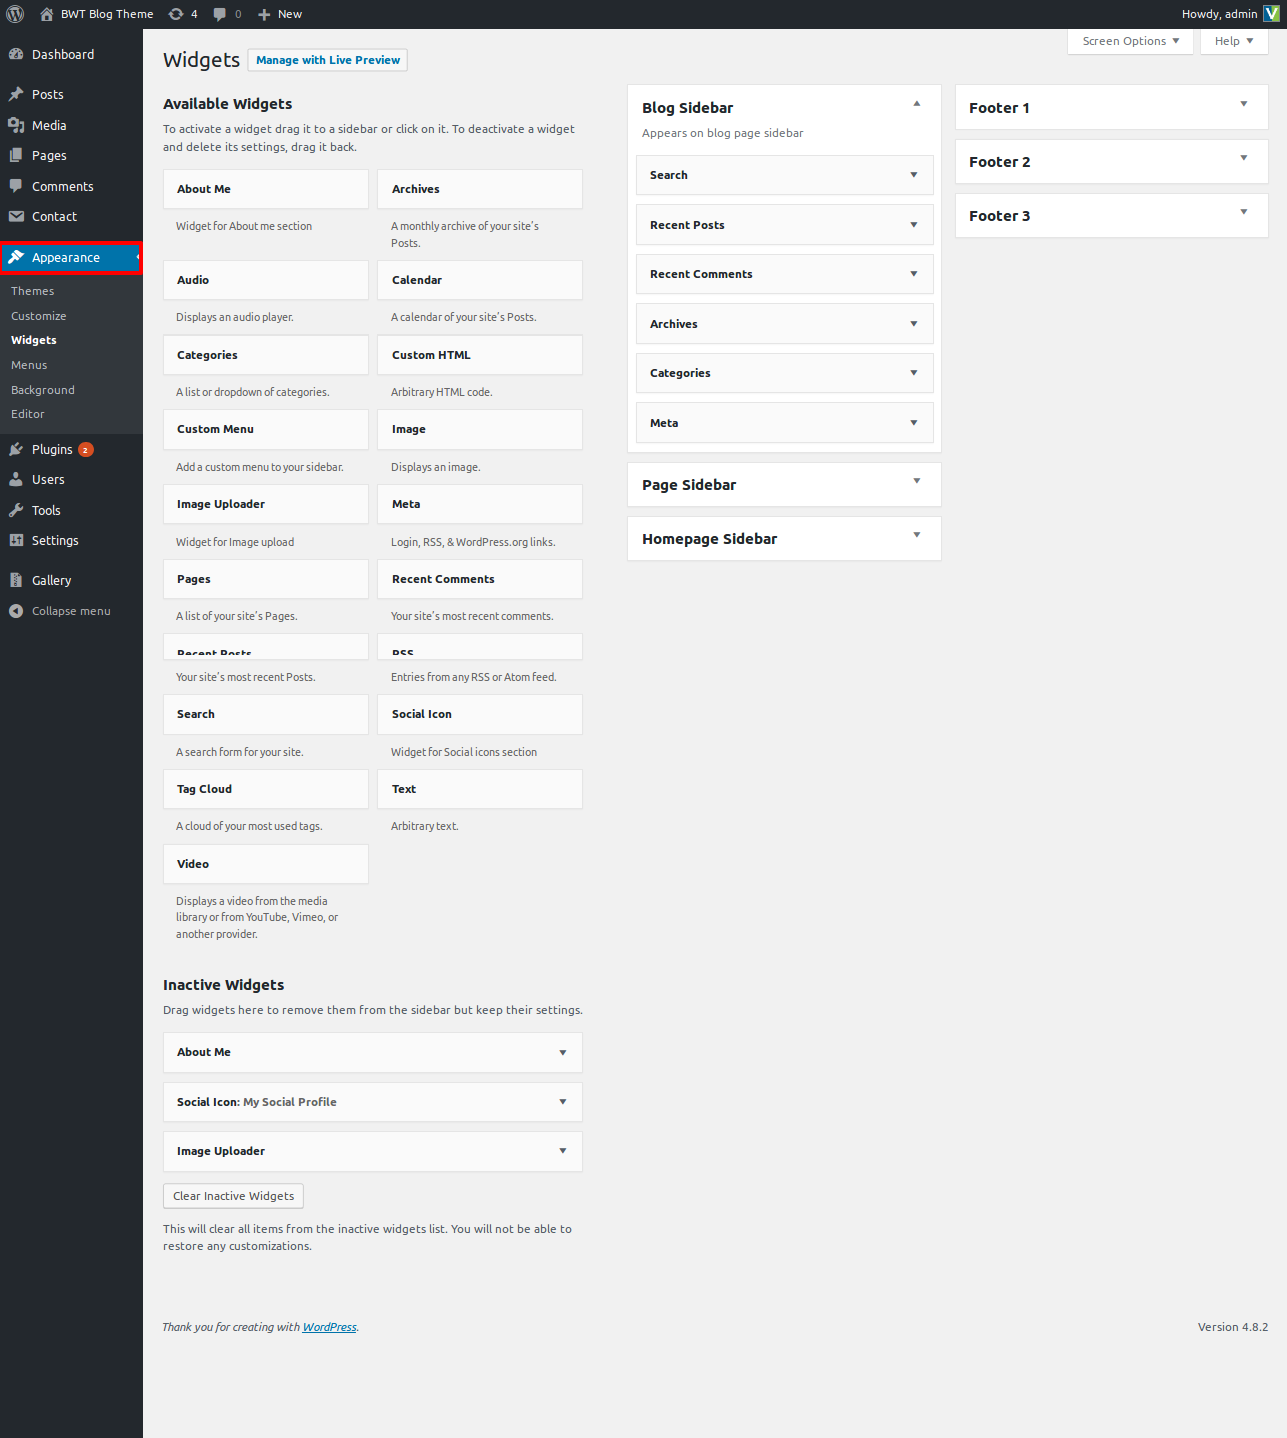
Installing the traditional widget pulgin is necessary for setting up the footer. Next, go to Dashboard >> Appearance >> Widget

Now Go to Appearance >> Customize >> Theme Settings >>Footer Widget

In order to establish Newsletter Go Customizer >> Our Newsletter

These recommendations will help you develop Footer Section.
In order to continue, Single Blog Page Settings Section,
Go to Appearance >> Customize >> Theme Settings >>Blog Page Settings Section

You can create Single Blog Page Settings using these suggestions.
Go to Dashboard >> Page Click Add New Button >> Add page name >> select Blog with No Sidebar template at right bottom of page >> Click publish button

The result will resemble this.

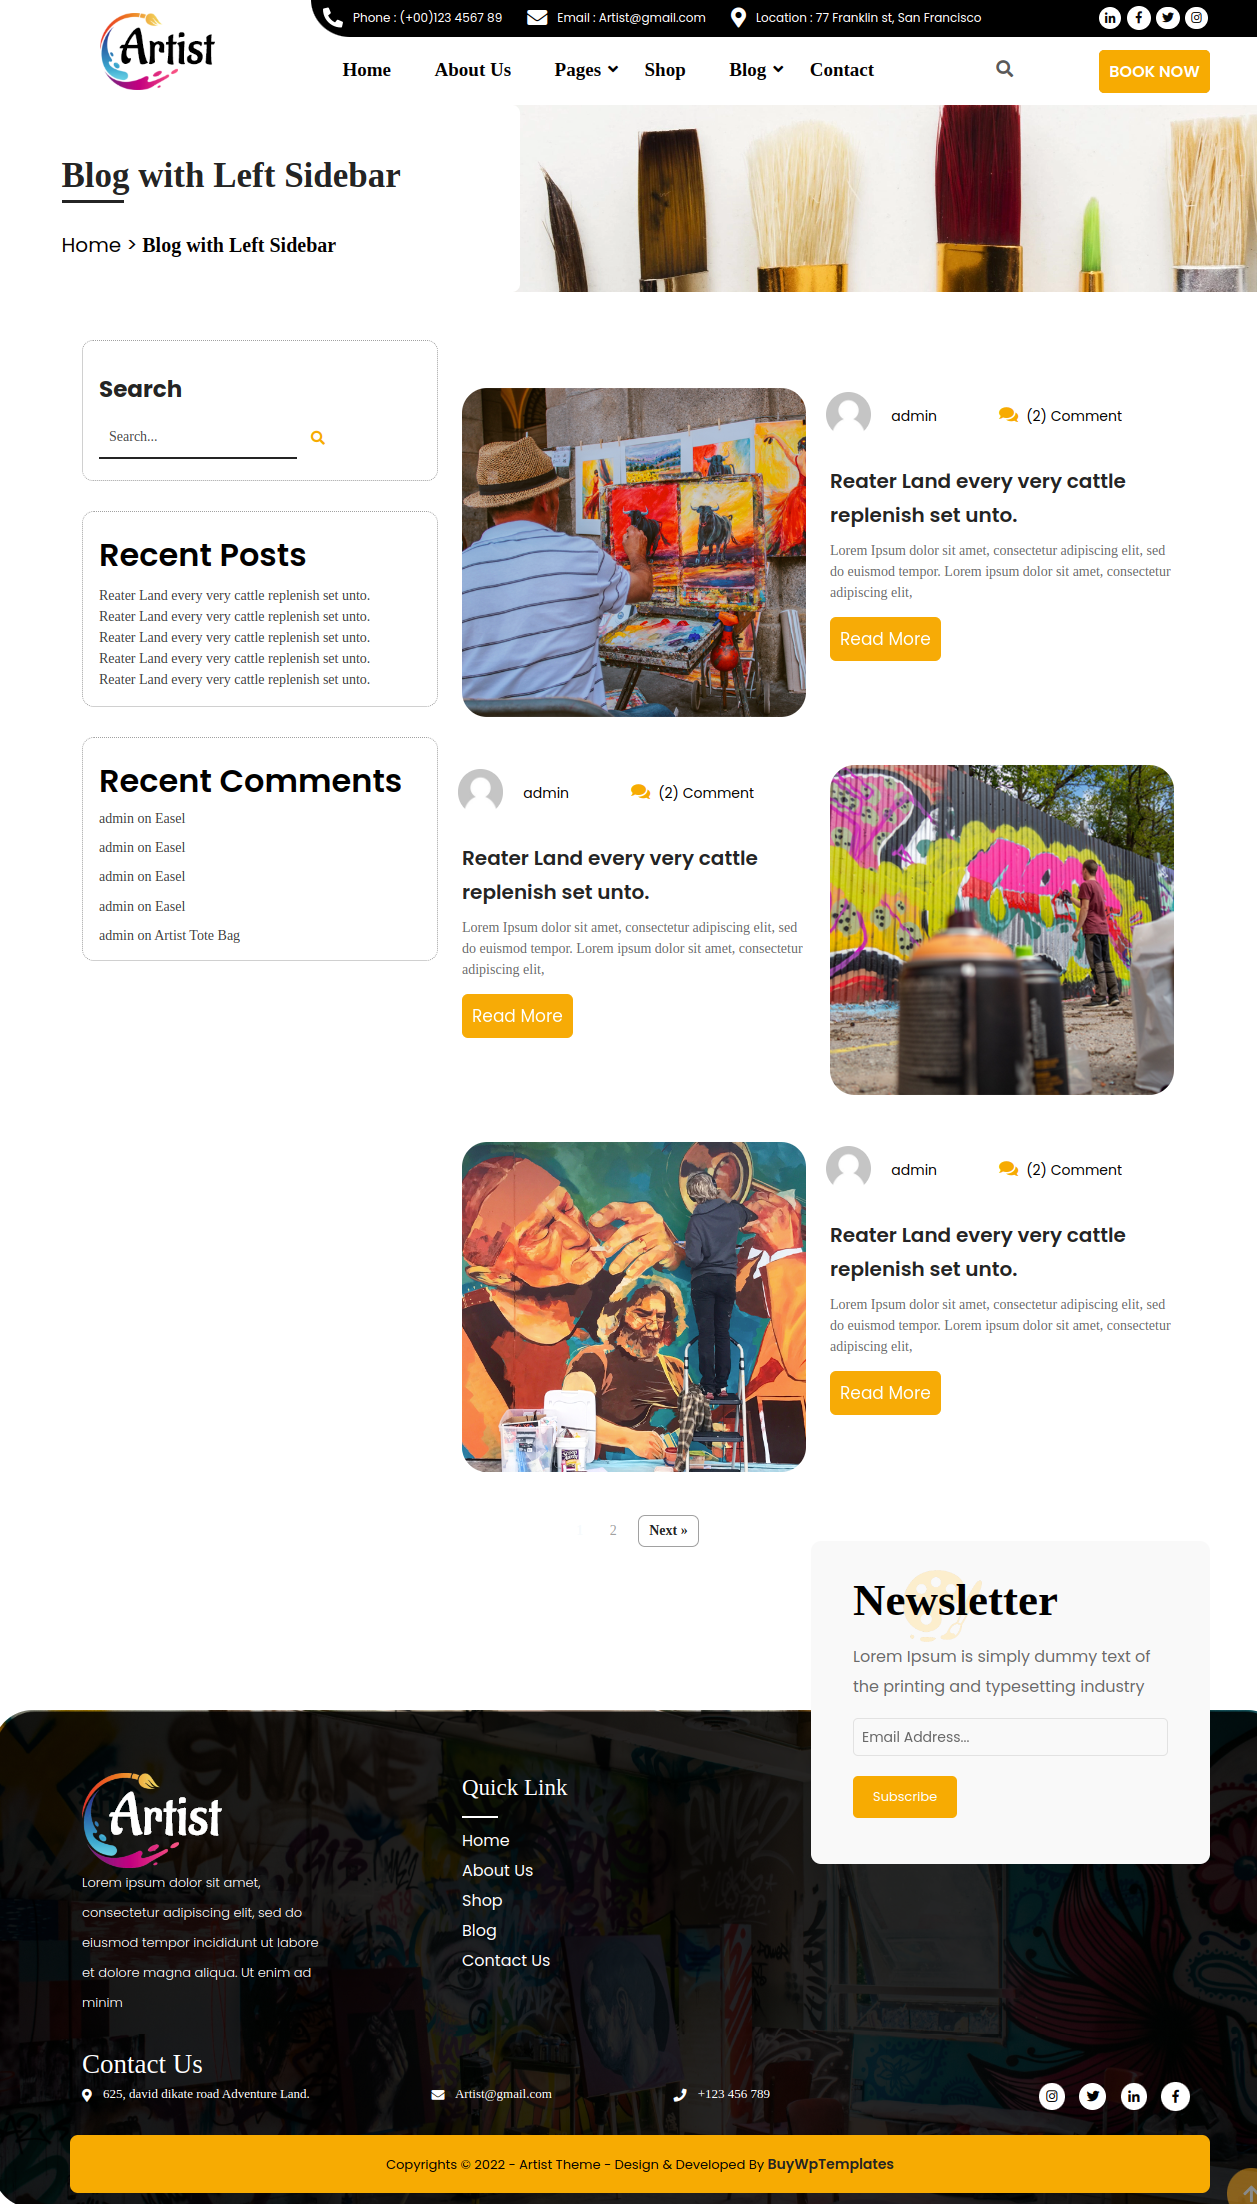
Go to Dashboard >> Page Click Add New Button >> Add page name >> select Blog with Left Sidebar template at right bottom of page >> Click publish button

The result will resemble this.
Go to Dashboard >> Page Click Add New Button >> Add page name >> select Blog with Right Sidebar template at right bottom of page >> Click publish button
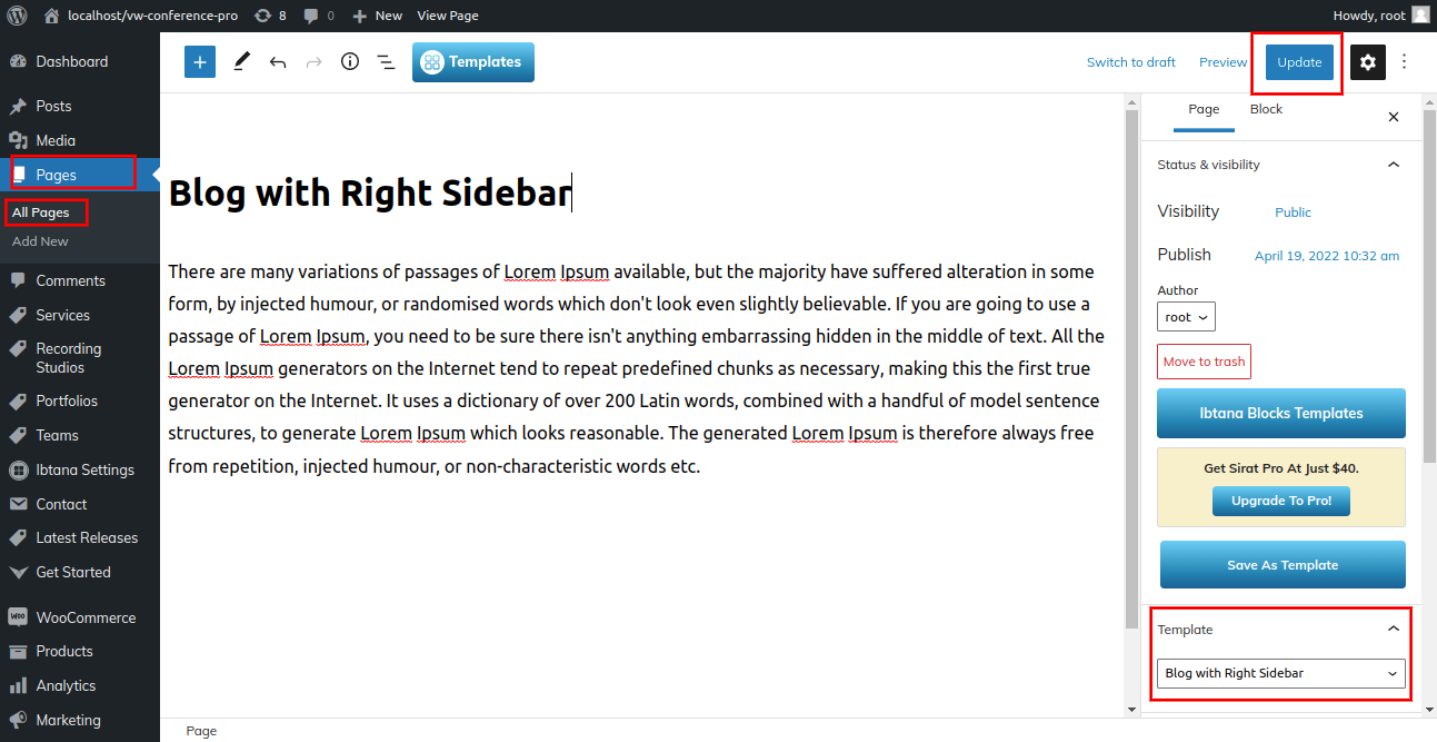
The result will resemble this.


In order to continue, Contact section,
the Contact Form 7 component must be uploaded and turned on. The contact choice will be visible on the dashboard following the installation process.
Go to Dashboard >> Contact >> Add new
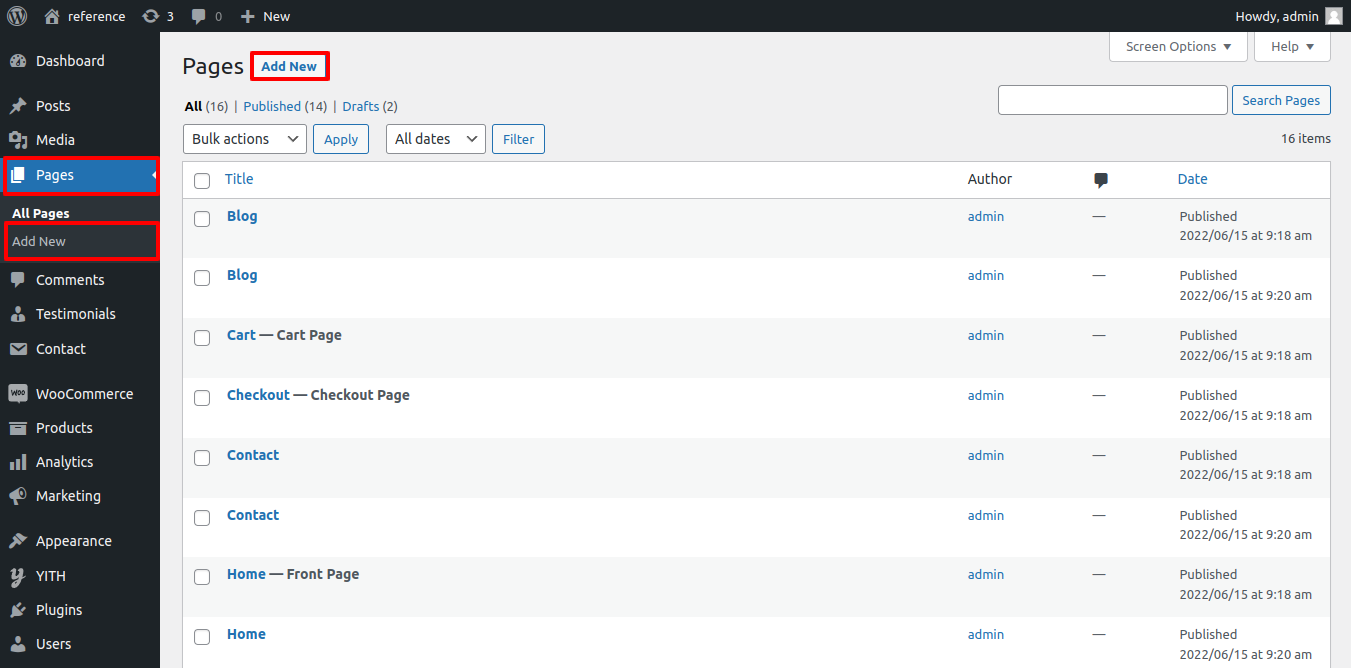

Go to Dashboard >> pages >> add new
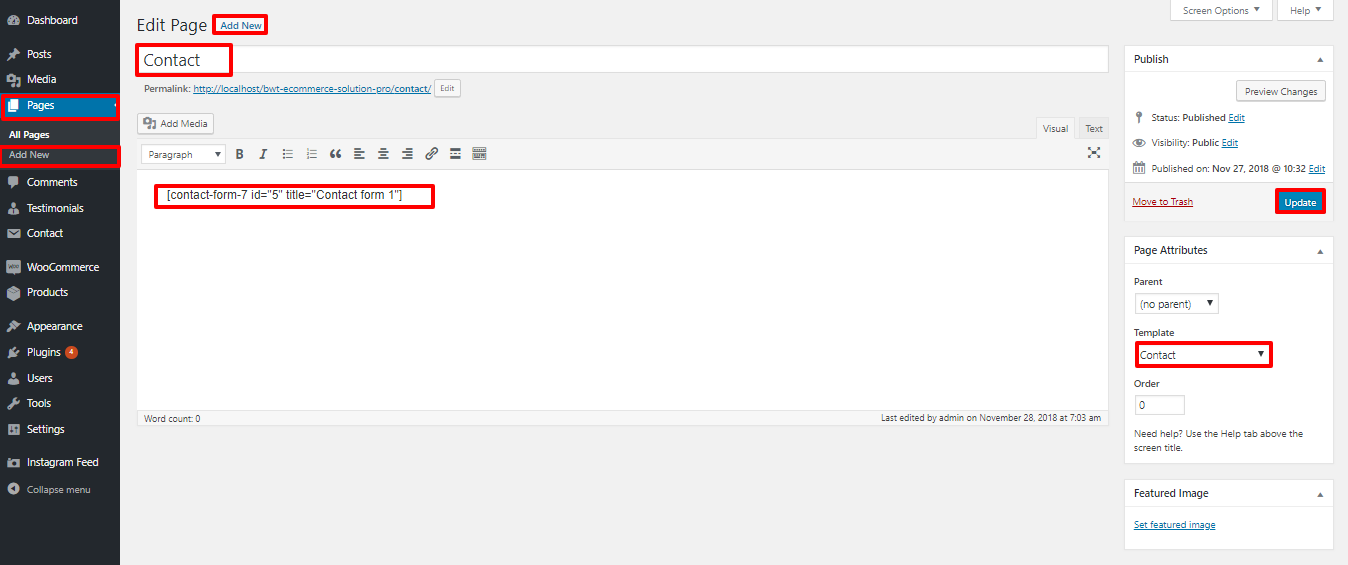
Go to Appearance >> Customize >> Theme Settings >>Contact Section
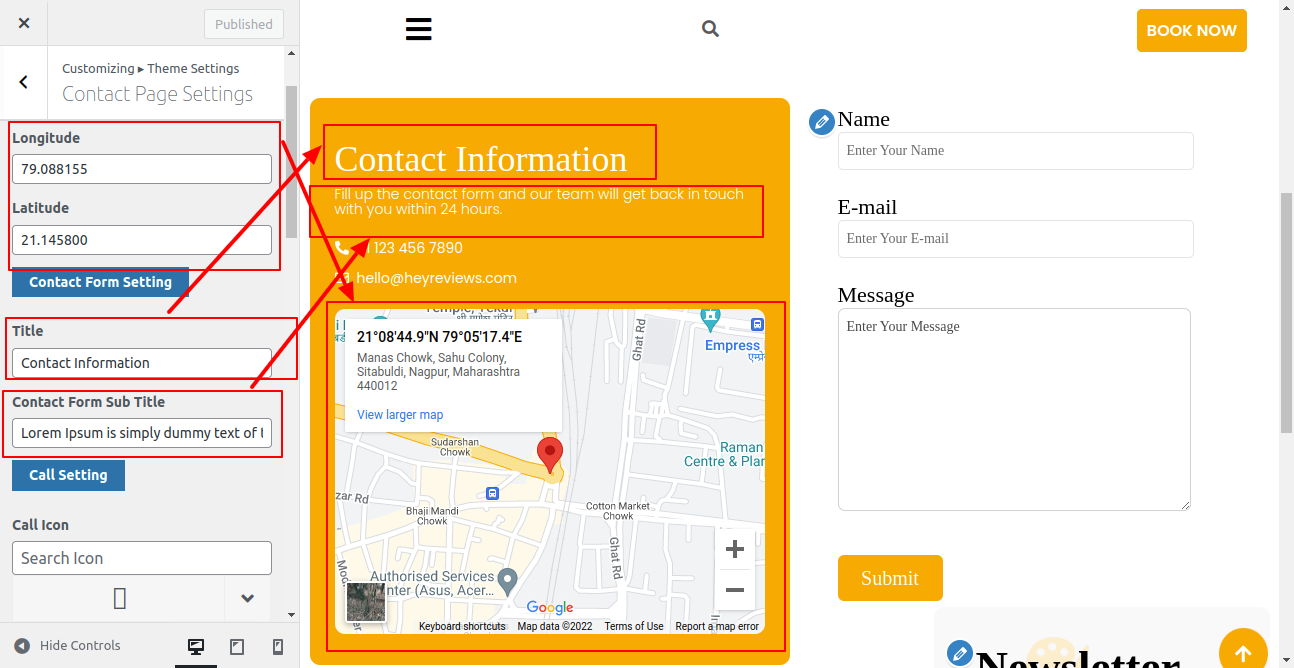

These ideas will assist you in creating the Contact section.

In order to establish About us page Go to Customizer >> Theme Setting >>About us
Using plugins, you can increase and expand the capability that comes with WordPress.
If you want these features in your theme, you must enable the plugin. In order to activate the plugin in your theme, follow these steps.
Go to Plugins >> Installed Plugins >> Plugin Name >>Activate
There are now three modules total. Refer to the image below for a better comprehension.

For the Testimonials section, the bwt electronics marketplace pro posttype plugin has been introduced. Refer to the following image for more information.
Testimonial Section
These suggestions will assist you in creating Testimonials.
Enter the post name, contents, and featured image in the Testimonials area when adding a new post. then select "Publish."
View this image to get a greater understanding.

Here is the list of created categories

Check the list of shortcodes that are available with the Themes:
Fetch All the Properties: [all_properties]
Fetch All the Properties By Categpory: [properties_by_cat cat_name="Add category slug"]
Fetch All the Agents: [agents]
Fetch All the Testimonials: [testimonials]