1-Install a theme using wordpress admin
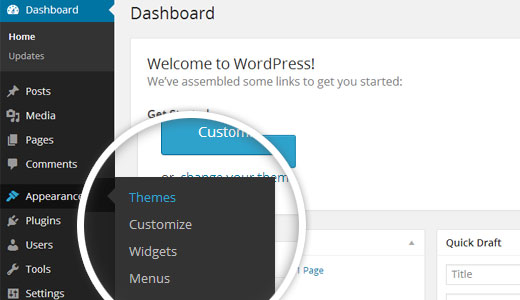
The first step is to log into your WordPress admin area. Then, click on
1.Go to the menu Appearance >> Themes
The template bundle you downloaded is divided into numerous directories. Let's have a look at what each folder contains:
Screenshots - contains template screenshot. Not for use in production.
The BWT Key Activation procedure is as follows.
Because you will receive the License Key on your Email, use that key to Activate License.
Follow the following Process to Activate License.
Go to Dashboard >> Appearance >>BWT Setup Wizard>>Enter Key>>Next
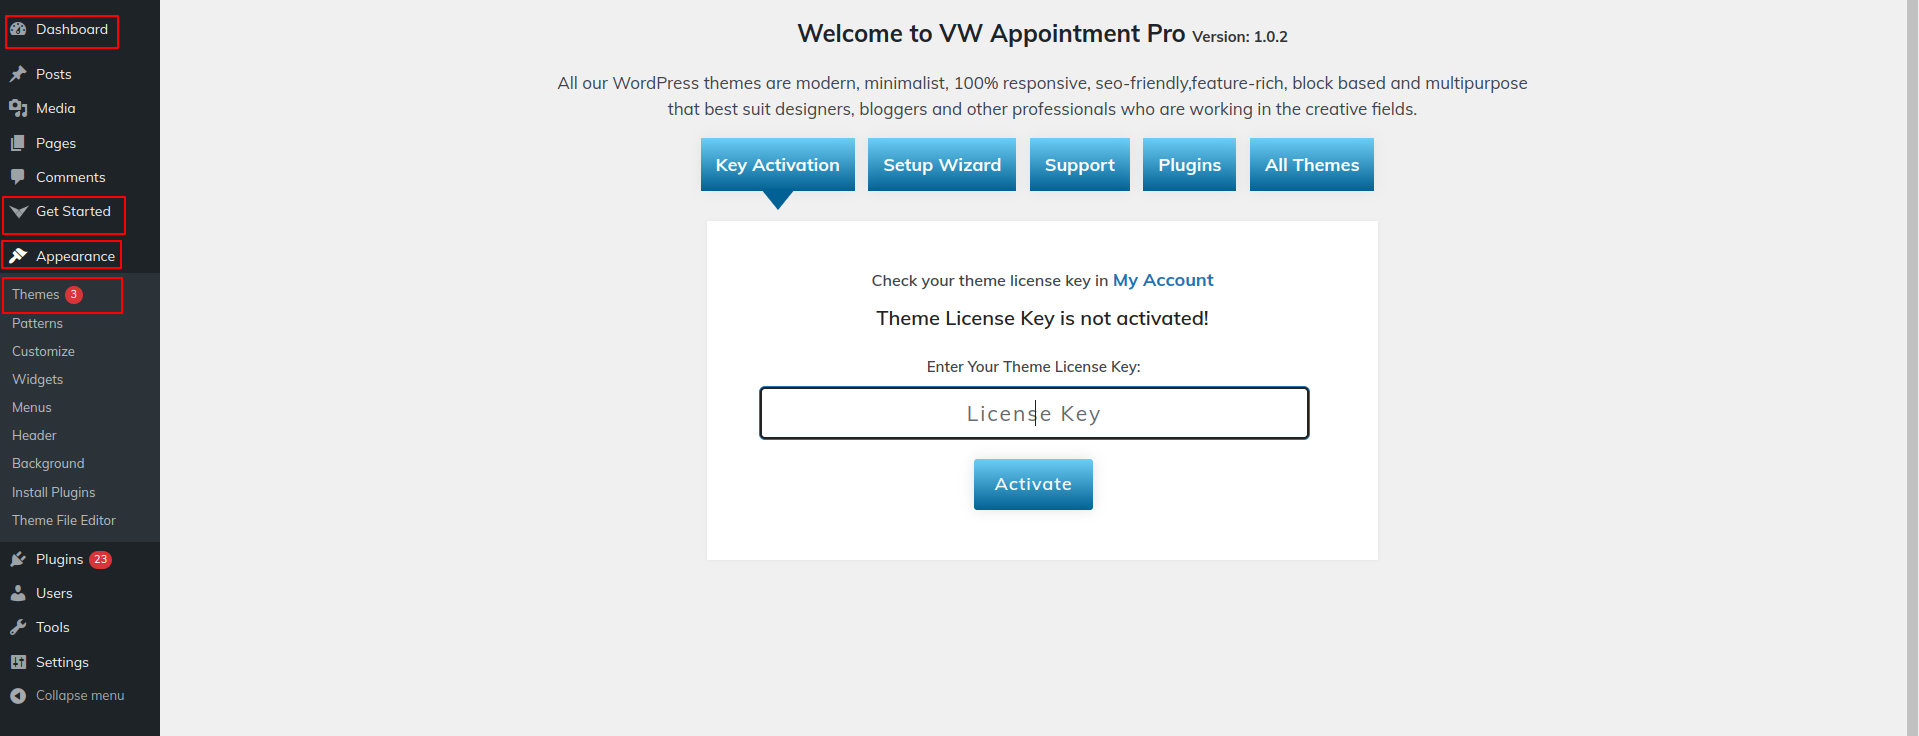
After Entering The Key >> Activate Licence.
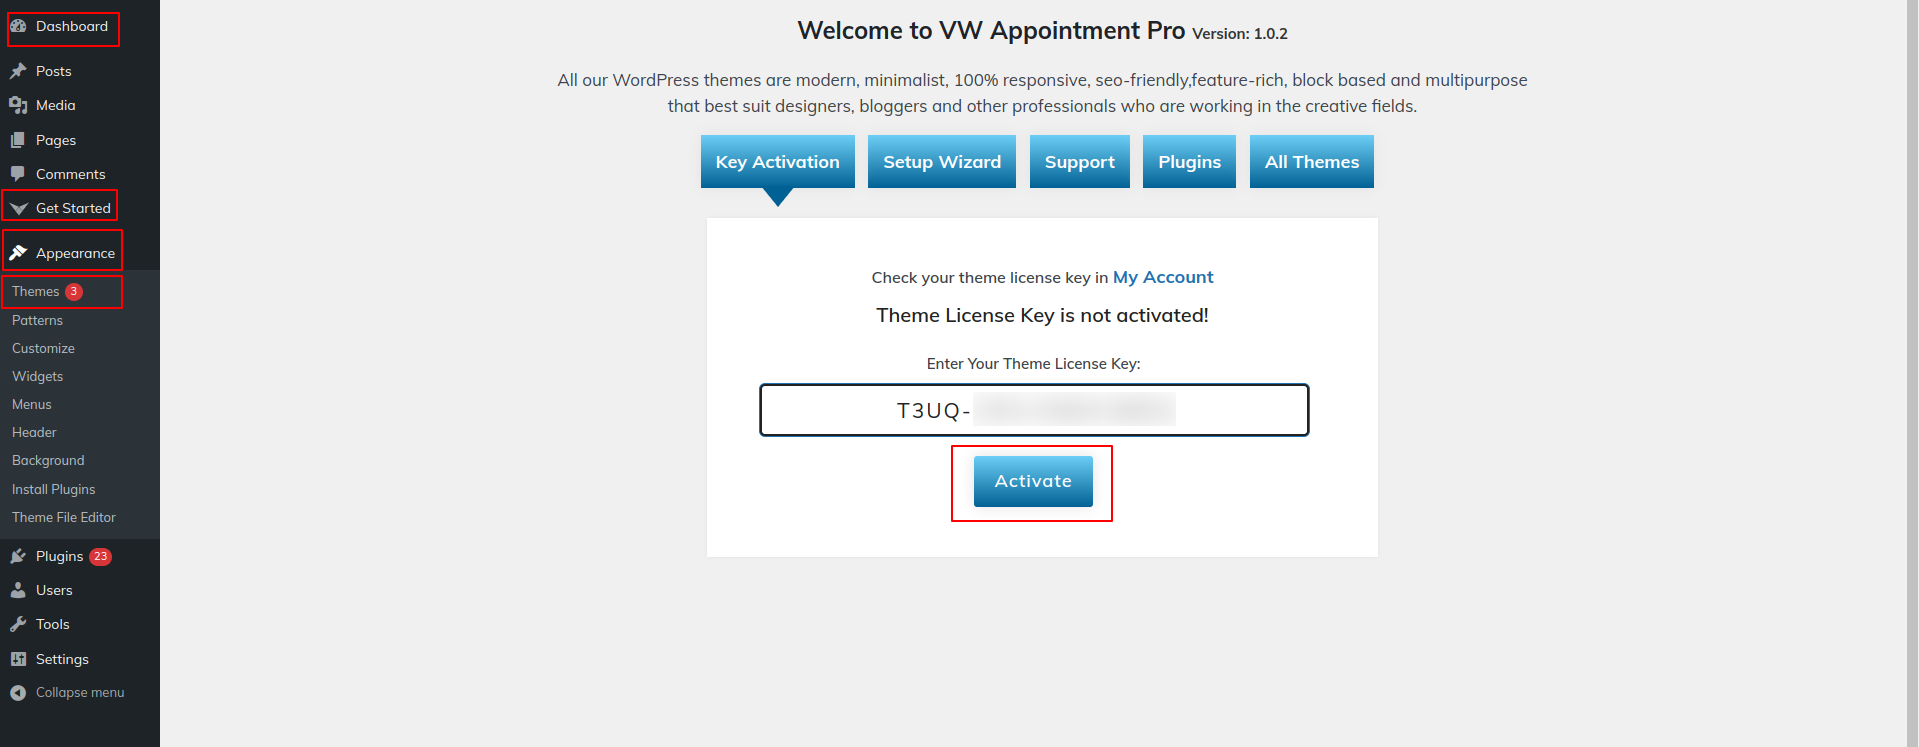
After you Activate Licence,the key will be active and then you can Getstarted with the Theme.

In this way you can activate your Licence Key.
The first step is to log into your WordPress admin area. Then, click on
1.Go to the menu Appearance >> Themes
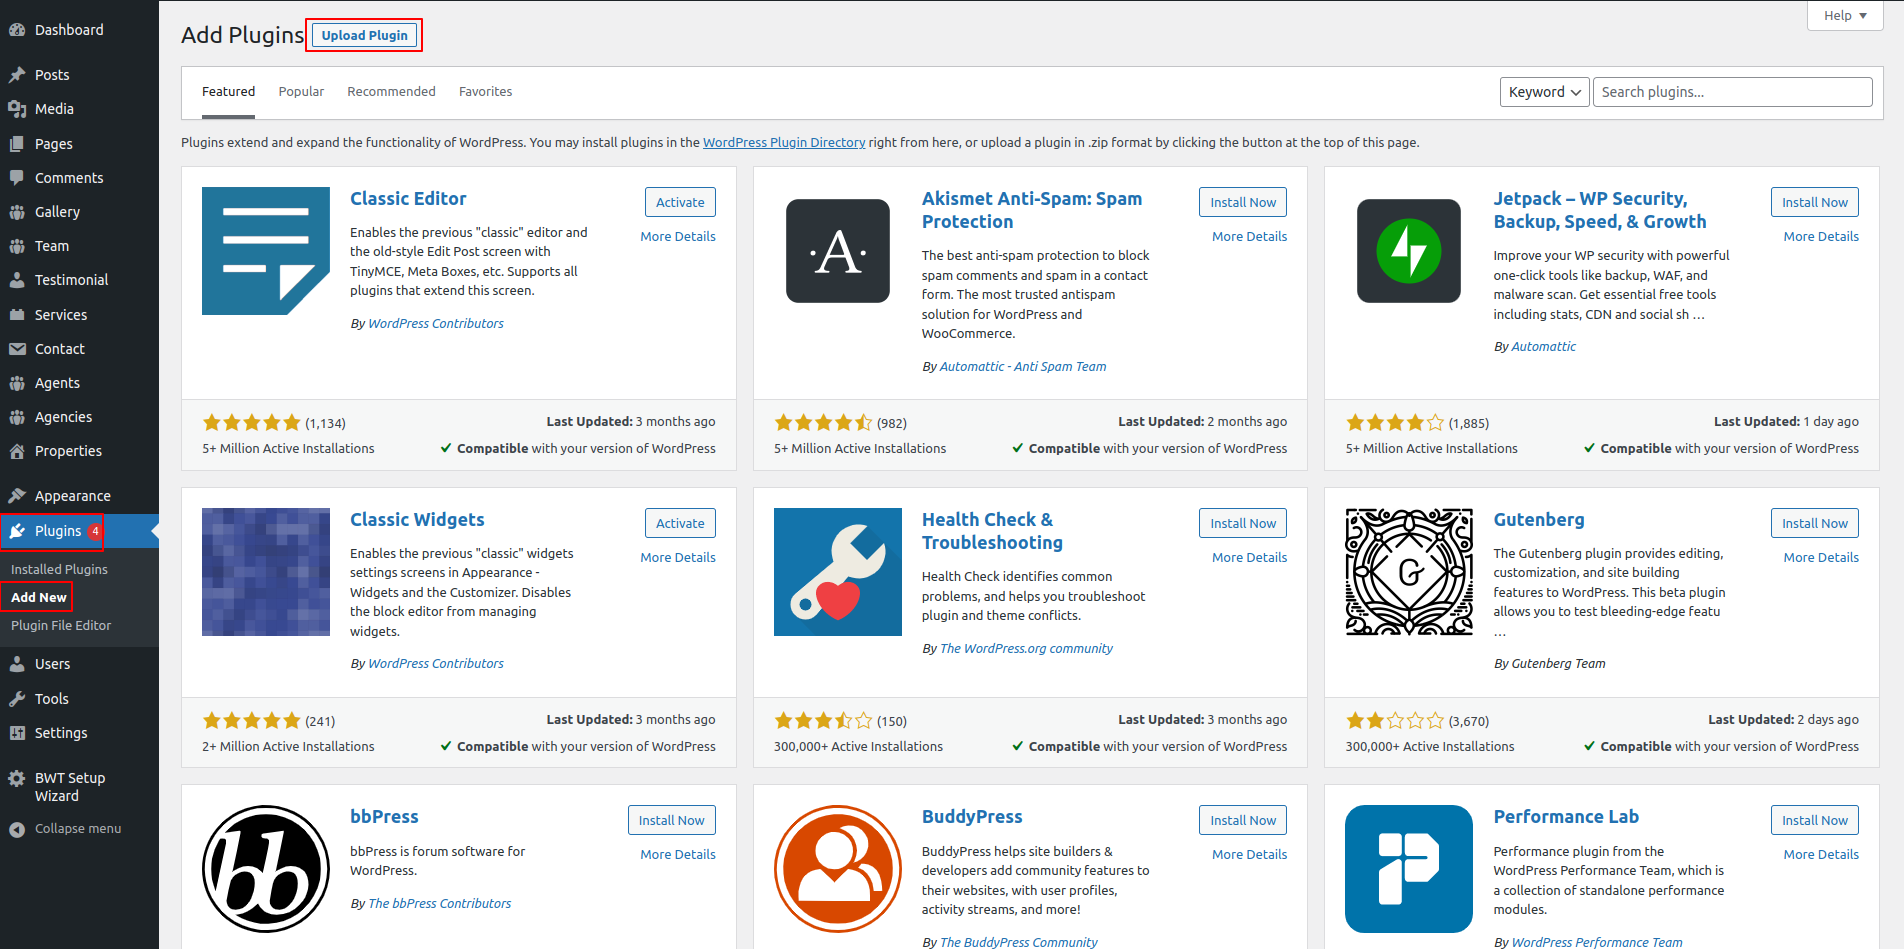
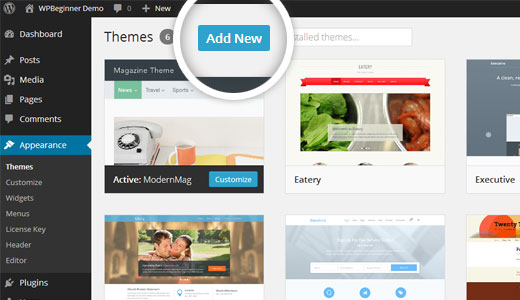
2.Once you've arrived at the themes page, click the Add New button at the top.
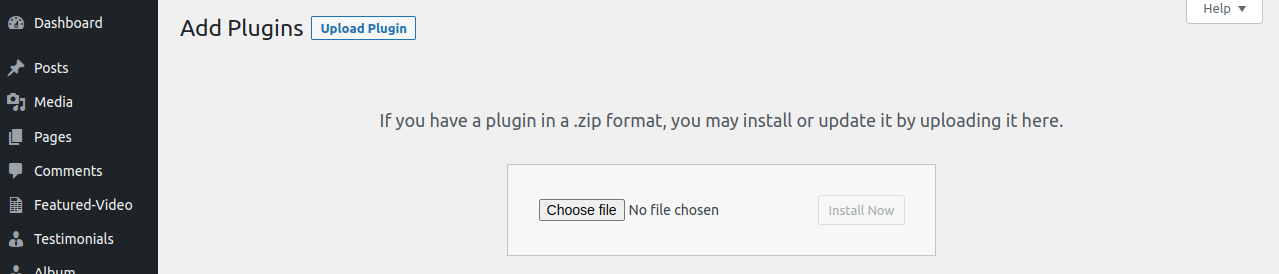
3. Click on upload theme button.
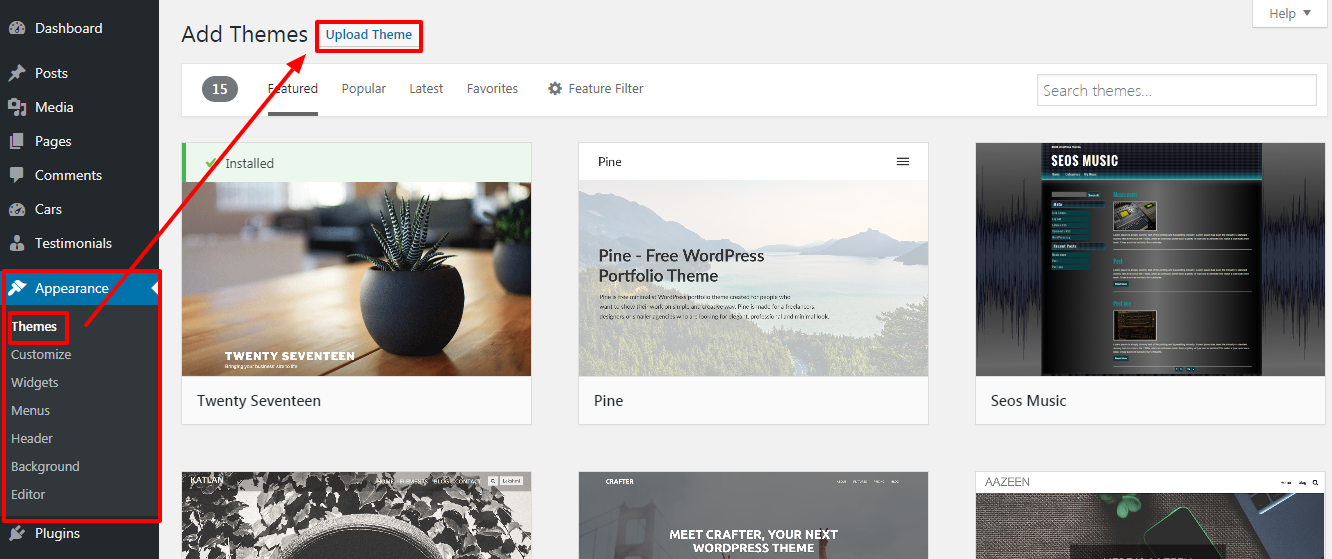
4. Click on Browse Button then select your bwt-multipurpose-blog_1.0.zip theme and click on install now button.

Congratulations, your theme has been installed successfully.
Import demonstration content with a single click to have your theme up and running.This article will walk you through the process of developing your website for website creation.
Install all essential components before running Importer. Plugins
1. Go to the Dashboard >>BWT Setup Wizard
Then, select "Demo Content Importer" and then "Run Importer."

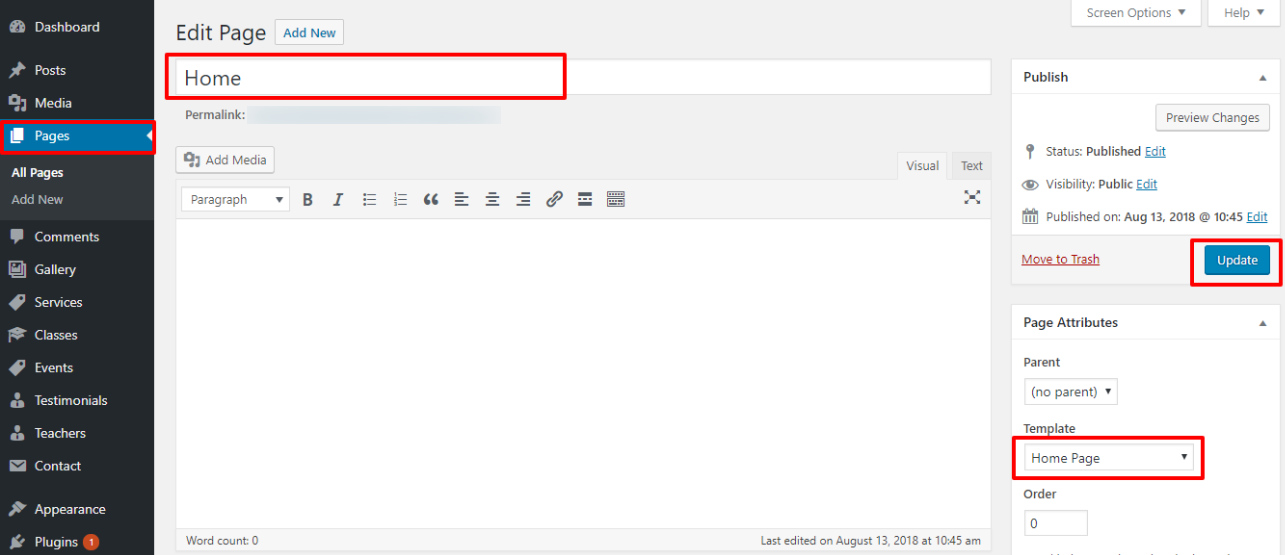
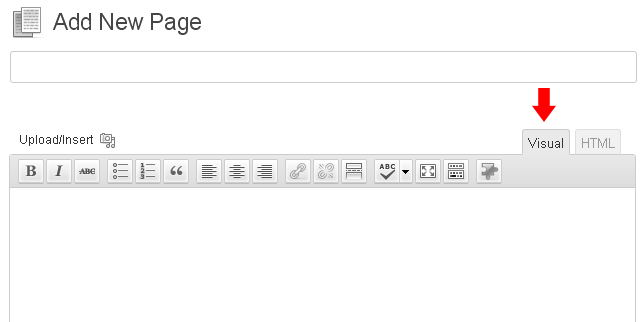
Create Page to set template:Go to Dashboard >> Pages >> Add New Page.
Label it "home" or whatever you like. Then, from the template menu, select "home-page."
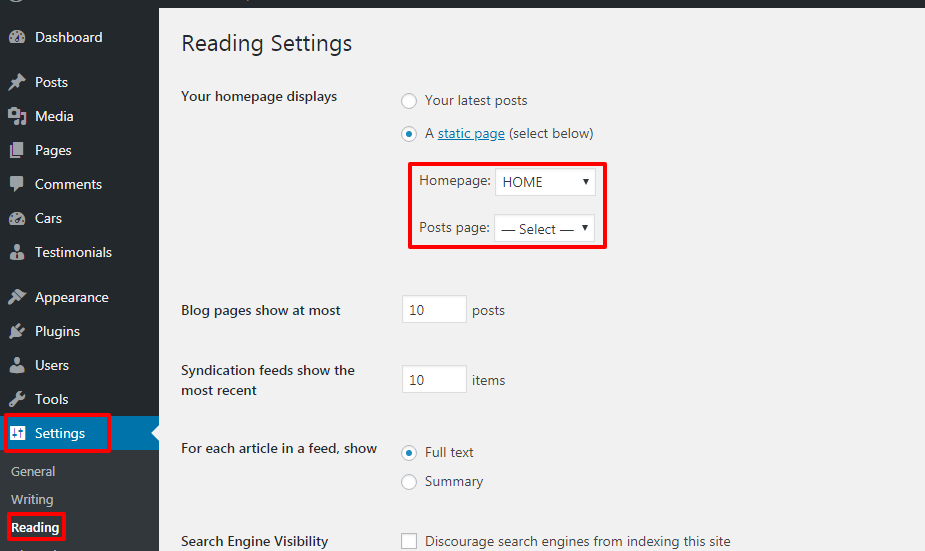
Set the front page:Go to Setting -> Reading --> Set the post page display static page to home page
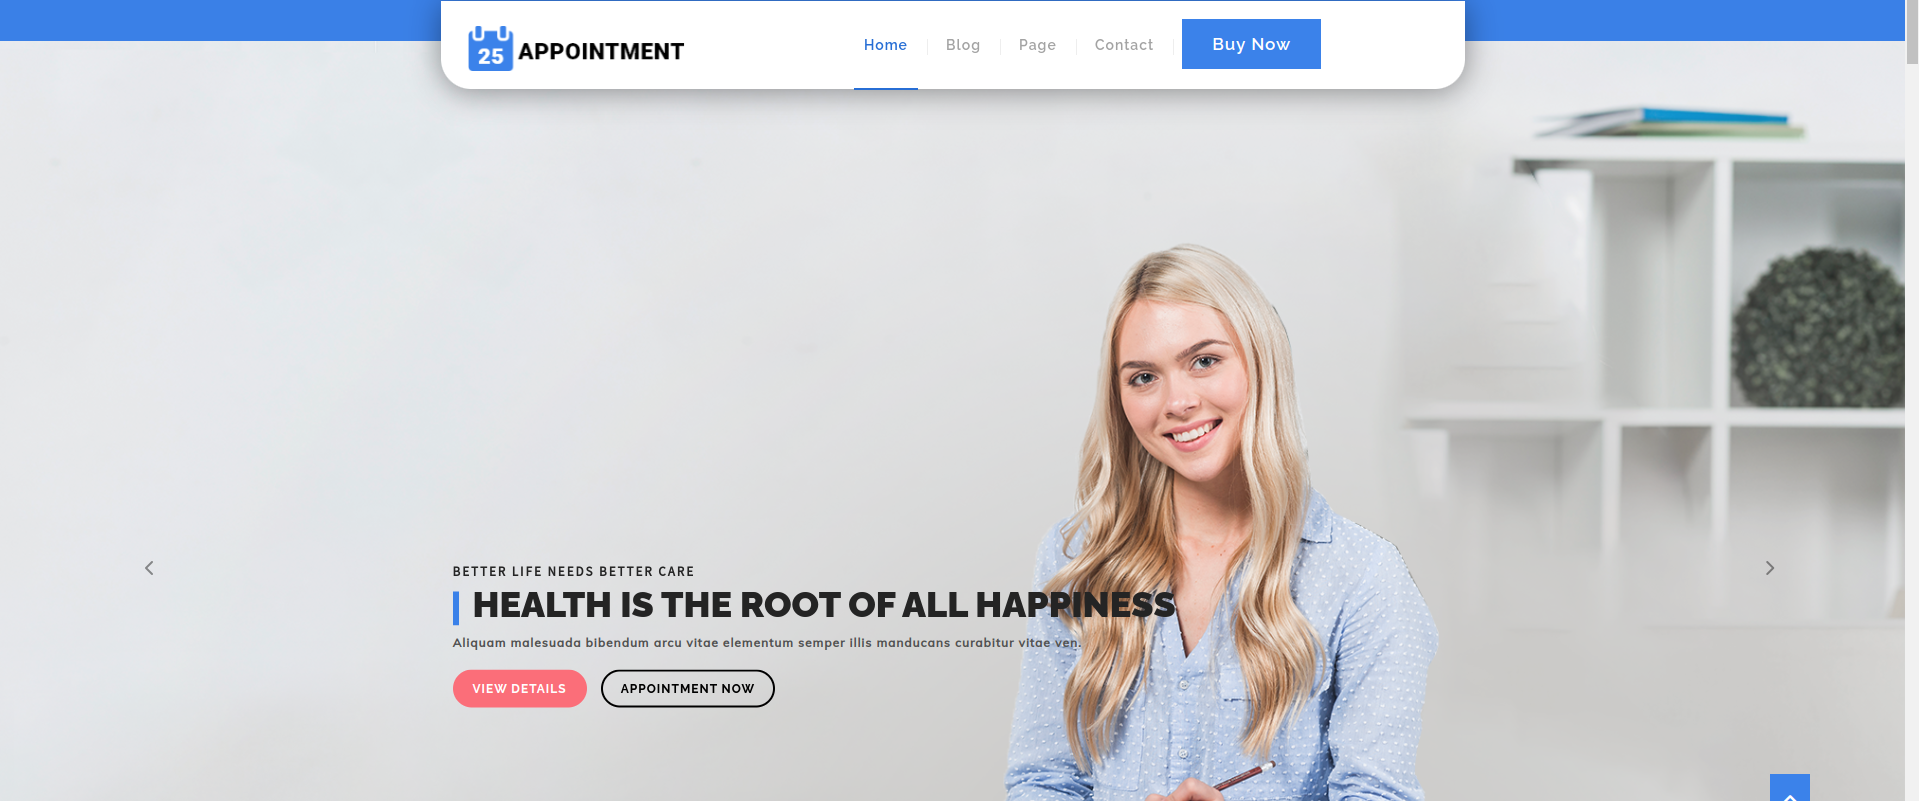
When you're finished, you'll be able to see all of the demo content on the top page.
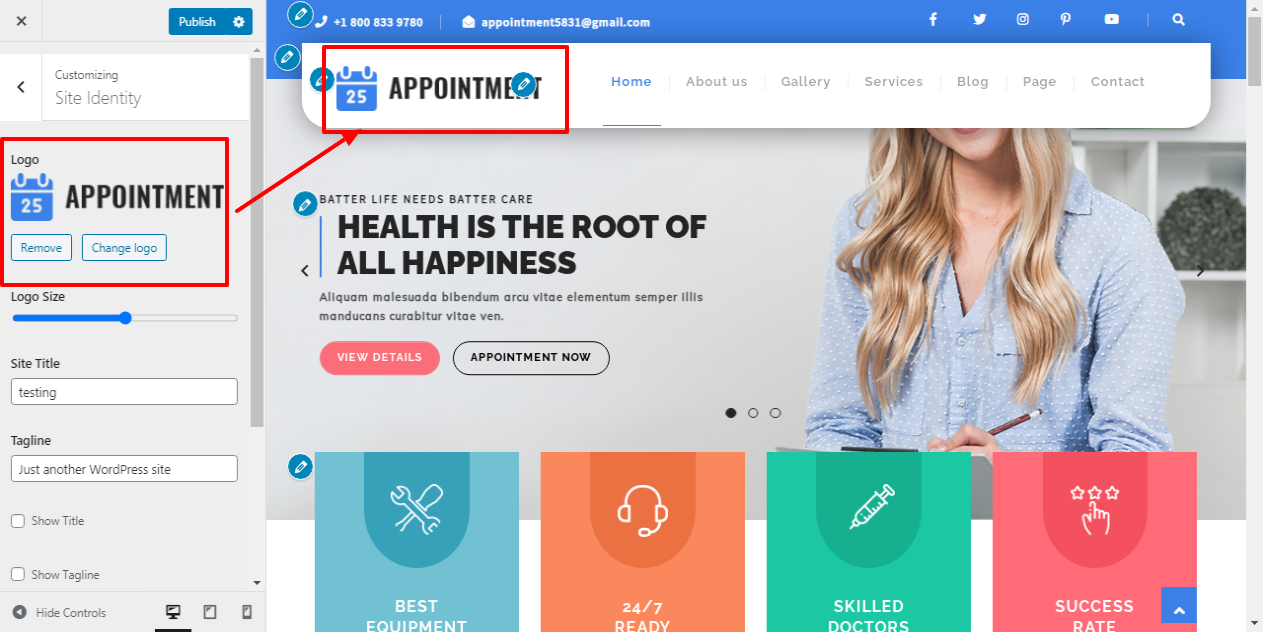
This section will help you to arrange Site Identity.
Go to Appearance >> Customize >> Site Identity

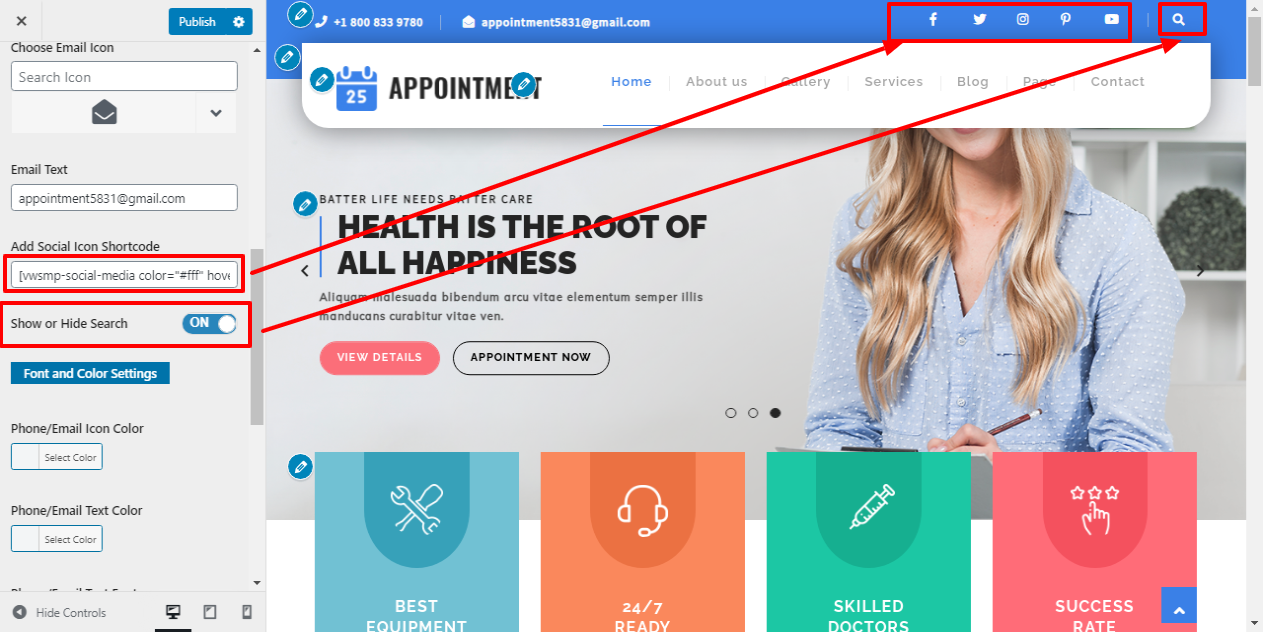
Follow the below steps to setup the Topbar
Go to Appearance >> Customize >> Theme Settings >>Topbar
Setting Options : contains options for the option to enable or disable service display. This section's enable/disable functionality is controlled by this setting. This environment is really significant. If you want this part to appear on your website, leave the option enabled; otherwise, click Disable to have it not appear on your website.

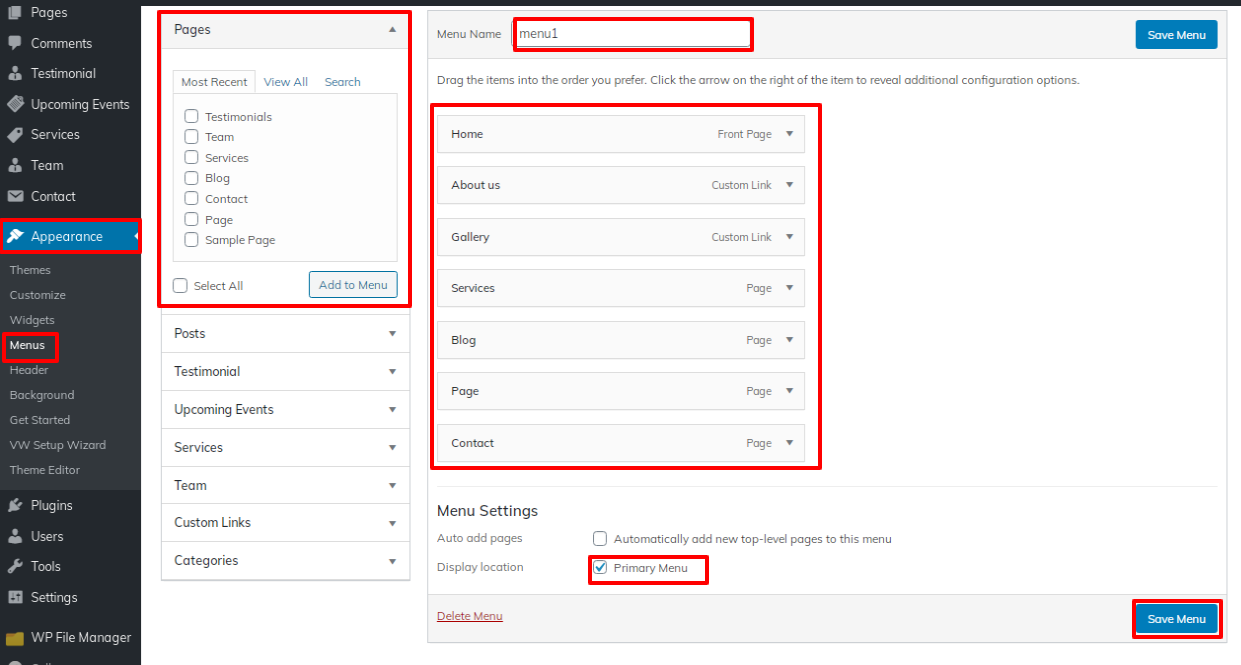
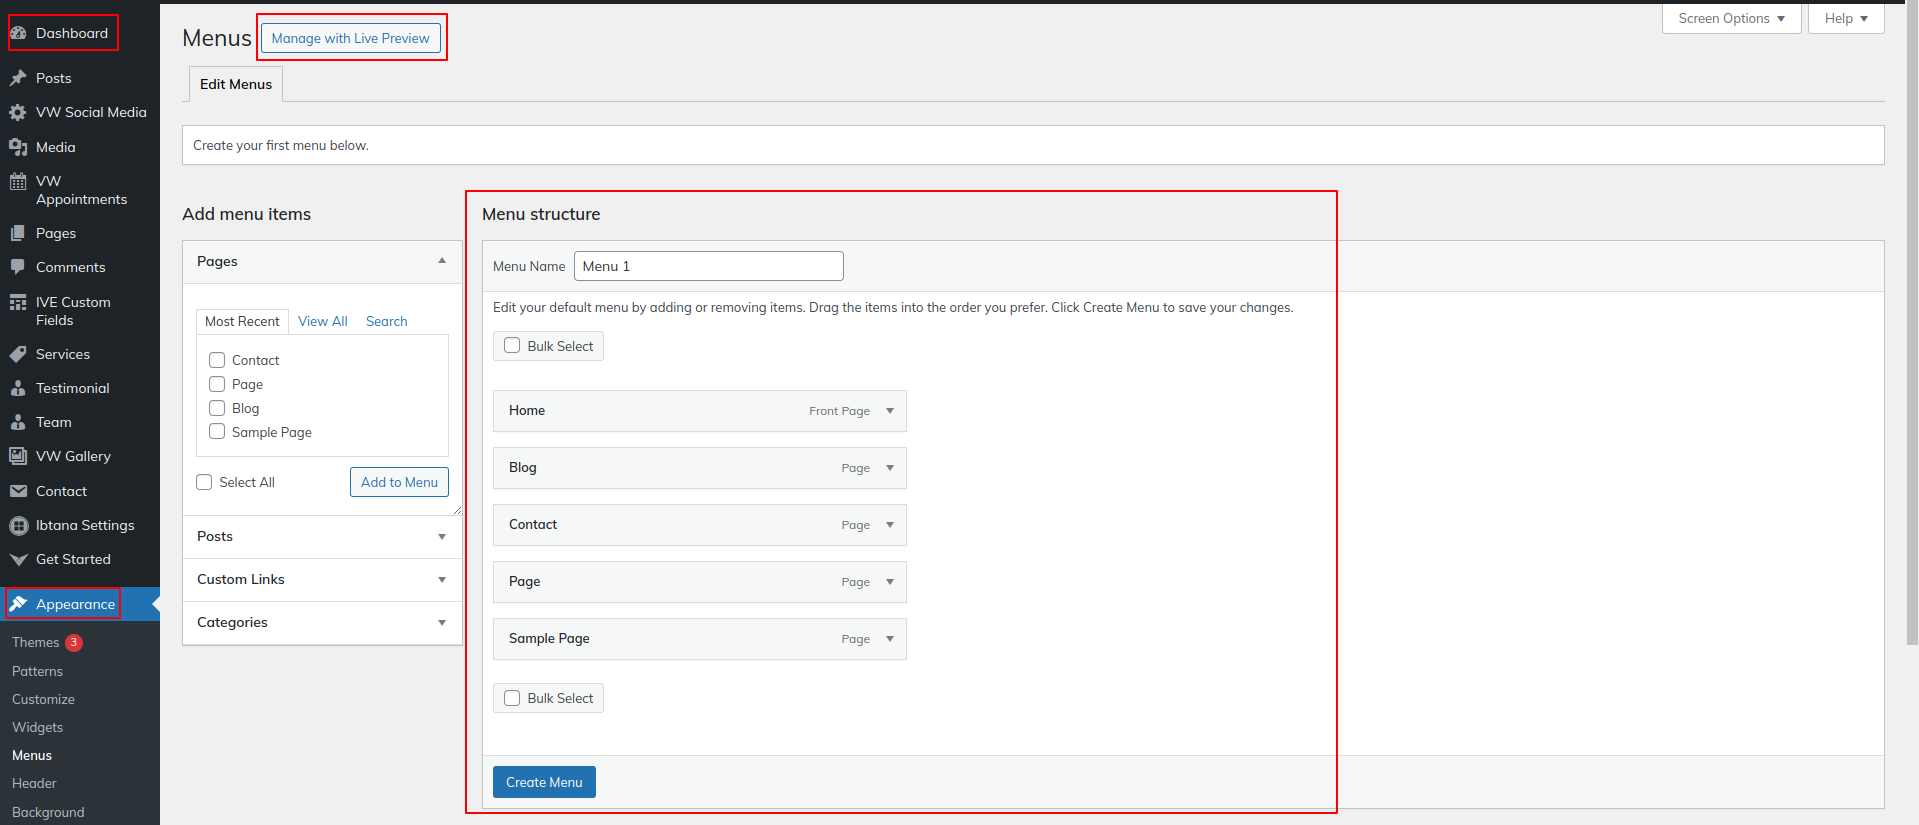
To proceed with the menus,
Go to Dashboard >> Appearance >> Menu
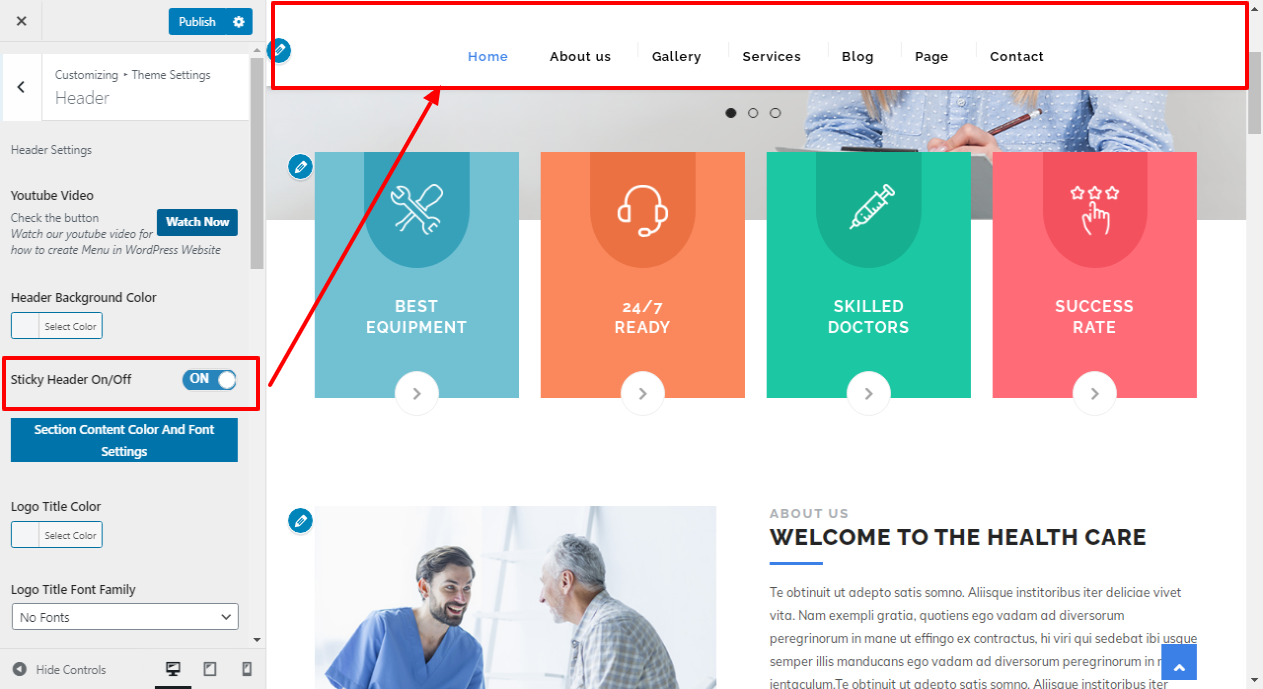
Go to Appearance >> Customize >> Theme Settings >> Header
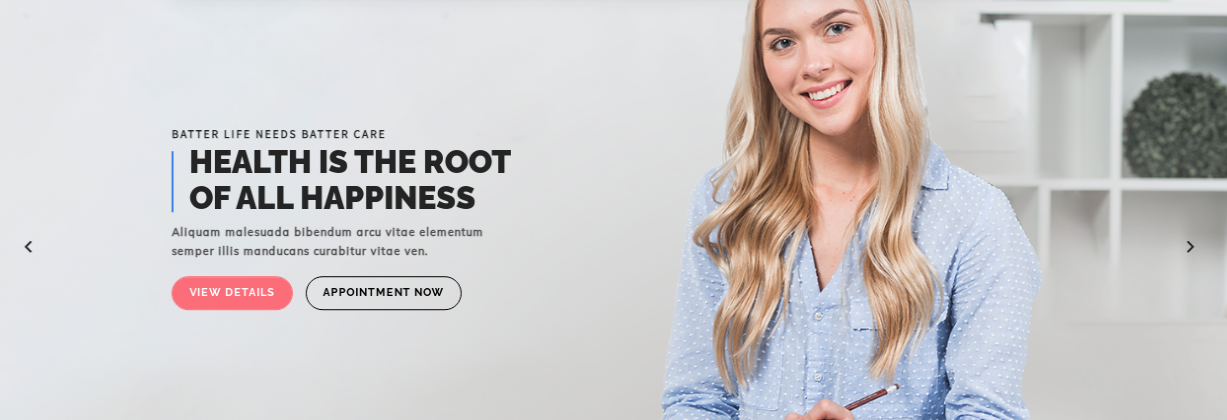
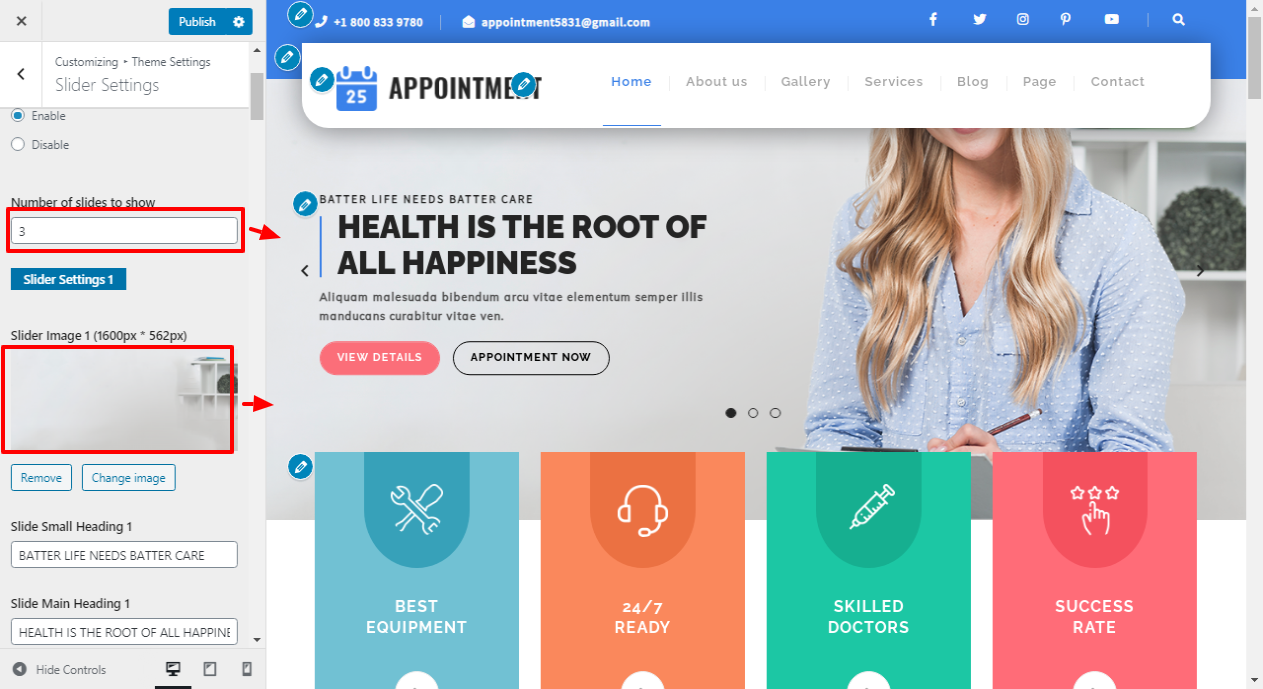
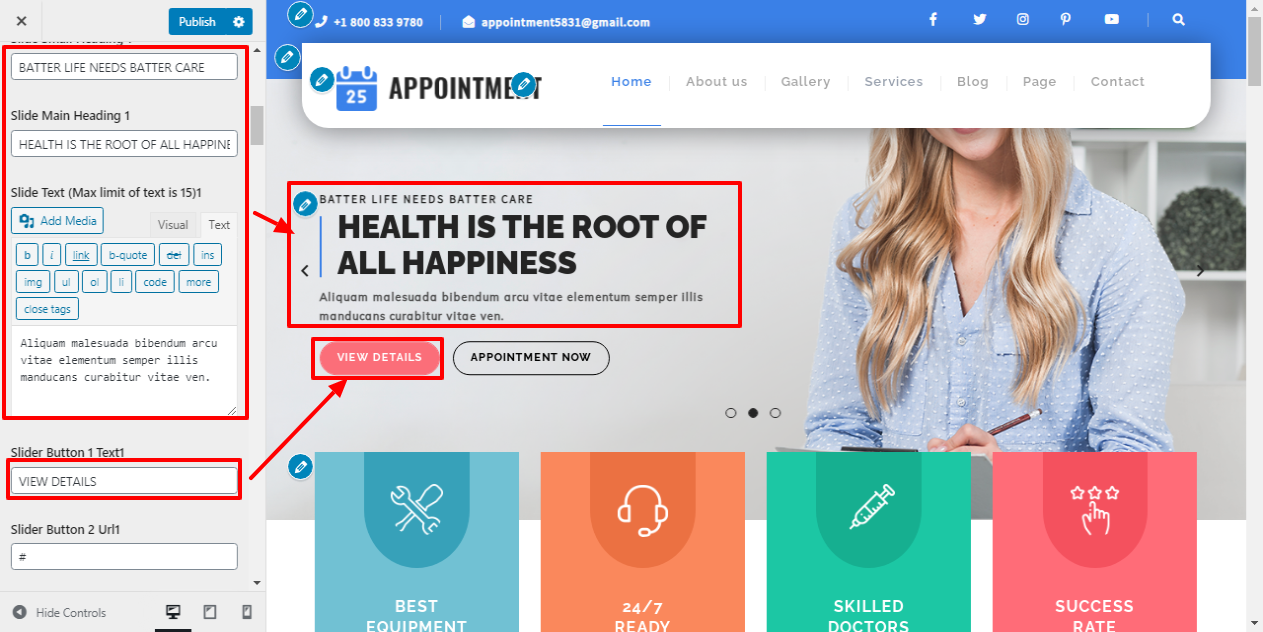
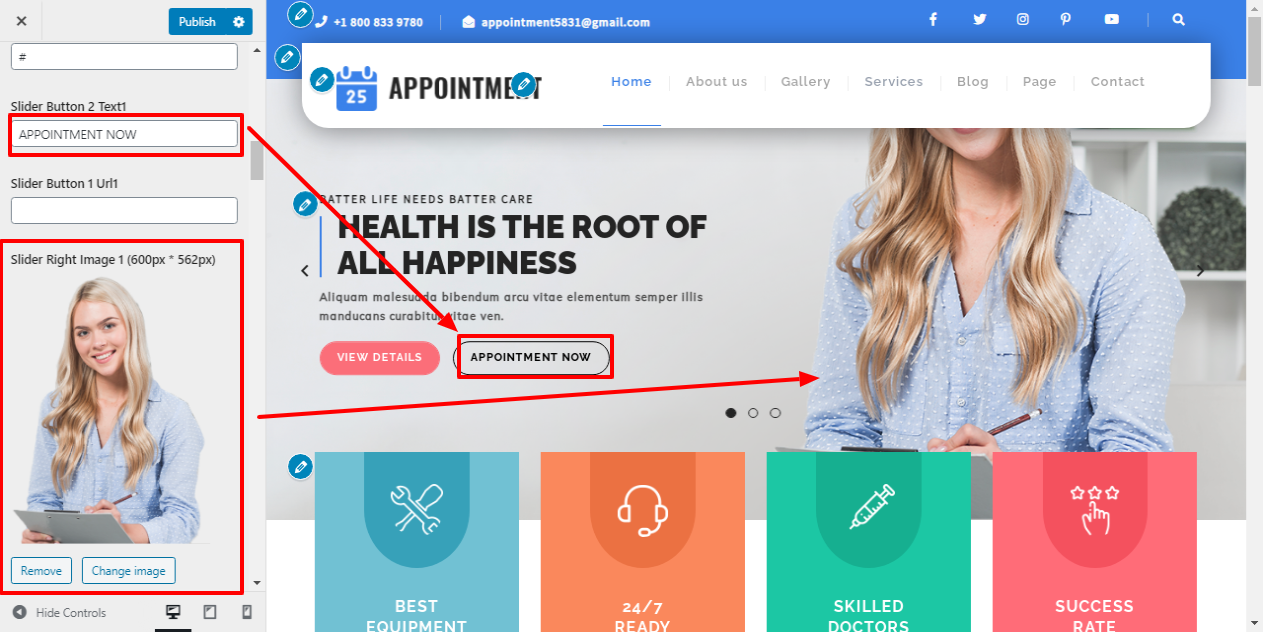
Follow the below steps to setup the slider
Go to Appearance >> Customize >> Theme Settings >>Slider Settings
Setting Options : contains options for the option to enable or disable service display. This section's enable/disable functionality is controlled by this setting. This environment is really significant. If you want this part to appear on your website, leave the option enabled; otherwise, click Disable to have it not appear on your website.
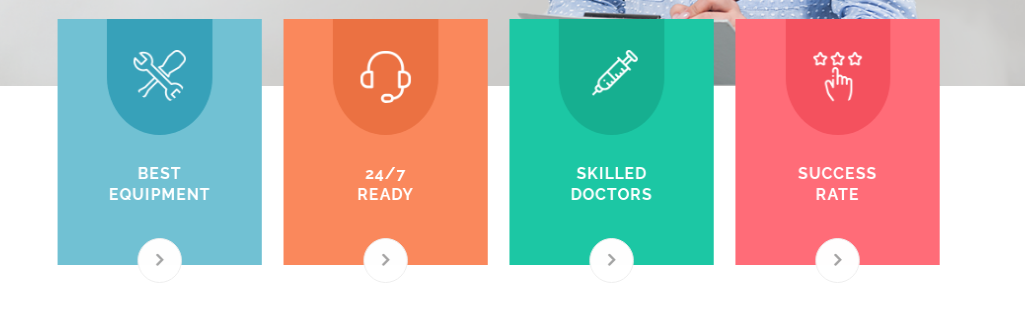
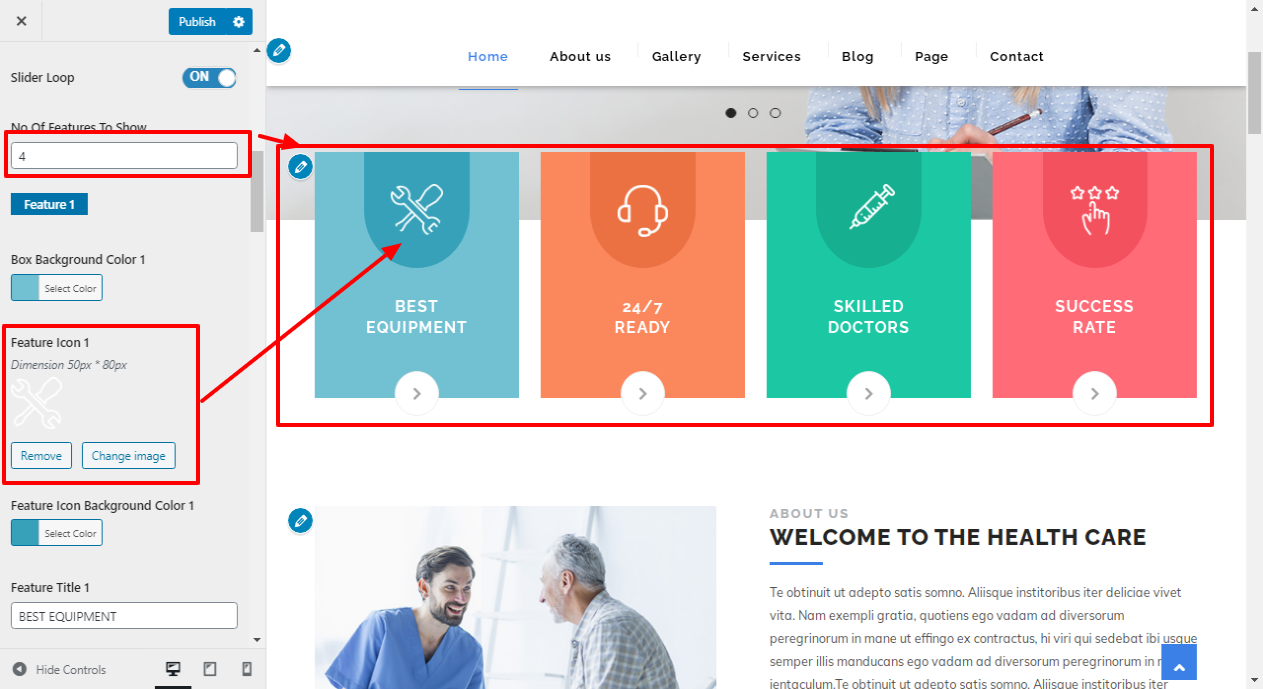
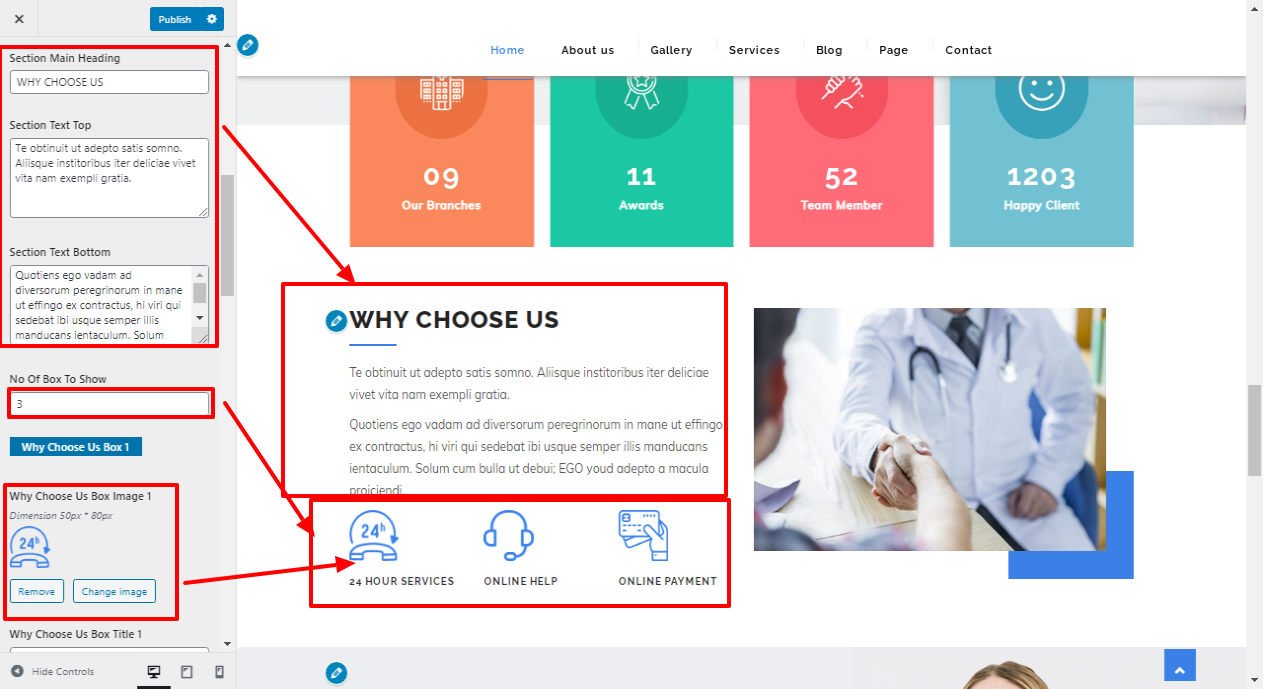
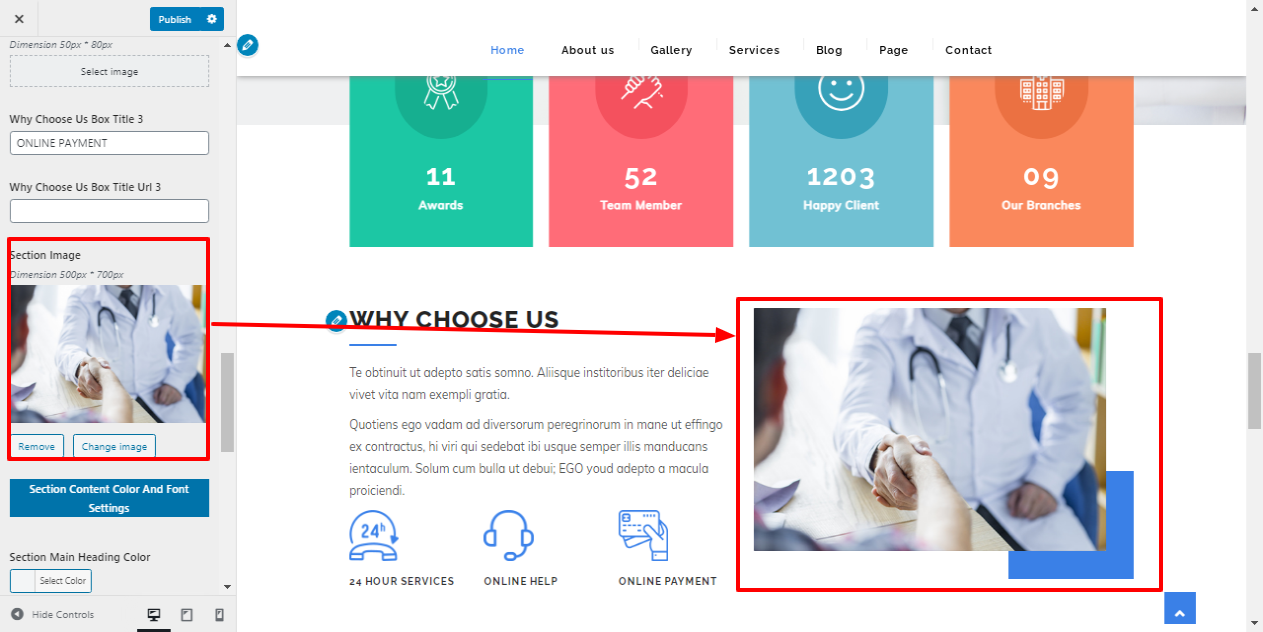
The next step in proceeding with the Our Features Section is to alter the Customizer Setting for this.
Go to Appearance >> Customize >> Theme Settings >>Our Features Section Section
Setting Options : contains options for the option to enable or disable service display. This section's enable/disable functionality is controlled by this setting. This environment is really significant. If you want this part to appear on your website, leave the option enabled; otherwise, click Disable to have it not appear on your website.

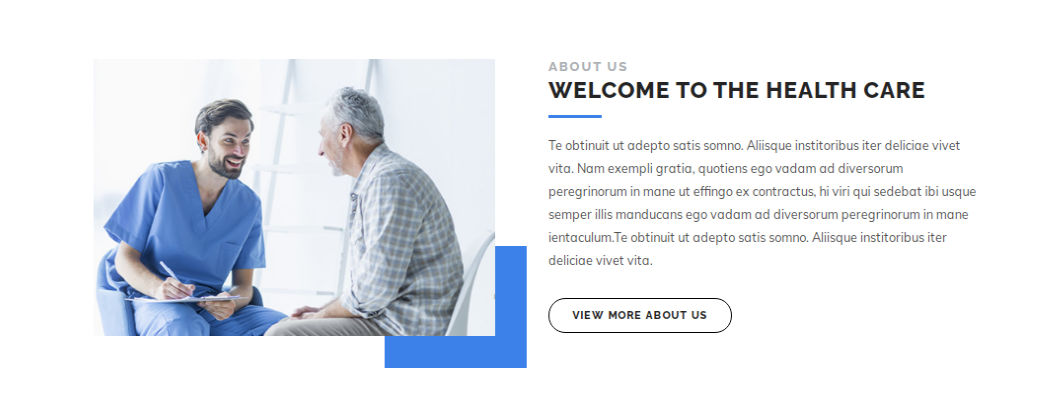
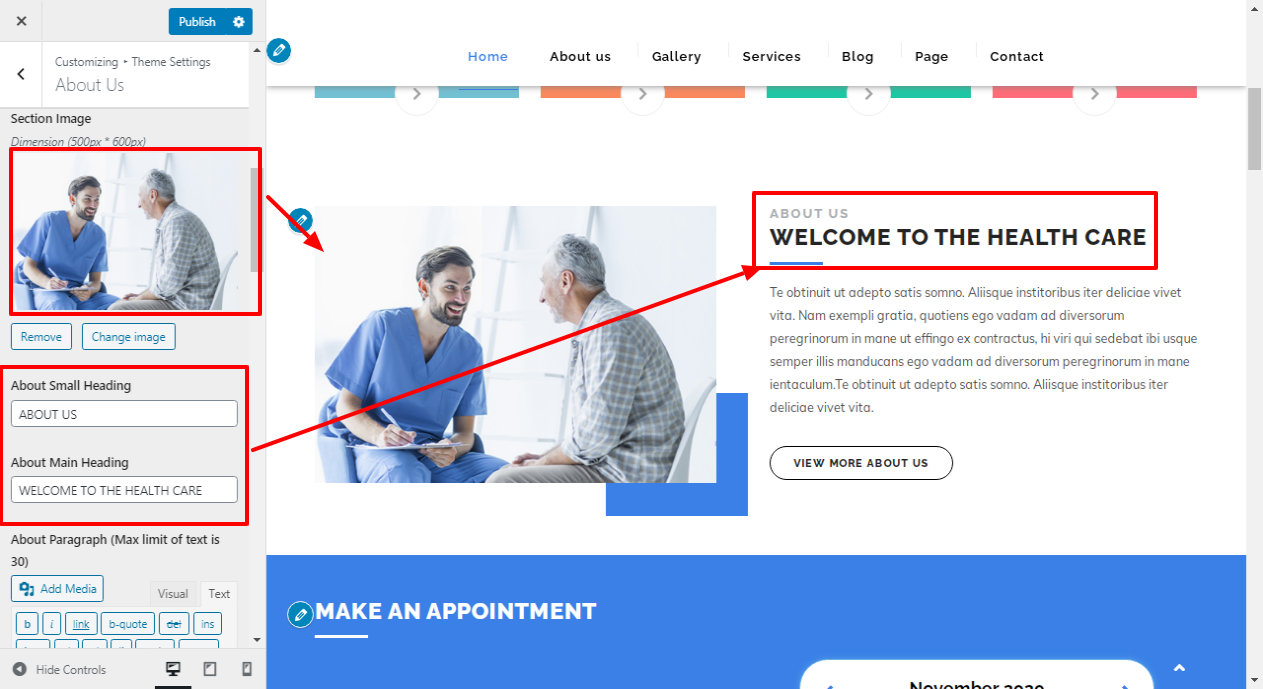
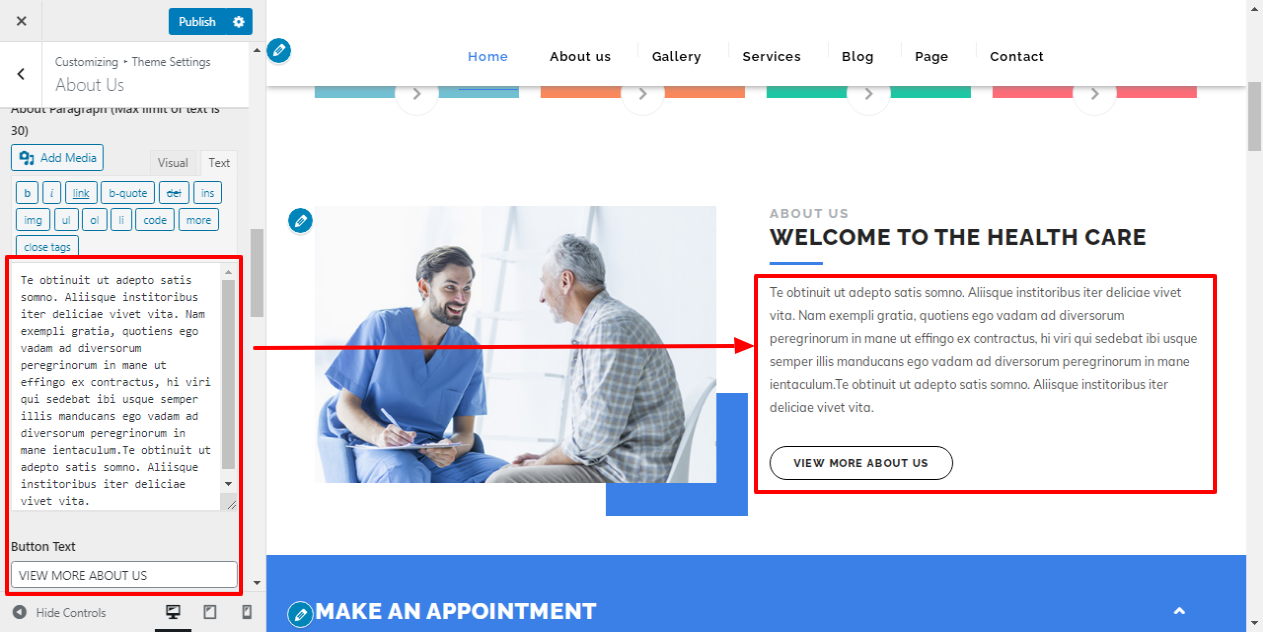
The next step in proceeding with the About Us Settings Section.
Setting Options : contains options for the option to enable or disable service display. This section's enable/disable functionality is controlled by this setting. This environment is really significant. If you want this part to appear on your website, leave the option enabled; otherwise, click Disable to have it not appear on your website.
Go to Appearance >> Customize >> Theme Settings >> About Us Settings Section
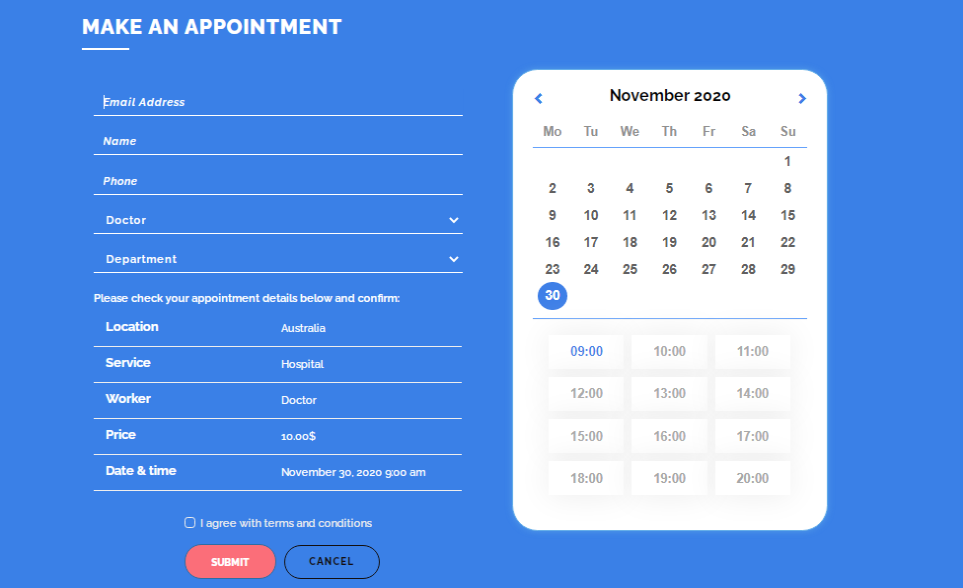
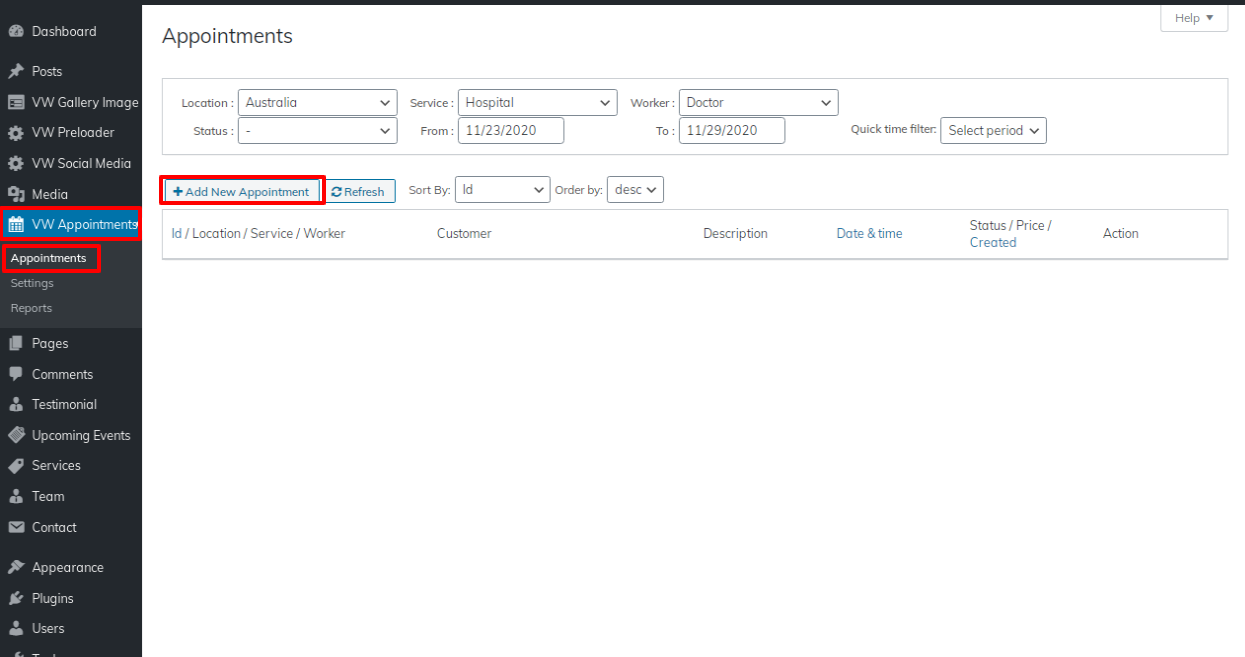
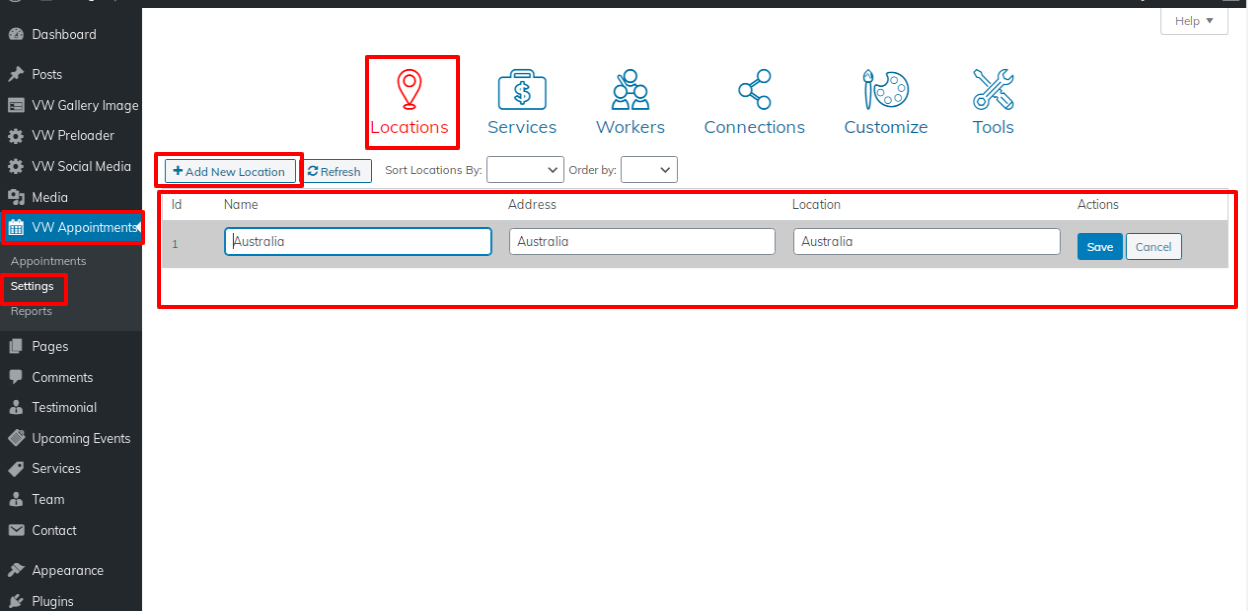
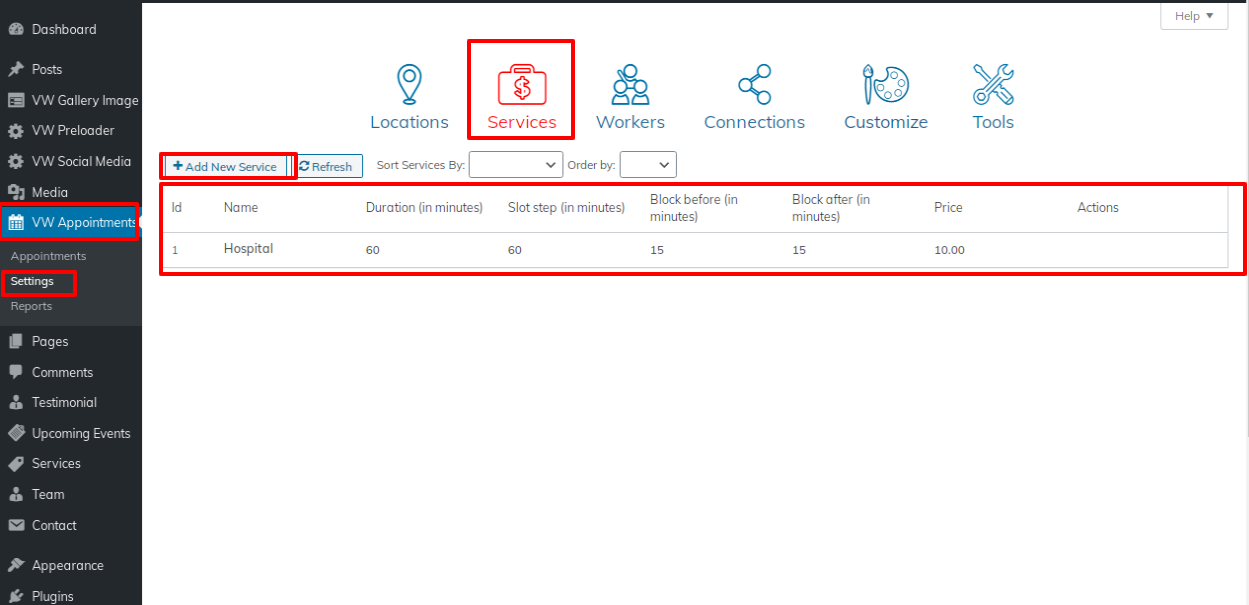
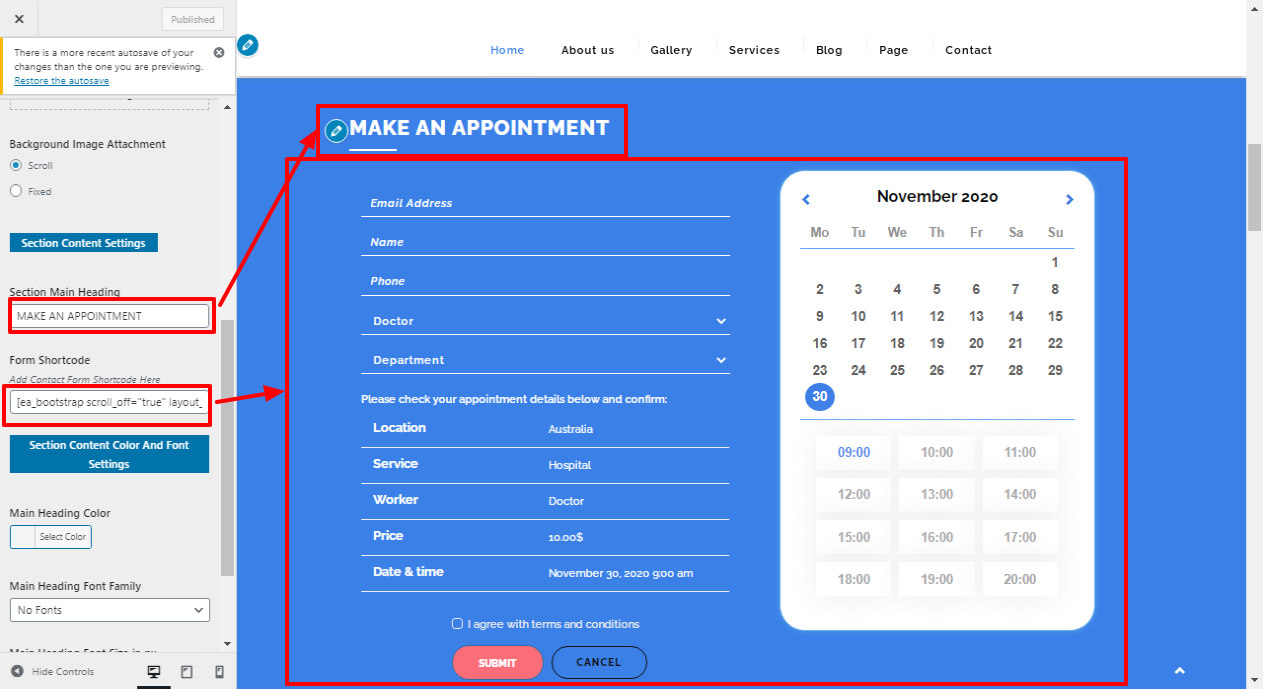
The next step in proceeding with the Appointment Settings Section.
Go to Dashboard >> Appointment >> Edit
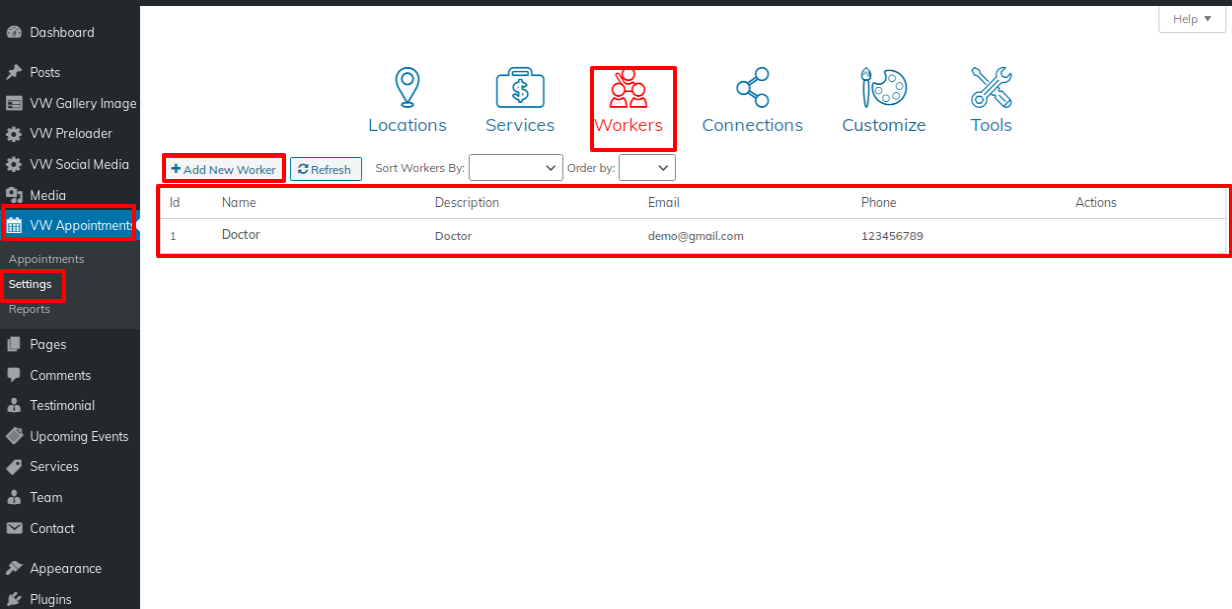
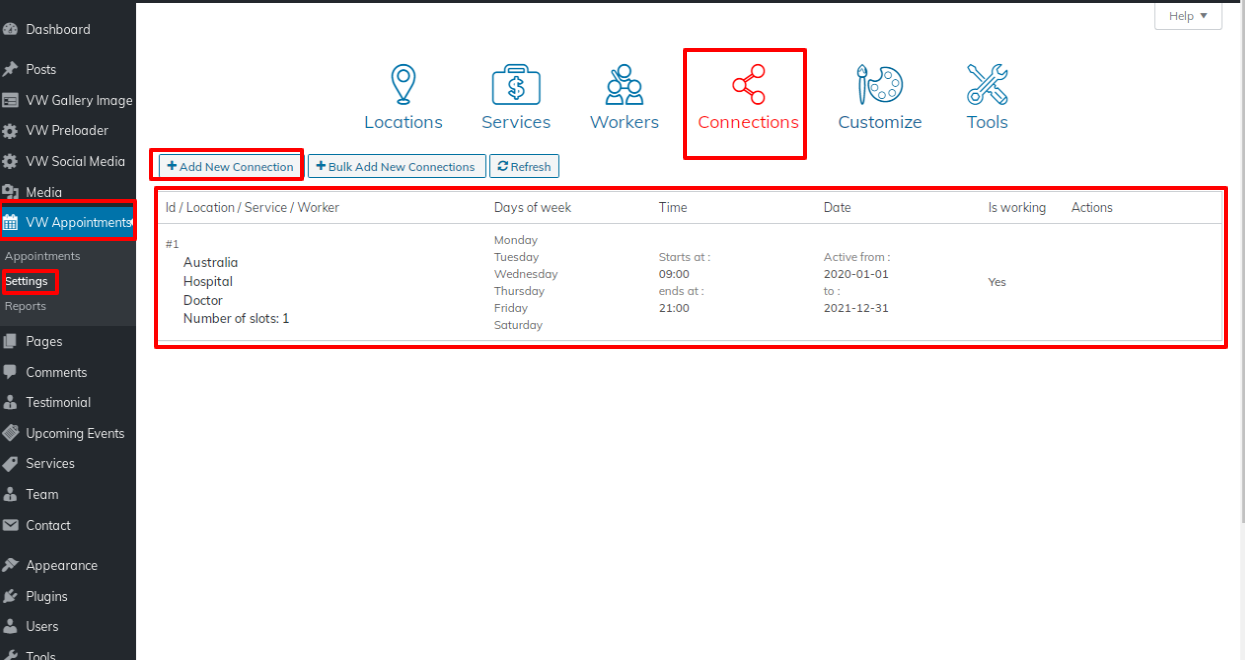
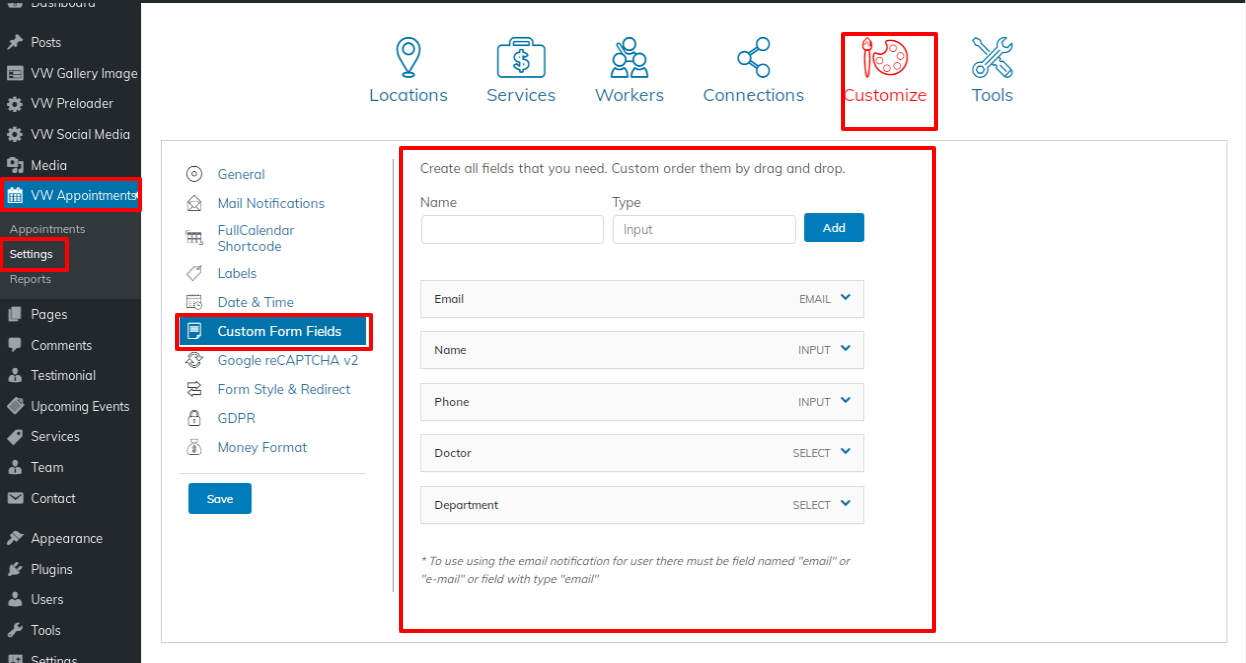
Enter section title, section sub title and select the. For better understanding refer below screenshot.
Go to Appearance >> Customize >> Theme Settings >>Appointment Settings
Setting Options : Includes
settings for Service display enable/disable option. With this setting, you can enable/disable this
section. This is very important setting. If you want this section to appear on your
website,
just let the option to be enabled and if you don't want this section to appear on your
website, you can select
disable and this section will disappear from your website.
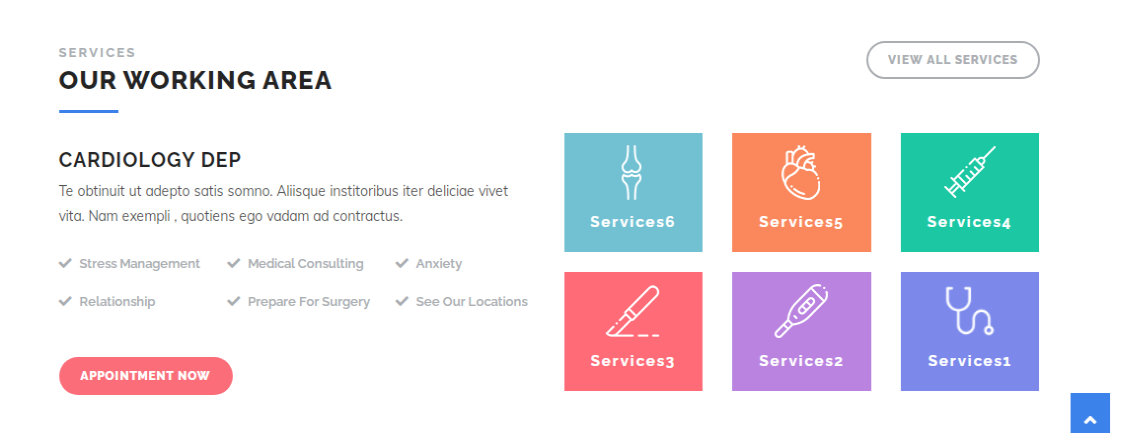
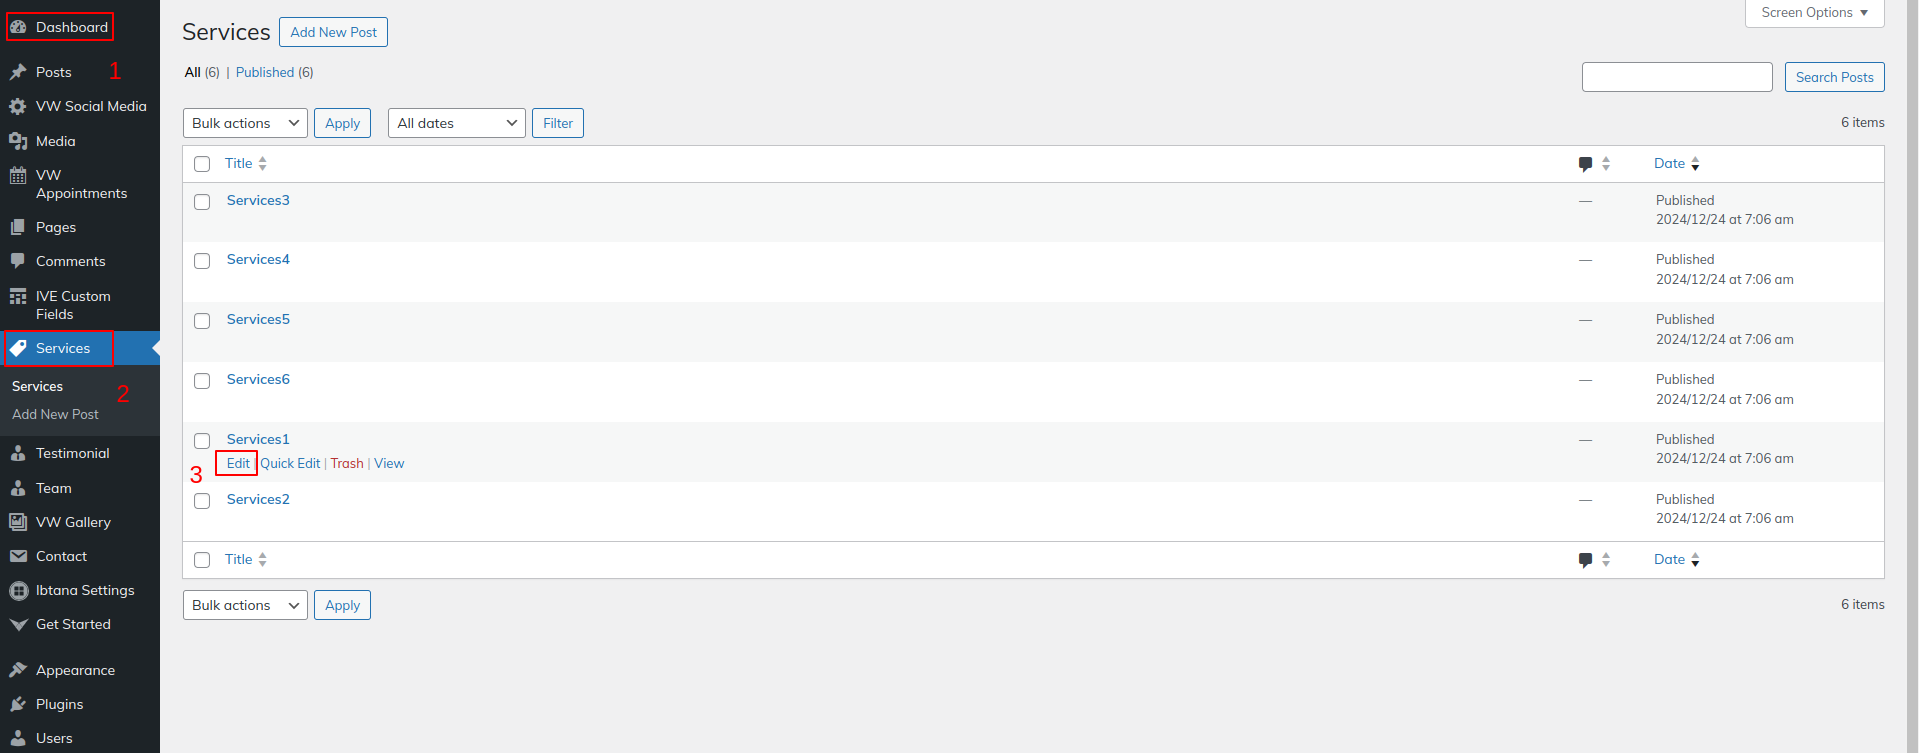
The next step in proceeding with the Our Services Section.
Go to Dashboard >> Services >> Edit

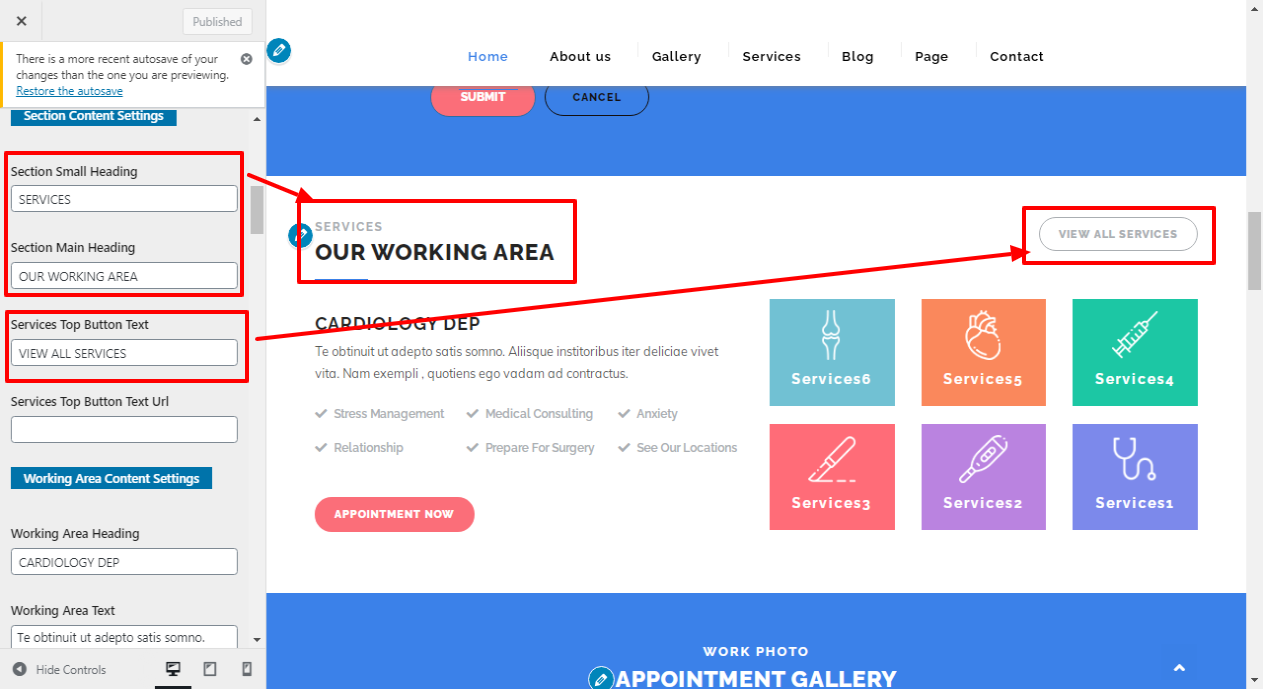
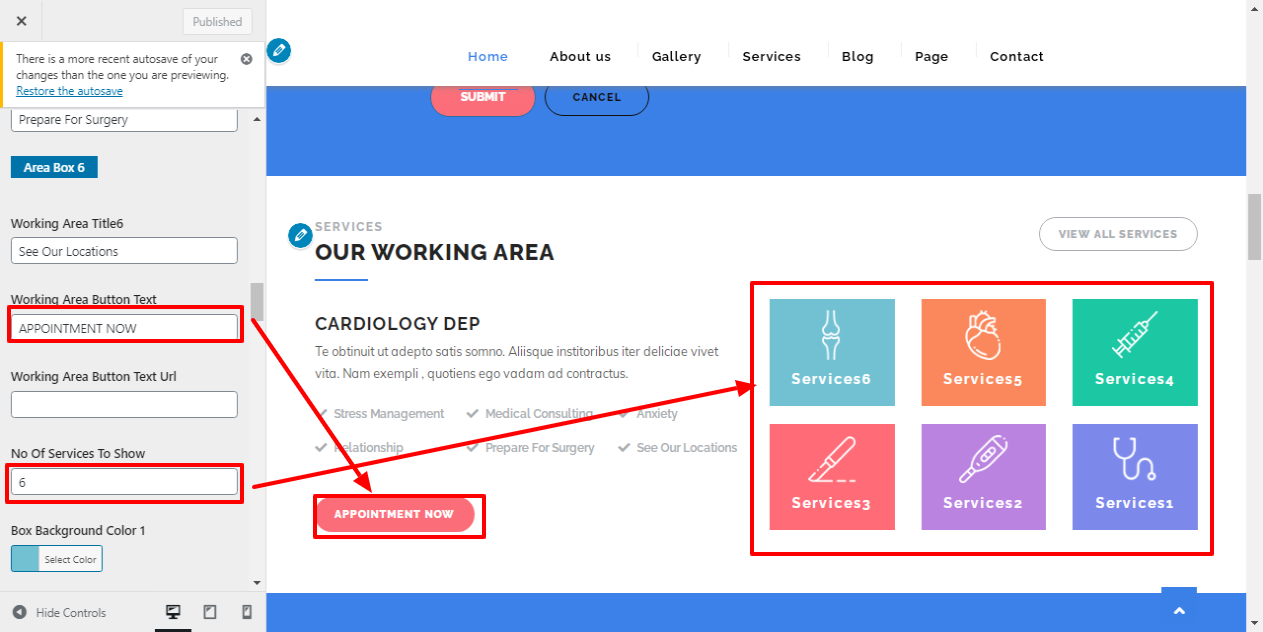
The next step in proceeding with the Our Services Section is to alter the Customizer Setting for this.
Go to Appearance >> Customize >> Theme Settings >>Our Services Section
Setting Options : contains options for the option to enable or disable service display. This section's enable/disable functionality is controlled by this setting. This environment is really significant. If you want this part to appear on your website, leave the option enabled; otherwise, click Disable to have it not appear on your website.

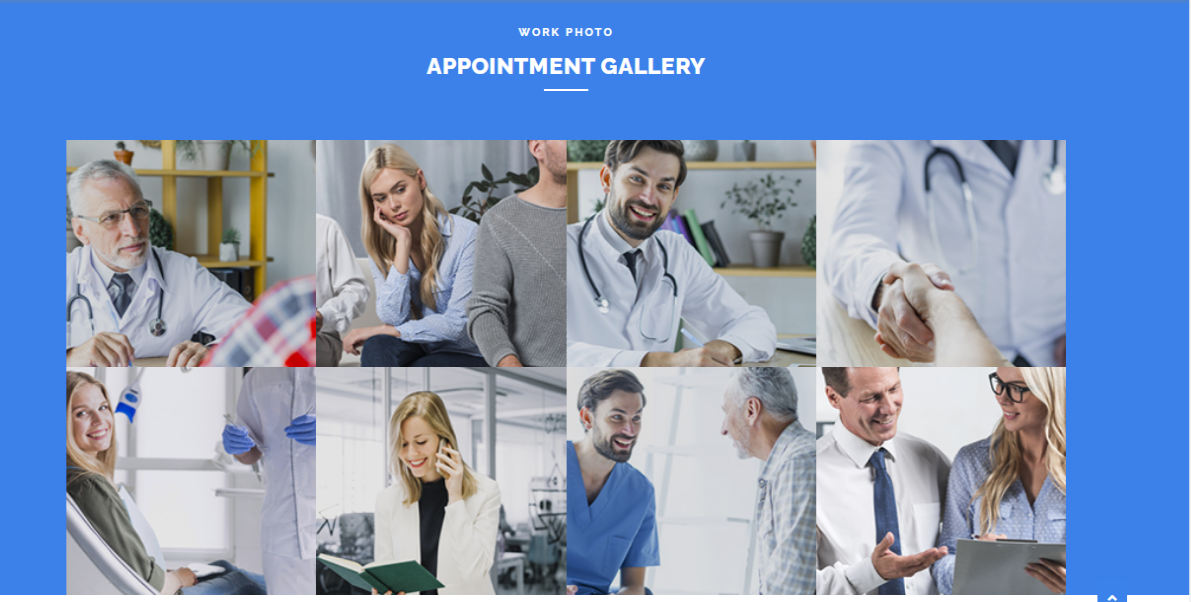
Enter section title, section sub title and select the. For better understanding refer below screenshot.
Go to Appearance >> Customize >> Theme Settings >>Gallery Settings
Setting Options : Includes
settings for Service display enable/disable option. With this setting, you can enable/disable this
section. This is very important setting. If you want this section to appear on your
website,
just let the option to be enabled and if you don't want this section to appear on your
website, you can select
disable and this section will disappear from your website.
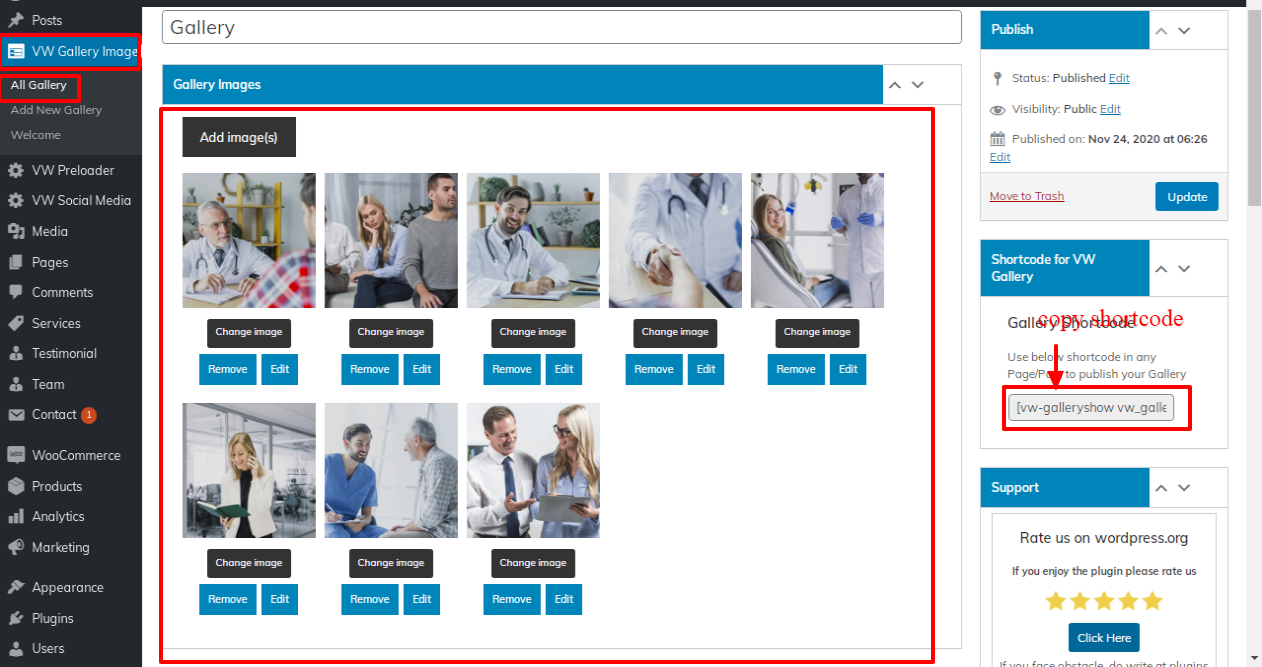

Enter section title, section sub title and select the. For better understanding refer below screenshot.
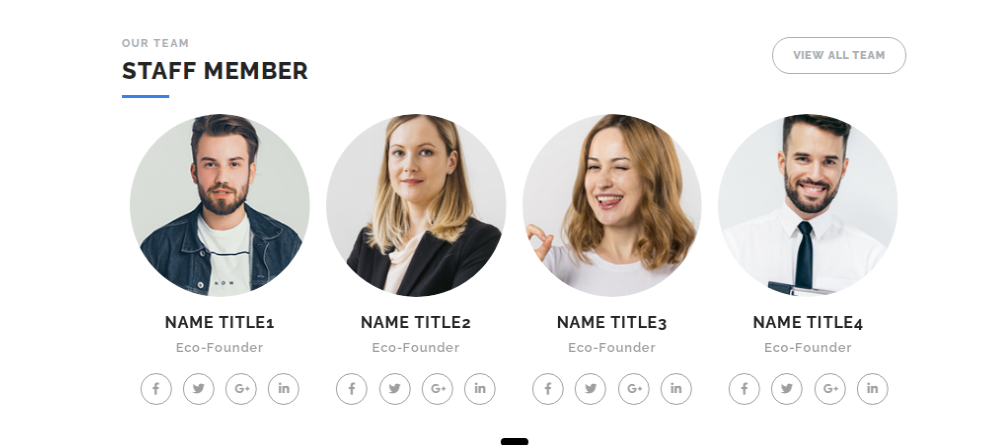
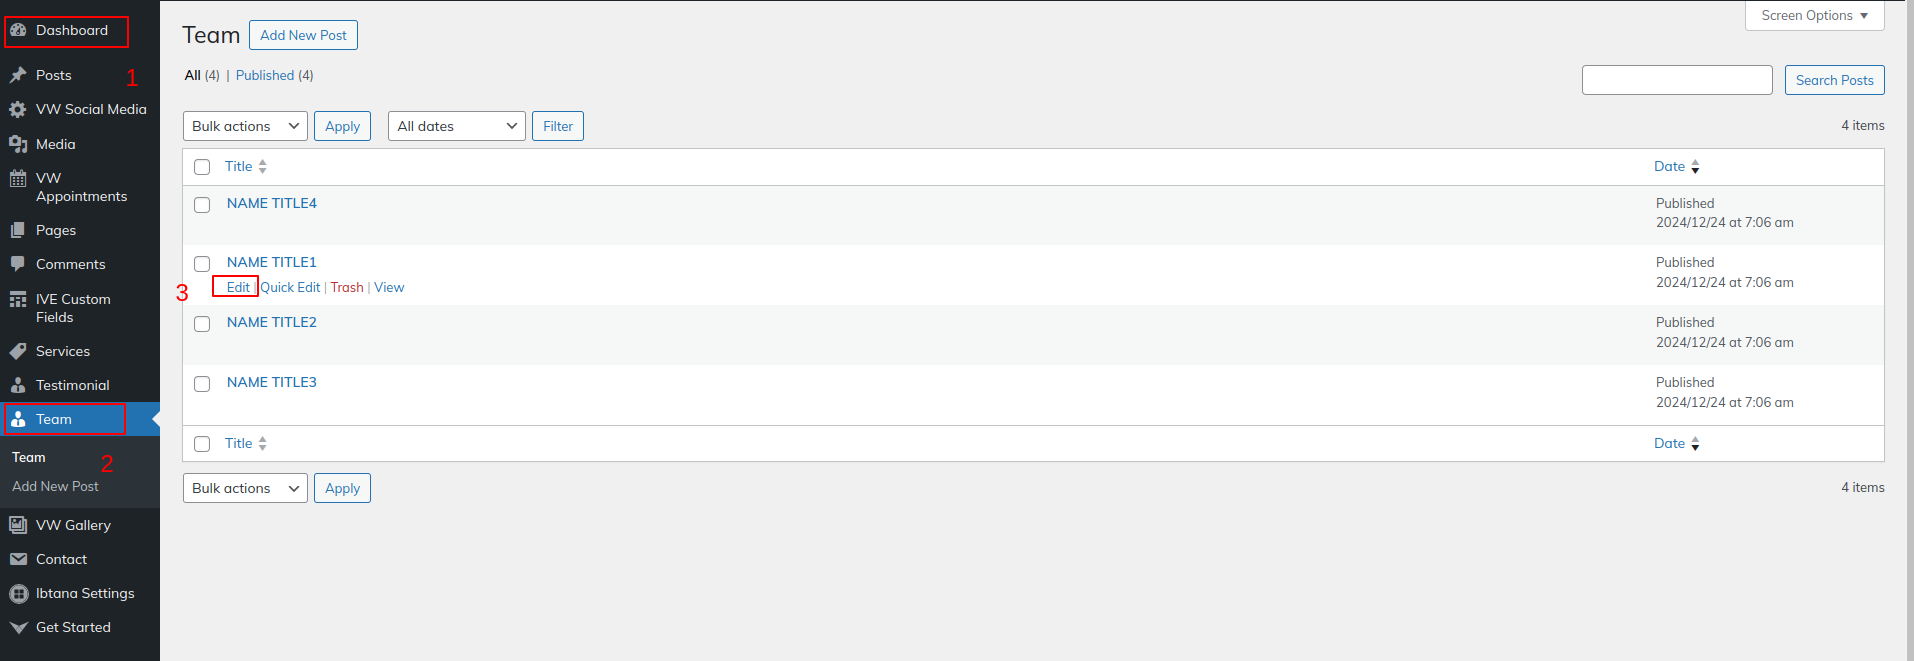
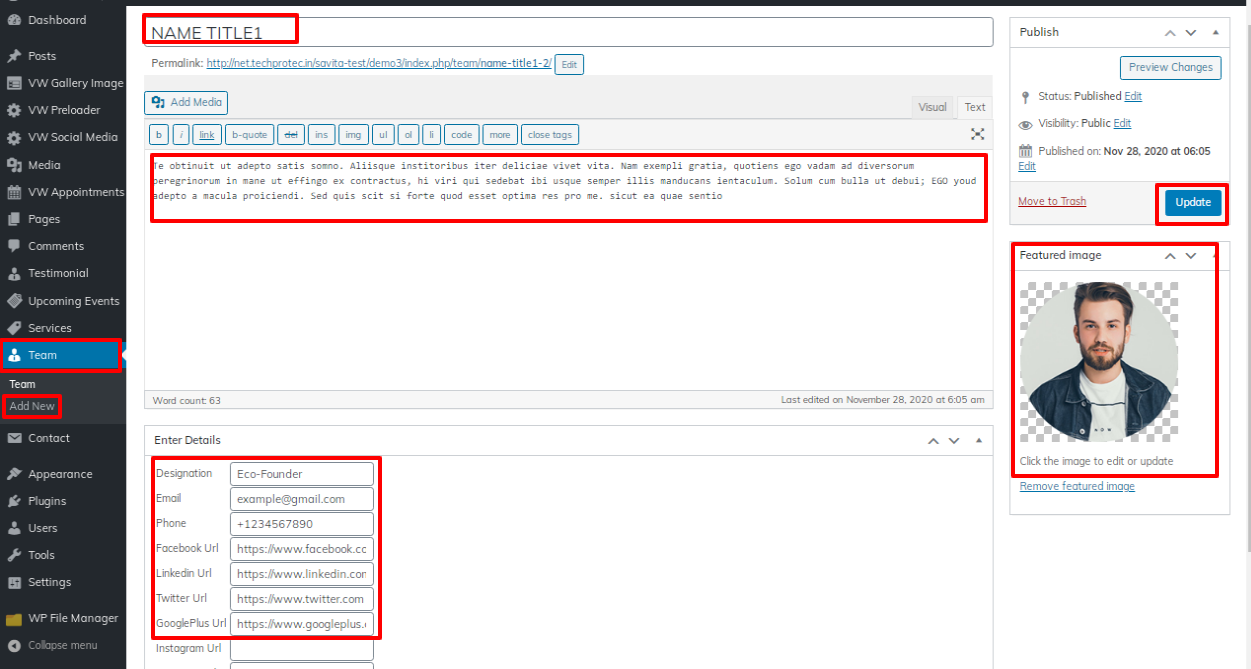
The next step in proceeding with the Our Team Section.
Go to Dashboard >> Team >> Edit
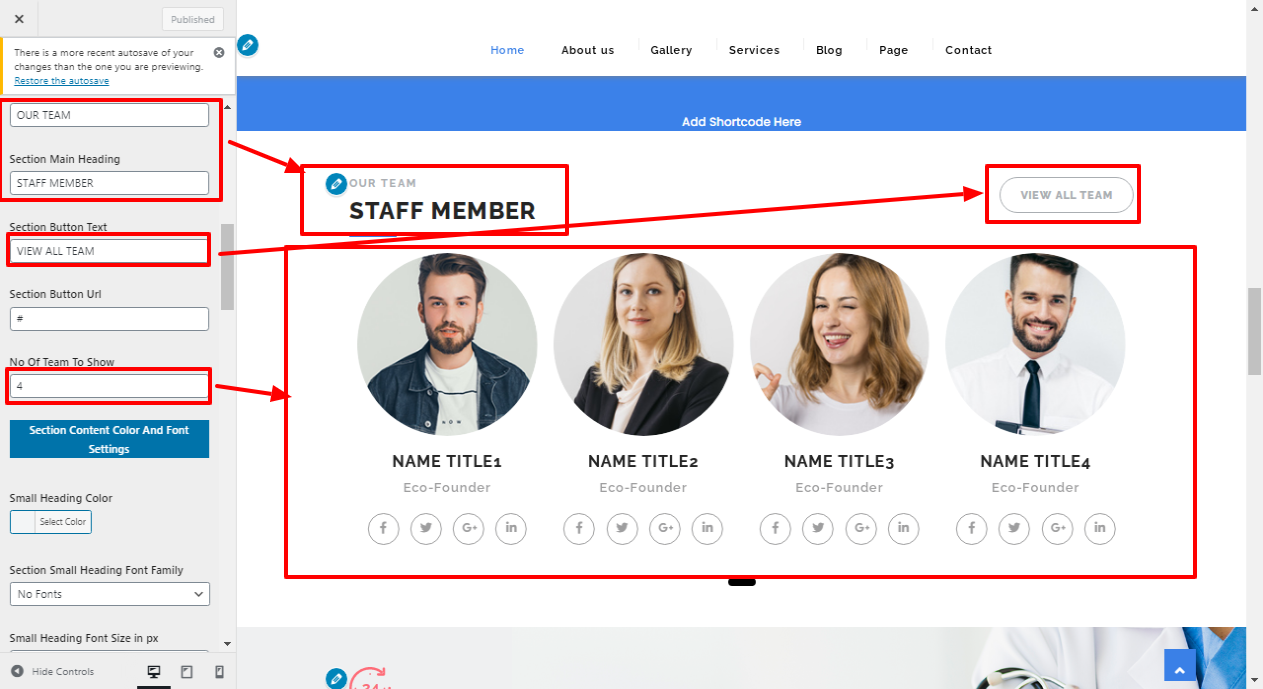
Go to Appearance >> Customize >> Theme Settings >>Our Team
Setting Options : Includes
settings for Service display enable/disable option. With this setting, you can enable/disable this
section. This is very important setting. If you want this section to appear on your
website,
just let the option to be enabled and if you don't want this section to appear on your
website, you can select
disable and this section will disappear from your website.

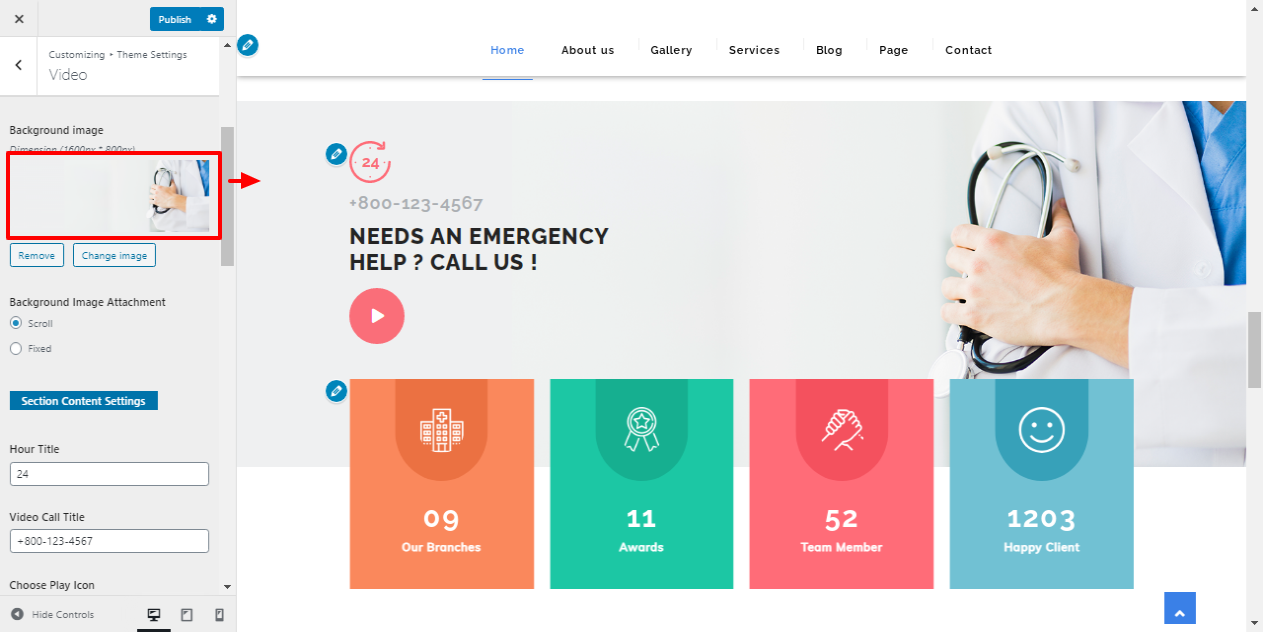
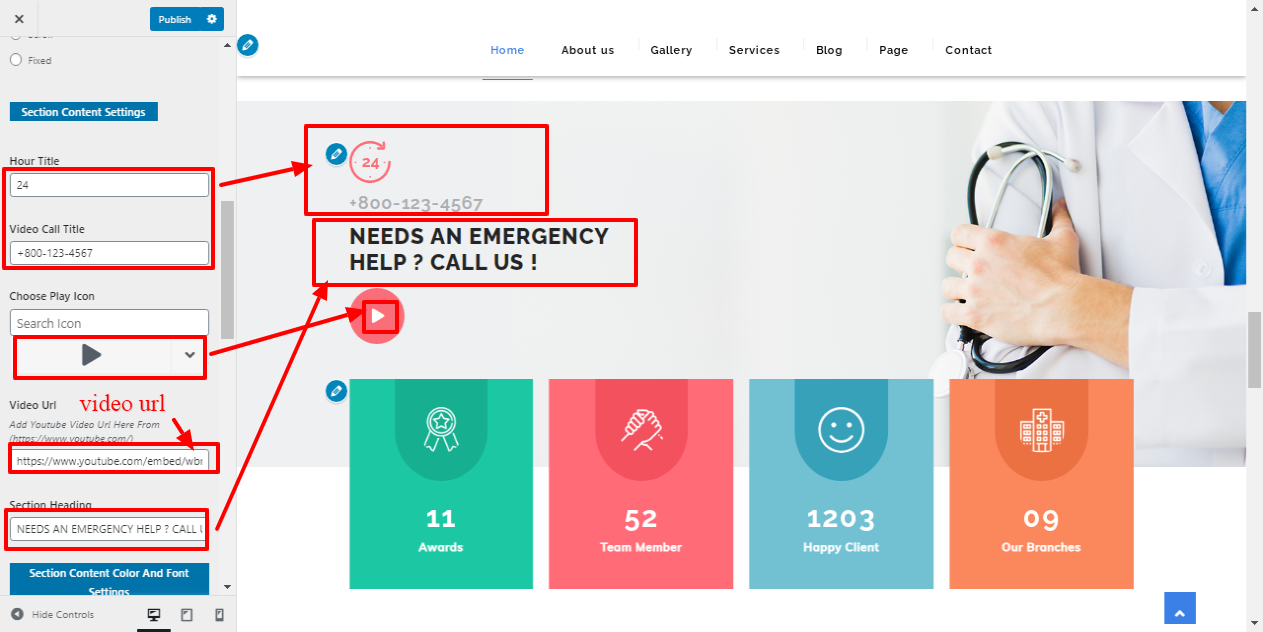
Enter section title, section sub title and select the. For better understanding refer below screenshot.
Go to Appearance >> Customize >> Theme Settings >>Video Settings
Setting Options : Includes
settings for Service display enable/disable option. With this setting, you can enable/disable this
section. This is very important setting. If you want this section to appear on your
website,
just let the option to be enabled and if you don't want this section to appear on your
website, you can select
disable and this section will disappear from your website.
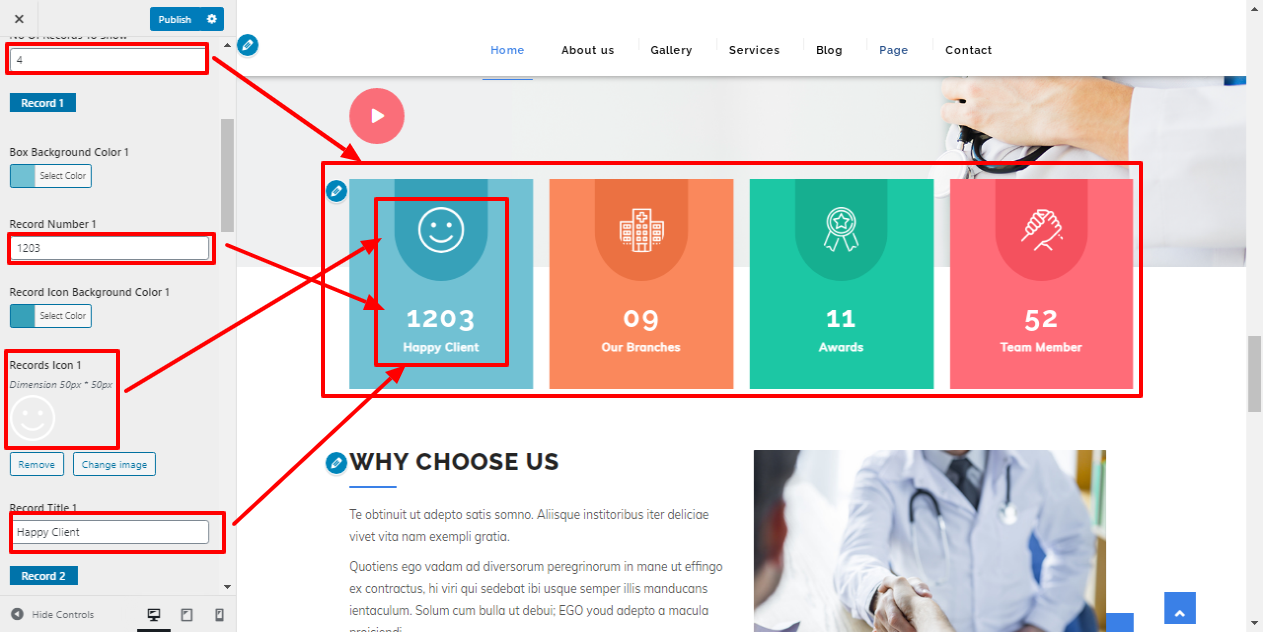
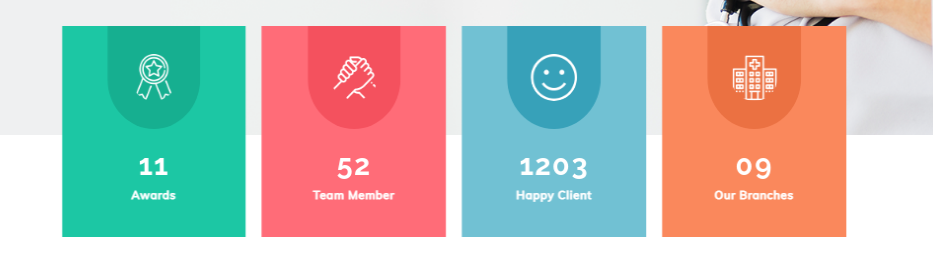
The next step in proceeding with the Our Records Section is to alter the Customizer Setting for this.
Go to Appearance >> Customize >> Theme Settings >>Our Records Section
Setting Options : contains options for the option to enable or disable service display. This section's enable/disable functionality is controlled by this setting. This environment is really significant. If you want this part to appear on your website, leave the option enabled; otherwise, click Disable to have it not appear on your website.

Enter section title, section sub title and select the. For better understanding refer below screenshot.
Go to Appearance >> Customize >> Theme Settings >>News & Event Settings
Setting Options : Includes
settings for Service display enable/disable option. With this setting, you can enable/disable this
section. This is very important setting. If you want this section to appear on your
website,
just let the option to be enabled and if you don't want this section to appear on your
website, you can select
disable and this section will disappear from your website.

Enter section title, section sub title and select the. For better understanding refer below screenshot.
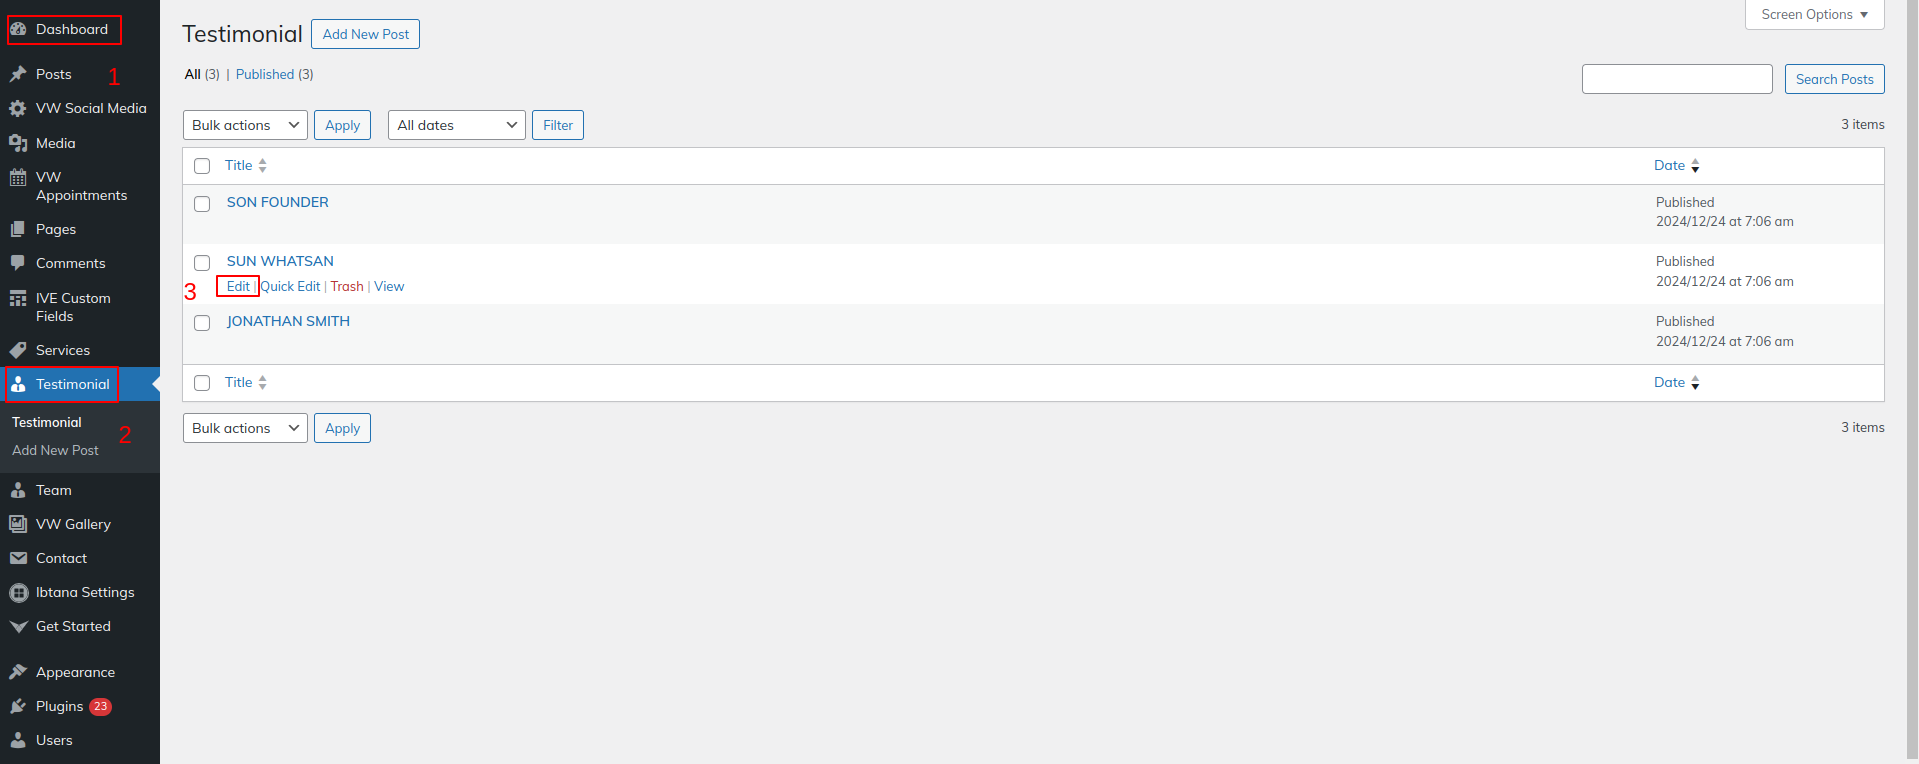
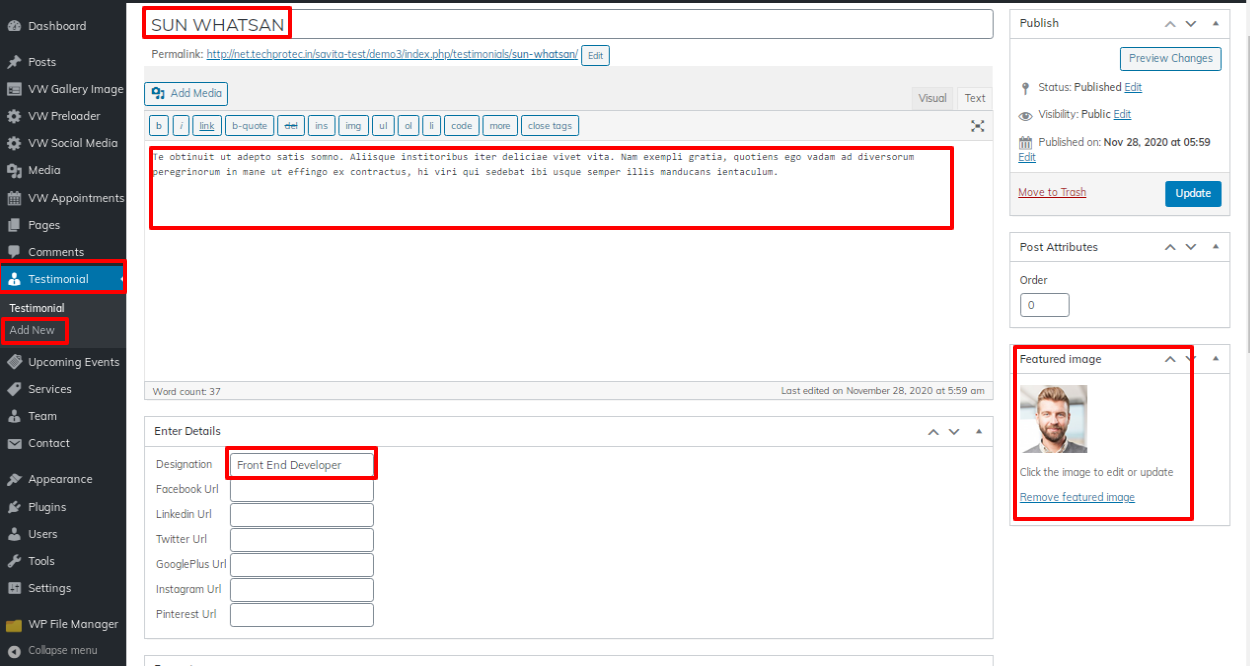
The next step in proceeding with the Our Testimonial Section.
Go to Dashboard >> Testimonial >> Edit
Go to Appearance >> Customize >> Theme Settings >>Our Testimonial
Setting Options : Includes
settings for Service display enable/disable option. With this setting, you can enable/disable this
section. This is very important setting. If you want this section to appear on your
website,
just let the option to be enabled and if you don't want this section to appear on your
website, you can select
disable and this section will disappear from your website.
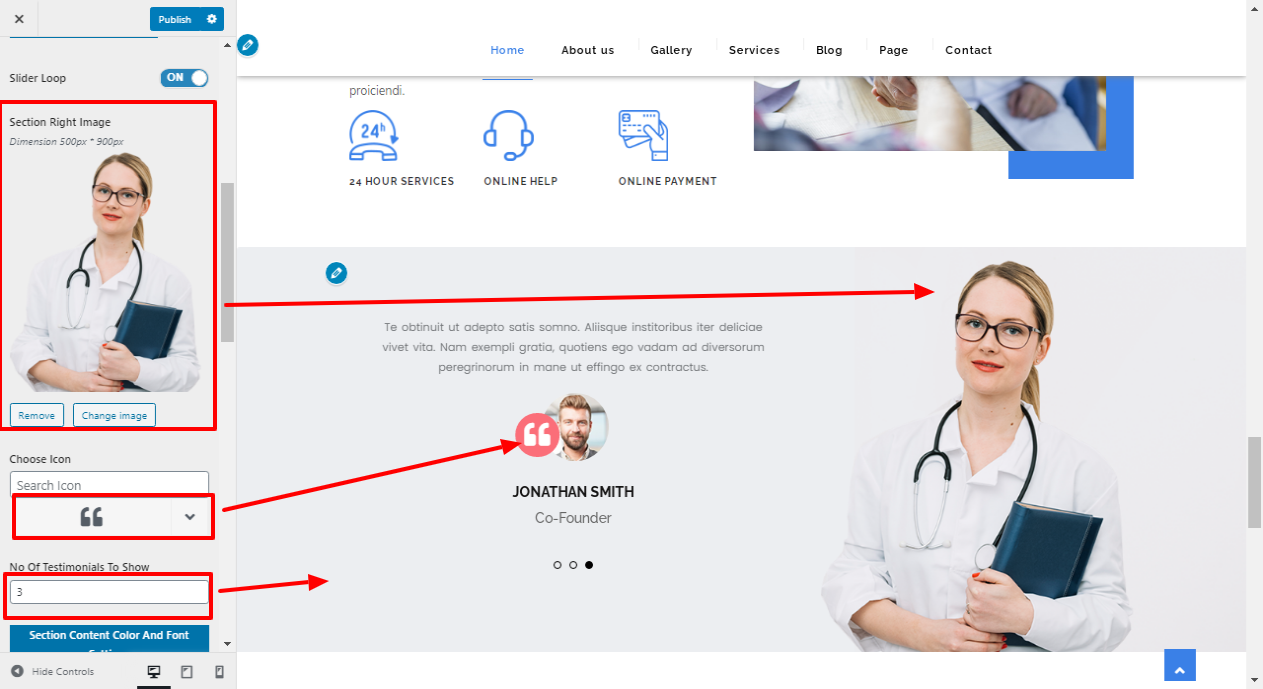
Enter section title, section sub title and select the. For better understanding refer below screenshot.
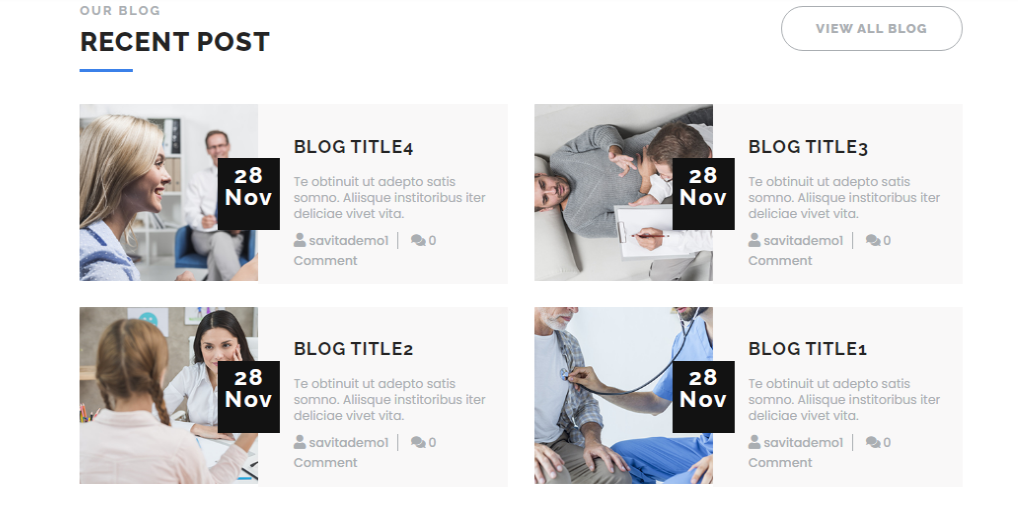
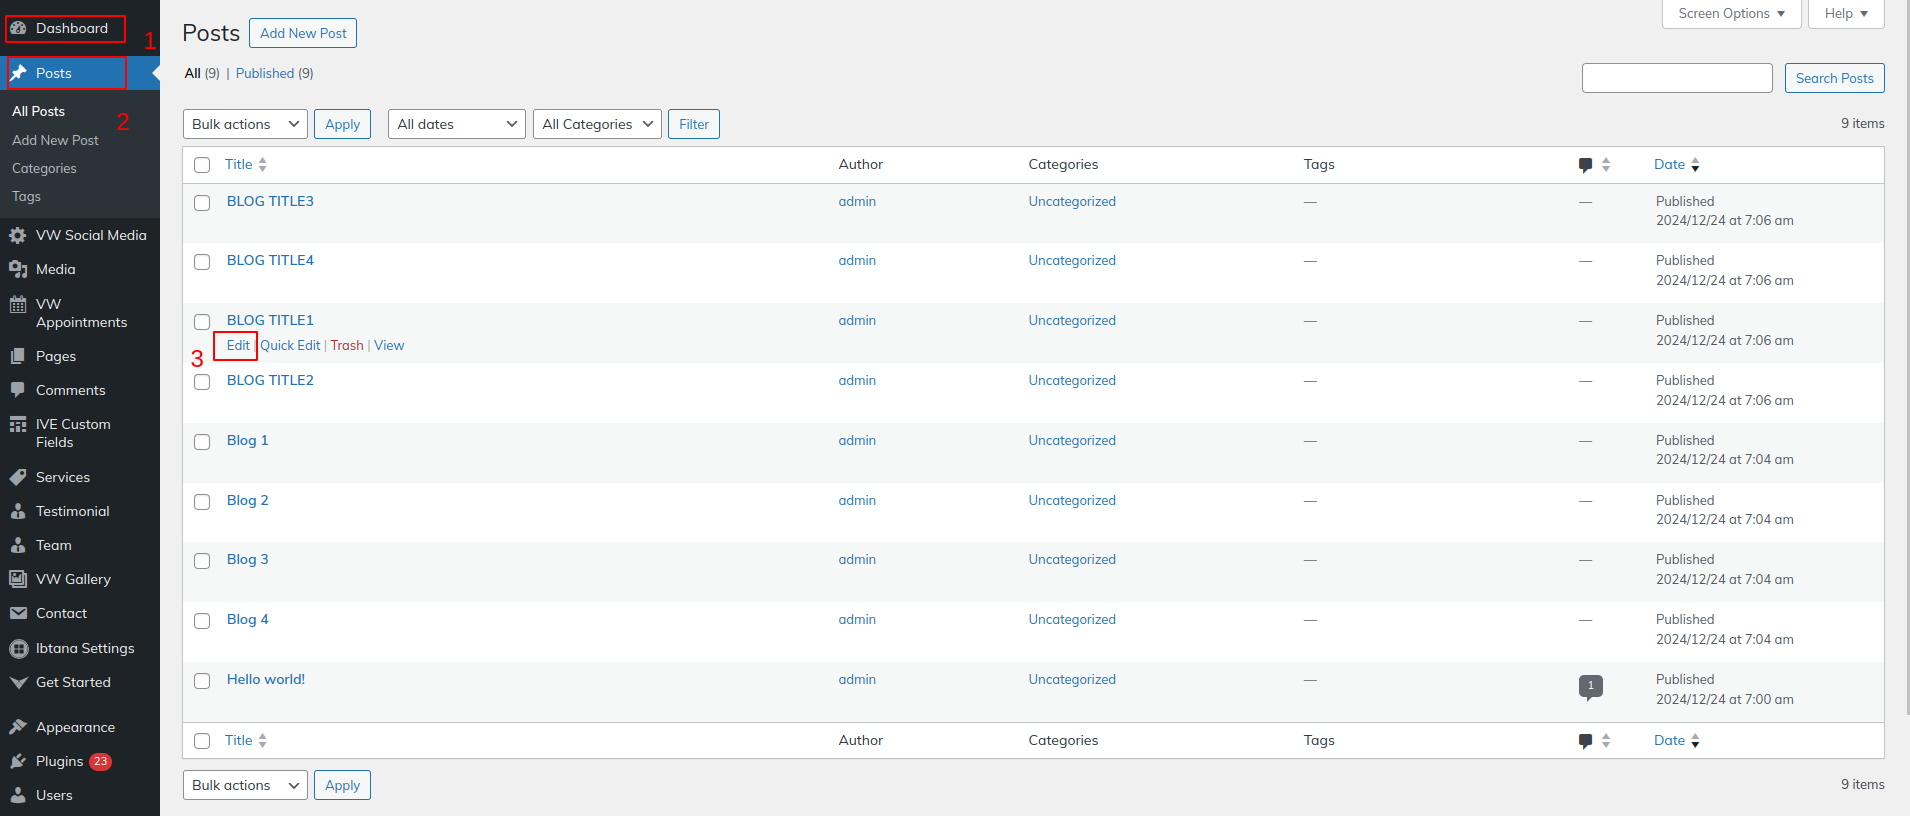
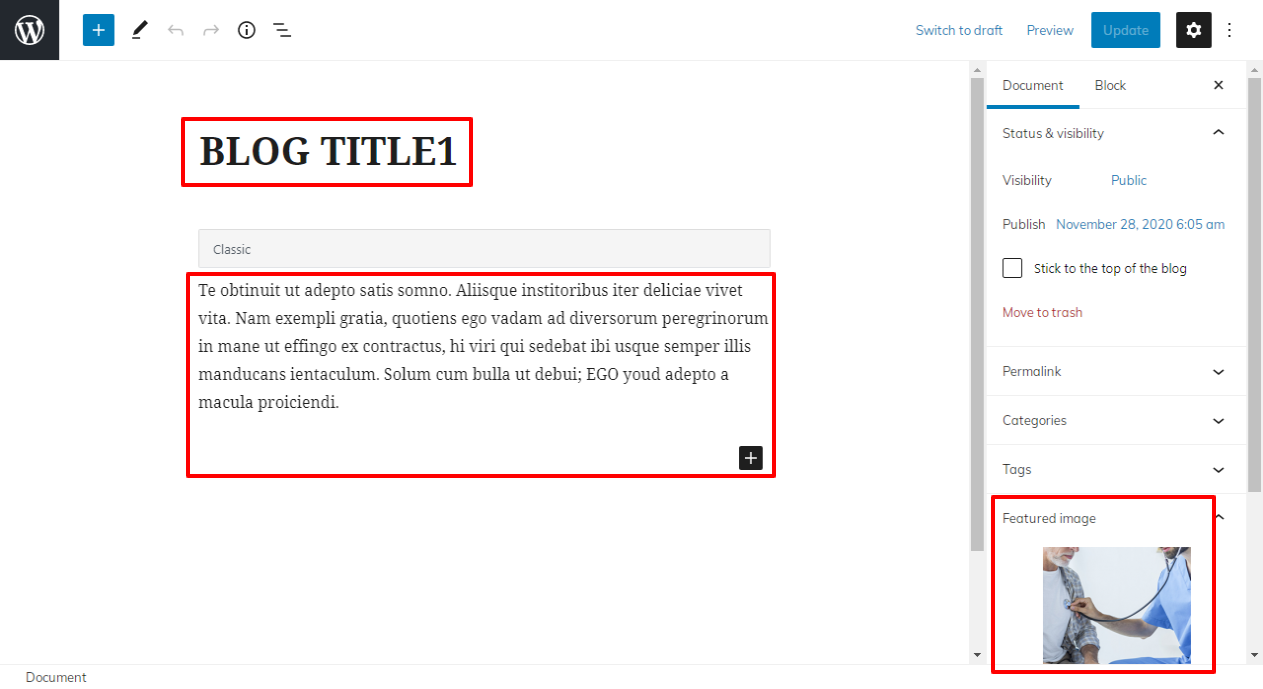
The next step in proceeding with the Our Blog Section.
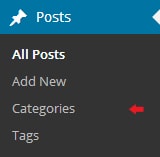
Go to Dashboard >> Post >> Edit
Go to Appearance >> Customize >> Theme Settings >>Our Blog
Setting Options : Includes
settings for Service display enable/disable option. With this setting, you can enable/disable this
section. This is very important setting. If you want this section to appear on your
website,
just let the option to be enabled and if you don't want this section to appear on your
website, you can select
disable and this section will disappear from your website.
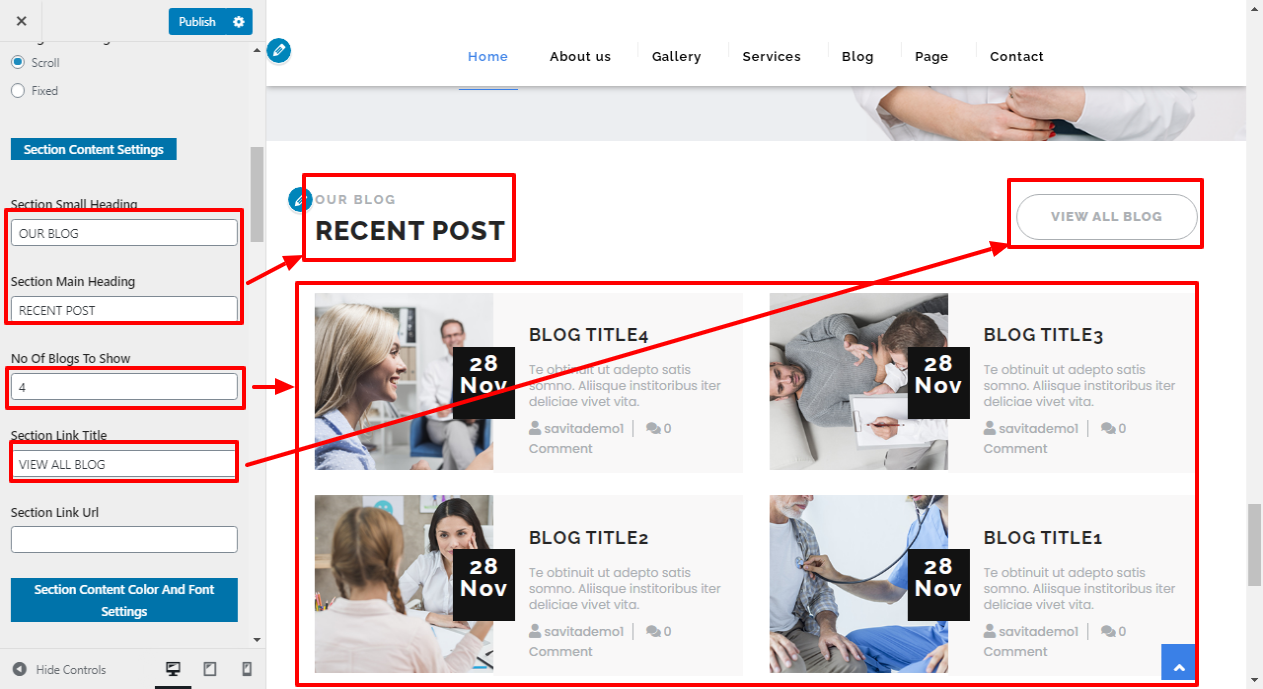
Enter section title, section sub title and select the. For better understanding refer below screenshot.
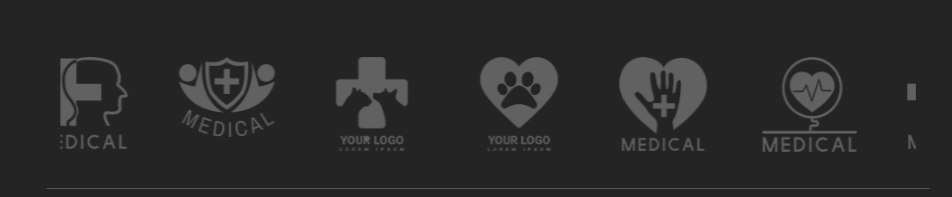
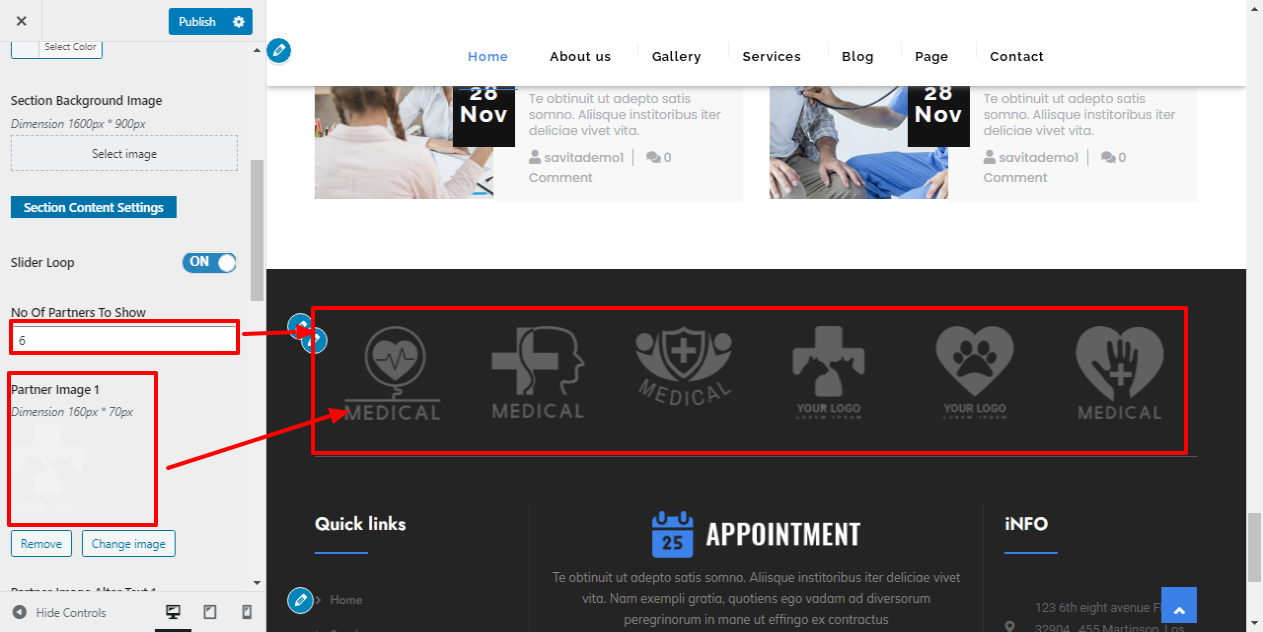
Go to Appearance >> Customize >> Theme Settings >>Our Partners
Setting Options : Includes
settings for Service display enable/disable option. With this setting, you can enable/disable this
section. This is very important setting. If you want this section to appear on your
website,
just let the option to be enabled and if you don't want this section to appear on your
website, you can select
disable and this section will disappear from your website.
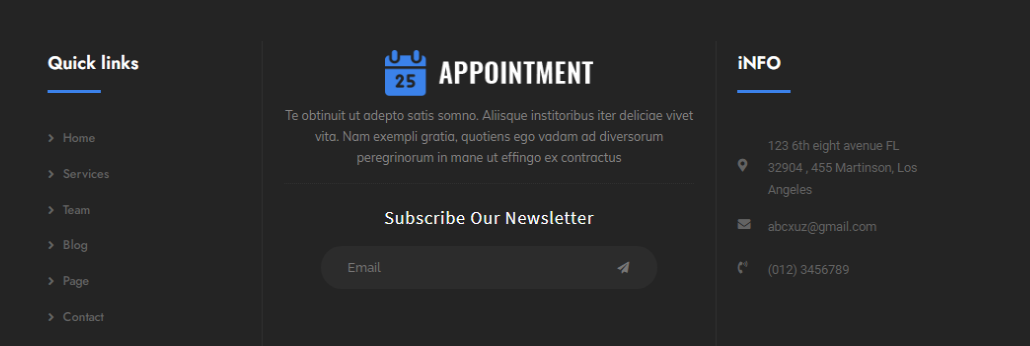
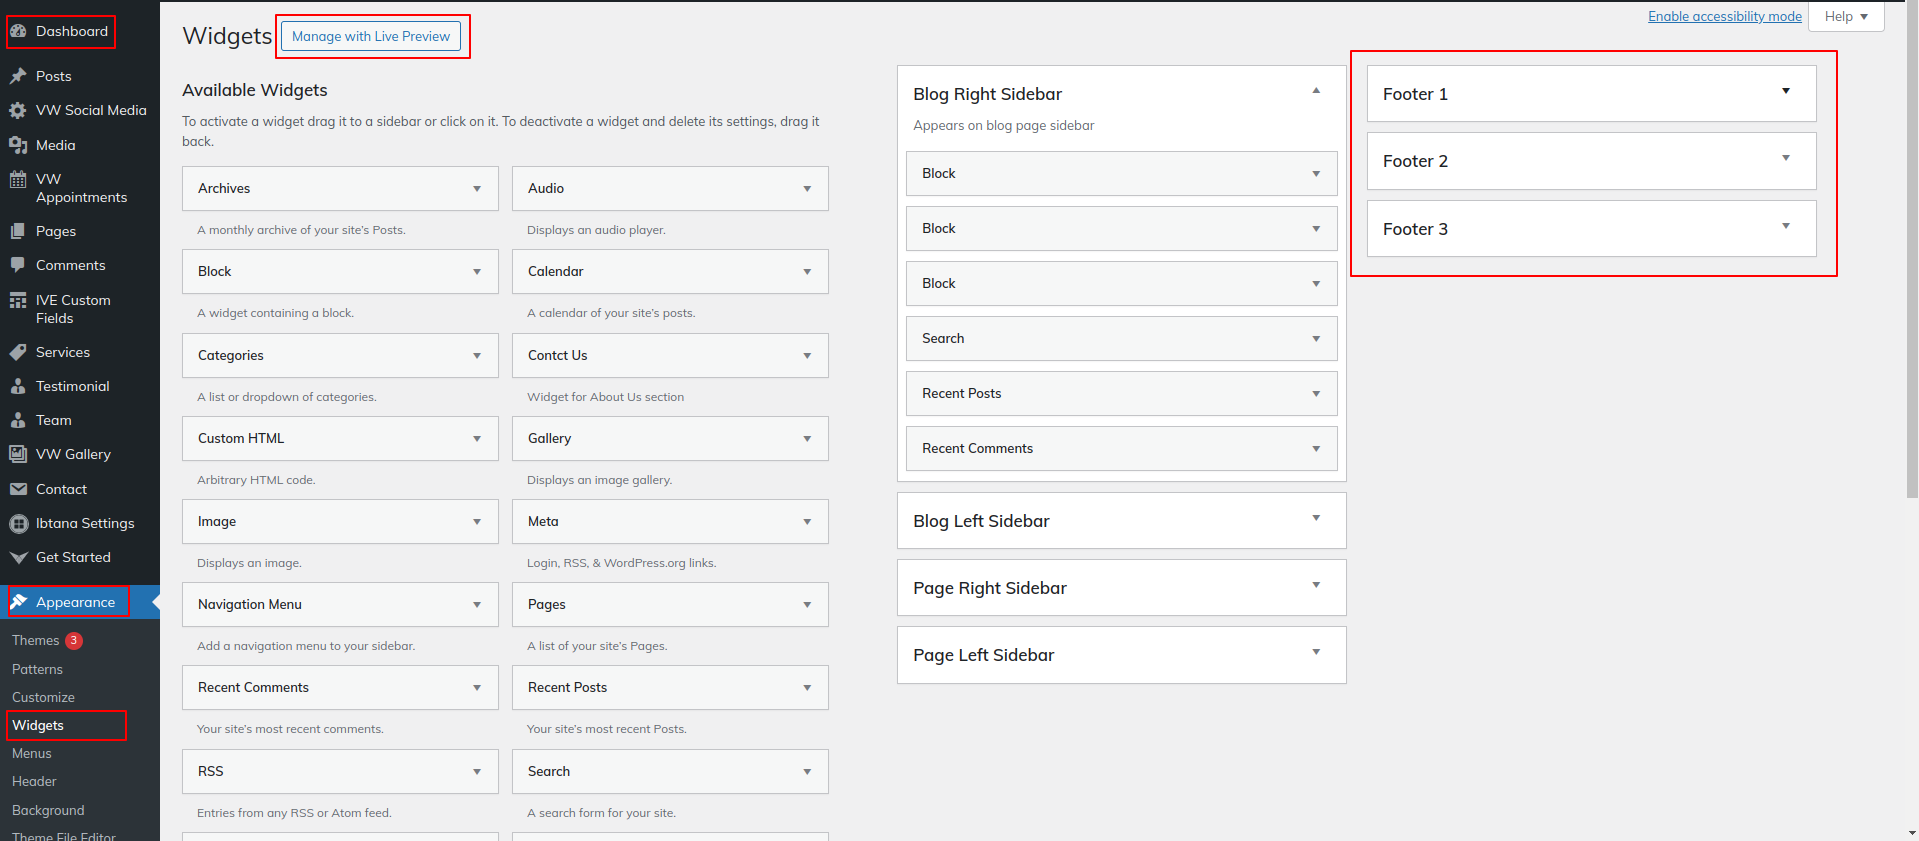
The widgets area is explained in the image below.
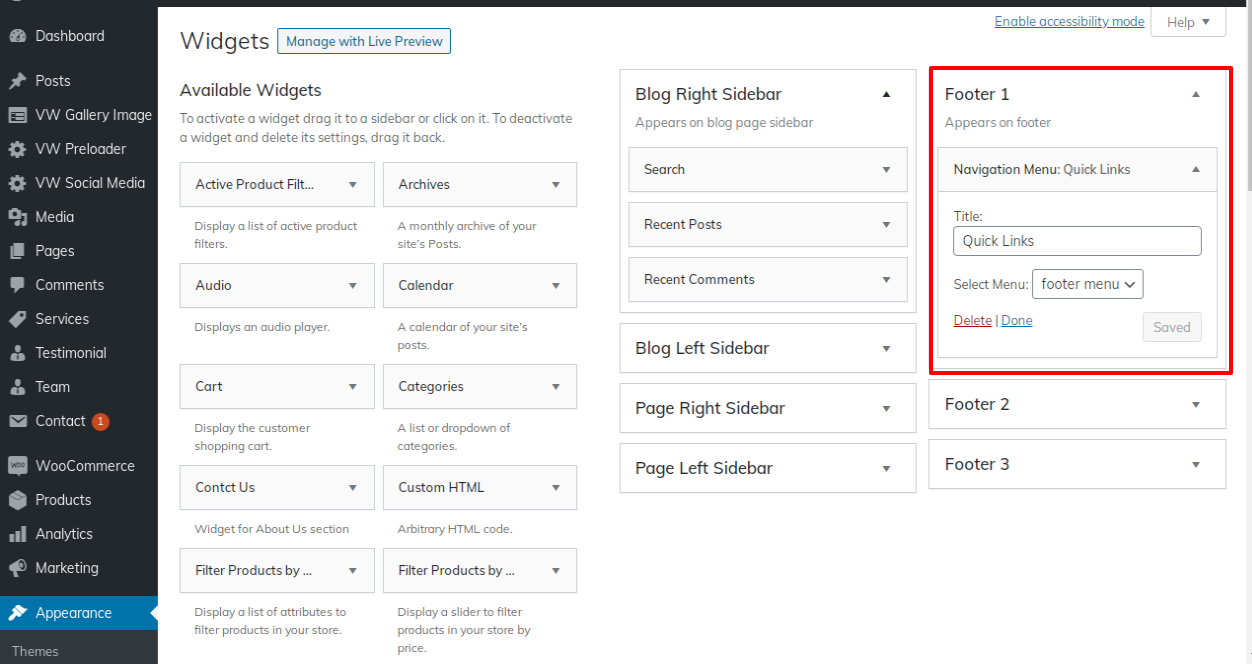

Go to widgets in the Appearance section and choose the four footers columns for tags, gallery, contacts, and logo picture when establishing this section.
To proceed with the Footer,
Go to Appearance >> Customize >> Theme Settings >>Footer Section
Enable/Disable option: You can decide whether to show this section by using the enable/disable option here. You can activate or deactivate this part using this setting. This environment is crucial. If you want this section to display on your website, leave the option enabled. If you don't want this section to appear on your website, pick the disable option, and this section will no longer be visible on your website.
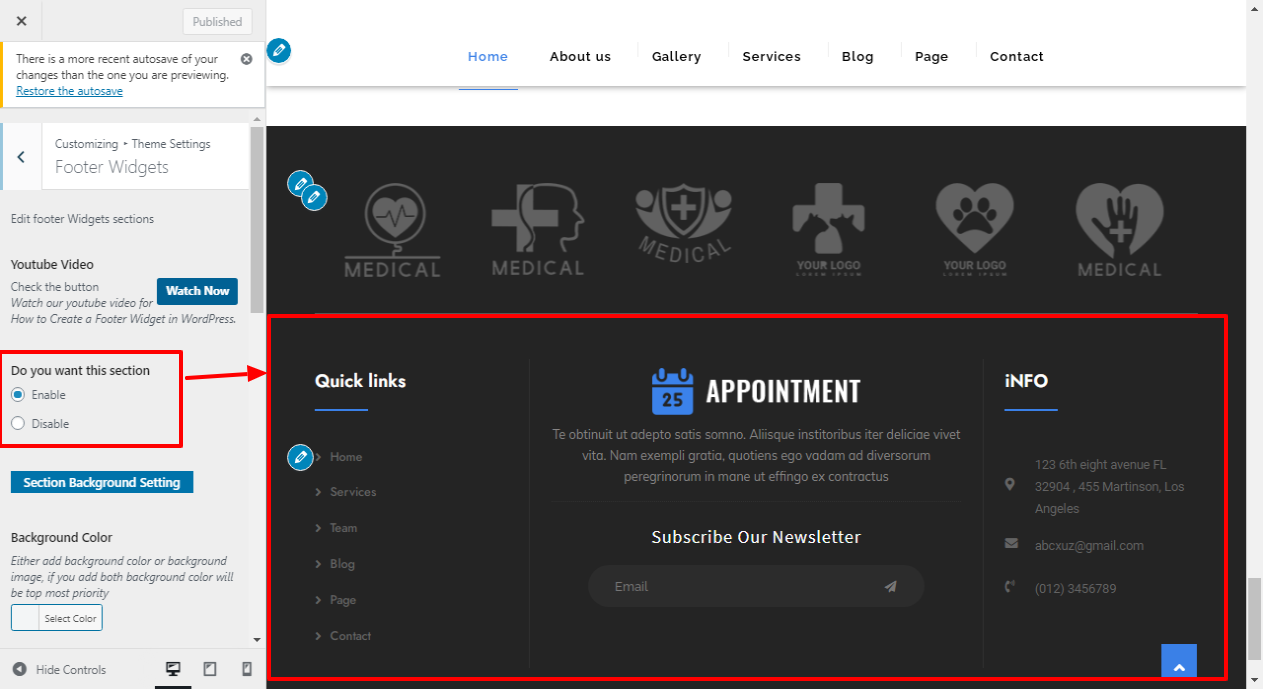
To build up a footer section, follow these directions.

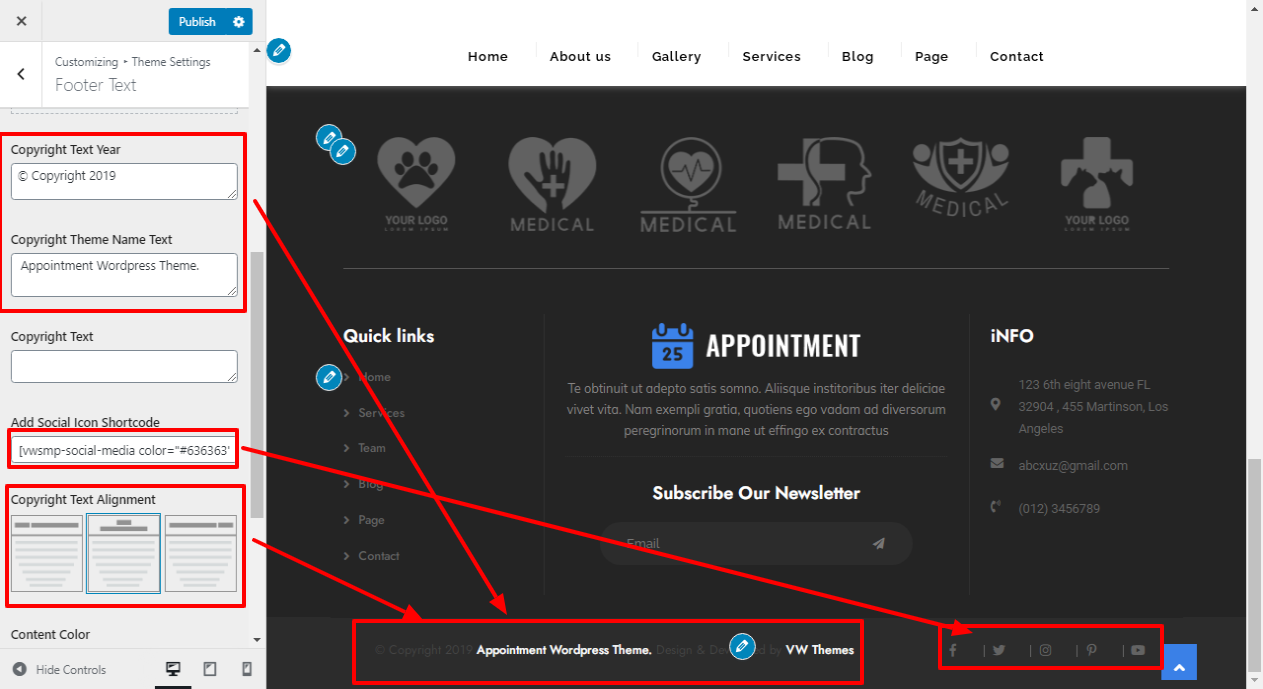
To proceed with the Footer Text section,
Go to Appearance >> Customize >> Themes Settings>> Footer Text.
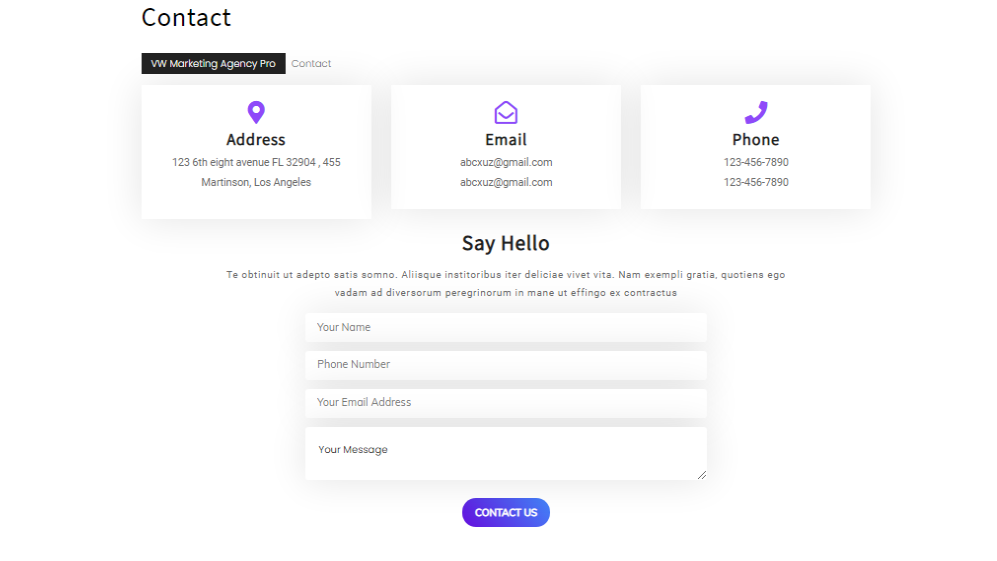
To proceed with the Contact section,
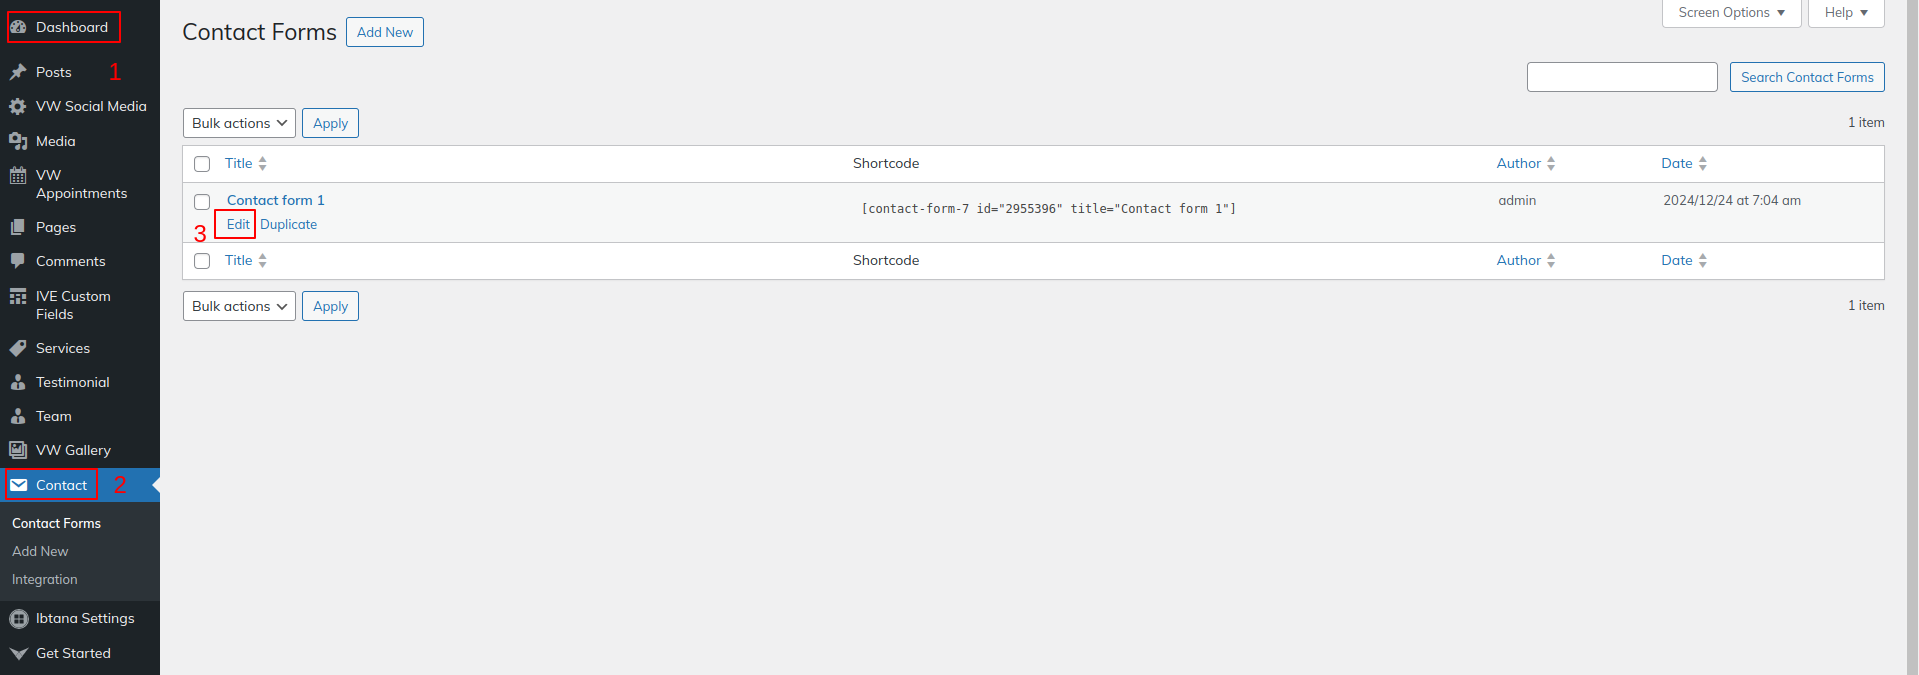
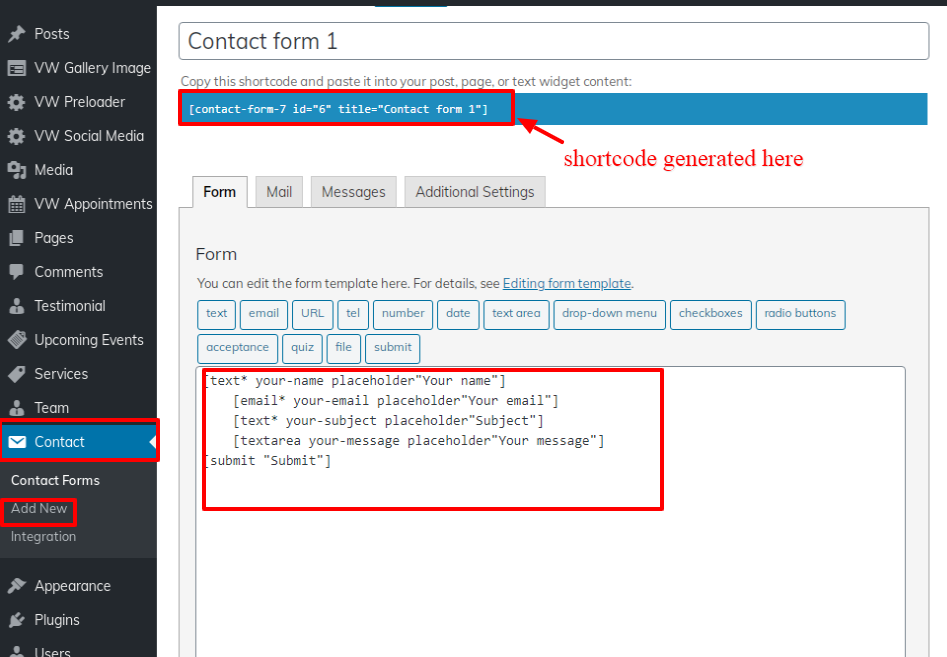
In order to Setup contact Page first you need to upload and activate the contact form 7 plugin.
After installation contact option will appear on the dashboard.
Go to Dashboard >> Contact >> Edit.
To proceed with the Contact section,
Go to Appearance >> Customize >> Themes Settings>> Contact Page Settings.
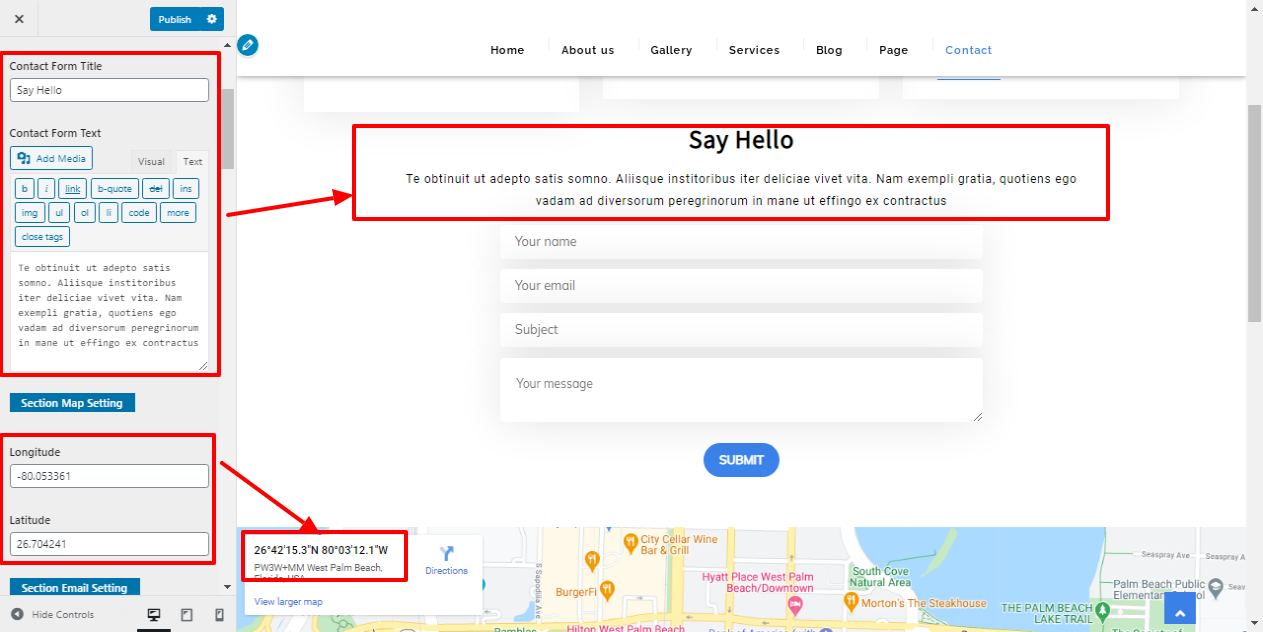
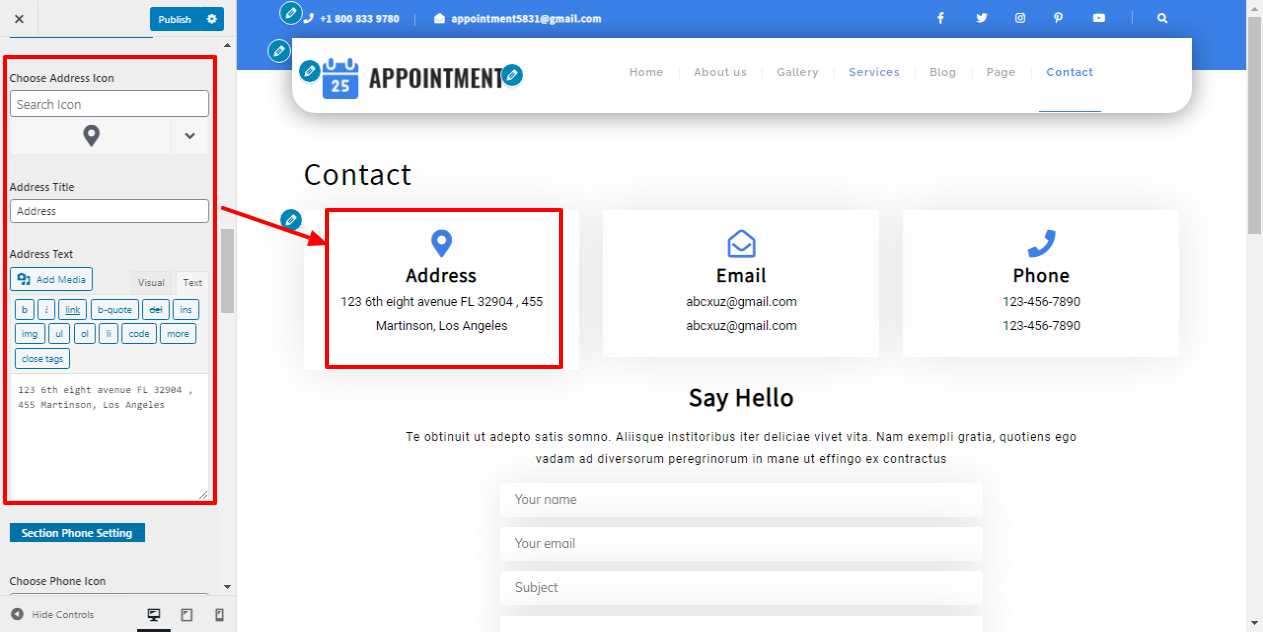
View this image to get a better understanding.

Fetch All the Properties: --> [all_properties]
Fetch All the Properties By Categpory: --> [properties_by_cat cat_name="Add category slug"]
Fetch All the Agents: --> [agents]
Fetch All the Testimonials: -->[testimonials]